❑Welcome to the Summary Page which describes the major New Features in the MKMS Version 5.1.35.XXXX Release.
•Many "bug fixes" have been completed during this series of updates.
•The major changes and enhancements are included in the Features List below.

•This New Features Table contains three columns of data relating to each of these New features:
1.Program Module(s) Affected - This column lists the specific modules that were improved.
2.Chapter Topic Links - This column lists of the link(s) to the Chapter Topic(s) where the previous instructions, illustrations and explanations have been revised to reflect the program changes and/or enhancements.
3.Description of the Enhancement - A brief explanation of the new features, functions and enhancements that have been added in this release with links to all of the affected Chapter Topics and some related Chapter Topics, also.
•Each Module also has an individualized list of those features (all of which are contained in the chart below) that were changed or enhanced specifically for that particular module.
❑Understanding the New features Chart:
•All of the Program Module(s) that are Affected are listed.
•The Chapter Topic Links are provided for finding the instructions, illustrations, and details on the operation and usage of the new feature(s).
•A brief Description of the Enhancement is shown, sometimes with additional Chapter Topic Links.
Program Module(s) Affected |
Chapter Topic Links |
Description of the Enhancement |
||||||||||
|
|
|||||||||||
Module |
Forms Affected |
8300 - 84XX New Features |
||||||||||
|
|
|
||||||||||
|
|
|||||||||||
|
|
|||||||||||
MKMS STARK |
All General Maintenance Menus and Items are now displayed in Alphabetical Order |
|||||||||||
MKMS STARK |
The Company Settings dialog has been completely redesigned. ▪Now there are five columns in the Grid: 1.Section - Starting with a No Section entry, and then listing the other settings which control various functions/features with the MKMS suite of programs and apps 2.Setting Name - The specific name for a Setting 3.Setting Value - A numeric value, logical (Y/N, T/F), or text entry associated with the selected Setting Name 4.Description - Currently left blank 5.Edit - Click the Edit box to open the Company Setting Name Edit dialog ▪There is also a Search Box field at the top of the Company Settings Form. To display the Setting Names for a specific Section (or Sections) containing a specific set of characters a.Enter the characters to be located in that Search Box b.Click the Search button c.The Section(s) and/or Setting Names containing those characters will be listed d.Re-Sort the Setting Name Column to make locating the desired Company Setting, it appropriate e.Inspect the Setting Name column to locate the desired Setting Name |
|||||||||||
MKMS STARK |
A new Email Account maintenance Form where specific SMTP Email settings may be identified. ▪The SMTP Setup tab on the Employee Form now contains a Drop-Down Selection List of the previously defined Email Account settings. (see Employees - SMTP Setup tab below) |
|||||||||||
MKMS STARK |
The SMTP Setup tab on the Employee Form has been changed. ▪This SMTP Setup tab now contains a Drop-Down Selection List of the previously defined Email Account settings. ✓An SMTP setting must be identified for each Employee who will be receiving/sending Reports, Invoices , Proposals, Work Orders, Statements, etc., via Email using a Mail Server other than Microsoft® Outlook®. ✓If no SMTP Setup data is entered for an Employee who is sending Reports, Invoices , Proposals, Work Orders, Statements, etc., via Email, the system will use the default Microsoft® Outlook® (and/or Outlook Express®) Email Account. |
|||||||||||
MKMS STARK |
▪The keyboard's Insert (to start a new entry on an Employees Form tab with a Grid format), Delete (to remove an existing entry on an Employees Form tab with a Grid format); plus the Ctrl+S combination (for Save) have been implemented. ▪The Left and Right Arrow Navigation Keys will move the focus from one Employees Form tab to another has been implemented, as has the Ctrl+Insert combination to start a new record on the Employees Form; |
|||||||||||
MKMS STARK |
Sometimes your Company may need a special report that is not available in MKMS. ▪To accommodate this need, a Reports Icon on the Shortcuts tab provides access to the Reports Module where Custom Reports may be created, Updated, Deleted, Tested, etc.
❖Important Notice - A working knowledge of SQL is required to be able to properly use this Reports Module. |
|||||||||||
|
|
|||||||||||
This new Suspended Invoicing Clean Up Maintenance dialog provides the ability to remove pending Suspended Invoices which no longer need to be Invoiced from the MKMS system. |
||||||||||||
|
|
|||||||||||
Dealer Billing Setup - Click the Billing tab on the Dealers Form to display the new Dealer Billing dialog. Each Dealer - for whom your Company's Central Station is providing Contract Monitoring Services - may be Invoiced for those services by implementing Dealer Billing. ▪Dealer Billing functions include: a)Maintains a specific Billing Address for the Invoices sent to the Dealers to pay for their Contract Monitoring Services your Company is providing to that Dealer's Subscribers b)Virtually automatic Invoice creation for billing Contract Monitoring Services provided to those Dealers c)Billing Structure provides Tiered Monitoring Rates d)Administrative Fees and Credit Card processing fees may also be Invoiced ▪Also see these Billing - Price List, Billing - Account Rate Table, Billing - Zone Rate Table, Billing - Accounts RMR, and Billing - Invoice History chapters for related information. |
||||||||||||
The new Dealer Billing Review report displays as a Grid which may be reconfigured, sorted, reconfigured, filtered. ▪The Dealer Billing Review will provide a detailed listing of each Invoice for created for Contract Monitoring Services using the Dealer Billing feature. ▪General Ledger related Transactional Posting information for a selected item may be viewed in the special Grid on the right side of this report. |
||||||||||||
The new Run Dealer Billing option on the File Menu is only available when Dealer Billing has been setup within the Dealer Billing dialog on the Dealers Form but the Dealer Billing option to set to False in Company Settings (DealerBillingWorkerEnabled = "F"), ▪By default, once Dealer Billing information has been entered, the billing process can become automatic. a)However, you must first set the Dealer Billing option to True in Company Settings (DealerBillingWorkerEnabled = "T") b)Thereafter, this automatic billing process works in a similar manner to how the Fully Automatic Recurring Revenue Billing process operates. c)If the Dealer Billing option to set to False in Company Settings (DealerBillingWorkerEnabled = "F"), the Dealer Billing must be manually implemented using this Run Dealer Billing option d)You Company's Business Module should determine whether Dealer Billing will be an automatic or manual process. |
||||||||||||
End Fixed Terms - Click on the new End Fixed Term Icon on a Fixed Term Recurring Revenue Form's Ribbon Menu to instantly remove the Payments, Balance, Amount, and Note, set the End Date to Today, and remove the system maintained Last Period/Next Period information, thus terminating this Fixed Term entry |
||||||||||||
|
|
|||||||||||
MKMS STARK & MKMSCS UL |
This column outlines the security related requirements of the Third Edition UL® 1981 Standard |
|||||||||||
UL® Password and Username Requirements: As part of properly implementing the Third Edition UL® 1981 Standard, specifically for compliance with section 6.2 Sign-on Security of the Third Edition UL® 1981 Standard, the creation of Passwords is strictly defined. |
||||||||||||
When the UL® 1981 Version is Registered (i.e., Active), the Company Settings CheckULPasswordRestrictions option is set to True ("T") to comply with Section 6.2.6 relating to Password Restrictions in the Third Edition UL® 1981 Standard.
When the CheckULPasswordRestrictions option is set to True ("T") in Company Settings, the Password Requirement legend on the Change Password Form and the Add/Delete Users Form has been updated to more clearly identify those UL® requirements for password creation. |
||||||||||||
Change Passwords: Passwords must be created using the UL® Sign-on Security requirements: ▪UL® Password and Username Requirements: As part of properly implementing the Third Edition UL® 1981 Standard, specifically for compliance with section 6.2 Sign-on Security of the Third Edition UL® 1981 Standard: 6.2.1 - The Employee's Password (i.e., Passcode) shall consist of the following: a)A Username of at least six (6) characters b)A Password which shall consist of a minimum of six alpha-numeric characters with at least one alpha and one numeric character 6.2.6 - The automation system shall prevent: a)Repeated passwords, used within the last six changes; b)Passwords that are a derivative of the user name(s); and i.[e.g., Password cannot contain 50% of a Username so a User "Stacy" cannot have a Password of "STA3841"] c)Passwords that are simply letters or numbers in order (e.g.: abcd, 1234, etc.). i.[e.g., any type of sequence is prohibited such as 'ab', '34', '89', 'xy'] |
||||||||||||
This is the new Employee Hired/Terminated report (documented to comply with the Third Edition UL® 1981 Standard) which provides a list of the Company's Employees is displayed in a functioning Grid dialog with an Employee Trace Form Title: ▪It provides a list of the Employees - retrieved based on their Hire, Termination, or original Entry Date - that is displayed in Grid format and so may then be viewed, sorted, filtered, reconfigured, printed, emailed, and/or exported. |
||||||||||||
A new Entities Drop-Down Selection List field has been added to the Review Deleted Entities Form where previously deleted Proposals were not included. ▪Entities - By default, All deleted entities (e.g., Invoices, Bills, Receipts, Proposals, etc.) will be listed based on the selected Filter type and Date Range. oUsing the Drop-Down Selection List provided, you may also Choose to list only one type of Entity. oIf Proposals are selected, you may Choose whether to list the deleted Proposals for Prospects (the default) or Subscribers.
▪The Restore option on the Review Deleted Entities Form can now restore Proposals including data entered in the Proposal Items, Recurring Items, Job Tasks, and Options tabs, when present. |
||||||||||||
There is a new E-Signature field and E-Signature Icon (shown above) on the Personal Tab of the Employees Form that provides the ability to store an Electronic Signature for an Employees. The Electronic Signature dialog - where the Electronic Signature is actually created - is accessible by Clicking the E-Signature Icon. ▪This E-Signature Icon is only active when a User has been given the appropriate Access Rights to the Electronic Signature Form. ▪These Access Rights are provided by including the Electronic Signature Form in the Employee Group to which the Employee is a member (in the Security Access Group field within the Security tab of their Employee Form), and/or by specifically adding the Electronic Signature Form to the User Access Rights Form for this User.
When entering the Employee's User Name in the Database User Name field in the Security tab of their Employee Form, if the CheckULPasswordRestrictions option is set to False ("F"), the UL® Password and Username Requirements Password Restrictions feature will be turned off. |
||||||||||||
Password Field Access: If your Company needs to restrict access to the Password field on the Central Station Data Form within the Monitoring tab, but still allow access to the other Fields on this Form, you may now simply remove the Check from the Password item in the Fields tab of the Employee Groups Form for the Central Station Form. ▪The result would be that no Employee assigned to this Employee Group would have access to that Password field. ▪In a similar manner, access to most of the other Fields on this Central Station Data Form may also be controlled.
➢Note: It is important to remember that when an Employee has specific rights assigned by using the User Access Rights Form, those rights granted or restricted by using the User Access Rights Form will override those granted or restricted on the Employee Groups Form! When restricting or granting any rights or access to a Form or a Field, be certain that those restricted or granted rights are not negated in the User Access Rights Form |
||||||||||||
The new User Login History Report (designed and documented to comply with the Third Edition UL® 1981 Standard) will list those Employees who have attempted to, or successfully Logged Into the MKMS database (mkmsdefault.db). ▪Because this is a true Grid (see the Grids & Lists - Print Preview - Exporting Data chapter for much more information), it offers the Filtering, Configuration, Sorting, Printing, Emailing and Export capabilities that are inherently part of an MKMS based data grid |
||||||||||||
The Employee Groups Form allows you to define which Access Rights will be available to the Employee (on a Form by Form basis) by assigning the appropriate Employee Group Code to that Employee. ▪Checking the Audit Access Right on all Forms assigned using the Employee Groups Form is mandatory for compliance with the Third Edition UL® 1981 Standard requirement. |
||||||||||||
|
||||||||||||
This new Verify Address option will execute an Address Validation process - that will be performed by the United States Postal Service ("USPS") - for the currently selected Subscriber. |
||||||||||||
There is a new Sales Tax Information box within the Invoice Header section of the Invoice Form which displays the Tax Rate ID, Tax Code, and Tax Rate assigned to the Invoice. |
||||||||||||
Allow_Change_Tax_For_Invoice - A new feature enabled in Company Settings which allows a User to update the Sales Tax assessed on individual Invoices has been implemented. ▪By default, this new Allow_Change_Tax_For_Invoice option is set to False ("F"). ▪Setting the Allow_Change_Tax_For_Invoice option to True ("T"), lets new Sales Tax Information box owithin the Invoice Header section of the Invoice Form to becomes editable (assuming that a Receipt has not been Allocated to that Invoice) |
||||||||||||
The Recurring Revenue Breakdown report dialog has been updated to include additional selection (filtering) options. |
||||||||||||
There is a new States Maintenance Form which is populated with all of the current US Sates and Territories, and new records may be added later, if required. ▪It will be used in conjunction with the Credit Card Surcharge feature (see below). ▪The State entries may also used in the Sales Taxes Invoiced and the Sales Tax Breakdown Reports to identify the specific State for which the Sales Taxes were Invoiced or Collected. |
||||||||||||
A Credit Card Surcharge may now be assessed on designated Subscriber Payments that are made using their Credit Card, ▪A Credit Card Surcharge Setup process puts in place your Company's decision to assess a Credit Card Surcharge. ▪Those Surcharges are assessed as a percentage of the Amount being charged on the Credit Card ▪That Surcharge Amount charged to the Subscriber's Credit Card will be in addition to the Amount needed to pay the Balance Due on an Invoice |
||||||||||||
The Sales Taxes Invoiced report has been enhanced to allow the User to request a report based on which State(s) those Sales Taxes were Invoiced for: 1)By specifying a set of one or more States which have been identified in the Tax Rates Form, or 2)By specifying those Tax Rates records which have NOT been associated with a State (i.e., Unassigned) |
||||||||||||
The Sales Tax Breakdown report has been enhanced to allow the User to specify which State(s) those Sales Taxes were Invoiced or Collected for: 1)By specifying a set of one or more States which have been identified in the Tax Rates Form, or 2)By specifying those Tax Rates records which have NOT been associated with a State (i.e., Unassigned) |
||||||||||||
|
||||||||||||
From time to time, it may become necessary to cancel a previously executed Bank Reconciliation and revert that Bank Account's records to the previous Bank Reconciliation ▪The new Bank un-reconcile dialog is now available for this purpose |
||||||||||||
From time to time, it may become necessary to cancel a previously executed Credit card Reconciliation and revert that Credit Card's records to the previous Credit card Reconciliation ▪The new Credit Card Un-reconcile dialog is now availa le for this purpose |
||||||||||||
The Credit Cards Form now has an Import option ▪Click the Import Icon on the Credit Cards Form to open the Import Credit Card Transactions dialog ▪This Import Credit Card Transactions option will allow your Company to import the Credit Card Transactions contained in a CSV file |
||||||||||||
|
||||||||||||
A new Select Date field has been added to these reports (see box on the left) which allows the User to select which As Of Date (e.g., Scheduled Start Date, Estimated Completion Date, etc.) will be used to construct that Aging report. |
||||||||||||
|
Central Station Monitoring Updates
|
|||||||||||
The newly revised Notifications sub-tab on the Monitoring tab now provides the ability to identify and define one or more specific Alarm Conditions which - when received by SPA - are to be processed internally by ▪sending a Predefined Message to a designated Person.by an Email or Pager, or ▪executing an Inter-active SMS or Inter-active Voice message to a defined Telephone Number (using the MKS Connect Service) |
||||||||||||
Auto Close Mins - The new Auto Close Mins (Minutes) field in the Events tab provides the ability to have a designated User (see Users below) Open the premises without triggering an Event Signal entry (Opening) as long as that User actually Closes the premises within the number of minutes set in tis Auto Close Mins field. a)This feature requires the O&C Supervised field in the Central Station Data section of the Edit View - Monitoring tab is set to "Both" and the appropriate Person/Company Employee has been assigned a User number b)This feature is implemented to facilitate Cleaning Crews, Maintenance Staff, etc., who may need to Open the premises at random times, may do so as long as they Close within the number of minutes entered in the Auto Close Mins field. |
||||||||||||
There is now a Required password to put On Test field on the Central Station Data section in the Edit View of the Subscribers Form ▪Password On Test Default in Company Setting - There is a new PasswordOnTestDefault option which by default, is set to False .When the PasswordOnTestDefault option is set to True, the Require Password to put On Test field will be Checked automatically in the Central Station Data section of all Subscribers.
When the Password On Test Default in Company Setting is set to True, the Account Pwd button on the Place an Account On Test dialog MUST be selected and a valid Password must be selected from the pop-up Password Selection dialog before that Account may be placed on test. ▪Also, there is a new Require Password to put On Test field on the Alarm Conditions Form to identify specific Alarm Condition Codes that will require a Password to be placed On Test.
❖Understanding the Require password to put On Test feature . oWhen the the Require Password On Test option is set to True in Company Settings, the Require Password to put On Test field in the Central Station Data section (of the Monitoring tab in the Edit View of the Subscribers Form) will default to Checked automatically, thus enforcing that a Password will be required before an Account may be Placed On Test. oThis Require password to put On Test field may also be Checked (or un-checked) individually, based on a specific Subscriber's requirement. oSee the Alarm Conditions chapters, the Password On Test Default option and the Require Password On Test option in Company Settings for more information about this requirement. |
||||||||||||
The new Get Agencies option can automatically assign Police, Medical, and Fire Agencies based on the Subscriber's Address by creating (when needed) a Town Code record which is then added to the Central Station Data section of the Subscriber record ▪Your Company must Subscribe to this service ▪Go to https://developer.precisely.com/pricing ▪Available plans and pricing will be provided at that site, and this is also where your Company may also subscribe to the service. |
||||||||||||
The new LLP Schedule Form allows for the selection of a New, or existing Schedule which is then associated with a specific Alarm Condition. ▪Thereafter, when an Alarm Signal for that Alarm Condition is received for the Account that was assigned this LLP Schedule, that Signal will be processed as an LLP (Interactive Low Level Signal Processing) if it was received within the time and day parameters of that Schedule.
There is a new LLP Schedule Icon on the Monitoring tab of the Edit View of the Subscribers Form ▪LLP (Interactive Low Level Signal Processing) will automatically send interactive SMS or Voice messages to a Dealer, to the Subscriber's Premise, and/or to any Contact so they can interact with the system and handle certain designated Alarm Signals without the need for Operator intervention. ▪LLP Schedules may also be associated with a Contact List where an Alarm Condition, and optionally a Signal ID or Zone code will determine when (if) that LLP Schedule response will be executed. ▪Also see Understanding the Schedules feature referenced by this LLP Schedule option for more information about defining and using Schedules
The revised Notifications sub-tab on the Monitoring tab now provides the ability to identify and define one or more specific Alarm Conditions which - when received by SPA - are to be processed internally by sending a Predefined Message to a designated Person.by an Email or Pager, or an Inter-active SMS or Inter-active Voice message to a defined Telephone Number (using the MKS Connect Service) |
||||||||||||
There is a new Action Plans Icon located on the Monitoring tab's Ribbon Menu which provides the ability to identify one or more Action Plans, each of which may or may not have an associated Alarm Condition Code that, when received at the Central Station, will not be processed by the Operator using the standard Operator Guided Response, but instead will follow the designated Action Plan, using the Action Steps defined in that Action Plan ▪There is also a new Action Plans Icon located on the CSID Zones tab, the CSID Overrides tab, the Panel Zones tab, the Panel Zone Override tab, the Alarm Conditions Form and the Dealers Form
If more than one Action Plan is available when an Alarm Signal is being Processed, the Order of Priority for implementing those Action Plans is: |
||||||||||||
MKS recommends using the MKS Customer Connect Service for Low Level Processing and Twilio (www.twilio.com) to provide cloud based interactive SMS and IVR (Text & Voice) communication services. ▪See MKS Connect Service (and its subordinate chapters) and IVR Management (and its subordinate chapters) for important information! |
||||||||||||
|
|
The new Schedules feature was created because certain situations require very customized responses based on the day(s) or the week, month(s) of the year, various time cycles and/or other special circumstances The new Schedules Form will display all of the existing (previously created) Schedules and provide for the creation of new ones ▪The Schedules Form has three sections: 1)Schedule List section with previously defined Schedules 2)Availability section listing the Days of the Week when a selected Schedule will be in effect 3)Assignments section where the individuals or Subscribers using the selected Schedule are listed
▪Once a Schedule is created, it may be assigned to a Contact List a)A Contact List is used for a specific purpose (it defines who should respond to a certain Alarm Condition and/or CSID Zone and/or Zone) within the specified date and time parameters of the Schedule to which the Contact List is assigned b)Members of a Contact List are individually chosen from all existing Contacts (selected from that Account's Contacts (People To Call) , Alternate Call List, and/or Dealer Call List) c)Call Numbers on the Contacts (People To Call) Form d)LLP Schedules may be assigned to specific Subscribers |
|||||||||||
The new Contact Lists tab in the Subscriber Panels section of the Edit View of the Subscribers Form and its three sections provides a new interface: 1.To list all Available Contacts associated Contacts (People To Call), Alternate Contact List, and/or Dealer Contact List for each Subscriber Panel's CSID 2.To design a Contact List for Responses to specific Alarm Conditions, and 3.To assign a Schedule for specific Days and Times, and Alarm Events to a Contact List, and 4.To assign a Schedule to a designated Contact List, and/or to an individual Contact (e.g.,Contacts (People To Call), Alternate Contact List, and/or Dealer Contact List member) and/or to its List Members
❖See Contacts (People To Call) and Call Order below for related information ❖See the Before Dispatch and/or After Dispatch below for that special new feature |
||||||||||||
The revised Contacts (People To Call) tab still contains the names, telephone numbers, and other important information for the People To Call ▪Plus, it now includes a Call Order tab which replaces the previous stand--alone Call Order tab and it allows for the Re-Setting of the Call Order sequence of the existing Contacts (People To Call) ▪Any Call Number for a Contact entered in any Contacts (People To Call) Form may be assigned to any Schedule |
||||||||||||
There are new instructions for processing an Alarm Event that has the new Before Dispatch and/or After Dispatch Contact List ▪Before & After Dispatch Contact Lists are created in the Contact List Form: a.When Processing Alarm Signal - as the software is preparing to enter the Dispatch phase, the system now checks if there is a “Before Dispatch” Contact List created for this Account (CSID). b.Assuming there is a Contact List entry which is active and not expired: 1)If the Contact List entry's Alarm Condition, CSID Zone Signal Identifier and Physical Zone fields are all empty, then the “Before Dispatch” Call List is always presented before proceeding to the actual Dispatch phase, 2)If there are specified conditions (Alarm Condition, and/or Signal Identifier, and/or Physical Zone) assigned to the Contact List entry, then the Alarm Signal must have those same conditions before the list is presented 3)If the specified conditions do not match the "Before Dispatch" Contact List entry, the software proceeds directly to the normal Dispatch sequence described below. c.Any “After Dispatch” Contact List entries adhere to the same rule but are presented after the Alarm Signal has been Dispatched. d.There is no default "fall back to" for Before Dispatch and After Dispatch Contact List entries 1)When there is no matching Before Dispatch and After Dispatch Contact List entry, the software moves on the next logical step in the Operator Guided Response, or Action Plan. 2)Call Lists will be displayed in the same format and same locations as they always have and will be as expected when presented to the Operator. 3)The only exception is for the Before Dispatch and After Dispatch Contact Lists. |
||||||||||||
|
Must Contact List Type |
New Must Contact - List Type: For those situations where, regardless of who was contacted prior to, or during the Notifications process, a specific person (or persons) must also be contacted (notified) prior to displaying the Signal Options tab on the Signal Processing screen. ▪When this new Contact List's Must Contact List Type is assigned to a Contact List entry, the List Members for this Contact List entry must be notified as described below: i.The List Member(s) must be contacted prior to Completion of the Signal Processing procedure ii.To ensure this action is taken, the List Member(s) will be shown in a Must Call List sub-tab within the Signal Options tab iii.These Contact(s) must be reached before a Resolution Code is selected |
|||||||||||
▪The Notification List on the CSID Zones Form now supports the SMS, Voice, and RS-232 message Types (in addition to Pager and Email). ▪The Notify Subscriber on Alarm Dispatch and the Notify Dealer on Alarm Dispatch fields on the CSID Zones Form now supports SMS, and Voice message types (in addition to Pager and Email). |
||||||||||||
The Smooth Operator Form is used to define (identify and configure) certain procedures that will provide an Automatic Action (predefined alarm signal processing functionality) while Processing Signals within MKMSCS. |
||||||||||||
Sub Dealers now also has a Schedule Reports option which is accessed by: ▪Clicking on the Sub Dealers Icon to display the list of Sub Dealers section ▪Selecting the Sub Dealer record that needs a Schedule Report defined ▪Clicking the new Schedule Reports option |
||||||||||||
Two areas on the Main tab of the Dealers Form have new features added 1)Notifications section - The Notify On Dispatch field now supports SMS via the SMS Notification #, or by Voice using the Voice Notification # as (in addition to Pager, or E-Mail) 2)Alarm Notifications may now be specified for a specific Alarm Condition using SMS via the SMS Notification #, or by Voice using the Voice Notification # (in addition to Pager, or E-Mail), each using a selected Predefined Message |
||||||||||||
When the Copy Operator Notes ("CopyOperatorNotes") option is set to True in Company Settings, a Copy Operator Notes From History button will now be available at the bottom of the Notes tab during the Verification process. ▪When selected, a Signal History dialog for that Account will be displayed ▪The Operator may locate the appropriate Signal and Select the appropriate Signal Detail item, then: i.Copy Selected Notes and/or ii.Copy All Operator Notes and/or iii.Use Ctrl+Click or Shift+Click to multi-select operator notes ▪Once the desired Note(s) are chosen, those note(s) will immediately be inserted into the Notes tab |
||||||||||||
When the MKS Connect Service is enabled, SMS and IVR Interactive Notifications may be utilized. There are two new fields on the Subscriber tab of the Edit View of the Subscribers Form that enable the entry of: a)SMS Notify # - Enter the telephone number that should be used to send a Text Message (SMS) Notification to this Account b)Voice Number # - Enter the telephone number that should be used to send a Voice Message (IVR) Notification to this Account
For those Companies using the MKS Connect Service, the Notify Subscriber on Dispatch field on the Central Station data section in the Monitoring tab of the Edit View of the Subscribers Form now supports the option to have the system automatically notify the Subscriber whenever a Dispatch is executed for an Alarm Signal received from their premises by SMS via the SMS Notify #, or by Voice using the Voice Notify # as described above (in addition to Pager, or E-Mail) |
||||||||||||
|
|
|
||||||||||
Module |
Forms Affected |
8255 - 8258 New Features |
||||||||||
|
|
|
||||||||||
MKMS STARK |
The Customer Connect Service ("MKSCustomerConnectSrv.exe") is an application which runs in the background as a Windows® Service ▪This service provides a variety of automated Email responses and/or reminder Tasks to follow up with someone for a designated reason. ▪Types of automated responses which may be defined by your Company are: a)Notify New Prospects and/or Subscribers with a Welcome and/or Thank You Email b)Send a notification reminder for upcoming Service calls c)Remind Subscribers that they have a past due Invoice d)Ask Subscribers with expiring Credit Cards to update their file e)Send an Email when certain Contracts are about to expire f)Survey a Subscriber about a recently Completed Service visit g)Send an acknowledge when a Receipt record has been created |
|||||||||||
MKMS STARK |
A Contacts tab which will list the Contact records that have been associated with the currently selected Subscriber has been added to the History Grid and Related Accounts tabs at the bottom of the Subscribers Form. |
|||||||||||
MKMS STARK |
New |
|||||||||||
|
|
|||||||||||
The Subscriber (Prospect, and Vendor) Form's Documents options have a revised where the Add Document dialog only allows for the specific identification of the File Location to be added or a URL and has discontinued the Embedding of the actual Documents within the SQL Database |
||||||||||||
There is a new Receipt Icon on the Invoice Form ▪Click the Receipt Icon on the Invoice's Ribbon Menu to open the Create Receipt and Allocate dialog in which a payment from the Subscriber may easily be posted and allocated in one step by using this Create Receipt and Allocate Form |
||||||||||||
A new Transaction Type option with three choices has been added to the Cash Receipts Report i.All - Include all of the Receipts that match the User set Parameters (the default) ii.Auto Draft - Include all of the Receipts that match the User set Parameters and were posted using the Auto Draft process iii.Daily - Include all of the Receipts that match the User set Parameters and were posted using the Fully Automated Recurring Revenue Billing process |
||||||||||||
|
|
▪When setting the Auto Draft field to Yes in the Receivables section of the Edit View of the Subscribers Form, the system now first confirms that there is at least one Payment Method defined as the default. ▪When setting the Auto Draft field to Yes in the Payment Method Form, the system also confirms that there is at least one Payment Method defined as the default |
|||||||||||
The Enter/Edit Credit Card Form has been updated and will provide automatic insertion of certain key field (which may be modified if required) and credit card number validation. |
||||||||||||
The Enter/Edit Bank Account Form has been updated and will provide automatic insertion of certain key field (which may be modified if required) |
||||||||||||
The Enter/Edit Credit Card Form has again been updated as follows: ▪Card Holder's Name MUST be what is embossed/printed on the Credit Card itself, ▪Only alphabetic characters are permitted (and so in many cases the existing entry will need to be modified) ▪Therefore, No numbers and/or punctuation marks are permitted (e.g., "2", "5", ",", ".", "-")
The Enter/Edit Bank Account Form has again been updated as follows: ▪Account Holder's Name MUST be what is shown on the Bank Statement itself, but only alphabetic characters are permitted (and so in many cases the existing entry will need to be modified) ▪Therefore, No numbers and/or punctuation marks are permitted (e.g., "2", "5", ",", ".", "-")
|
||||||||||||
A new Debit Card Check box is now available on the Enter/Edit Credit Card Form. ▪Check this box if the currently displayed Credit Card information actually represents a Debit Card rather than a Credit Card. |
||||||||||||
There is a new Pay Method List (Report) that is a fully functional Data Grid which provides a list of the Payment Methods that have been entered for your Company's Subscribers. ▪This is a multi-purpose report which helps to identify anomalies in data entry, verify data entry, confirm what and from where Payment Methods were entered within a specific Date Range, |
||||||||||||
The E-Pay Form has been updated and will now automatically provide credit card number validation. |
||||||||||||
When using Subscriber as the Search By option, the Date Received (defaulted to Today), Batch Number (defaulted to the Day number of Today), Method of Payment (defaulted to Check) and Bank Account (defaulted to the Default Bank Account) will be inserted automatically. |
||||||||||||
The Export option in the Subscriber Statements dialog now offers a "Note to include on statement" option and the allowable length of the Statement's Note field has been increased. |
||||||||||||
After reporting all of the Breakdown for Sales Taxes that were Invoiced or Collected, a Summary page will now be presented - based on the User selections made - with: a)Total Invoiced or Collected Sales that were subject to Sales Tax, b)Taxes Invoiced or Collected sub-divided by Taxing Authority and each Authority's individual Sales Tax Rate c)Column with the accumulated Sales Tax totals Invoiced or Collected for each of these Sales Tax Rates d)Total of all Sales Taxes Invoiced or Collected |
||||||||||||
|
Installed Equipment dialog
|
When Converting a Proposal to an Invoice, there is a new Add Inventory To Installed Equipment?option ▪When that Add Inventory To Installed Equipment? box is Checked, a new Installed Equipment dialog will be displayed. |
|||||||||||
There is a new States Maintenance Form which is populated with all current States and Territories of the US, with the ability to add new records as may be added. ▪It is be used in conjunction with the Credit Card Surcharge feature |
||||||||||||
In addition to the Search F2 option, the Quick Search and Multi Field Search Search Options are now part of the Subscriber Form's Ribbon Menu |
||||||||||||
The Accounts Receivable As Of report has a new Print Detail option: ▪When the new Show Detail box Checked a Print Detail option now becomes available as a data grid Option. ▪Click the Print Detail Icon to display the Detail for the selected Accounts Receivable As Of report item. |
||||||||||||
The Auto Draft field on the Payment Methods Form now has a Drop-Down Selection List to Choose whether ("Yes") or not ("No") this Subscriber will authorize/has authorized the use of a Credit Card or Bank Draft to process Recurring Revenue Invoice Payments via a Payment Gateway) during either the Fully Automated Recurring Billing process, or by using the Post Auto Drafts procedure. ▪This Auto Draft field setting may now be changed (No to Yes, Yes to No) when required. |
||||||||||||
Checking the Auto Draft box in the Receivables section of the Edit View on the Subscribers Form indicates that this Subscriber will be using the Auto Draft feature (see Payment Methods immediately above) as a method of making Payments for their on-going, automatically drafted payments for the Recurring Services being provided by your Company. ▪A new Auto Draft field within the Accounting tab on the Subscriber Form will be Checked automatically. |
||||||||||||
The Subscriber (Prospect, and Vendor) Documents option has a revised Add Document dialog which allows for the specific identification of the File Type to be added |
||||||||||||
|
|
|||||||||||
In addition to the Search F2 option, the Quick Search and Multi Field Search Search Options are now part of the Prospect Form's Ribbon Menu |
||||||||||||
|
|
|||||||||||
If a Sale-Purchase Item has been designated the Default Sales Code on the Service Options tab of the User Options Form, it can no longer be designated as Inactive. |
||||||||||||
There is a new Order Inventory dialog accessible from the Parts List tab of a Work Order Form ▪See the "Understanding the Order Inventory option on the Work Order's Parts tab" discussion in the Parts List tab chapter for more information |
||||||||||||
|
|
|||||||||||
A.There is a new Restrict Vendor PO in the Company Settings Form- By default, this RestrictVendorPO option is set to False ("F") in the Company Settings Form and the previous "normal" behavior will be in effect ▪A Sales-Purchase Item (e.g., Purchase Category) may be associated with (e.g., belong to) a Sales-Purchase Item when any of these actions occur: 1)A Vendor is selected in the Sales-Purchase Item Form's Vendor field a)When chosen for the Vendor field, it populates the internal APID field in the SaleItem table 2)A Vendor is added to the Sales-Purchase Item Form's Vendor Item ID Grid a)When inserted into the Vendor Item ID Grid, it also creates a record in table Vendor Codes.
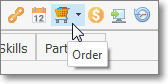
B.If the RestrictVendorPO option is set to True ("T") the above actions are still in effect, plus: 1)When creating a Purchase Order for a Vendor, the User will only be able to pick from a list of the Sales-Purchase Items which have been associated with (e.g., belong to) that Vendor 2)From the Work Order Form, when creating a Purchase Order by Clicking the Order Icon,
Work Order Ribbon Menu Order Icon
a)The User is required to select a Vendor, then b)The Purchase Order Form will be limited to selecting Sales-Purchase Items that "belong" to that selected Vendor. 3)When the Order Inventory option is selected within the Part List tab on a Work Order Form, in the Order Inventory dialog, the User must Choose a Vendor and a Warehouse, after which the User will only be able to Order from a list of the Sales-Purchase Items which have been associated with (e.g., belong to) that Vendor 4)From the Item List sub-tab within the Inventory tab on the Job Costing Form, when the Order Inventory option is chosen an Order Inventory dialog is displayed in which the User must Choose a Vendor and a Warehouse, after which the User will only be able to Order from a list of the Sales-Purchase Items which have been associated with (e.g., belong to) that Vendor 5)From Work Order Invoicing/Review - When viewing the Parts List tab of a specific Work Order Form, if the Order Inventory option is selected within the Part List tab on that Work Order, in the Order Inventory dialog, the User must Choose a Vendor and a Warehouse, after which the User will only be able to Order from a list of the Sales-Purchase Items which have been associated with (e.g., belong to) that Vendor |
||||||||||||
|
|
|||||||||||
Pay a Bill directly via E-Pay from within the Bills Form itself by using the Pay Bill By Bank option on its Action Menu |
||||||||||||
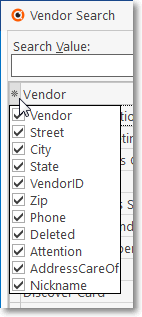
There is a new Nickname field in the Edit View of the Vendors Form where a brief "nickname" for each Vendor may be created. This Nickname will be included in the F2 Vendor Search columns and on the main Vendor Form |
||||||||||||
|
|
Purchase Orders may now be created for delivery to: i.Your Company Billing Address (the default Address entered in the Company Tab of the User Options Form) ii.A predefined "Ship To" address (explained in the Edit View on the Vendor Form chapter) iii.The address of an end-user ("Direct Sale" explained in the Creating a Purchase Order chapter) ▪All purchases will still be billed to your Company's Address. |
|||||||||||
The (Subscriber Prospect, and) Vendor Documents option has a revised Add Document dialog which allows for the specific identification of the File Type to be added |
||||||||||||
|
|
|||||||||||
This new Job Status Form is used to define the Progress of Job Costing records (e.g., Status of the Job as it progresses from creation to completion) ▪The Job Status of a Job Costing entry is initially assigned when it is created, and then periodically updated as that Job progresses toward completion. |
||||||||||||
The revised Item List sub-tab on the Inventory Tab of the Job Costing Form provides many capabilities (e.g., maintain a parts list and print it as needed, Order news parts, reserve parts for this Job, identify the parts that were "used"). |
||||||||||||
|
|
|||||||||||
Module |
Forms Affected |
8254 New Features |
||||||||||
|
|
|
||||||||||
MKMS STARK |
The Contacts Form has been substantially improved with ▪Search On - Additional Search On option which offers many new Search capabilities the selection of which is provided by a Drop-Down Selection List ▪By default, when the Contacts Form is opened from the Receivables tab, all Active Contacts are listed. ▪The number of Contact records displayed in the Contact List's Grid is now User definable. ▪Max records to show in grid - This new option - which is located at the bottom of the Contacts List (Grid) is set to 50 by default. oProvided for those Companies with a large number of Contacts oThis setting allows a User to restrict the number of Contact records that will be retrieved from the database at one time to the Maximum set here. oA pair of left and right arrow buttons provides movement from Grid page to Grid page. |
|||||||||||
|
|
|||||||||||
Bill In Advance - By default, the BillInAdvance option is set to False ("F") in the Company Settings Form. ▪Those Companies using the Version 5.1.8254 or later will have the BillInAdvance option set to False ("F") and should not change it!
Auto Billing Notification Email - By default, this new AutoBillingNotificationEmail option in Company Settings is blank. ▪This option stores the Email address of the Employee who is to be notified if (when) the Fully Automated Recurring Billing process has failed. ▪If no AutoBillingNorificationEmail Email address is entered, no Failure Notification will occur.
Email_invoice_notification - By default, the new email_invoice_notification option is set to False ("F"). ▪The emailing of the Invoice notification - using the MKS Connect Service - during the Fully Automated Recurring Billing process is activated in Company Setting by setting the "email_invoice_notification" to True ("T") and the Subscriber must have a valid Email address.
Email_receipt_notification - By default, the new email_receipt_notification option is set to False ("F"). The emailing of the Receipt notification - using the MKS Connect Service - during the Fully Automated Recurring Billing process and/or when using the Receipt Posting dialog is activated in Company Settings by setting the "email_receipt_notification" to True ("T"). ▪To take effect, the Subscriber must have a valid Email address entered prior to the next running the Fully Automated Recurring Billing process, but may manually enter a valid Email address anytime when using the Receipt Posting dialog. |
||||||||||||
Any E-Payments created from a Work Order, Subscriber and/or an Invoice Form was always listed in the ePay Review report with a Description in the format: "Transaction Type+Subscriber+Invoice #:nnnnnn" regardless of the actual Form from which the transaction originated. ▪Now this Description's format specifically lists the "Work Order #: nnnnnn" or "Invoice #: nnnnnn" or the "Subscriber Name" as appropriate. |
||||||||||||
The E-Payments Form has been enhanced to include new options: ▪Save Current Method of Payment - If new Credit Card or Bank information was entered and this information should be saved as another Payment Method for this Subscriber, the User may now Click the "Save Current Method of Payment" bar ▪Make this Payment Method the default for Subscriber - If the currently selected (or newly defined) Payment Method should be identified as this Subscribers's Default Payment Method, the User may now Check this box. |
||||||||||||
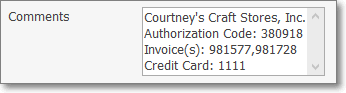
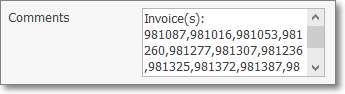
If a Receipt was paid by Credit Card, that information including the last four digits of that Credit Card's Account Number will now be inserted into the Comments section.
If a Receipt paid for multiple Invoices and those Invoices were selected for payment using the Receipts Form's Open Invoices Drop-Down Selections Check Box List, those Invoice Numbers will now be inserted into the Comments section.
|
||||||||||||
Email Notification - When the new Email Notification box at the bottom of the Receipt Posting Form is Checked, and an Email address is inserted in the Email field, the system will now create an Email Receipt Notification. ▪For this Email Notification feature to function properly: a.The "email_receipt_notification" option in Company Settings must be set to True ("T"). b.The default Email address is the one entered in the General section within the Edit View of the Subscribers Form c.This default Email address may be changed (or added), as needed.
▪Once the Receipt is Posted, and the conditions above are in place, a This receipt has been queued to be emailed message will be presented. |
||||||||||||
A new Bill in Advance Check box now permits your Company to individually identify those Billing Cycles which are to be Billed in Advance, and those that are not. When this 5.1.35.8254 Upgrade is initially installed, this field will be populated based on how your Company's Bill In Advance option ("BillInAdvance") was previously set in Company Settings |
||||||||||||
A new Internal Notes Press (F9) for timestamped entry field has been added to the Proposal Form. ▪This field is used (in addition to the original Comments field) to record "Internal" notes and/or comments, has a new Time Stamp (F9) feature, and will not be printed on the actual Proposal. ▪Unlike the Comments field, it is not Rich Text Editor capable. |
||||||||||||
|
|
|||||||||||
The Proposal Conversion Information dialog has been updated to include a new Installed Equipment dialog which will only be displayed if the Add Inventory To Installed Equipment? box has been Checked when Converting a Proposal to an Invoice ▪In this new Installed Equipment dialog the User can identify which Proposal Items will be added to the Subscriber's Installed Equipment table using the Qty and optional the How Many? column fields. a.Qty - By default, this Qty (Quantity) represents what was entered on the Proposal, but may be changed if needed. b.How Many? - This column will only be displayed when the Insert_Multiple_Equipment_Items option in Company Settings is set to ("T") True i.Therefore, when the Qty (Quantity) value is greater than One ("1"), Multiple Installed Equipment entries will be created in the Subscriber's Installed Equipment table - based on the How Many? Quantity entered - with each of those Subscriber's Installed Equipment table Quantity entries set to "1". ii.However, when the Insert_Multiple_Equipment_Items option in Company Settings is set to set to ("F") False, this How Many? field is not displayed and only one Installed Equipment entry will be created with the Installed Equipment dialog's Qty (Quantity) inserted into the Quantity field on that one Subscriber's Installed Equipment record. |
||||||||||||
|
|
|||||||||||
An E-Payment option has been added to the Quick Work Order Form which may be used to "collect" the balance for a Past Due Work Order (or Invoice) prior to accepting a new service request. |
||||||||||||
Default Sales Code - The Drop-Down Selection List on the Service Options tab on the User Options Form which is used to Choose the default Sales Category Code for the invoicing of a Service Request will no longer include Inactive Sales Category Codes, any Sales Category Code beginning with "R-", and Sales Category Codes identified as Inventory Items. |
||||||||||||
The load time for the Technician Schedule Form has is now substantially faster. |
||||||||||||
The process of using the Complete button when the Non Billable? field was Checked on a Work Order has changed. Now, if one or more Inventory Items were identified as being Used, and the Non Billable? field was Checked, the Installed Equipment dialog will now be displayed. ▪Install - Check all of the items that where installed from Inventory and should be added to the Installed Equipment table for this Subscriber), then Save the entries. |
||||||||||||
There is a new Quantity field on the Subscriber's Installed Equipment Form ▪During the update to MKMS Version 5.1.8235, this field will be set to one ("1") but may be modified as needed. |
||||||||||||
A Subscriber's Installed Equipment Form's List may now be Grouped by a User selected column name to be able to easily see how many of a particular type of Equipment has been installed at this premises. |
||||||||||||
|
|
A.While Completing a Work Order, and using the Generate Invoice option in the Itemized Invoice Form (see the Automatic Invoice Generation discussion in the Completing a Work Order chapter), when selecting the Inventory Items which are to be added to the Subscriber's Installed Equipment table (the Install box was Checked), the How Many? field must be filled in: ▪When this How Many? Quantity entered is greater than One ("1") - based on the new Insert_Multiple_Equipment_Items option's True/False entry in Company Settings - there are now two possibilities: 1.False - One Installed Equipment entry will be created with the Itemized Invoicing dialog's How Many? Quantity inserted into the Quantity field on that Subscriber's Installed Equipment record. 2.True - Multiple Installed Equipment entries will be created in the Subscriber's Installed Equipment table - based on the How Many? Quantity entered - with each of those Quantity entries set to "1".
B.When using the Work Order Invoicing/Review Form, while Recording Work Order Charges, the Installed Equipment (Shift+F9) tab's How Many? Quantity should be filled in. ▪How Many? - By default, the Quantity in this Installed Equipment (Shift+F9) tab will match the number in the Quantity field in the Inventoryt/Materials tab, but this Quantity may be modified (reduced but not increased), as may be appropriate. oWhen this How Many? Quantity is greater than One ("1") - based on the new Insert_Multiple_Equipment_Items option's True/False entry in Company Settings - there are two possibilities: 1.False - One Installed Equipment entry will be created with the Installed Equipment (Shift+F9) tab's How Many? Quantity inserted into the Quantity field on that new Subscriber's Installed Equipment record. 2.True - Multiple Installed Equipment entries will be created in the Subscriber's Installed Equipment Form - based on the Installed Equipment (Shift+F9) tab's How Many? Quantity - with each of those Quantity entries set to "1". |
|||||||||||
|
|
There's a new capability added to the Job Invoice Multi Usage dialog: ▪Install - Check the box in the Install column for each Inventory Item that is to be recorded in the Subscriber's Installed Equipment Form (if all listed Inventory Items were installed, Check the Green Install box). 1)If the new Insert_Multiple_Equipment_Items option in Company Settings is set to ("F") False - and the Install box is Checked on the Job Invoice Multi Usage Form, one Installed Equipment record will be inserted in the Subscriber's Installed Equipment Form with the Quantity entered equaling the Quantity field entry on that Job Invoice Multi Usage Form.
▪How Many? - This new field is only displayed on the Job Invoice Multi Usage Form when the new Insert_Multiple_Equipment_Items option in Company Settings is set to ("T") True 1)By default, this number will be the same number as the Job Invoice Multi Usage Form's Quantity column but may be changed as needed. 2)When the Insert_Multiple_Equipment_Items option in Company Settings is set to ("T") True - and the Install box is Checked on the Job Invoice Multi Usage Form, then Multiple Installed Equipment entries will be created in the Subscriber's Installed Equipment table - based on the How Many? Quantity that was entered - with each of the Installed Equipment Form's Quantity entries set to "1". |
|||||||||||
There is a new Insert Multiple Equipment Items option in Company Setting Depending on the Insert_Multiple_Equipment_Items option's True/False entry, there are two possibilities: 1.False - One Installed Equipment entry will be created with the Itemized Invoicing Form's How Many? Quantity inserted into the Quantity field on that Subscriber's Installed Equipment record. 2.True - Multiple Installed Equipment entries will be created in the Installed Equipment Form, based on the How Many? Quantity , with each Installed Equipment record's Quantity entry set to "1". |
||||||||||||
There are two new fields and a new Icon located below the Ribbon Menu at the top of the Pending Work Orders section of the Technician Scheduling Form: ▪Start Date - Used to enter the first Date Requested Date to identify the Date Range for the Work Orders that should be included in the Pending Work Orders Grid. ▪End Date - Used to enter the last Date Requested Date to identify the Date Range for the Work Orders that should be included in the Pending Work Orders Grid. ▪Retrieve WOs - Click this Icon to retrieve the appropriate Work Orders. |
||||||||||||
|
|
|||||||||||
The Comments field on the Bills Form be now be included in the List's Grid when it is displayed. |
||||||||||||
|
|
|||||||||||
Module |
Forms Affected |
8253 New Features |
||||||||||
|
|
|||||||||||
MKMS STARK |
Completely new user interface offering a simpler, cleaner design. |
|||||||||||
MKMS STARK |
Implemented Spell Checking in most editable comments and notes fields: ▪The system will Spell Check as you type, underlining any misspelled words with a wavy red line. ▪Select (Double-Click) and then Right Click on a misspelled word to view a Drop-Down Suggestion List from which a replacement may be chosen.
Inside of the Rich Text Editor dialog (Double-Click to open in the RTE Memo field), there is now a Spell Check option to check the entire memo. ▪F7 is a hot key for checking inside the Rich Text Editor dialog. |
|||||||||||
MKMS STARK |
Re-implemented Context Sensitive Help Files (The most recent Help File document (MKS.chm) must be located within the folder in which the MKMS.exe resides). 1.Pressing Ctrl+F1 will open the Help File's Introduction page and the Contents Menu. 2.When the User is within a Form for which Context Sensitive Help has been implemented, by Pressing F1 the specific Help Files Chapter Topic - associated with the current Form - will be displayed. 3.There is also a Help Menu Icon on two MKMS Desktop tabs (i.e., Receivables, Payables). |
|||||||||||
MKMS STARK |
A new Themes capability has been added which allows the User to set their preferred coloration, screen accents (and special occasion) Theme in MKMS and MKMSCS. |
|||||||||||
MKMS STARK |
Backstage Menu System Menu tab on the MKMS Desktop provides a single point of access to almost all File, Maintenance, Reports, Windows, Security and Help options. |
|||||||||||
MKMS STARK |
Quick Access Menu opened with a Right-Click executed on any blank space on the MKMS Desktop, or be Clicking the Menu Icon at the top left of the MKMS Desktop, and provides access to almost all of the File, Maintenance, Reports, Windows, Security and Help options, and this Menu may be accessed while any number of Forms are currently displayed. |
|||||||||||
MKMS STARK |
The Widgets Dashboard normally used within MKMS is now available as a stand-alone MKS Dashboard application and provides access to any/all of those same Widgets. ▪Because it is a stand-alone application, it can be run from any workstation on your Company's network that has access to the SQL Anywhere Network Server. ▪Owners and Managers may use the MKS Dashboard application without having to run MKMS - thereby using less local and network resources. |
|||||||||||
MKMS STARK |
The Widget - Quick Search option has been deactivated because the Widgets feature is now loaded from an external application to improve MKMS performance, and as a result, this type of search would no longer work properly. |
|||||||||||
MKMS STARK |
The new Quick Search dialog (to replace the deactivated Widget - Quick Search option) provides an easy method to Search designated field(s) in Subscriber, Prospect and/or Vendor records - all at the same time - and display a list of each record that matches their Search entry ▪This Quick Search dialog and is accessible two ways: 1)On the Receivables tab in the MKMS Desktop, Select the Search Icon and Choose the Quick Search option. 2)From anywhere within the MKMS Desktop, Press the Ctrl+Alt+Q key combination. |
|||||||||||
MKMS STARK |
MKS Auto Billing |
The Auto Billing capability normally used within MKMS is now available as a stand-alone MKS Auto Billing application and provides far greater flexibility for determining when and which Billing Cycles will be Invoiced. ▪Because it is a stand-alone application, it can be run from any workstation on your Company's network that has access to the SQL Anywhere Network Server. ▪Accounting Administrators and authorized Accounts Receivable System Users may run the MKS Auto Billing application without having to run MKMS - thereby using less local and network resources. |
||||||||||
MKMS STARK |
The new MKMS Data Archive Utility application provides an alternative to the current set of MKMS Purging capabilities.. ▪It can Purge Alarm History and Purge Audit Data based on a selected Purge Date, |
|||||||||||
MKMS STARK |
The Advanced Sale Item Look-up dialog available within the Invoices, Proposals, Bills, and Purchase Orders Forms has been enhanced and simplified with the elimination of the Sale Item field in the header, faster operation, and a more powerful Find capability added: ▪Find - Type the characters (numbers) for the Sale-Purchase Item to be located. i.Upper and lower case entries are treated the same (the entry is compared to both). ii.The incremental search will highlight the closest match. ▪Clear - To start a new search, or just to cancel the existing search, Click the Clear option. |
|||||||||||
MKMS STARK |
Various Reports presented in a data grid |
For some time: A data grid may be separated into Groups based on a selected column's Header Name by Dragging & Dropping a Header Name to the Drag a column here to group a column area above the data grid's Header. ▪Then, to cancel the Grouping, the User would Drag & Drop the selected Header Name back to the Header itself. ▪Now if this data grid is closed when Grouping is still in effect, once reopened, in most cases the previously established Grouping will still be in effect. |
||||||||||
MKMS STARK |
Print Preview (from Grid style Reports) |
Any user defined Print Preview enhancements (e.g., Headers, Footers, Page Numbering, Date & Time location, User Name, Machine Name) are stored and retrieved automatically for each User and for each Report that is derived from a Grid. |
||||||||||
MKMS STARK |
New Icons on Reports using a data grid |
An Email (the data in the Grid) capability, and in some cases a Print Detail and/or Go To Subscriber function has been added to many more reports that present their information in a data grid. When available, these options will appear on the Ribbon Menu at the top of that Report Form as an Icon. Those reports include: |
||||||||||
MKMS STARK |
The Logo tab on the User Options Form will now accept .bmp, .jpg, and .png file formats when Choosing the Company's Logo Image. The Image File Size requirement remains the same. |
|||||||||||
MKMS STARK |
A special MKGM.dup file is included in this upgrade to enable the use of Google Maps® without incurring the map views limitation. Google Map® may now initially display either in the "roadmap" (default) view, or in the "satellite" view, as your Company's Central Station and/or Operations Manager prefers. ▪For those who want to use this feature, this feature requires the installation of a new Company Setting which may be accomplished by using the dbisql utility to run this script: INSERT INTO "DBA"."CompanySettings"("Section","SettingName","SettingValue") VALUES('Feature','DefaultMapType','roadmap') ▪To change the default map display to "satellite": update dba.companysettings set settingvalue = 'satellite' where settingname = 'DefaultMapType' |
|||||||||||
MKMS STARK |
All of the basic Maintenance Forms that must be accessed as each module is implemented (see the How to Setup a Module Chapter Topic for additional information) are now located (with a few exceptions) within their own General Maintenance Menu system and may be accessed with the General Maintenance option on the Backstage Menu System Menu tab and/or the Quick Access Menu |
|||||||||||
MKMS STARK |
The Review Audit Form provides a dialog where records - identified as Audit Form Activity eligible records - are available for viewing. |
|||||||||||
MKMS STARK |
There is a new Review Deleted Entities Form (Only available to the System Administrator i.e., ADMIN) which offers a dialog that allows for the selection by Date Range - based on either the Deletion Date or the Document's Creation Date - of a List of those Entities (e.g., Invoices, Receipts, Bills, Payments) which have been manually deleted by an authorized User from MKMS. |
|||||||||||
MKMS STARK |
Documents are now identified exclusively as a Link to a Drive, Folder, and File name (but previously Embedded Documents will still be available). |
|||||||||||
MKMS STARK |
The selected sorting order for a List (which, when changed, becomes the new default sorting order for that List), will also determine how, and which records are displayed (when the User is not in the List mode) as those Record Movement options (e.g., Begin, Next, Previous, Last) are used on the Main Form's Ribbon Menu. |
|||||||||||
MKMS STARK |
In the Subscriber Search dialog, the system will now show the Limit Record and Search Delay menu options in the Drop-Down Selection Menu for all Users, not just for the Admin User. |
|||||||||||
MKMS STARK |
An MKS Validate stand-alone Utility has been created with similar functionality to the Validate Database function within MKMS. |
|||||||||||
MKMS STARK |
▪The keyboard's Insert (to start a new entry on an Employees Form tab with a Grid format), Delete (to remove an existing entry on an Employees Form tab with a Grid format); plus the Ctrl+S combination (for Save) have been implemented. ▪The Left and Right Arrow Navigation Keys will move the focus from one Employees Form tab to another has been implemented, as has the Ctrl+Insert combination to start a new record on the Employees Form; |
|||||||||||
MKMS STARK |
Various as Listed |
The keyboard's Insert (to start a new entry), Delete (to remove an existing entry), and the Left-Right-Up-Down-Arrow Keys for Navigating within the Grid or Form; plus the Ctrl+S combination (for Save) are implemented on these Forms: ▪On the Job Costing Form's i.Labor tab ii.Sub-Contract tab iii.Materials tab iv.Expenses tab v.Commissions tab vi.Job Tasks tab vii.Inventory tab's Item List sub-tab ▪General Journal Entry Form ▪Work Order Invoicing/Review dialog |
||||||||||
MKMS STARK |
A universal Contacts capability has been added to the system. ▪The Ribbon Menu on the MKMS Desktop's Receivables tab contains a new Contacts Icon which opens the Contacts Form ▪The Subscribers Form, Invoice Form, Prospects Form, Proposals Form, Vendor Form, Purchase Orders Form, Bills Form, and Work Order Form all provide a Contacts (Form access) option as well. |
|||||||||||
MKMS STARK |
Customer Connect Service |
There is a new Customer Connect History (Grid) which displays the history of the Customer Connect Service's Communication transmissions. ▪It is a Grid with full search, column selection and rearrangement,sorting, filtering, etc., features and also provides Print, Export, and Email capabilities. |
||||||||||
MKMS STARK |
A new Salesperson Search field has been added to the Multi-Field Search Form. |
|||||||||||
|
|
|||||||||||
|
|
|
||||||||||
When the UL® 1981 Version is Registered (i.e., Active), the Company Settings CheckULPasswordRestrictions option is set to True ("T") to comply with Section 6.2.6 relating to Password Restrictions in the Third Edition UL® 1981 Standard.
When the CheckULPasswordRestrictions option is set to True ("T") in Company Settings, the Password Requirement legend on the Change Password Form and the Add/Delete Users Form has been updated to more clearly identify those UL® requirements for password creation. |
||||||||||||
A new Entities Drop-Down Selection List field has been added to the Review Deleted Entities Form where previously deleted Proposals were not included. ▪Entities - By default, All deleted entities (e.g., Invoices, Bills, Receipts, Proposals, etc.) will be listed based on the selected Filter type and Date Range. oUsing the Drop-Down Selection List provided, you may also Choose to list only one type of Entity. oIf Proposals are selected, you may Choose whether to list the deleted Proposals for Prospects (the default) or Subscribers.
▪The Restore option on the Review Deleted Entities Form can now restore Proposals including data entered in the Proposal Items, Recurring Items, Job Tasks, and Options tabs, when present. |
||||||||||||
There is a new E-Signature field and E-Signature Icon (shown Above) on the Personal Tab of the Employees Form that provides the ability to store an Electronic Signature for an Employees. The Electronic Signature dialog - where the Electronic Signature is actually created - is accessible by Clicking the E-Signature Icon. ▪This E-Signature Icon is only active when a User has been given the appropriate Access Rights to the Electronic Signature Form. ▪These Access Rights are provided by including the Electronic Signature Form in the Employee Group to which the Employee is a member (in the Security Access Group field within the Security tab of their Employee Form), and/or by specifically adding the Electronic Signature Form to the User Access Rights Form for this User.
When entering the Employee's User Name in the Database User Name field in the Security tab of their Employee Form, if the CheckULPasswordRestrictions option is set to False ("F"), the UL® Password and Username Requirements Password Restrictions feature will be turned off. |
||||||||||||
|
|
|
||||||||||
|
|
|
||||||||||
|
|
A new Email option is now available on the Subscriber, Prospect, Employee and Vendor Forms; and as part of the Printing an Invoice, and/or Printing a Proposal process. a)Click the Email option to open a pre-populated Email Dialog (e.g., using Outlook©, or another Email protocol) to send an Email to the Email Address associated with that Form b)When an Email of an Invoice, or Proposal is sent, the appropriate document is attached to that Email as a PDF file. |
|||||||||||
▪The new Add or Remove Buttons option - accessed by selecting the Down-Arrow at the top of the Subscribers, Prospect, and Vendor Forms - will now allow the User to Customize the content of the new Quick Access Tool Bar on these Forms. |
||||||||||||
▪Status - A new Status field has been added to the Lead Information section of the Edit View of the Subscribers Form (which, during a conversion of a Prospect to a Subscriber, will also be populated with any corresponding Status field in the Edit View of the Prospects Form). If empty, use the Drop-Down Selection List provided to select appropriate Status of this Subscriber (or any of their pending Proposals). ▪This Status field is also used in the new Pipeline Analysis Report |
||||||||||||
|
|
When the new "UseSubscriberTerms" option in Company Settings is set to True ("T"), it now also requires that the Convert a Prospect to Subscriber Process gets the payment Terms your Company will offer to that newly created Subscriber. |
|||||||||||
The documentation for the Understanding Earned & Deferred Revenue and Post Earned Revenue chapters, plus the related Billing Cycles, Company Settings, Run Automatic Billing and Deferred Revenue Setup chapters have all been rewritten; and the Deferred Revenue, and Earned Revenue by Month report chapters have also been updated - all based on the revised (Monthly Basis) methodology used to calculate Earned & Deferred Revenues . |
||||||||||||
|
|
This completely redesigned Subscribers Form has a whole new "look" including new Ribbon Style Menu with special Edit View and Search Icons, History Options and Options Menus, plus options on the Navigation and Actions sections of its Ribbon Menu; new Accounting, Monitoring and Service information sub-tabs ▪Setting the new SaveSubscriberHistorySetting option to True ("T") in the Company Settings dialog will cause the system to save ("remember") each User's History Options History setting as they prefer it. |
|||||||||||
All additions, modifications and deletions of Subscriber data is now performed within the Edit tab on the Subscribers Form which has two sub-tabs: 1.Subscriber - This is where General information about the Subscriber is entered, and where specialized data entry sections for the Receivables, Auto Draft, Service, Acquisition and any Custom Defined field data are provided. 2.Monitoring - This is where basic Central Station Data is entered, and specialized sections for Subscriber Panels, Medical and the myriad number of other Monitoring related information fields are provided |
||||||||||||
Micro Key is now recommending a new way to Assign Batch Numbers on the Receipts, E-Payments, Receipt Posting, and Post Auto Drafts Forms that will better identify When (what day and month) the Receipt was entered, and will also identify what Type of Receipt was posted (e.g,, Check or Cash, Electronic Funds Transfer [E-Pay], the specific Credit or Debit Card, Other) which will make Bank Deposits and Bank Reconciliation processes much easier. ▪When a Batch Number needs to be entered, follow this process: a)Enter the (one digit) number for the Payment Type of the Receipt being posted (1 - 9 based on your Company's adopted Batch Number Assignment method) b)Append the two-digit Month Number and two-digit Day Number ▪If your Company is using an Automatic Payment Gateway (i.e., InnoEPay, Authorize.net, or Forte.net) as your Payment Processor, this Batch Number configuration will be inserted in the E-Payments Form and while Posting Auto Drafts automatically. |
||||||||||||
There is a new Search Open Invoice Read Only - By default, the SearchOpenInvoiceReadOnly option is set to False ("F") which means, when the Subscriber Search by Invoice Number feature is used, the Invoice - if located - will NOT be opened in Read Only Mode, even if the Invoice is for a Service Only Address record and it has a separate Bill Payer identified. ▪Setting this SearchOpenInvoiceReadOnly option to True ("T") Will open the Invoice in Read Only Mode, but only when that Invoice is for a Service Only Address record with a separate Bill Payer identified. ▪When an Invoice is opened in Read Only Mode, the Navigation Icons are not available. |
||||||||||||
Special new Sales Tax related Company Settings: a.3 Digits Tax - By default, the 3DigitsTax option is set to False ("F"). ▪When Taxing Authorities have implemented Sales Tax Percentage Rates to three (3) Decimal Places (e.g., nn.nnn%), this Company Settings that must be re-set to True ("T") to support Charging and Collecting this type of Sales Tax. ▪Therefore, setting this 3DigitsTax option to True ("T") will also activate this Three Decimal Places Sales Tax feature in the Tax Rates Form.
b.Show Tax And Total Per Line Item Report - By default, the ShowTaxAndTotalPerLineItemReport option is set to True ("T"). ▪By always setting this ShowTaxAndTotalPerLineItemReport option to True ("T"), which is recommended, it will automatically support - when required - the Three Decimal Places Sales Tax feature's three (3) Decimal Places Sales Tax format on reports; and will also show the exact Sales Tax being charged on each Detail Line Item on related reports regardless of how many decimal places, are needed. ▪Whether or not Taxing Authorities have implemented Sales Tax Percentage Rates to three (3) Decimal Places (e.g., nn.nnn%), this Company Settings may be set to add support on Reports for Charging and Collecting this type of Sales Tax (also see "Show Tax And Total Per Line Item Screen" immediately below) . ▪Setting the ShowTaxAndTotalPerLineItemReport option to False ("F") will eliminate Detail Line Item Sales Tax totals from reports.
c.Show Tax And Total Per Line Item Screen - By default, the ShowTaxAndTotalPerLineItemScreen option is set to True ("T") which - regardless of the 3DigitsTax option setting, includes Detail Line Item calculations for Sales Tax Amounts (the Tax Rate and Sales Tax per line item is shown); and also provides a Totals information box with Net, Tax, and Gross Amounts at the bottom of the Invoice. ▪When Taxing Authorities have implemented Sales Tax Percentage Rates to three (3) Decimal Places (e.g., nn.nnn%), this is one of the three Company Settings that may be set (see "Show Tax And Total Per Line Item Report" immediately above) to add support for Charging and Collecting this type of Sales Tax on Invoices. ▪Setting this ShowTaxAndTotalPerLineItemScreen option to True ("T") which is the default, will also support this Three Decimal Places Sales Tax feature on Invoices thus showing three (3) Decimal Places on all Detail Line Item entries plus net, tax and total columns. ▪However, you may still consider changing the ShowTaxAndTotalPerLineItemScreen option setting to its default of False ("F") when the 3DigitsTax option to True ("T"). oThis False setting will show the Tax Rate on an Invoice's Detail Line Item in two (2) or three (3) Decimal Places, as appropriate, but will not show the extension pricing in two (2) or three (3) Decimal Places to avoid confusion. oIn this case the net, tax and total columns are removed, but a Totals information box with Net, Tax, and Gross Amounts is included at the bottom of the Invoice. ▪See the Sample Results of these Sales Tax related Company Settings Options discussion in the Company Settings for Accounts Receivable chapter for Invoice Detail Line Item illustrations. |
||||||||||||
While in the Subscribers Form: Edit View, two Users could modify the same Subscriber record at the same time. Once this issue was identified, it was corrected by implementing record locks when a User has started Editing a record. ▪If a User attempts to modify an existing Subscriber's record while another User has already started doing the same, an error message will now be displayed:
Record is locked by user XYZ (abc)
▪OK - Click OK to continue, and the modification made by the second User will be canceled. ▪Once the first User has completed and Saved their entry, the second User may then proceed with making their changes. |
||||||||||||
The CSID field on the main Subscribers Form's Browse View page now has a Drop-Down Selection List to allow a User to view all of the CSIDs that have been defined for that Subscriber. |
||||||||||||
When Printing Invoices, in some cases, the Comments entered when an Invoice was created where so long, or had rows of extra spaces, that they were generating extra blank pages on the Invoice. ▪These extra long Comments are now being trimmed, when required. |
||||||||||||
The system will now stop a User from manually running the Auto Bill Recurring Revenue process when the wrong Sale Date is selected by checking whether or not your Company bills their Recurring Revenues in Advance [e.g., whether the "BillInAdvance" Company Setting option is set to True ("'T") or False ("F")']. a)If Bill in Advance is set to True, the Sale Date must be within the month prior to the Month and Year selected as the Period To Bill. b)If Bill in Advance is set to False, the Sale Date must be within the same Month and Year selected as the Period To Bill.
Examples: ▪When Bill in Advance is set to True and: 1)You are running Auto Billing for any Billing Cycle for the Month and Year of April 2018, the Sale Date must be set to a date within March 2018 only. 2)You are running Auto Billing for any Billing Cycle for the Month and Year of January 2018, the Sale Date must be set to a date within December 2017 only.
▪When Bill in Advance is set to False and: 3)You are running Auto Billing for any Billing Cycle for the Month and Year of April 2018, the Sale Date must be set to a date within April 2018 only. 4)You are running Auto Billing for any Billing Cycle for the Month and Year of January 2018, the Sale Date must be set to a date within January 2018 only. |
||||||||||||
There is a new Run Auto Draft Days Prior setting: As part of the Fully Automatic Recurring Billing functionality, the associated Auto Draft process is now executed separately, as needed, on or prior to the Due Date of each Invoice which is eligible for that service. ▪The RunAutoDraftDaysPrior option in Company Settings determines when the Bank Draft or Credit Card charge will occur in relation to that Due Date. ▪By default the RunAutoDraftDaysPrior option is set to '1' but may be changed based on your Company's business operating model (see the Billing Cycles chapter for more information). |
||||||||||||
A new sPaydModule option has been added to the Company Settings Grid which, by default, is set to False ("F"). ▪To access Its Payd Module Menus the IsPaydModule option is set to True ("T"). |
||||||||||||
The number of Transactions which are to exported to the ItsPayd file when using the ItsPayd - Submit Export File Form may now be limited by using the new Export Limit field. ▪By default, 100 is inserted; but this number may be changed, or deleted altogether (blank = no limit). ▪You may use the Drop-Down Selection List provided to Choose from a list of pre-set limits. |
||||||||||||
The ItsPayd FTP Client dialog - accessed from the ItsPayd File Import/Export Form - is divided into two sections: The Down Load Files section contains a list of the files to be downloaded. ▪Among these files are Payments and Statements. ▪MKMS requires a “payment file” to import the payments received by ItsPayd into its database. ▪Clicking the Download option will generate standard Windows® "Save as..." dialog to allow the User to select a location to save the desired payment file. ▪A file must be selected in the list view or the User will be prompted to select a file before attempting to download.
Once the User has chosen to download a file: a Query dialog is now presented asking if the User wants to Delete the file after it is downloaded. ▪Answering Yes will delete that selected file from the ItsPayd FTP Site. |
||||||||||||
A new feature that allows your Company to establish individualized Payment Terms for each (any) of your Subscribers has been implemented. It is enabled in Company Settings ▪By default, this new UseSubscriberTerms option is set to False ("F"). ▪The Individualized Payment Terms feature is implemented by setting the new UseSubscriberTerms option to True ("T") in Company Settings: a)When the UseSubscriberTerms option is set to True ("T"), a new field is added to the Receivables section of the Edit View on the Subscribers Form. b)That new Terms field in the Receivables section may then be modified, as and when needed, on a Subscriber by Subscriber basis. c)To update all of the entries in this new Terms field, using dbisql.exe, run the following script:
update dba.AccountsReceivable set Terms = (Select Terms from dba.Useroptions) where SubscriberID IN (Select SubscriberID from dba.Subscriber where SubscriberID = BillPayer)
▪In a planned future version, the User will be offered the opportunity [when the UseSubscriberTerms option is first set to True ("T")] to pre-populate that Terms field in the Receivables section with the Terms set in the General sub-tab in the Company Options tab on the User Options Form. |
||||||||||||
MKMS now provides a Fully Automated Recurring Billing process for each Subscriber who has any Recurring Revenue records defined to be billed and will: ▪Identify who needs to be Invoiced daily ▪Creates the required Invoices ▪Posts any applicable Auto Draft transactions ▪Creates the associated Receipt record(s) oComments - If the Receipt was a Credit Card payment, the last four digits of that Credit Card's Number will be inserted into the Comments section of that Receipt record. ▪Deposits that revenue into the correct Bank Account
An Automatic Billings Setup Wizard is also provided. |
||||||||||||
▪The Payment Gateways which are MKMS supported Automatic Payment Processors are: 3.InnoEPay
▪Manual Payment Gateways may be defined as needed
➢Note: Each Payment Gateway may be set up to be : i.the Default Payment Processor for Credit Cards transactions, or ii.the Default Payment Processor for ACH/Check transactions, or iii.the Default Payment Processor for both Credit Card and ACH/Check transactions, or iv.Not the Default Payment Processor for any Credit Card or ACH/Check transactions |
||||||||||||
|
|
As installed, MKMS will have dozens of Payment Gateways defined, but no Company will use all or even more than a few of those pre-defined Payment Gateways. ▪The new Gateway Kinds Form is used to identify those that will actually be used (i.e., are Active) by your Company, and those that will not (i.e., are Inactive). ▪This new Form is provided to allow you to "hide" those Inactive Payment Gateways from Drop-Down Selection Lists to restrict a Users choices and thereby prevent the accidental selection of an Inactive Payment Gateway. |
|||||||||||
Multiple Automatic Payment Gateway PINs are now supported based on the number of Banks into which the Payment Gateway must deposit Receipts.
When using an Automatic Payment Gateway (i.e., InnoEPay, Authorize.net, or Forte.net) and your Company is using more than one Bank for making Deposits via InnoEpay transactions, each Payment Gateway will make deposits directly to only one Bank. ▪Therefore, when your Company is using additional Banks for depositing Automatic Payment Gateway transactions, your Company will need to get additional keys and have additional Payment Gateways defined - one for each Bank that will get those Receipts. ▪As those additional Payment Gateways are identified, consider a naming method such as InnoEPay-Bank1, InnoEPay-Bank2, etc., with the actual Bank Name used in each case. ▪Also, if your Company will tokenize Credit Cards, all Tokens must be created by the same (default) Payment Gateway type (i.e., InnoEPay, Authorize.net, or Forte.net). |
||||||||||||
The Billing Cycles Form has been substantially updated to accommodate: ▪A variety of Payment Gateway assignments - both manual and automatic - so MKMS can know which Payment Processor should process the Payment Transactions for any Invoices created for that Billing Cycle. ▪Assigning it to the default Payment Processor (Payment Gateway) or a separate one, as needed ▪Identifying whether Subscriber's Recurring Revenue record(s) should be billed using the Fully Automated Recurring Billing process, or the manually selected Auto Bill process. |
||||||||||||
Users of the original Auto Billing process which has to be selected and run manually by Billing Cycle, may now use the radically more powerful Fully Automated Recurring Billing engine. |
||||||||||||
The original Auto Billing process which is selected and run manually, will now use the more powerful Fully Automated Recurring Billing engine. ▪The Show Batch List option has been replace with a Show Invoices Generated option which displays the new Invoice List dialog. |
||||||||||||
When ePay transactions are created as the Auto Billing process runs, the Batch Number for a Receipt will be comprised of the Receipt Type Code "#" followed by the Month "99" and Day "99" on which it is actually Deposited (see the Defining your Company's Batch Numbers discussion in the E-Payments chapter for more information). |
||||||||||||
Email Notifications for Invoices will now be inserted into the Customer History Grid, |
||||||||||||
Email Notifications for Receipts will now be inserted into the Customer History Grid, |
||||||||||||
Normally, when the History Options Date Range is selected (e.g., Last 30 Days, Last Year, etc.), only those transactions dated within that selected Date Range will be displayed. ▪However, there are times when your Company may post-date transactions to some future date, and those future transactions were never listed until they came within the selected Date Range. ▪Now, when the All History Date Range is chosen, transactions as much as two years into the future will be displayed. |
||||||||||||
Added a "Dealer" option in the Details section of the Print Invoices dialog. Choosing this option provides the following functionality: ▪The Invoice report's Dealer format will have an initial summary page with the Dealer's Name and Sale Items that were Invoiced based on the other specified parameters, grouped by Sale Item ID and Price, displaying how many there were for that Sale Item at that Price. ▪Thereafter, the Invoice report's Dealer format shows subsequent pages with detailed sales information. |
||||||||||||
The Activate/Deactivate Edit Mode Icon which was used to toggle the Detail Line Item's Edit Mode interface has been removed from the Invoice and Proposals Forms so In Line Editing is now the only data entry method supported. ▪In doing so, the issue with not being able to modify data while the Edit Text Editor was activated has also been resolved. |
||||||||||||
|
|
There is a new UpdatePackagePrices option in Company Settings. To Automatically Update the Sale-Purchase Item's Price in a Proposal Package when an associated Sale-Purchase Item's Retail Price field is modified in the Sale-Purchase Items Form: ▪Set the UpdatePackagePrices option in Company Settings to True ("T") - which is the initial default setting. ▪Setting the UpdatePackagePrices option in Company Settings to False ("F") will turn off that Automatic Price Update feature. |
|||||||||||
When Taxing Authorities have implemented Sales Tax Percentage Rates with up to three (3) Decimal Places, three Company Settings may (one must) be re-set to support Charging and Collecting this type of Sales Tax. 1)3 Digits Tax - By default, the 3DigitsTax option is set to False ("F"). ▪When Taxing Authorities have implemented Sales Tax Percentage Rates to three (3) Decimal Places (e.g., nn.nnn%), this Company Settings must be re-set to support Charging and Collecting this three (3) Decimal Places Sales Tax. ▪Setting this 3DigitsTax option to True ("T") will activate this Three Decimal Places Sales Tax feature in the Tax Rates Form.
2)Show Tax And Total Per Line Item Report - By default, the ShowTaxAndTotalPerLineItemReport option is set to False ("F"). ▪When Taxing Authorities have implemented Sales Tax Percentage Rates to three (3) Decimal Places (e.g., nn.nnn%), this is one of the three Company Settings that may be re-set to add support on Reports for Charging and Collecting this type of Sales Tax. ▪Setting this ShowTaxAndTotalPerLineItemReport option to True ("T") will include a three Decimal Places Sales Tax format on reports. a)Setting this ShowTaxAndTotalPerLineItemReport option to True ("T") will activate this Three Decimal Places Sales Tax feature on certain Reports (listed below) thus showing the Tax Collected/Invoiced in three (3) Decimal Places on all Detail Line Item entries. b)Alternately, consider leaving the ShowTaxAndTotalPerLineItemReport option setting to its default of False ("F") when the 3DigitsTax option has been set to True ("T"). i.To avoid confusion, this False setting will show the Tax Rate in three (3) Decimal Places for each Invoice, but will not show the extended price in three (3) Decimal Places and column Totals are shown rounded to two Decimal Places. ii.In this case a Totals information with rounded Net, Tax, and Gross Amounts are typically included in a Totals section at the bottom of the Report.
3)Show Tax And Total Per Line Item Screen ▪By default, the ShowTaxAndTotalPerLineItemScreen option is set to False ("F") which - regardless of the 3DigitsTax setting, excludes Detail Line Item calculations for Sales Tax Amounts (the Tax % Rate is still shown); but instead provides a Totals information box with Net, Tax, and Gross Amounts at the bottom of the Invoice. ▪When Taxing Authorities have implemented Sales Tax Percentage Rates to three (3) Decimal Places (e.g., nn.nnn%), this is one of the three Company Settings that may be re-set (see "Show Tax And Total Per Line Item Report" immediately above) to add support for Charging and Collecting this three (3) Decimal Places Sales Tax on Invoices. c)Setting this ShowTaxAndTotalPerLineItemScreen option to True ("T") will activate this Three Decimal Places Sales Tax feature on Invoices thus showing three (3) Decimal Places on all Detail Line Item entries plus in each column's Total field. d)Alternately, consider leaving the ShowTaxAndTotalPerLineItemScreen option setting to its default of False ("F") when the 3DigitsTax option has been set to True ("T"). iii.To avoid confusion, this False setting will show the Tax Rate on an Invoice's Detail Line Item in three (3) Decimal Places but will not show the extended price in three (3) Decimal Places and no column Totals are shown. iv.In this case a Totals information box with Net, Tax, and Gross Amounts are included in a Totals information box at the bottom of the Invoice.
Once these two Sales Tax related Company Settings are re-set to True ("T"): e)The Tax Rates Form will allow for a Sales Tax entry with three (3) Decimal Places when identifying a Tax Rate. f)The Receivable section within the Edit View of the Subscribers Form will allow for a Sales Tax entry with three (3) Decimal Places when identifying a Tax Rate. g)The Detail Line Items section on the Invoice Form will allow for a Sales Tax entry with three (3) Decimal Places h)The Printed Invoices will support the resulting Sales Tax charges. i)The Sales Taxes Invoiced report will include this three (3) Decimal Places Sales Tax information j)The Sales Taxes Collected report will include this three (3) Decimal Places Sales Tax information k)The Sales Taxes Breakdown report will include this three (3) Decimal Places Sales Tax information l)The Recurring Revenue Form will display the three (3) Decimal Places when identifying a Tax Rate. m)The Sales Analysis Report (detail) will report the resulting Sales Tax charges. n)The Ledger Card for a Subscriber will will report the resulting Sales Tax charges. o)The Tax Information section within the Edit View of the Prospects Form will allow for a Sales Tax entry with three (3) Decimal Places when identifying a Tax Rate. p)The Detail Line Items section on the Proposal Form will allow for a Sales Tax entry with three (3) Decimal Places q)The Recurring Revenue Items for a Proposal will display three (3) Decimal Places r)The Printed Proposals will report the resulting Sales Tax charges. s)The Vendor Tax Information section in Edit View of the Vendors Form allows for a Sales Tax entry with three (3) Decimal Places t)The Detail Line Items section on the Bills Form supports a three (3) Decimal Places Sales Tax entry.
▪See the Sample Results of these Sales Tax related Company Settings Options discussion in the Company Settings for Accounts Receivable chapter for illustrations. |
||||||||||||
See the New Auto Billing Features chapter for how to implement these new & revised features: 1.InnoEPay Payment Batch- File Generation |
3.InnoEPay 7.Payment Batch- File Generation 8.Automatic Billings Setup Wizard 9.Fully Automated Recurring Billing
|
|||||||||||
Features Overview of the Fully Automated Recurring Billing process: a)It will run automatically, Generating Recurring Revenue Invoices each morning at 4:00am [this requires that the Automatic Billing Setup Wizard be run to set the “AutoBillingOn” option in Company Setting to True (‘T’)] b)Selects only those Accounts (Subscribers) who have Recurring Revenue billing records with a Billing Cycle Starting Day matching the day number of the current Date ("Today" at 4:00am). c)Recurring Revenue Invoices may be created in advance of the Invoice's Sale Date [this requires the “DayPriorToCylceStart”option in Company Setting be set to the appropriate Value (= the Number of Days to be billed In Advance)] - This requires that the Automatic Billing Setup Wizard be run to set the “DayPriorToCylceStart”option in Company Setting to the appropriate Number of Days. d)The generation of Recurring Revenue Invoices respects the Separate RMR Invoice option to specifically generate a separate Invoice for designated Service Accounts e)Includes any unbilled Suspended Invoicing charges on the Recurring Revenue Invoices f)Generates Late Fees during the Automated Recurring Billing process [this feature requires the “GenerateLateFees” option in Company Setting be set to True (‘T’)] g)Supports the grouping of Detail Line Items on the Recurring Revenue Invoices (this feature requires the definition of Invoicing Groups and the assignment of an Invoice Group to the appropriate Recurring Revenue records) h)Automatically generates and submits the Auto Draft payments to the InnoEPay recommended Payment Gateway [which requires that 1) the Company's InnoEPay account has been setup, 2) the “ePayAPI" option in Company Setting is set to True (‘T’), and 3) the MKSePayService is running]. i)Generates Receipt records for each of the Approved Batch Payment Transactions when acknowledged by InnoEPay. j)Allocates those Receipts to the appropriate Recurring Revenue Invoices k)Generates e-mail notifications for Invoices to customers l)Generates e-mail notification for Receipts to customers |
||||||||||||
This new Deferred Revenue Setup procedure is used to properly initialize the Deferred Recurring Revenue feature in the MKMS Accounts Receivable module and supported by the General Ledger module.
When the Deferred Revenue Setup process is completed, the User must Click the OK button to acknowledge the successful completion of the Deferred Revenue Setup procedure. ▪The Defer Recurring Revenue ("DeferRecurringRevenue") option in Company Settings will be set to True ("T"). ▪As indicated in a new "Complete! - Deferred Revenue tracking is now active." message, the User is now reminded that they must Logout and then Log In again to fully activate the Deferred Revenue process.
Earned & Deferred Revenues are calculated on a Monthly basis. ▪Bill in Advance - This means that the Date Sold recorded on the Invoice is within the month before the Starting Day of the Period Covered for the related Billing Cycle. ▪Starting Day - The Starting Day - which is identified in the Billing Cycle record - is now used to determine when the Recurring Revenue related Services will start being provided (i.e. Earned). ▪Start Date - The Start Date (Starting Day) of the Period Covered being Billed is not always the "First of the Month"
Therefore: a)Whenever the Starting Day is not the "First of the Month" and the Date Sold recorded on the Invoice is in the month before or simply in the same month but Prior to the Starting Day of the Period Covered for the related Billing Cycle: the associated Recurring Revenue will not be "Earned" until the following month, or b)Whenever the Date Sold recorded on the Invoice is in a month Prior to the first month of the Date Range of the Period Covered being billed: the associated Recurring Revenue will not be "Earned" for that month until service for the Period Covered month has been provided. c)Whenever the Date Sold recorded on the Invoice is within (on or after) the Period Covered identified on the Invoice, your Company is not Billing in Advance, nor deferring the first months Revenue, so the first month of the Period Covered is "Earned" in that month. |
||||||||||||
|
|
The internal General Ledger calculations for Earned & Deferred Revenue have been updated: ▪Earned & Deferred Revenue is now calculated on a Monthly basis rather than on a Daily basis. ▪The Starting Day - which is identified in the Billing Cycle record - is used to determine when the Recurring Revenue will start being Earned. ▪Billing in Advance means that the Date Sold recorded on the Invoice is before the Starting Day of the Period Covered for the related Billing Cycle. ▪Keep in mind that sometimes the Starting Date (Starting Day) of many Periods Covered being Billed may not by the "First of the Month"
Therefore, when the Starting Day is not the "First of the Month" and the Date Sold recorded on the Invoice is before the Starting Day of the Period Covered for the related Billing Cycle, then the associated Recurring Revenue will not be "Earned" until the following month. ▪If the Date Sold recorded on the Invoice is within the Period Covered on the Invoice, your Company is not Billing in Advance. ▪To assure the Earned Revenue is posted for the final Months within all Service Periods that were Billed, it's best to Post Earned Revenue after the normal Date of the last Automatic Billing process (e.g., we suggest the last day of the month). |
|||||||||||
When you Post Earned Revenue for a negative Recurring Revenue detail line item it will now post these Transaction File entries: a)The Deferred Revenue Liability Account is Credited (increased) by the Value of the Recurring Revenue that was Un-Earned during the Accounting Period b)The (Revenue) Sales Account assigned to the Recurring Revenue Item is Debited (decreased) by the Value of the Recurring Revenue that was Un-Earned during the Accounting Period c)The Current Earnings Equity Account (a Mandatory Account) is Debited (decreased) by the Value of the Recurring Revenue that was Un-Earned during the Accounting Period d)The Earnings Posting Expense Account (a Mandatory Account) is Credited (decreased) by the Value of the Recurring Revenue that was Un-Earned during the Accounting Period |
||||||||||||
|
|
Previously, once a Check (Receipt) had been Reconciled, it could no long be Bounced (the Bounce option was Grayed Out). In real life, this limitation was not workable. ▪The system will now allow the User to Bounce a Receipt that is Reconciled. |
|||||||||||
|
|
The Receipts Form has been updated, and the process of Posting Receipts has changed. Now once a Receipt is recorded, it must then be Deposited by entering that Deposited information on this Receipts Form, or by using the Bank Deposits Form. 1.All Receipts must now be classified as either: a)A Customer Deposit (a payment Amount accepted in advance of an anticipated future - as yet unentered - Sale (recorded in the General Ledger as an Advance Deposit Liability Account b)An Amount that will be allocated to reduce (or eliminate) the balance due on an existing Invoice 2.All Receipts are initially recorded as not deposited, and are posted to the Undeposited Funds Asset Account in the General Ledger System (if in use). 3.A Receipt, regardless of whether it is an Advanced Deposit, or will be used to reduce a currently owed Accounts Receivable balance, must be specifically Deposited (See Recording a Deposit below). c)A Receipt may not be Bounced, or Refunded until it has been Deposited. d)A Receipt may not be Applied to an Invoice if it had been identified as a Customer Deposit - that designation must be changed (i.e., the Check removed on the Receipts Form) to be able to Allocate it. e)The new Open Invoices Drop-Down Selection List on the Receipts Form provides a quick and easy will to selectively allocate the current Receipt. to one or more Invoices. ▪The Posting Receipts Form and that process is essentially unchanged. |
|||||||||||
Added a new Email Notification Icon on the Receipts Form to be used to create an Email to inform the Subscriber that a Receipt record has been entered for their most recent Payment. ▪Requires that the Customer Connect Service is active. |
||||||||||||
There is a new possible (RECONCILED) entry in the Receipt Information section on the right of the Receipts Form which may now include: 1)(BOUNCED) - The Receipt has Bounced. 2)(RECONCILED) - Includes the Bank Statement Date for when the Receipt was Reconciled. 3)(CONVERTED) - The Receipt was Converted from a Customer Deposit to a regular Receipt. 4)Refund Issued - A Refund was Issued for this Receipt. The detail information for that Refund is available by Clicking the Refunds Icon on the Receipts Form. |
||||||||||||
The Batch Number of a Receipt may now be changed, even after it was Deposited, when necessary. |
||||||||||||
If either the Date Paid of a Receipt which has been Allocated, or a Date Sold of an Invoice which has been Allocated has subsequently been modified, the system will now update the Allocation Date to be equal to either the Date Paid on the Receipt or the Sale Date of the Invoice, by inserting whichever of those Dates is newer. |
||||||||||||
▪A new "Log_Recurring Revenue" table has been created and will be used to record Recurring Revenue record Inserts, Edits and Deletes. ▪There is a new Recurring Revenue (Audit Report) which is displayed in a fully functioning Grid format and contains the data recorded in the new "Log_Recurring Revenue" table described above. The data to be included may or may not be filtered by a Date Range, and reported for All Recurring Revenue records, or only those entries made for a User selected Subscriber. ▪This report has been enhanced with additional system maintained fields for the Last Period Billed , Next Billing Period, and Last Date Billed information. |
||||||||||||
▪The Recurring Revenue Form has been enhanced with system maintained fields for the Last Period Billed , Next Billing Period, and Last Date Billed information.
▪A new Billing History Grid has been added - accessed with the new Billing History Icon - which displays a Grid List of all Recurring Revenue Billing records that were Invoiced to (and/or subsequently Deleted form) this Subscriber for the selected Recurring Revenue record. |
||||||||||||
|
|
When the MultinationalTax option is set to False ("F") - the default in Company Settings - and the CanadaTax option is set to True ("T") - and a National Sales Tax (or a National and Local Sales Tax) is identified in the Tax tab of the User Options Form: a)The appropriate Provincial Sales Tax Rate Code must be assigned to each Canadian Subscriber, b)On a Detail Line Item of an Invoice the National Tax Code (Ntl) may only be N, E, 1, 2, or 3; and the Local Tax Code (Lcl) may only be Y, N, or E. |
|||||||||||
Search Open Invoice Read Only - By default, the new SearchOpenInvoiceReadOnly option is set to False ("F") which, when the Subscriber Search by Invoice Number feature is used, the Invoice - if located - will NOT be opened in Read Only Mode. ▪Setting this SearchOpenInvoiceReadOnly option to True ("T") Will open the Invoice - if located - in Read Only Mode. |
||||||||||||
Recording a Deposit using the revised Receipts Form ▪Deposited On - If the Receipt being posted was (or will be) Deposited individually: use the Drop-Down Calendar/Date Entry field provided in the Deposited On field to record that Date (the Receipt will be deposited in the Bank identified on the Receipts Form). ▪Deposited - Once recorded as Deposited by entering a Date in the Deposited On field (or by using the Bank Deposits Form), the system will insert a Check in the Deposited box for this Receipt. However, in most cases multiple Receipts will be deposited at the same time and that type of Deposit Transaction will be recorded using the Bank Deposits Form (see below) so in that case the Check in the Deposited field and the Date in the Deposited On field will be inserted by the system automatically.
The new Bank Deposits Form lists all Receipts which have not yet been recorded as Deposited. These un-deposited Receipts are listed by Batch Number, Date recorded, Subscriber, Amount, and the Bank to which the Receipt has been assigned. ▪A Bank Deposit may then be identified based on the User selected (one, several or all) Batch Number(s). |
||||||||||||
The new Subscriber Listing (Grid) is a fully function Grid so it allows for sorting, rearrangement of columns, filtering, data export, etc., and provides options to help you discover: a)Potential lost Recurring Revenues b)Members of a specific Division c)Are owned by a specific Dealer d)Create customized lists based on your own specifications. |
||||||||||||
Two new options have been added to the Customer Deposit Report 1.Current Customer Deposits Liability - This shows Receipts marked as a Customer Deposit, subtracts any Amount that was Refunded from those Receipts and displays it as the Amount paid; and also subtracts any Receipt that was Allocated ((thereby "paying off some portion of an Invoice, causing a reduction in your Company's Accounts Receivable balance) within the designated Date Range (see "Reporting Date Range" immediately below). ➢Note: The Amount from Current Customer Deposits Liability should match the Customer Deposit Liability Mandatory General Ledger Account listed in the Balance Sheet report if the Start Date is 01/01/1985 and the End Date is the same as the As Of Date entered for the Balance Sheet. 2.Converted Customer Deposits - These are Receipts originally marked as a Customer Deposit which have subsequently been Allocated (thereby "paying off some portion of an Invoice, causing a reduction in your Company's Accounts Receivable balance). |
||||||||||||
|
|
Bounced Check records, and the original Receipt record are now reported on the Accounts Receivable Report.as follows: ▪The original Receipt record, and the negative Bounced Check record, will be included in the Accounts Receivable Report only until the report's selected As Of Date is equal to, or after the Date the of (negative) Bounced Check record. ▪If the Receipt record and the negative Bounced Receipt record were dated the same day, neither will be included on the Accounts Receivable Report.
Disabled the Bounce Icon on the Receipt created for a Customer Deposit, if that Customer Deposit has been Reconciled. |
|||||||||||
A new Outstanding Invoices report provides an additional view (with lots of formatting and filtering options) of the Outstanding Invoice Amounts owed to your Company. a)This report is not intended to be used as a Collection Report. b)The Subscriber's Account Balance does not reflect Unallocated Receipts nor Unallocated Credit Memos. c)The report can include All Invoices, even those created with a Future Date. d)Customer Deposits are excluded from this report.
|
||||||||||||
There is a new Deposited Only choice on the Cash Receipts report Options tab. which allows you to see those Receipts that were actually deposited in a Bank within a specific Date Range. |
||||||||||||
The Cash Receipts Report dialog has been updated with the addition of a Data View tab and an enhanced version of the Windows® Print dialog's Print to File option (available using the Print option on the Preview tab). ▪The User may now create a Spreadsheet ("XLS Data File") by Choosing Print to File, then selecting the Type: of XLS Data File, and indicating Where: that file is to be "written." |
||||||||||||
|
|
A new Company Settings enabled feature has been implemented which allows your Company to establish individualized Payment Terms for each (any) of your Subscribers. a)By default, this new UseSubscriberTerms option is set to False ("F"). b)Individualized Payment Terms may be implemented by setting the new UseSubscriberTerms option to True ("T") in Company Settings: i.When the UseSubscriberTerms option to True ("T"), a new field is added to the Receivables section of the Edit View on the Subscribers Form. ii.The User will be offered the opportunity to pre-populate that Terms field in the Receivables section with the Terms set in the General sub-tab in the Company Options tab on the User Options Form. iii.That new Terms field in the Receivables section may then be modified, as and when needed, on a Subscriber by Subscriber basis. |
|||||||||||
When Converting a Proposal to a Job, the order of the Proposal Items on the Proposal is now duplicated in the Item List sub-tab of the Inventory tab on the Job Costing Form. |
||||||||||||
Some changes have been made to the Sales Analysis Report: ▪Exclude Credits - The option to exclude Credit Memo transactions for this report has been removed. ▪Hide Tax on Line Items - this new Check box has been added to hide Tax Amount and Gross Sales Amt. columns when the Detail Line Items are included as part of the Detail Report format. |
||||||||||||
The Department Number field in the Recurring Revenue table is used to set the Department field in table InvoiceLineItems when the Fully Automated Recurring Billing or the Auto Billing process is executed, causing the insert to fail if the RecurringRevenue Department number was invalid. ▪Prevent Recurring Revenue records from having the wrong (or invalid) Department Number assignment is therefore very important.
Within MKMS a User cannot select an invalid Department (number). ▪However, converting data (prior to installation or during an Upgrade) could cause invalid values to be created in the Department number field. ▪A special internal process has been created to prevent this from happening. |
||||||||||||
Advanced Payment Gateway Authentication Information (when and as required): To accommodate Payment Gateway Payment Transactions originating from both the local system and from the Internet (via Pay Point and/or Tech Pro), there may be two sets of Login Name and Password required. ▪This is why the Payment Gateways maintenance screen now accepts both a Merchant and an Internet Login and Password set.
When a Payment Transaction is created from Pay Point or Tech Pro, the Payment Transaction will now be flagged as it has originated from the "Internet". ▪When a Payment Transaction originated from the Internet, the e-Pay Review report's Internet column will be Checked.
When the e-Pay Service is processing a Payment Transaction from the Internet, it will attempt to use the Internet Login Name and Password. ▪If there is no Internet Login Name and Password defined or it's not accepted, the e-Pay Service will attempt to use Merchant Login Name and Password. |
||||||||||||
|
|
|||||||||||
Display Warranty Info - By default, the new DisplayWarrantyInfo option is set to False ("F") which means when a Subscriber record is displayed, their Warranty Status is not included on the Information Bar on that Subscriber Form. ▪When the ShowWarrantyInfo option is set to True ["T"] the Subscriber's Warranty Status is displayed in the Information Bar on that Subscriber Form. |
||||||||||||
Tech and Sales Person column is now displayed with no information (blank) in the Work Order Invoicing/Review Form when the Employee (Technician and/or Sales Person) has been identified as Terminated. |
||||||||||||
Invoices may be created from the Job Costing module. Some Users were Modifying an Existing Invoice by adding additional Inventory Items to those Invoices after they were created - causing issues with the accuracy of the Job Costing module. ▪The system will no longer allow a User to enter new Inventory Items to any Invoices originally Generated for a Job |
||||||||||||
Two new features have been added to the Subscriber F2 Search, Prospect F2 Search and Vendor F2 Search dialogs: ▪Columns - A User may now Select which specific columns are to be listed in these Search dialogs:
Sample - Vendor Search dialog Sample - Field selection options
i.Click the asterisk (¬) at the left of the list's Header row (see the mouse pointer in the illustration above) to display a list of all of the column names - and associated data - which may be displayed. ii.By default, all Column Names will be Checked. iii.Remove the Check mark (Click on the Check to remove it) to hide that column of data from the list.
▪Columns - A User may now Rearrange the left to right sequence in which the Columns are to be displayed: iv.To move a Column left or right of its original location, Drag and Drop that Column to the desired location. v.This relocation may be executed on the Vendor Search dialog itself, or within the Column List described above. |
||||||||||||
The substantially revised Refund option on the Receipts Form now allows the User to identify a Receipt that must be Refunded and process that Refund all the way through the Accounts Payable System.:
An Overview: Creating a Refund Check for a Receipt using the Refunds For dialog along with the Accounts Payable System: ▪The Refund option on the Receipts Form allows the User to Print the Check for a Refund within the Accounts Payable System. This process works as follows: 1.To Print a Refund Check, the Cut Check field on the Refunds For dialog is Checked - thus indicating that this Refund is to be processed through the Accounts Payable System. 2.All Refunds that have been identified for payment by inserting a Check in the Cut Check field [and have not yet been marked either as Ready To Print nor Printed by the system - see steps 3., a. and 4., a. below] will be listed in the Disbursement Form oThe Disbursement Form lists all of the outstanding Bills and any Refunds that are to be paid - the Invoice # of these Refunds will be "REFUND". oThe User must Check the Pay field for each item REFUND (and Bill) for which a Check should be created. oOnce all of the Bills and Refunds have been identified, the User must then Click the Pay Bills button. 3.When a Check is entered in the Pay field for a REFUND item on the Disbursement Form: a.On the associated Refunds For dialog each Refund selected for payment by Check will automatically have the Ready To Print field Checked by the system. b.The REFUND item may be paid from any Bank Account (it does not have to come from the Bank to which the original Receipt was Deposited). c.The Cash Requirements Report will include any Refund Payments that need to be Printed. d.These Refund Payments become available to Print during the next Print Checks process. 4.Once the Refund Payments are printed using the Print Checks process: e.On the associated Refunds For dialog the Printed field will be Checked, and Check # field will be populated with the Check Number assigned to the Printed Check. 5.On the Bank Reconciliation Form f.Those Refunds which have not been identified on the Refunds For dialog with a Check in the Cut Check field will be displayed on the Deposits (right) side of the of the Bank Reconciliation Form as a negative Amount with a Description of Refund . g.Those Refunds which are identified on the Refunds For dialog with a Check in the Cut Check field and a Check in the Printed field will appear under the Payment (left) side of the Bank Reconciliation Form as a positive Amount and the appropriate Check Number displayed. |
||||||||||||
There is a new Inactive Check box on the Bank (maintenance) Form ▪If a Bank Account will no longer be used, Check this box. ▪A Bank record cannot be identified as Inactive if: a)There are Receipts that have not yet been Allocated b)There are Receipts that have not yet been Deposited c)There are Payments that have not yet been Allocated d)It is the Default Bank Account as defined in the Company Options - General tab on the User Options Form. |
||||||||||||
Now, an Inactive Bank Account will not be included in a Drop-Down Selection List on any of these Forms: f)Payments h)Receipts m)Bank (widget) n)Company Options - General tab on the User Options Form Default Bank Account Drop-Down Selection List. |
||||||||||||
The E-Payments Form which may be accessed three ways and can Validate and/or Authorize a one time Credit Card or Check (Bank Draft) Payment from any currently selected (1) Subscriber, (2) Work Order, and/or (3) Invoice has been substantially changed. ▪See the E-Payments chapter for complete information. |
||||||||||||
|
|
The Auto Draft Setup dialog in the Edit View of the Subscribers Form has been replaced with a Payments Methods dialog. ▪There is now a Friendly Name field to identify which Credit Card is being entered (e.g., John Smith8456), Card # field, Credit Card Type, Expiration Date, and a Card Holder Name field where the Card Holder's Name should be entered with two names as they appear on then Credit Card, and with no punctuation marks! ▪There are now individual Account Holder's Address fields for: Address (or PO Box) where no punctuation marks in that Street Address field should be entered, and separate City, State/Province, and Zip/Postal Code fields. ▪When the E-Payment option is used on the Subscribers Form (or the E-Pay option on the Work Order Form, or the Invoice Form), that Name and Address information is inserted into the E-Payment Form automatically. ▪If no Name and Address information has been entered in the Payment Methods section, then the Subscriber's Name and Address will be used (but may need to be modified at that time). ▪In the Payments Methods dialog, when Credit Card information is added, the system will now ensure that the Credit Card Type, Account Number, and Expiration Date fields are filled in. |
|||||||||||
The new Payment Method Types Form is used to identify the various types of Payments which may be paid by and received from Subscribers ▪It allows you to identify the associated default Batch Number preface (see Batch Number Assignment discussion in the Receipts chapter for more information) that should be used to construct the Batch Number assigned to a Receipt record, particularly when executing the Post Auto Draft and E-Payments processes Most (perhaps all) of the required Payment Method Types have been pre-defined. |
||||||||||||
Pay Batch Pending Transactions
|
Sometimes a Subscriber's existing Payment Method information (Expiration Date, Account Number, etc.) for a Bank or Credit Card may need to be updated, or deleted. So when: 1.Any Subscriber Payment Method changes are required for a Bank or Credit Card, and 2.Your Company is using an Automatic Payment Gateway (i.e, InnoEPay , Authorize.net, or Forte.net), and 3.There are existing Payment Transactions in a Payment Batch file for this Subscriber's Bank or Credit Card (see the Post Auto Drafts chapter for more information on Payment Batch files) , •Then, a Confirmation box with three options will be displayed:
There are pending transactions for this Subscriber
a)Yes - Click the "Yes" option to use the new information and to update any pending transactions. b)No - Click the "No" option to save the changes and the existing payment transactions will be processed with the old (previous) information. c)Cancel - Click the "Cancel" option to abort the changes.
▪When the "Yes" option is selected, the Pay Batch Pending Transactions dialog will be displayed. |
|||||||||||
|
|
For those Companies who use an Automatic Payment Gateway (i.e, InnoEPay , Authorize.net, or Forte.net): When an Invoice is deleted, the PENDING ePay transactions will now be marked as CLOSED; the Credit Card Number entry will be X'd out; and the LastStatusUpdate field will be updated with Today's Date. ▪Thereafter, if the Invoice is reinstated, the User is again responsible for arranging payment for that Invoice. |
|||||||||||
To avoid a Bank Reconciliation problem, the system will not allow the User to modify the "Deposited On" date of a Receipt which has already been Reconciled. |
||||||||||||
When offered the option to Create a Pro-Rated Invoice? on the Recurring Revenue Form there are two choices offered: 1.Create (an Invoice Amount covering the time period that would pass prior to when the first Auto Billed Invoice will be generated), or 2.Suspend (instead, calculate and hold that Amount, then add it to the first Auto Billed Invoice when it is generated).
▪Previously, "Today" was used for this time period calculation. The time period calculation will now use the Acquired Date (entered in the Attrition Tracking section on the Recurring Revenue Form) - which defaults to Today - but may be reset to whatever the appropriate Date should be.
This is a full explanation of the new process used for this time period calculation: i.An Average Month is assumed to be 30 days. ii.The number of Days Remaining from today's date to the end of that Average Month is calculated and inserted in the Detail Line Item's Qty field of the Invoice iii.The Payment Amount (determined by Payment assigned to the Pay Group Code, or a Custom Pay Amount entry) is divided by 30 to establish a Daily Rate which is inserted as the Detail Line Item's Price. iv.That Daily Rate is multiplied by the number of Days Remaining between the Acquired Date (entered in the Attrition Tracking Section on the Recurring Revenue Form) and the Start Date (entered in the Billing Information Section on the Recurring Revenue Form) to establish the Detail Line Item's Net. v.The Item and Description as entered on the Recurring Revenue Form are inserted in those Detail Line Item fields. |
||||||||||||
|
|
The Deferred Revenue Setup procedure has been enhanced with three new options: 1)Select GL Account # - Using the Drop-Down Selection List provided, Choose the Deferred Revenue Liability created for that purpose in the General Ledger Accounts Form. 2)Date To Start Deferred Revenue - Use the Drop-Down Calendar/Date Entry field provided to Choose the desired Date when you want to start tracking your Company's Deferred Revenue 3)Set All - Click this option to assign the selected Deferred Revenue Liability General Ledger Account Number to all Recurring Revenue Sale-Purchase Items ▪Optionally, a GL Number may still be assigned or modified for any listed GL Number - one at a time. |
|||||||||||
The Post Auto Drafts dialog has been completely revised and now includes: i.Processor/Bank for Credit Card payments field which is pre-populated using the corresponding information for the selected Billing Cycle ii.Processor/Bank for Bank Accts payments field which is pre-populated using the corresponding information for the selected Billing Cycle iii.Generate Payment Batch option which generates the required Payment Batch file. iv.Review Cycle List option which displays the Show Billing Cycles Grid v.Show Batch List option which displays the Payment Batch / File Generation dialog. |
||||||||||||
|
|
Several new Payment Gateway File Types for the Post Auto Drafts procedure have been added. When the Processor/Bank for Credit Card payments and the Processor/Bank for Bank Accts payments are chosen on the Post Auto Drafts Form the appropriate File Type will be used automatically.
|
|||||||||||
A new RestrictRRModification option is by default set to False ("F"). ▪When set to True ("T") in the Company Settings dialog - which is accessed from the Company tab of the User Options Form - and a previously entered and saved Recurring Revenue record is being modified: a)The User - determined by their specific Access Rights - will either be presented with an Authorize Transaction dialog requesting that User to specify the reason for this modification b)Or the User will need their Administrator to provide that information and also enter their Admin User Name and Admin Password. |
||||||||||||
If a Recurring Revenue record has been assigned an End Date and the DeferRecurrringRevenue option in Company Settings is set to True ("T"), the End Date can no longer be modified. ▪When that Recurring Revenue record was ended, it inserted the remaining Amount that was in Deferred into the Transaction File thus reducing Deferred Amount and increasing Sales Amount. ▪Therefore, changing the End Date would double-dip the Deferred Amount.
Now, the User must create a new Recurring Revenue record, and set the End Dated to the Date to which is should have been set. |
||||||||||||
|
|
The new Post Earned Revenue dialog is used each month to recognize in the General Ledger System (i.e., transfer from Unearned to Earned) those Deferred Revenues which have now been earned.
This new Earned Revenue by Month Report tells your Company how much of the previously Deferred Revenue has subsequently been Earned. ▪It will itemize the Amounts of the previously Deferred Revenues that have now been earned during the chosen Accounting Period (e.g, within either a designated Month, or a designated Year) |
|||||||||||
The Deferred Revenue report's dialog now requires a User designated Month and Year instead of an As Of Date to establish the time-frame for that report. ▪Month - No default Month is inserted: Use the Drop-Down Selection List provided to Choose the Month for which the Earned/Deferred Revenue Values will be calculated. ▪Year - No default Year is inserted: Use the Drop-Down Selection List provided to Choose the Year for which the Earned/Deferred Revenue Values will be calculated. ▪Modified the query to use the Cycle Starting Date (which is identified in the Billing Cycle record) to determine when Recurring Revenue is Deferred/Earned. |
||||||||||||
Modified the Earned Revenue by Month report's query so it uses the Cycle Starting Date (which is identified in the Billing Cycle record) to determine when Recurring Revenue is Deferred/Earned. |
||||||||||||
The Sales Taxes Invoiced may now be reported for a specific Division or Division Group |
||||||||||||
If you erroneously selected a Division, or Division Group to be reported in the Sales Analysis Report, you may now place the Mouse within the Division field and press the Delete key to cancel that selection. |
||||||||||||
The Sale Date entered on the Invoice Form determines the Transaction Date that will be used in the General Ledger System. ▪Therefore, if an Invoice is post dated (a "future" date is used), the Accounts Receivable Account balance reported in the General Ledger will not reflect that Invoiced Amount until that (post dated) date. ▪The Accounts Receivable As Of Report - with a user defined As Of Date - has been completely revised and is now presented as a Sortable, Filterable, and Configurable Grid with Print (Print Preview) and Export options ▪The Accounts Receivable As Of Report has three new options: 1)List All Invoices with a Balance Due, 2)List Only Recurring Revenue Invoices with a Balance Due, 3)List only Invoices that are not for Recurring Revenue and have a Balance Due. |
||||||||||||
A new Show "Comments" option has been added to the Unallocated Receipts/Credits/Customer Deposits Report ▪Check this box to have any Comments recorded on the Receipts, Customer Deposits, and/or Credit Memos included on the Unallocated Receipts/Credits/Customer Deposits Report. |
||||||||||||
A new "Enter Message for Email Statements Below" field has been added to the Subscriber Statements Dialog, ▪When some or all of the Statements are to be Emailed to Subscribers: this field is where you can now include a message in the Body of the Email sent with the Subscriber Statements, which may be based on the selected days Past Due, for a general note to remind them that their Statement is attached, and/or even a note about their Company Division (or Alarm Dealer). ▪This message is sent in addition to the Note To Include On Statement message that will be included in the attached Statement itself. |
||||||||||||
The new Fixed Term Recurring Revenue Report lists those Subscribers who have Fix Term Recurring Revenue record(s) defined that are still Active (or all Fix Term Recurring Revenue records, including those that are now Inactive) and shows the details of those Fix Term Recurring Revenue records - including any outstanding Balance - with this data presented as a Grid |
||||||||||||
The new Accounts Receivable Collections Report is a multi-purpose Report that assists in the management and Collection of Past Due Accounts, offers a one page Accounts Receivable Summary format and offers a snap-shot view of the Company's potential Cash Flow, or list a specific Dealer's (Division's) Accounts for whom your Company provides Monitoring Services and is also billing those Alarm Dealer's Monitoring Accounts Other Accounts Receivable Collections Report modifications include: ▪The All Invoices (Excludes future Invoices) field will now list All Subscribers who have any Invoices with any Balance Due, but will Exclude Invoices dated after Today. ▪A specific description of what the report is to be used for has been added. |
||||||||||||
▪If the Post Pending Credits/Deposits process fails for any reason, the system displays an error message. However, previously there was no way to know which Deposit Receipt and/or Credit Invoice was processing when that error occurred. ▪The posting procedure now creates a processing table (dba.AllocateReceiptParams) of these transactions. ▪If an error occurs, the last record (order by ID DESC) in this table is the one with the issue. |
||||||||||||
These updates have been made to the Accounts Receivable Collections report's Options tab ▪The Past Due box has been renamed to " Options". ▪A new option in the Options box has been added with a title of "All Invoices" and will list all Subscribers who have an Invoice with any Balance Due. |
||||||||||||
The Receipts Form will now load more quickly for those Subscribers who have a large number of Receipts records in that table. |
||||||||||||
The new RMR Rate Changes fully functional data grid (populated based on a User Defined Date Range) lists When, by Whom, and by what Amount the Rates being charged for Recurring Revenue have been changed. ▪As with fully functional data grid, the selected columns of data may be filtered, sorted, formatted; and then Printed and/or Exported, as needed. ▪You may Double-Click on any Rate Change record line item in the RMR Rate Changes report data grid to display the associated Subscriber record.
This RMR Rate Changes report also now contains these four additional columns: CSID, Dealer, Division and Division Group. ▪These fields will be visible by default, but as with most Grid reports, the Users will be able to select the fields they want to display on the Grid by Clicking the asterisk (*) on the upper left hand corner of the Grid. |
||||||||||||
Active - By default the new Active field on the Billing Cycles Form will be Checked. ▪If your Company will no longer be using this Billing Cycle Code, remove this Check mark. |
||||||||||||
The system will not allow a Starting Day Number greater than 28 to be used when defining a Recurring Billing Cycle. ▪This is because an Auto Billing Invoice with a Starting Day Number greater that 28 would not be generated in February - even if it should have been. ▪Therefore, no Recurring Billing Cycle will have a Starting Day Number greater that 28 ▪This fact should be kept in mind when creating Recurring Billing records and running your Company's Auto Billing process(es). ▪When assigning a Start Date (in a Recurring Billing Form), the Starting Day Number will be inserted in between the Month and Year selected to compose a complete Start Date. |
||||||||||||
When the currently selected Subscriber record represents a Service Address which is not the Bill Payer for that Account, the Accounts Receivables section will have no Account Status section, but will have all of the other Accounts Receivable Configuration items i.e., Sales Tax Rate, Division, Credit Limit, Later Fee Group, and/or Pricing Markup Category as needed) - except the Terms field (which will be determined by the associated Billing Payer Account).
▪Separate RMR Invoice - Additionally, when the currently selected Subscriber record represents a Service Address which is not the Bill Payer for that Account, there is a new "Separate RMR Invoice" field which offers a Drop-Down Selection List containing Yes or No options. 1.No - Select No (the default) when the Recurring Revenue charges for this Service Address are to be Invoiced on the Bill Payer's Recurring Revenue Invoices. 2.Yes - Select Yes when the Recurring Revenue charges for this Service Address are to be Invoiced separately. |
||||||||||||
The Accounts Receivable System Period Close dialog (only available when the General Ledger System has not been activated) has been substantially changed and now allows different Closing Stages on a month by month basis when Closing a Month in AR: 1)Closed - This Closing Stage restricts all posting to and from all modules ▪This Stage may be changed to Partially Closed, or Open, if necessary; or remain as Closed. 2)Open - This is the default Closing Stage and allows posting to and from all modules. 3)Partially Closed - This Closing Stage temporarily restricts all posting to and from all modules. ▪This Stage may be changed back to Closed, or Open, if necessary. |
||||||||||||
▪The system will no longer allow a Proposal containing a line item with a Zero ("0") Quantity to be Converted to an Invoice. ▪When Converting a Proposal to a Job, the system was not populating the Job's Title field. When a Proposal with a Title entered, is converted to a Job, the Title is now properly converted and displayed on that Job Costing Form. |
||||||||||||
When Printing Invoices, the system will now removes any empty lines from the Invoice Comments field which was causing formatting issues during the Invoice printing process. |
||||||||||||
|
|
There is 3 Automatic Payment Gateways available named InnoEPay, Authorize.net, and Forte.net Because of its advanced functionality, InnoEPay is now the Micro Key Solutions™ recommended Payment Gateway ▪InnoEPay is one of the oldest Payment Gateway providers in the eCommerce industry. ▪InnoEPay integrates seamlessly with MKMS, is secure, simple to use, and has plenty of extra features in addition to its basic Credit Card and Check processing functions. 1.InnoEPay is an automatic, real-time Payment Gateway that uses the MKS ePay Service which is automatically installed on your system (computer) so it's available whenever it's needed. There are no files to upload or download because all of the payment processing requirements are handled internally by MKMS. 2.The E-Payments dialog - available from the Subscriber and Invoice Forms - now supports the InnoEPay, Authorize.net, and Forte.net Payment Gateways. 3.The File Type field on the Post Auto Drafts Form has been eliminated.
▪Now, if InnoEPay is adopted as your Company's Payment Gateway, this will be the only Payment Gateway that you'll need. See the "The InnoEPay Setup Process" discussion in the InnoEPay chapter, plus the Auto Draft Setup, ePay Review, E-Payments, and the Post Auto Drafts chapters for additional information.
▪These two other Payment Gateways are also fully supported in MKMS: |
|||||||||||
|
|
There is a new ePay Review report - presented as a data grid - which provides a listing with (a selectable set of any or) All of the Reportable Data Elements of the new/revised InnoEPay, Authorize.net, and Forte.net service's transactional responses (see the "InnoEPay Status and Error Codes" chapter for that information) . ▪This ePay Review report's data grid includes Credit Card and Check Payments (Receipts), Transaction Flow, and related Funding Status updates, plus other related information. ▪This data may be Printed as a report, and/or Exported (or Emailed) as an Excel style Spreadsheet (or as a comma delimited file, or a text file).
The ePay Review report (data grid) also: ▪Allows a User to specify which Date Field Type (i.e., Date Created, Due Date, Status Time, Last Status Update, or Last Retry) will be used when retrieving the ePay Review report's data; and to retrieve that data set based on a User specified Date Range. ▪Allows a User to open an Invoice associated with the currently select ePay transaction using the Radial Right-Click Menu
Show Totals - This new option provides a summary of the data retrieved (based on the User selected options) in the form of a Pop-Up dialog.
Max records to show in grid - This new option on the ePay Review report is set to 50 by default, The currently displayed Page and Number of Transactions is also provided. ▪Provided for those Companies with a large number of Accounts, this setting allows a User to restrict the number of records that will be retrieved from the database at one time to the Maximum set here. ▪By doing so, when the Retrieve Data option is selected, the system will not slowdown as it locates and populates this report with what could easily be many thousands of records. ▪A set of left and right arrow buttons provides movement from page to page. |
|||||||||||
The new Payment Batch / File Generation dialog - accessed by selecting the Show Batch List option on the Auto Draft Form - provides a list of all the Payment Batch Files previously generated within a user selected Date Range, ▪From this Payment Batch / File Generation Form you may also view the status of each Payment Transaction, and/or Print, Email, or Export the contents of the Payment Batch File Detail (its Grid) ▪You can generate the text file - formatted as required by your Bank (or other Manual Payment Gateway) - that is defined by that Payment Processor for the transmission of the Payment Transactions recorded in the Payment Batch files for a Manual Payment Gateway used by your Company.. |
||||||||||||
Pay Batch Pending Transactions
|
There is a new Pay Batch Pending Transactions dialog - which is used for Editing the Pending Payment Transactions created when using one of the three supported Automatic Payment Gateway - InnoEPay, Authorize.net, and Forte.net - when (if) a User modifies a Subscriber's existing Payment Method information and one or more Pending InnoEPay, Authorize.net, and/or Forte.net Payment Batch Transactions exist. |
|||||||||||
When a Bank Draft is being defined in the Auto Draft Setup section of the Subscriber Form's Edit View, there is a new "Account Holder" field available. ▪By default, the Subscriber's Name entered in the General Subscriber Information section is inserted as the Account Holder, but this should be modified as required.
Thereafter, when changing any of these Auto Draft related fields a)Draft Type (CardType), b)Account Holder (BankAccountHolder), c)Routing Number (RoutingNumber), d)Account Number (BankAccountNumber), e)Account Number (CardNumber), f)Credit Card Type (CardKind), g)Account Holder's Name (CardHolderName), h)Expiration Date (CardExpiryDate), i)Account Holder's Address (CardHolderAddress), j)Zip/Postal Code (CardHolderZip)
▪The system will display a Confirmation box with three options will be displayed: 1)Yes - Click the "Yes" option to use the new information and to update any pending transactions. 2)No - Click the "No" option to save the changes and the existing payment transactions will be processed with the old (previous) information. 3)Cancel - Click the "Cancel" option to abort the changes.
When the "Yes" option is selected, the new Pay Batch Pending Transactions dialog - data grid - will be displayed. ▪This Pay Batch Pending Transactions dialog will allow the User to modify PENDING payment transactions. ▪If you do not want to modify a PENDING payment transaction, you may (as needed) Delete a selected payment transaction from the data grid and then enter a new E-Payment which would use any revised information. |
||||||||||||
|
|
The new/revised InnoEPay, Authorize.net, and Forte.net Payment Gateways have been added to the Post Auto Drafts dialog as a new set of options (Processor/Bank Credit Card payments and Processor/Bank Bank Accts payments. ▪No additional fields are required to be populated. ▪These new new/revised InnoEPay, Authorize.net, and Forte.net Payment Gateways have also been added to the E-Payments dialog and streamlines that process as well. See the new/revised InnoEPay, Authorize.net, and Forte.net chapters for more information |
|||||||||||
There is a new Invoicing Groups Form (located in General Maintenance) which has been added for those Companies who have a large number of Accounts (Subscribers), many of whom are Invoiced for on-going monitoring and recurring maintenance services, and often these services are provided at multiple locations for varying sets of those recurring services. ▪Under these circumstances, the associated Recurring Revenue Invoices can become extremely long, complicated to read, and difficult to comprehend.
The "Summarize Recurring Items" option on the Print Invoices Form allows the Detail Line Items on those Recurring Revenue Invoices to be condensed into groups - sets of related Recurring Revenue Items summarized together - and printed with a simple Description and Total for each set (Invoicing Group) of items. ▪The Description for each recurring revenue Invoicing Group is defined using this new Invoicing Groups Form ▪When a Recurring Revenue Item may need to be grouped with similar items when the Summarize Recurring Items option is chosen on the Print Invoices dialog, use the Drop-Down Selection List provided on the Recurring Revenue Form to Choose the appropriate Invoicing Groups Description from that list.
Any number of Invoicing Group Descriptions may be defined, and any one of these may be added to any Recurring Revenue record when that Recurring Revenue item is to be available for grouping. a)This Invoicing Group's Description will determine in which Invoicing Group that Recurring Revenue Item will be included when the "Summarize Recurring Items" option is Checked in the Print Invoices dialog. b)The Description of the assigned Invoicing Group will be the Description printed on the Invoice - along with the Total charges for the set (group) of summarized Recurring Revenue Items. c)By using this feature, the length of those Recurring Revenue Invoices will become much more manageable (and comprehend-able) for the recipient.
❖ See the Summarize Recurring Items discussion in the Print Invoices chapter for more information. |
||||||||||||
Other System Maintained fields section on the Recurring Revenue Form:now has fields which are populated by the system as that data becomes available.
a)Last Period Billed - The Month and Year in which Auto Billing was executed for this Recurring Revenue item. b)Last Date Billed - The Billing Date assigned to that Recurring Revenue item's Invoice. c)Next Billing Period - The Month and Year in which Auto Billing should be executed for this Recurring Revenue item.
Invoice Group - The Invoicing Groups Form is used to define the Description of Summarized Invoices when a Recurring Revenue Item should be grouped with other similar items to simplify and clarify the resulting Recurring Billing Invoices. ▪This Special Function Invoice Group field is manually populated when appropriate.
❖See the Summarize Recurring Items discussion in the Print Invoices chapter for more information. |
||||||||||||
|
|
Tokenize Credit Card Information: ▪Whennew/revised InnoEPay, Authorize.net, and/or Forte.net Payment Gateways are properly installed and operating as your Company's Payment Gateway, that system will "tokenize" the Account Number and Expiration Date of those Credit Cards identified by selecting the Auto Draft Setup option in the Edit View of the Subscriber Form and entering the Subscriber's Payment Method(s). a)Thereafter, when the Credit Card Account Number and/or Expiration Date changes, the system will set Credit Card Status field in the epPayBatchDet table back to PENDING and Card Token data back to NULL, b)This will cause the Payment Gateways service to "tokenize" the Credit Card again using the new (revised) Credit Card Account Number and/or Expiration Date information. |
|||||||||||
|
|
When a Bank Draft is being defined using the Auto Draft Setup option of the Subscriber Form's Edit View, to access the Subscriber Payment Methods dialog, there is a new Account Holder field available. By default, the Name entered in the General Subscriber Information section is inserted as the Account Holder, but this may be modified when required. |
|||||||||||
There is a new Summarize Recurring Items? option on the Print Invoices dialog. ▪This "Summarize Recurring Items" option allows the Detail Line Items on those Recurring Revenue Invoices to be condensed into groups - sets of related Recurring Revenue Items summarized together - and printed with a simple Description and Total for each set (group) of items. ▪The Invoicing Groups (General Maintenance) Form will be used by those Companies who have a large number of Accounts (Subscribers), many of whom are Invoiced for on-going monitoring and recurring maintenance services, and often these services are provided at multiple locations for multiple, for varying sets of those recurring services. oUnder these circumstances, the associated Recurring Revenue Invoices can become extremely long and complicated to read (and difficult to comprehend). ▪The Description for each recurring revenue Invoicing Group is defined using the Invoicing Groups Form (located in General Maintenance).
Check this Summarize Recurring Items? box on the Print Invoices dialog to have those Recurring Revenue Items - which were assigned an Invoicing Group Description - summarized into one Detail Line Item on the Subscriber's Invoice. ▪The Description printed on the Invoice (along with the Total charges of those summarized Recurring Revenue Items) will be the Description of the Invoicing Group assigned to each member of that group of summarized Recurring Revenue Items (i.e., by assigning the appropriate Invoicing Group to those Recurring Revenue item's record, those Recurring Revenue Items will be summarized on that Invoice when the "Summarize Recurring Items" option is selected.
➢Note: When there are Recurring Revenue Items not assigned to an Invoicing Group and/or other non-recurring item(s) on the same Invoice, those Detail Line Items will appear individually as usual. |
||||||||||||
An Export Icon has been added to the Custom Pay Increase dialog: ▪Export - Once the data has been formatted, filtered, sorted and configured as needed, the Rate Increase defined and Previewed, the User may Click the new Export Icon to display the standard Windows® Save As dialog. to export this grid in a spreadsheet format. ▪See the data grid chapter for more information. |
||||||||||||
There is a new Auto Draft Accounts Report dialog provides a fully functioning Grid listing: a)All previously defined Payment Methods, or b)Only the previously defined Credit Cards, or c)Only the previously defined Bank Account |
||||||||||||
The Subscriber's Ledger Card report has a new Running Balance Format which Lists all Invoices for (Purchases by) the current Subscriber in chronological order based on a User selected Date Range. |
||||||||||||
A new option has been added to the Invoices - Printing Options dialog: Division - By default, the Invoices for All Divisions will be Printed. ▪All - All Invoices from All Divisions will be Printed. ▪Specific - Invoices only originating from the specified Division will be Printed. oUsing the Select Division dialog, Choose that required Division. oThe selected Division will be inserted in the Division field. |
||||||||||||
Invoice List - Invoices may be created manually by a User using the Invoices Form, or generated automatically using the Fully Automated Recurring Billing process, or the manually selected Auto Billing procedure. ▪The new Invoice List dialog presents a Grid of all, or a selectable set of previously generated Auto Bill, Non Auto Bill or All Invoices, with the ability to select for a specific Billing Cycle and/or specify a Date Range
Show Totals - This new option on the Invoice List Report provides a summary of the data retrieved (based on the User selected options) in the form of a Pop-Up dialog.
Max records to show in grid - This new option on the Invoice List Report is set to 50 by default, The currently displayed Page and Number of Transactions is also provided. ▪Provided for those Companies with a large number of Accounts, this setting allows a User to restrict the number of records that will be retrieved from the database at one time to the Maximum set here. ▪By doing so, when the Retrieve Data option is selected, the system will not slowdown as it locates and populates this report with what could easily be many thousands of records. ▪A set of left and right arrow buttons provides movement from page to page. |
||||||||||||
When using Subscriber as the Search By option, the Date Received (defaulted to Today), Batch Number (defaulted to the Day number of Today), Method of Payment (defaulted to Check) and Bank Account (defaulted to the Default Bank Account) will be inserted automatically. |
||||||||||||
|
|
|||||||||||
Converting a Subscriber's Proposal Installation Order (Work Order) |
1.When a Work Order which originated from a Proposal is converted to an Installation Order: a.All of the Proposal Detail Line Items will be included in the Parts List tab of that Installation Order (Work Order) . b.When the Installation Order is finished, the Installation Order (Work Order) is Completed and an Invoice is Generated c.All of the Note entries from the Detail Line Items of the original Proposal will now be included in the corresponding Note entries for the Detail Line Items of that Invoice. 2.When a Work Order - which originated from a Proposal - is converted to a Job Costing record d.When this Proposal is converted to a Job, any Job Tasks defined on that Proposal, will be inserted in the Job Tasks tab on the Job Costing Form. e.All of the Proposal Detail Line Items will be included in the Item List sub-tab of the Inventory tab of that Job Costing record. f.When a Work Order is created for the Job Tasks, the Parts List may Pick (import) the Inventory (defined in the Proposal) that was automatically inserted into the Item List sub-tab of the Inventory tab of that Job Costing record. g.When the Job is finished, the Job Costing record is Completed and an Invoice is Generated for the Work Order created for this Job Task. h.All of the Note entries from the Detail Line Items of the original Proposal will now be included in the corresponding Note entries for the Detail Line Items of that Invoice. |
|||||||||||
To make the (General Maintenance) Bank Form's Bank Reconciliation History Grid easier to use, it is now ordered by the Statement Date column (descending), and the "Report" column with the Report Icon - used to access a specific Bank Reconciliation Summary report's PDF - is now listed first. |
||||||||||||
The Attrition Report has been renamed to the RMR Differential (Attrition Reports) |
||||||||||||
This new Deferred Revenue Setup menu option only appears if the DeferRecurringRevenue option is set to False ("F") in Company Settings dialog which is accessible from the Company tab of the User Options Form. ▪It is used to properly initialize the Deferred Recurring Revenue feature within MKMS Accounts Receivable module and - if the General Ledger module is Registered - in the General Ledger System. |
||||||||||||
Invoice - The Printed Invoice will now include the Service Address on Printed Invoice as its displayed on the Invoice Form: a)If there is an Invoice Billing Address (i.e., "Default Invoice Address") defined for that purpose in the Address Configuration section within the Edit View of the Subscribers Form i.That "Default Invoice Address" will be used for the Billing Address ii.The Address in the General Section of the Edit View of the Subscribers Form will become the Service Address. b)Otherwise, the default Address on the Subscriber Form will be used for both the Billing and the Service Address.
Sale Date - The Sale Date entered on the Invoice Form determines the Transaction Date that will be used in the General Ledger System: ▪Therefore, if an Invoice is post dated (a "future" date is used), the Accounts Receivable Account balance reported in the General Ledger will not reflect that Invoiced Amount until that (post dated) "future" date. c)The Accounts Receivable As Of Report - with a user defined As Of Date - has been completely revised and is now presented as a Sortable, Filterable, and Configurable Grid with Print (Print Preview) and Export options d)The Accounts Receivable As Of Report has three new options: i.List All Invoices with a Balance Due, ii.List Only Recurring Revenue Invoices with a Balance Due, iii.List only Invoices that are not for Recurring Revenue and have a Balance Due. |
||||||||||||
The revised Sale-Purchase Items Form now has a WIP field which tracks those Inventory Items which have been assigned to a Job and/or Work Order and will be subject in future Invoicing. ▪There is a new COGS Value field which contains the Value of an Inventory Item that will be used in all General Ledger related Financial Transactions as documented in the Tracking Inventory Values & Quantities as Assets, Liabilities, Sales & Expenses chapter. ▪The new Inventory WIP Report lists all Inventory Items' Counts that were transferred to Work In Progress via a Job and/or Work Order entry, executed within the Date Range specified, and subject to certain filtering and selection options. ▪If an attempt to make an Inventory Item inactive when that Inventory Item has been used on a Proposal which is still active and has not yet been converted, a Conformation message will be displayed.
New Sales Tax fields: ▪A new AR Taxable? field has been added to the Sale-Purchase Item Form - replacing the original Taxable? field. ▪A new AP Taxable? field has been added to the Sale-Purchase Item Form - thus allowing Purchases and Sales to be identified as Taxable (by default) independently. ▪For Canada Sales Taxes - a)AP National Tax - When an HST or GST Tax must be assessed on Purchases, Check this box. b)AP Local Tax - When a PST Tax must be assessed on Purchases, Check this box. |
||||||||||||
|
|
There is a new Inventory Replacement Value dialog which lists those Sale-Purchase Items identified as Inventory Items with the associated On Hand quantities, Warehouse, replacement Cost, and Total (current) Value - presented as a Grid |
|||||||||||
|
|
|
For those Companies who use multiple fully automated Payment Gateways (i.e., InnoEPay, Authorize.net, and/or Forte.net) and also use multiple Banks into which Receipts are deposited during the Fully Automated Recurring Revenue Billing process, this Division Level Payment Gateway Default capability allows your Company to Designate the following for all Subscribers assigned to that specified Division: a)The Bank ("Default Bank") into which b)The specified Payment Gateway that will process and deposit ACH ("Bank Payment Gateway") payments c)The specified Payment Gateway that will process and deposit Credit Card ("Card Payment Gateway") payments |
||||||||||
Each Subscriber and/or Vendor may be assigned to a Division. The Divisions Form now allow a Company to identify a Default Warehouse for a Division ▪Thereafter, when Invoices and/or Work Order documents are created for a Subscriber; or Purchase Orders and/or Bills for a Vendor who is assigned to a Division (a Division assignment to a Subscriber or Vendor is optional), any Inventory related Transaction posted to one of those documents will automatically be assigned to that (Subscriber's or Vendor's) default Warehouse but the Warehouse may be changed, when appropriate. |
||||||||||||
|
|
The revised Work Order Invoicing/Review Form with its new user interface now Excludes Work Orders which have been marked as Non Billable and are Completed and now has 2 filters plus the user interface has been substantially improved: 1.Using the new Date Options Drop-Down Selection List with six Date Range filtering options [i.e., Date Requested, Date, Date Serviced, Date Completed, Date Created, Last Date Modified, Schedule Date], 2.The Work Order Type Drop-Down Selection List with six filtering options [i.e., All, Standard Work Order, Fire Alarm Test, Fire Extinguisher Inspection, Installation Order, Jobs].
▪The old Completion Box has been eliminated: Editing is now done: a)within the Work Order Listing's data grid, and/or b)by using one or more of the 6 tabs at the bottom of the Work Order Invoicing / Review Form (see below), or c)by using the Go To Work Order function to open the actual Work Order and complete that Work Orders within the actual Work Order Form.
▪There are now 6 tabs (each tab has a new Keyboard option shown) at the bottom of the Work Order Invoicing/Review Form: Labor, Inventory/Materials (where a Department may now be assigned to each Inventory entry), Installed Equipment, Technician Activity, Appointments, and Parts List which are explained in the Recording Work Order Charges chapter. ▪Installed Equipment tab has a new Install box in the Install column's Header: oCheck the oOtherwise, you may Check the individual Install Check box of each Inventory Item that is to be added to this Subscriber's Installed Equipment Form. |
|||||||||||
Any Work Orders identified as Nob-Billable (i.e., any costs associated with this Work Order should not be billed to the Subscriber) and are finished, will now also be listed - as long as they were not marked as Completed within the Work Order Form. a)The User will then have the ability to add (or confirm) the Inventory/Material (Shift+F9) items that were used. b)Once that has been done, those Inventory items will appear in the Installed Equipment (Shift+F10) tab c)Checking the corresponding Install box in the Installed Equipment (Shift+F10) will notify the system that those should be inserted into the associated Subscriber's Installed Equipment Form. d)Complete the Work Order as normal, and once any of the other Work Orders have been billed, this Work Order will be removed form this list and the Inventory item will be added to the Subscriber's Installed Form automatically.
▪The keyboard's Insert (to start a new entry), Delete (to remove an existing entry), and the Left-Right-Up-Down-Arrow Keys for Navigating within the Grid or Form; plus the Ctrl+S combination (for Save) are implemented on the Work Order Invoicing/Review Form and its six (6) sub-tabs for Inventory/Materials, Installed Equipment, Technician Activity, Appointments, and Parts List tabs (see the Recording Work Order Charges chapter for more information). |
||||||||||||
This new Customer Deposit Report dialog displays a Grid with all of the designated Receipts listed (based on the Option selected) which may be Printed and/or Exported, as needed. |
||||||||||||
|
|
A new Email option is now available on the Subscriber, Prospect, Employee and Vendor Forms; and as part of the Printing an Invoice, and/or Printing a Proposal process. a)Click the Email option to open a pre-populated Email Dialog (e.g., using Outlook©, or another Email protocol) to send an Email to the Email Address associated with that Form b)When an Email of an Invoice, or Proposal is sent, the appropriate document is attached to that Email as a PDF file. |
|||||||||||
A new "Panel Description" Search By option has been added to the F2 - Subscriber Search function [and the Search button on the Sub Info (F2) Form within MKMSCS). ▪This new "Panel Description" Search By option is associated with the Description that is defined in the Subscriber Panels section of the Monitoring Information tab within the Edit View of the Subscribers Form. |
||||||||||||
When inserting a taxable Detail Line Item into a Prospects/Subscriber's Proposal, the Local Tax ("Lcl") column was being populated with "Y". ▪The Local Tax column is now pre-populated with the Tax Code entered for the selected Tax Rate ID for this Subscriber in the Receivables section of the Edit View of the Subscriber Form (or the corresponding Tax Information section is the Prospects Form).
The Activate/Deactivate Edit Mode Icon which was used to toggle the Detail Line Item's Edit Mode interface has been removed from the Proposals Form so In Line Editing is now the only data entry method supported. ▪In doing so, the issue with not being able to modify data while the Edit Text Editor was activated has been resolved. |
||||||||||||
Several enhancements have been added to the Proposal Form's Header section: ▪Inside Sale - The purpose of this field is to determine if a Proposal was created for an existing, but unassigned Subscriber (the Sales Person would enter their name in the Salesman field and Check this Inside Sale box when creating the Proposal); or a new or existing Prospect (the field will be left unchecked). The Converted Proposals and Proposals (Grid) reports will include the "Inside Sale" field and allow the User to filter that Inside Sale field in those reports' Grids by "True" or "False" ▪Demoed - Check this box when the Proposal has been presented and/or demonstrated to the Prospect. ▪Demoed By - Use the Drop-Down Selection List to Choose the appropriate Salesperson. ▪Active? - This box, by default, will be Checked to indicate that this is an Active Proposal. You may Un-check this box if the Proposal becomes Inactive. •Salesperson - Renamed from Salesman |
||||||||||||
Improvements to the Note field on the Proposal Items tab: When a more definitive explanation is required for a Proposal Item for a Proposal, a detailed explanation of that Item may be entered: ▪Click within the Note field to open a Note Pad dialog (no formatting options are available, but multiple lines of information may be entered). ▪When formatting options are desired, a Rich Text Editor may also be opened by Double-Clicking within the Note field. ▪Enter and Format the appropriate explanation in the Rich Text Editor dialog, then Press Ctrl+S or Click the Save option on the Rich Text Editor Form ▪If the Proposal Item was inserted using a predefined Proposal Package or Copied From Template, the Note field will be populated automatically when the imported Proposal Item has Note information available. |
||||||||||||
There is a new Proposal Expiration Aging Report - presented as a data grid - which displays an "Aging Grid" showing how many days have passed since the Expiration Date that was assigned to each listed Proposal. ▪This information lets the Sale Team and/or Sales Manager see how "stale" these Proposals have become. |
||||||||||||
|
|
|
||||||||||
|
|
|||||||||||
When inserting a taxable Detail Line Item into a Prospects/Subscriber's Proposal, the Local Tax ("Lcl") column was being populated with "Y". ▪The Local Tax column is now pre-populated with the Tax Code entered for the selected Tax Rate ID for this Subscriber in the Receivables section of the Edit View of the Subscriber Form (or the corresponding Tax Information section is the Prospects Form).
The Activate/Deactivate Edit Mode Icon which was used to toggle the Detail Line Item's Edit Mode interface has been removed from the Proposals Form so In Line Editing is now the only data entry method supported. ▪In doing so, the issue with not being able to modify data while the Edit Text Editor was activated has been resolved. |
||||||||||||
Improvements to the Note field on the Proposal Items tab: When a more definitive explanation is required for a Proposal Item for a Proposal, a detailed explanation of that Item may be entered: ▪Click within the Note field to open a Note Pad dialog (no formatting options are available, but multiple lines of information may be entered). ▪When formatting options are desired, a Rich Text Editor may also be opened by Double-Clicking within the Note field. ▪Enter and Format the appropriate explanation in the Rich Text Editor dialog, then Press Ctrl+S or Click the Save option on the Rich Text Editor Form ▪If the Proposal Item was inserted using a predefined Proposal Package or Copied From Template, the Note field will be populated automatically when the imported Proposal Item has Note information available. |
||||||||||||
There is a new Proposal Expiration Aging Report - presented as a data grid - which displays an "Aging Grid" showing how many days have passed since the Expiration Date that was assigned to each listed Proposal. ▪This information lets the Sale Team and/or Sales Manager see how "stale" these Proposals have become. |
||||||||||||
When importing the Detail Line Items for a new Proposal by using an existing Proposal as a Template, if a Detail Line Item in the selected Template is Taxable (e.g., Tax Code is Y, 1, 2, 3) then: a)If the Proposal is for a Subscriber the Tax Code and Tax Rate will be pulled from the Receivables section of the Edit View of the current Subscriber, b)If the Proposal is for a Prospect the Tax Code and Tax Rate will be pulled from the Tax Information section of the current Prospect (as appropriate).
▪However, If any Detail Line Item in the selected Template is Non Taxable (Tax Code is N or E), the system will use that same Tax Code from the selected Template's Detail Line Item (therefore the Tax Code will be N or E), regardless of the current Subscriber's or Prospect's tax status. |
||||||||||||
Added all of the fields in the Central Station Data table including Account Type to the Converted Prospects Report - Available Columns list. ▪By default, the original columns plus the Account Type column will be displayed. ▪Because this is a true Grid, columns may be filtered and grouped, showing the count per group. |
||||||||||||
▪Improved Copy From Template feature now pulls the Salesman information from the Prospect (or Subscriber) who is getting the Proposal (rather than from the Template) and inserts it into the Commissions To field of each Detail Line Item imported from that Template. ▪New Inside Sale field - The purpose of this new field is to determine if a Proposal was created for an existing Subscriber (the Sales Person would Check this Inside Sale box when creating that Proposal), or for a Prospect (the Inside Sale field will be left unchecked). ▪The Converted Proposals and Proposals (Grid) reports will include the "Inside Sale" field and allow the User to filter that Inside Sale field in those reports' Grids by "True" (Subscriber's Proposal), or "False" (Prospect's Proposal). |
||||||||||||
There is a new Proposal Status Form (located in General Maintenance) which is used to create Descriptions representing the current Status (as it relates to a Proposal's Sales Cycle) of any Proposal created for a Prospect or Subscriber. a)One of these Proposal Status Descriptions must be assigned to each Proposal. (initially the system provided Default Proposal Status will be assigned automatically). b)Thereafter: 1)The associated Pipeline Analysis Report will provide a list (among many other things) of the Status of each listed Proposal 2)The associated Proposals (Grid) report will also report the Status of each listed Proposal. 3)The new Proposal Lost Report (see below) which includes the Status that existed immediately prior to when the Proposal was rejected. 4)The Status and Rating Modification report (see Status/Rating Modification Report immediately below) which displays a list (of selected) Proposals which have had a Proposal Status and/or Confidence % Rate change occur (See the "Understanding and Using the Confidence % field" discussion in the Proposals chapter for more information) within a specified Range of Days. c)These reports may be grouped, sorted, and/or filter by one or more the assigned Proposal Status. |
||||||||||||
There is a new Status/Rating Modification Report - presented as a data grid - which displays a list (of selected) Proposals which have had no Proposal Status, and/or Confidence % Rate, and/or Active State changes made to those Proposals within a specified Range of Days. ▪This information will help the Sale Team and/or Sales Manager see how "actively and/or inactively" these Proposals are being managed. |
||||||||||||
1)The Proposals Form has a new Demoed field which should by Checked when a presentation and/or demonstration was provided to the Prospect and/or Subscriber. 2)The Proposals (Grid) report also lists that new Demoed field when a presentation and/or demonstration was identified on a Proposal to the Prospect and/or Subscriber. |
||||||||||||
The Ctrl+Insert and Ctrl+S key combinations have been implemented to Insert (Add) a new record and Save a record respectively in the Subscriber Form - Edit View and the Prospect Form - Edit View Forms. |
||||||||||||
|
|
There is a new Proposal Net Balance Remaining field on the Proposal Form's Job Task tab ▪This system maintained field will display an Amount representing the sum of all the Job Tasks identified in this Job Task tab. |
|||||||||||
This (new) New Account Approval dialog provides a list of those Proposals which have been entered by a Salesperson via MKSales or from within MKMS. ▪The Account Approval functions works as follows: a)A Salesperson has created a Proposal using MKSales or from within MKMS. b)That Salesperson has submitted the Proposal for approval via MKSales or it was created directly within MKMS. c)Regardless of where it was initially created, it is now a Proposal which is pending approval from both that Prospect or Subscriber, and from your Company's Sales Manager. d)Therefore, that Proposal is automatically inserted into this New Account Approval Form. ▪Convert - This option on the New Account Approval dialog offers two Conversion processes, depending on whether the selected Proposal was submitted to a Prospect or an existing Subscriber: 1.If the selected Proposal is associated with a Prospect, this option will allow the User to Convert a selected Prospect to a Subscriber (See the Convert a Prospect to a Subscriber chapter for the instructions covering how to Convert a selected Proposal to a Subscriber record and ultimately an Invoice, Installation Order, or Job Costing record). 2.If the selected Proposal is associated with a Subscriber, this option will allow the User to Convert a selected Subscriber's Proposal directly into an Invoice, Installation Order, or Job Costing record (See the Converting a Subscriber Proposal chapter for the instructions covering how to Convert a selected Proposal into an Invoice, Installation Order, or Job Costing record). |
||||||||||||
This is the new Account Approval Types Maintenance Form which is used to define those Action Steps that will/may be required when a Proposal is reviewed in the New Account Approval Form (see above). |
||||||||||||
The new Proposals (Grid) dialog is a fully functional data grid which lists all existing Proposals (for Subscribers and Prospects) within a User specified Date Range with those Dates based on a User Selected Type of Date (i.e., Creation or Expiration Date). ▪This List of Proposals can have a unique set of User designated data columns, be reformatted, re-sorted, and rearranged; ▪It may then be produced as a Report and/or Exported as a spreadsheet file containing those redesigned data grid contents.
There are also new Sum and Percentage fields in the Proposals (Grid) report: ▪The Proposals (Grid) now includes (based on the options chosen) the total Number of Converted Proposals and the Percentage of all listed Proposals that were converted to Sales. |
||||||||||||
The new Pipeline Analysis Report dialog is a fully functioning data grid that lists Subscribers and/or Prospects who have a Lead Date and Status identified, and/or who have a Proposal enter which has not been converted. |
||||||||||||
The Pipeline Analysis Report has already been enhanced with additional columns (fields) with the information from each Proposal's Status, Confidence $, Confidence %, Gross, and Inside Sale entries. ▪See the "Understanding and Using the Confidence % field" discussion in the Proposals chapter for more information. |
||||||||||||
There is a new Proposal Lost Reason Form (located in General Maintenance) which is used to identify the various Reasons for why a Proposal would be/has been rejected by a Prospect or Subscriber. a)One of these Proposal Lost Reasons must be assigned to any Proposal which was ultimately rejected. b)Thereafter: 1)The associated Proposal Loss Report will provide a list of those Proposals which were determined to have been lost (i.e., ultimately rejected by a Prospect or Subscriber) and includes - among other information - the Date of, and Reason for each rejection. 2)The associated Proposals (Grid) report will also report the Reason why a Proposal was rejected. 3)The Proposal Lost Report c)These reports may be grouped, sorted, and/or filter by one or more Reasons. |
||||||||||||
There are 5 new fields which have been added to the Proposal Header on the Proposals Form ▪These fields allow your Company to more effectively track current Status (within the Sales Cycle), its Confidence Percentage Rating, and why a Proposal was Lost, the Lost Date, the Lost Reason. 1.Status – a Drop-Down Selection List field - the appropriate Proposal Status must be selected.. 2.Confidence % - a numeric field - requires 0 - 100 (%) entered as appropriate â. 3.Proposal Lost - a Check box field - Defaults to False (not checked). 4.Date - a Drop-Down Calendar/Date field - If "Proposal Lost" box is Checked, the Date Lost will be required and will be defaulted to Today. 5.Reason – a Drop-Down Selection List field - If "Proposal Lost" box is Checked, the Proposal Lost Reason will be required. â See the "Understanding and Using the Confidence % field" discussion in the Proposals chapter for more information.
The following reports use some or many of these new entries: |
||||||||||||
There is a new Proposal Loss Report which displays a fully functional data grid (list) of those Proposals that were determined to have been lost (i.e., ultimately rejected by a Prospect or Subscriber) which includes - among other information - the Date of, and Reason for each rejection, and the Status that existed immediately prior to when the Proposal was rejected. ▪This Proposal Loss Report data may be viewed, sorted, filtered, reconfigured, printed, emailed, and/or exported, as may be required. ▪Reconfigured Grid formats may be saved for future use and, if desired, shared with other Users ▪See the "Understanding and Using the Confidence % field" discussion in the Proposals chapter for more information. |
||||||||||||
The revised Prospect Status maintenance table now has a system defined Status of Inactive that cannot be deleted. ▪With this new "Inactive" Status code, a User may set a Prospect's status to "Inactive" in the Edit View of the Prospects Form, and/or Subscriber's status to "Inactive" or simply leave it NULL (i.e., empty) in the Lead Information section of the Edit View of the Subscribers Form to be excluded from the Pipeline Analysis report and Pipeline Snapshot widget.
▪In the Pipeline Analysis Report data grid and the Pipeline Snapshot Widget: a)Any Prospect who has been assigned an "Inactive" Status will be excluded. b)Any Subscriber with an "Inactive" Status or the Status field is blank (i.e., NULL) in the Lead Information section of the Edit View of the Subscribers Form will be excluded. c)During a conversion of a Prospect to a Subscriber, the Status field entry Lead Information section will be populated with any corresponding Status entry in the Edit View of the Prospects Form. |
||||||||||||
When adding a Package to an existing Proposal the additional items in that Package are now added to the end of the existing Proposal's Detail Line Items. |
||||||||||||
The Proposals (Grid) dialog which lists all existing Proposals (for Subscribers and Prospects) within a User specified Date Range with those Dates based on a User Selected Type of Date (i.e., Creation or Expiration Date).now has two additional columns of data: ▪Profit - The gross profit as currently calculated for the selected Proposal. ▪Margin (%) - The Percentage of gross profit (as it relates to the proposed Price versus Costs) for the selected Proposal. |
||||||||||||
Previously, when a Prospect was Taxable and a Proposal was created, if a selected Sale-Purchase Item was Non-Taxable it was still added as a Taxable item on the Proposal and had to be changed manually. ▪When a Sale-Purchase Item is added to a Proposal with a Non-Taxable status, it is now properly recorded on the Proposal as Non-Taxable. |
||||||||||||
All of the Telephone Number Extension fields in the Edit View of the Prospects Form have been expanded to eight (8) characters to match the capability in the Subscribers Form: Edit View. |
||||||||||||
▪This completely redesigned Prospect Form has a whole new "look" including new Ribbon Style Menu with special Edit View and Search Icons, History Options and Prospect Options Menus, plus options on the Navigation and Actions Icons of its Ribbon Menu |
||||||||||||
All additions, modifications and deletions of Prospect data is now performed within the Edit Icon on the Prospect Form |
||||||||||||
The Proposals (Grid) dialog has a new Lead Source column which displays that information, or "No Lead Source Selected" when that is the case. |
||||||||||||
The Proposals (Grid) - which is a fully functional data grid that lists all existing Proposals (for Subscribers and Prospects) within a User specified Date Range with those Dates based on a User Selected Type of Date (i.e., Creation or Expiration Date) - now has 5 new columns (fields) which should allow your Company to also track why a Proposal was Lost, the Lost Date, the Lost Reason, the Confidence Rating, and current Status (within the Sales Cycle) of each Proposal. 1."Status" – a Drop-Down Selection List field - the appropriate Proposal Status must be selected.. 2.Confidence % - a numeric field - requires 0 - 100 (%) entered as appropriate â. 3.Proposal Lost - a Check box field - Defaults to False (not checked). 4.Date - a Drop-Down Calendar/Date field - If "Proposal Lost" box is Checked, the Date Lost will be required and will be defaulted to Today. 5.Reason – a Drop-Down Selection List field - If "Proposal Lost" box is Checked, the Proposal Lost Reason will be required. â See the "Understanding and Using the Confidence % field" discussion in the Proposals chapter for more information. |
||||||||||||
The Converted Proposals Report dialog has a new Lead Source column which displays that information, or "No Lead Source Selected" when that is the case. |
||||||||||||
The Leads by Salesperson report has been improved as follows: ▪Report by All or a selected group of Salespersons ▪Report by All or a selected group of Lead Types ▪Report by All or a selected group of Lead Sources ▪Added Group Sub-totals by Salesperson and Grand Total ▪Choose the Date Type on which the Dates identified below will be based (i.e., Creation Date - Use the Creation Date entered for the Proposals., or Expiration Date - Use the Expiration Date entered for the Proposal.) ▪Date Range to be reported may be selected as 30, 60, 90, or Specific. |
||||||||||||
The Sales Tax Information section within the Edit View of the Prospects Form is now enforced as a mandatory entry. ▪If Sales Tax Information is not entered in the Tax Information section for Prospects and the User attempts to save this Prospect record, an error message will now be displayed and the record can not be saved until this information is provided. |
||||||||||||
Added an Amt Collected column field (showing the Amount that has been collected to date from the selected Converted Proposal) to the Converted Proposals dialog. |
||||||||||||
|
|
|||||||||||
|
|
|||||||||||
WO Detail - The new WO Detail choice on the Print options selection on the Work Order Ribbon Menu opens the Work Order Detail dialog where a User may customize the results of this request |
||||||||||||
If a Sale-Purchase Item has been designated the Default Sales Code on the Service Options tab of the User Options Form, it can no longer be designated as Inactive. |
||||||||||||
There is a new Order Inventory dialog accessible from the Parts List tab of a Work Order Form ▪See the "Understanding the Order Inventory option on the Work Order's Parts tab" discussion in the Parts List tab chapter for more information |
||||||||||||
|
|
The revised Work Order Invoicing/Review Form now has 2 filters plus the user interface has been substantially improved: 1.Using the new Date Options Drop-Down Selection List with six Date Range filtering options [i.e., Date Requested, Date, Date Serviced, Date Completed, Date Created, Last Date Modified, Schedule Date], 2.The Work Order Type Drop-Down Selection List with six filtering options [i.e., All, Standard Work Order, Fire Alarm Test, Fire Extinguisher Inspection, Installation Order, Jobs].
▪The Completion Box has been eliminated: Editing is now done within the Work Order Listing Grid, by using one or more of the 6 tabs at the bottom of the Work Order Invoicing/Review Form (see below), or by using the Go To Work Order function within the Work Orders Form.
▪There are now 6 tabs (each tab with a Key-Press option) at the bottom of the Work Order Invoicing/Review Form: Labor, Inventory/Materials (where a Department may now be assigned to each Inventory entry), Installed Equipment, Technician Activity, Appointments, and Parts List which are explained in the Recording Work Order Charges chapter. ▪Installed Equipment tab has a new Install box in the Install column's Header: oCheck the oOtherwise, you may Check the individual Install Check box of each Inventory Item that is to be added to this Subscriber's Installed Equipment Form. |
|||||||||||
The "Service ID" is no longer a required (Mandatory) field! ▪Affected Forms 1)Account Approval - Don't require populated Service ID on conversion to Work Order, Convert To Job) 2)Service Info Section (Remove Red outlines, don't force values for Service ID, Sale Date, and Warranty Ends) 3)Options (Recurring Service, Installed Equipment) 4)Converting a Proposal (Convert To Installation Order, Convert To Job) |
||||||||||||
WO Detail - The new WO Detail choice on the Print options selection on the Work Order Ribbon Menu opens the Work Order Detail dialog where a User may customize the results of this request |
||||||||||||
Default Warranty Terms - By default, the Value of the new DefaultWarrantyTerms option in Company Settings will be set to 12. ▪This Value represents the number of Months after the Sale Date entered in the Service Info section of the Edit View of the Subscribers Form when the installation's Warranty Ends. ▪The Value entered here will automatically populate that Warranty Ends field (i.e., Sales Date + Value in months = Warranty Date). ▪This Value may be changed, based on your individual Company's Warranty Policy.
Default Warranty WO Settings - By default, the new DefaultWarrantyWOSettings option in Company Settings is set to False ("F") . ▪Setting the DefaultWarrantyWOSettings option to True ("T") will set the Non Billable and Exclude Invoice Labor Check boxes on a new Work Order Form to match the settings in the Service Contract record associated with (assigned to) the current Subscriber - if that Subscriber is still under Warranty (i.e., Warranty Ends Date > Today).
Check Date Requested After Sub Sale Date - By default, the CheckDateRequestedAfterSubSaleDate option is set to True ("T") ▪When set to True ("T"), the program will confirm that the Requested On Date entered on a Work Order is on or after the Sale Date entered in the Service section of the Subscriber Edit View. ▪When set to False ("F"), the program will not make that comparison. |
||||||||||||
The Serial # field on the Installed Equipment Form has been increased in length from 15 to 70 characters. |
||||||||||||
There is a new Installed Equipment Grid dialog which is a fully functioning Grid dialog that provides a list of the Equipment previously identified as Installed Equipment for each Subscriber which may then be viewed by a specific Date Range based on the 1) Installation Date, 2) Warranty Expiration Date, or 3) Last Record Update, and then sorted, filtered, reconfigured, printed, emailed, and/or exported. |
||||||||||||
The revised Service Contracts Form now has two additonal fields: 1.Exclude Invoice Labor - Check the box when Work Order Labor Charges should not be billed to a Subscriber with this type of Service Contract. 2.Non Billable - Check the box when Work Order Charges should never be billed to a Subscriber with this type of Service Contract. ▪Setting the DefaultWarrantyWOSettings option to True ("T") in the Company Settings Form will set the Non Billable and Exclude Invoice Labor Check boxes on a new Work Order Form to match the settings in the Service Contract record associated with (i.e., assigned to) the current Subscriber - if that Subscriber is still under Warranty (i.e., Warranty Ends Date is greater than Today). |
||||||||||||
The Work Order Profit report (Grid) has been enhanced with the addition of : a)A Date Sold, Invoice #, and Balance Due field in its Grid. b)An Invoice Date Sold option has been added to the Select Date field. c)A Go To Radial Right-Click Menu which includes these option: i.Work Order ii.Subscriber iii.Invoice |
||||||||||||
|
|
The Work Orders Form has been substantially changed and new features have been added. ▪When a new Work Order is created, the "Non Billable" and "Exclude Invoice Labor" fields will be set based on the Service Contract assigned to that Subscriber only if the DefaultWarrantyWOSettings option is set to True ("T") in the Company Settings Form and Subscriber is still under warranty (i.e., Warranty End Date >= Today).
▪Department - Use the new Drop-Down Selection List provided to Choose the Department that should be charged for the Inventory/Materials expenses used to complete this Work Order. oUse the Drop-Down Selection List provided to Choose the Department that should be charged for the Inventory/Materials expenses used to complete this Work Order. oIf a Department has been assigned when the Work Order was created, it will become the default Department, and will be inserted automatically when the Inventory/Materials expense record is added. oWhen a Work Order is Invoiced, the Department assigned on the Work Order will be Department assigned to each Detail Line Item on that Invoice.
▪The User may Select which Columns of data will be included in the List (Grid) by Clicking the Asterisk (*) at the top left of the List's Header to display a list of all available Columns (Header Names). The User may Check the desired Header (column) Names (all will be Checked initially), or hide columns by removing the Check.
▪Parts List tab: When the Use Inventory option is selected: a)The User may now identify How Many items are to be (were) used (when first opened, to this the How Many field will equal the Quantity field). b)When the Use function is executed, the Quantity in the new record created in the Inventory/Materials tab will equal the How Many Amount entered in the Parts List tab. c)If the Quantity of any item in the Parts List tab becomes less than or equal to zero, the item will be deleted from the Parts List. d)Use Parts - If the Used Parts option is selected for an inactive item or for an item that was not identified as one that can Show on a Work Order, a warning message will be displayed: "The following items could not be used because they are not set to show on work orders, or the part is inactive"
▪The Ribbon Menu of the Inventory\Materials sub-tab's Drop-Down Info Box now allows the User to
▪When Completing a Work Order, a new Completed On field has been added, and the Labor and Inventory/Materials entry method has been enhanced.
▪The new Itemized WO Invoicing dialog (see Automatic Invoice Generation in the Completing a Work Order chapter) allows the User to choose which (or all) items will be Invoiced, whether any items will be billed at a $0.00 value, and allows the User to choose which (or all) items are to be added to the Installed Equipment table for the Subscriber. |
|||||||||||
The Day View tab on the Technician Scheduling Form now uses a Circle of Options Choices (presented in a Radial design instead of a Right-Click Menu). ▪When the mouse pointer is within a Scheduled Appointment entry and the User performs a Right-Click the Edit, Email, Delete, Set Status, Show on Google Maps, Go To Work Order, and Go To Subscriber options are presented in a Circle of Options Radial design.
The Pending Work Orders List on the Technician Scheduling Form has been substantially revised, and so will now function as a true Grid. ▪The new Identifier column in the Pending Work Orders List (Grid) identifies each Work Order record as being either for a Subscriber or a Prospect ▪Therefore, Grouping the Pending Work Orders List by Identifier enables the User to quickly identify which Work Orders are for a Subscriber versus a Prospect. See the Pending Work Orders List chapter and the "Grouping the Grid Data" discussion in the Grids & Lists chapter for more information about this Grouping capability.
The Pending Work Orders list also has a new Use Tool Tips? option which turns on/off the Work Order Detail pop-up. a)When a Check is in the Use Tool Tips? field, the Work Order Detail pop-up displays key information about the Work Order which is currently Selected in the Pending Work Orders Listing. b)When that pop-up feature is not wanted, removing the Check from the Use Tool Tips? option disables this feature.
▪The Filters option on the Pending Work Orders listing within the Technician Scheduling Form is now fully functional. ▪The Print Pending Work Orders option on the Actions Menu in the Pending Work Orders section of the Scheduling Form is now working properly. |
||||||||||||
▪A Department (Dept) column has been added to the Pending Work Orders List ▪The new Print Pending Work Orders option on the Actions Menu on the Pending Work Orders List will display a Print Preview of the Pending Work Order List as currently filtered and displayed in the Pending Work Orders Grid. |
||||||||||||
A new Work Order Profit dialog (which is actually presented as a fully functional data grid) may be populated based on a user selected Date Type (i.e., Completed Date, Requested Date, Date of Service, Date Created, Last Modified Date, or Schedule Date) of the Work Orders and filtered based on a specified Date Range ▪Each selected Work Order is listed with: a)The (Retail) Charges and (Wholesale) Costs that were recorded b)The Totals for those Charges and Costs, and c)The calculated Profit (or Loss) resulting from them. ▪There are new Invoice Profit and Invoice Net columns available, and the Profit column has been renamed to Proposed Profit. ▪Grand Totals for those Charges and Costs are also provided. ▪The resulting data may be formatted, custom filtered, sorted and then Printed and/or Exported, as needed. |
||||||||||||
The new Technician Performance Grid provides a list of Work Orders within a specified Date Range (based on a User designated Type of Date field) and includes: ▪The Labor Hours, the Labor Cost, and related explanatory information (e.g., Subscriber, Technician, Service Type, Services Performed, Resolution description) for each Work Order. ▪Totals number of the Work Orders that are listed, the total Labor Hours and the Total Labor (retail) Charges. ▪This fully functional data grid also provides Print and Export options. |
||||||||||||
The new Installed Equipment Grid is a fully functioning Grid dialog that provides a list of the Equipment previously identified in the Installed Equipment table for each Subscriber and may then be viewed, sorted, filtered, reconfigured, printed, emailed, and/or exported. |
||||||||||||
Suppress WO Warnings - A new SuppressWOWarning option in Company Settings has been created to allow your Company to suppress the Work Order Warning dialog: ▪By default, the SuppressWOWarnings option is set to False ("F"). ▪Setting this SuppressWOWarnings option to True ("T") will suppress the Pop-Up Warning Dialog which displays a Warning Message when the Subscriber has a pending Work Order, a Balance that is Past Due, and/or is out of Warranty (or has a Service Contract which has expired) when a new Work Order is started. |
||||||||||||
Added the ability to Email the contents of the Parts List tab on the Work Orders Form. |
||||||||||||
Added a "Show On Google Map" option when the User has selected an Appointment record within the Day View tab of the Technician Scheding Form.and Right Clicked their Mouse. Also, Reorganized the Right Click Menu to be more intuitive. |
||||||||||||
The new Service Tickets Widget provides a summary list in the form of a Grid with the status of various classification of Work Orders (e.g., Open, Scheduled by Type [i.e., today's Orders and Installs], recently Completed, and recently Billed). |
||||||||||||
If a duplicate Service ID is entered for a Subscriber in the Service Info Section in Edit View, a much more informative error message is now presented. |
||||||||||||
When Using the Scheduling Button on the Work Order Form's Ribbon Menu to set an Appointment, as part of that entry the User is able to enter Scheduling Instructions This information is entered in an Appointment Form on the Technicians Scheduling Form. Once entered, this information may be viewed in the Scheduling Drop-Down Info Box on that Work Order Form and printed on a Work Order. ▪The Scheduling Instructions may be longer than what will display in this box ▪A a vertical scroll bar is now available so the User may easy access and view all of those Instructions. ▪However, those Scheduling Instructions should be no longer than 200 characters or they will not be fully shown on the Technician's printed copy of that Work Order. |
||||||||||||
Because the Appointment Description field on the Appointment Editor Form may have several more lines of data than what is displayed in that field (the contents of this field may be pre-formatted using the Appointment Description option on the Service Options tab of the Users Option Form), this Appointment Description field may now be scrolled using the Up/Down Arrows on your keyboard, and the scroll wheel on your mouse (if enabled). |
||||||||||||
On the Day View of the Technician Scheduling Form, an Appointment may be set by Dragging it from Pending Wort Orders Grid to the appropriate Time Slot on a selected Technician's schedule. ▪Using the Radial Right Click Menu, the User may then open the Work Order Form associated with that Technician's Appointment. ▪However, once that Work Order is displayed, if the User starts a new Work Order, the Salesman of record (which existed on the original Work Order) was not being entered in the new Work Order record.
The cause of the problem has been identified and corrected.. |
||||||||||||
When Service Request Forms are printed, if the Work Order Type (see the Entering a Work Order Chapter Topic) is an Installation Order, the Work Order with Pages 2 to nn containing the Parts List should be printed. ▪When more than 23 items were defined on the Parts List tab of a Work Order, forcing a page 3 (and beyond), some Parts List items were skipped in those subsequent pages. ▪The cause of the problem has been identified and corrected.. |
||||||||||||
When Chaining one Work Order to another, the system inserted an empty line at the top of the Description of the Conditions Report.. ▪The cause of the problem has been identified and corrected.. |
||||||||||||
|
|
Converting Proposal to an Installation Order
|
1)When Converting Proposal to an Installation Order, the order of the Proposal Items on that Proposal is now duplicated in the Installation Order's Parts List tab. |
||||||||||
The Technician Performance (New Grid) has been updated to remove the PriceTotal, TotalCost, TotalLaborCost, LaborPriceIn, TotalMaterialCost, MaterialPriceIn, and MiscCost fields that were no longer pulled in this report's query. However, those fields were still available for customization and so could give improper results if used. |
||||||||||||
|
Using the Pending Work Orders Grid
|
The Pending Work Orders Grid now offers a Dept (Name of the Department to which the Work Order is assigned) as an available column option. |
|||||||||||
Services Performed - This field on the Work Order Form is used to enter a detailed description (up to 500 characters) of the work that was performed. ▪This field may new be updated even after a Work Order is Completed and Invoiced because additional information may - and frequently does - become available later. |
||||||||||||
A new Comments column has been added to both the Inventory/Material Info Box grid and the Parts List tab within the Work Order Form ▪Double-Click within the Comments field to Open a Rich Text Editor to enter a Comment about this Inventory Item (or any Material Used). ▪Alternately, if a Work Order is created from a Job, the Comments entry will be transferred to the Work Order's Parts List tab and if/when that Parts List Item is identified as used in the Inventory/Material Info Box of that Work Order, the Comments will be inserted there as well. |
||||||||||||
This is the new Recurring Service (Grid) dialog - based on the previously entered Recurring Service records - that allows you to View and/or Print a full function Grid containing a list of the Recurring Service Work Orders that will be generated for a User specified Month and Year - which may also be limited to those Subscribers who have been assigned to a specific Technician Group - when the Auto Service (Automatically Generate Service Requests) function is executed. |
||||||||||||
|
|
|||||||||||
Converting a Proposal to a Job
|
1)When Converting a Proposal to a Job, the order of the Proposal Items on that Proposal is now duplicated in the Item List sub-tab of the Inventory tab on the Job Costing Form. 2)When creating a Work Order for a Job Task, that Work Order's Parts List tab may be populated using the Pick From Job option which now imports those parts from the Item List sub-tab of the Inventory tab on the Job Costing Form in the same order as originally entered in that Item List. 3)When parts from that Parts List tab are Used, they are now inserted into the Mat.\Inv. (Material\Inventory) Drop-Down Info Box in the same order as those parts were listed in the Parts List tab. |
|||||||||||
The revised Parts List tab on the Work Order Form has some new features and internal validations to ensure the proper tracking of Inventory Items: 1.A Warehouse column (populated with the name of the default Warehouse that previously identified in the Inventory Tracking section of the Inventory Options tab in the User Options Form) 2.A Transfer option - Because the system's default Warehouse (see #1 above) may not be the location from which a Part is to be withdrawn, you may use the new Transfer option to identify and Transfer a Part to the Warehouse from where it is to be withdrawn. a)Once the Transfer is executed, when that Part is Used, it will appear on the Inventory Materials Drop-Down Info Box with that corrected (transferred) Warehouse name. b)However, if the User forgot to use the Transfer option, that Warehouse assignment may still be changed to the correct one from within the Inventory Materials Drop-Down Info Box by using the Warehouse column's Drop-Down Selection List. |
||||||||||||
Deleting a Work Order with Inventory and Non-Inventory items from the Inventory/Materials Info Box is now much easier: 1)When there are Inventory Items entered in the Inventory/Materials Info Box of a Work Order, if the User attempts to delete that Work Order, the program would present this error: "Error -99999: RAISERROR executed: Inventory must be cleared before deleting this work order." 2)When there are Non-Inventory Expense Items entered in the Inventory/Materials Info Box of a Work Order, if the User attempts to delete that Work Order, the program would present this error: "Error -198: Primary key for row in table 'WorkOrder' is referenced by foreign key 'WorkOrder' in table 'WorkOrderMaterialDetail'" ▪In either case, the User had to manually delete all of those Inventory and Non-Inventory items before the Work Order could be deleted.
Now, the program will display a Query asking the User if all Items in the Inventory/Materials Info Box should be deleted. ▪If User answers "Yes", the program now deletes all of those Inventory/Materials Info Box items immediately. |
||||||||||||
On the Parts List tab of the Work Orders Form there are new data entry conditions established to accommodate the features outlined above: 1.Add new Part - You cannot use the Add ▪If you attempt to do so, a "This WO is coming from a job, you must enter the item in "Job Costing \ Inventory \ Item List" and reserve it and then use "Pick from Job" button on this screen." reminder message will be displayed
2.Pick From Job - When the Work Order was created from a Job, and as part of that Job Costing information, an Item List was created, this Pick From Job option becomes active. ▪However, prior to using the Pick From Job option, the Warehouse from which the Inventory is to be taken must have already been identified in the Inventory Reserved sub-tab of the Inventory tab on that Job Costing Form
3.The Transfer option is only available when Inventory Items have already been added to the Parts List tab.
4.Transfer a Part - You cannot use the "Transfer" option when the Work Order was created for a Job Task in the Job Costing record. ▪This must be done using the Reassign/Transfer option on the Inventory Reserved sub-tab of the Inventory tab on the Job Costing Form ▪If you attempt to do so, a "This WO is coming from a job, you must use "Reassign/Transfer Inventory" button in "Job Costing \ Inventory \ Inventory Reserved" reminder message will be displayed. |
||||||||||||
|
|
An issue where: a)An Inventory Item and the Warehouse from which it was taken was recorded on a Work Order in the Inventory/Material Info Box; b)Then the Warehouse from which it was taken was changed (corrected) to a different Warehouse; c)But the Inventory Counts were not properly updated (e.g., added back to the original Warehouse and deducted from the newly assigned Warehouse) has been identified ▪The cause of the problem has been identified and corrected.. |
|||||||||||
|
Inventory/Materials Drop-Down Info Box
|
The initial focus on the Inventory/Materials Drop-Down Info Box on a Work Order Form has been set to the Item field to speed data entry. The Date Used field will default to Today and the User will not be allowed to re-set it to an invalid date (e.g., future, closed month, date prior to the Request Date). |
|||||||||||
|
Accounts Payable System |
|||||||||||
The Ctrl+Insert and Ctrl+S key combinations have been implemented to Insert (Add) a new record and Save a record respectively in the Vendor Form - Edit View Form. |
||||||||||||
The Activate/Deactivate Edit Mode Icon which was used to toggle the Detail Line Item's Edit Mode interface has been removed from the Bills and Purchase Orders Forms so In Line Editing is now the only data entry method supported. |
||||||||||||
Intermittently, MKMS was resetting the Balance Due shown at the top of the Bills Form back to the Gross Amount of the purchase after a modification was made to that Bill. ▪Now, the system sets the Balance Due = Gross Amount - Amount Allocated anytime a User modifies a Bill. |
||||||||||||
In the Bills Form of a Credit Card Vendor, there is no longer an Insert, Delete, or Cancel option on its Ribbon Menu. ▪Any Bills that were paid using a Credit Card are created using the Credit Card Pay option on the Bills Form for the Vendor who is charging the Balance Due on that Bill to this Credit Card company. ▪Modifications or Deletions of any Credit Card Payment record must be executed in the Bills Form of the Vendor that had that Bill be paid with a Credit Card. ▪Modifications or Deletions of a Credit Card Payment record is not permitted in the Credit Card Register unless that Credit Card charge was entered manually in that Credit Card Register. or as a Payment. |
||||||||||||
To avoid confusion and prevent an unintentional transaction the Void Icon on the Payments Form will now be disabled when the Check Type is Credit Card. ▪To remove a Payment made with a Credit Card, Unallocate that Payment (if it was already Allocated), then just Delete that Credit Card Payment entry. ▪This action will also remove the Credit Card Payment entry from the associated Credit Card's Register.
You cannot modify a Credit Card Payment entry in the Payments Form. ▪Instead, you must Delete that Credit Card Payment entry as noted above. ▪Then, re-enter it correctly, if necessary. |
||||||||||||
A new Pay Bill By Bank option on the Bills Form allows a User to make a Payment of the selected Bill via Electronic Transfer (EPay). |
||||||||||||
The Accounts Payable As Of Report - with a user defined As Of Date - has been completely revised and is now presented as a Sortable, Filterable, and Configurable Grid with Print (Print Preview) and Export options. ▪An Email (the data in the Grid) capability, and a Print Detail function has been added to the Accounts Payable As Of Report. These options will appear on the Ribbon Menu at the top of that Report Form as an Icon. |
||||||||||||
The Show Detail box may be Checked on the Accounts Payable As Of Report dialog to provide a secondary Detail Data Grid with that information. ▪Now, when the small right arrow } next to the Type : Bill option is selected in that Detail Data Grid, an Invoice # column is also included. ▪Double-Click on any Invoice # to open the associated Bills Form. |
||||||||||||
|
|
Voided Payment records, and the original Payment record are now reported on the Accounts Payable As Of Report as follows: ▪The original Payment, and the negative Voided Check record, will be included in the Accounts Payable Report only until the report's selected As Of Date is equal to, or after the Date the of (negative) Voided Payment record. ▪If the Payment record and the negative Voided Payment record are dated on the same day, neither will be included on the Accounts Payable Report. |
|||||||||||
The revised Purchases Analysis Report now allows User to also limit the report to: ▪Division - Using the Drop-Down Selection List provided, you may now Choose a Division or Division Group code to restrict the report to Purchases entered within the Date Range specified above (and limited by any Specific Selection Options chosen above) to only those Purchases made from Vendors that were assigned to the selected Division or Division Group.\ ▪Department - Using the Drop-Down Selection List provided, you may now Choose a Department Name to restrict the report to Purchases entered within the Date Range specified above (and limited by any Specific Selection Options chosen above) to only those Purchases made for a specific Department. |
||||||||||||
There is a new Purchase Orders Line Items List (Grid) report that is a fully functioning Grid dialog which provides a list of Purchase Order Detail Line Items listed with their Purchase Category, Date of Purchase,Vendor, Warehouse, Left to Receive, Left To Bill, etc., and may be viewed, sorted, filtered, reconfigured, printed, emailed, and/or exported. |
||||||||||||
The newly revised Purchase Orders Line Items List (Grid) report may now be limited to a specific User selected Purchase Category. |
||||||||||||
Selecting the Purchase Order Icon on the Payables Tab will now force the Vendor Search dialog to the screen as the Purchase Order Form is displayed. |
||||||||||||
When the GL Setup Wizard in the General Ledger System has not been executed (i.e., the GL system is not tracking Financial Transactions) there will be no filtering of Sale-Purchase Items in the Drop-Down Selection List based on any GL Account Type. |
||||||||||||
This new Credit Cards Form accessible on the Payables section of the General Maintenance Menu and is used to identify those Credit Cards which may be used to make Payments for Bills, ▪See the Credit Card Maintenance and Tracking Chapter Topic for detailed information about using this new feature.
When defining a new Credit Card, if no starting balance has been recorded (by creating a Vendor for this Credit Card and entering a Purchase (Bill) for that opening balance amount), a new "Balance Not Found" will be displayed along with choices on how to properly precede: a)The Vendor selected (on the Credit Card Form) has no open bills. b)This means your Credit Card opening balance (last statement balance) is equal to $0.00. c)If your last statement balance was zero Click OK to continue.
Otherwise, Click Cancel and go to "Vendor\Vendor Options\Bills" and create a Bill for the amount of the last statement. |
||||||||||||
Since initially provided (see above), there were two additional fields added to the Credit Card (maintenance) Form 1)Reconciled Balance - This entry is provided by the system once a Credit Card Statement has been Reconciled, but may be manually entered when first defined. 2)Date of Reconciliation - This read only field is provided by the system once a Credit Card Statement has been Reconciled |
||||||||||||
This new Credit Card Register dialog is accessible from the Register option on the Vendor Options Menu of a Vendors Form (if that Vendor represents a Credit Card Company that is being used to Pay Bills) ▪The Credit Card Register contains a Grid with a list of all the previously posted Payments made on Bills using the currently selected Credit Card (or Credit Card Company); and any Statements (entered as Bills to the Vendor) - whether or not Paid - from the currently selected Credit Card Company. |
||||||||||||
This new Credit Card Pay dialog is accessible from the Bills Form's Actions Menu (see the "Credit Card Pay" section in the Bills - Understanding the Bills Form Chapter Topic for more information) and provides a simple one-step process to pay a Bill using a predefined Credit Card. |
||||||||||||
Several processes have been improved (and stabilized): ▪To better handle Back Orders, the Ordered Quantity may now be modified to match the Received Quantity when one or more Ordered Items will be unavailable from this Vendor for an extended period of time. ▪System Maintained fields i.Amount Billed - The Amount that has been Billed to date for the Detail Line Items entered on this Purchase Order ii.Amount Left to Bill - The Amount that has not been Billed for the Detail Line Items entered on this Purchase Order iii.Line Items Left to Bill/Receive - The number of Detail Line Items on this Purchase Order which have not been Billed and/or Received ▪A previously assigned Work Order Number may be removed by Clicking on the new Work Order Delete ▪Bills - Offers a Drop-Down List of Invoice Number(s) for any Bills previously created from Detail Line Items on this Purchase Order that were Received and Billed using the Bill It Icon. ▪A dedicated Ribbon Menu has been added to the Detail Line Items section of the Purchase Order Form. ▪After Checking In Inventory, the User is allowed to repeatedly use of the Bill It function until all Item(s) are Received, or until the Ordered Quantity is modified to match the Received Quantity, at which time the Bill It function may be used one final time if there are Items that were just Checked In which had not been Billed ▪When using the Bill It Icon on the Purchase Order Form to create a Bill for the Items that were Received, there is a new PO Line Items To Bill dialog displayed to allow the User to Choose the Quantity of the Received Detail Lines Items that are to be billed, and/or Choose whether a Detail Lines Item will, or will not be billed at all. ▪The recommended procedure for handing Back Orders is now: 1.Adjust - If none of an ordered item is going to be available in the near future from this Vendor: a.Adjust the Quantity Ordered to match what if anything, has been Checked In (and therefore shown in the Received column ) b. c.Then, use the Bill It Icon to record the Bill for what was received, d.This action will automatically Close the Purchase Order, e.Attempt to order the back ordered Quantity of those items from another Vendor.
2.Wait - Leave the Purchase Order open while waiting for the back ordered items: f.Use the Bill It Icon to record the Bill for what was Received so far g.Then, when those back ordered Items are eventually received, Check In those additional items at that time h. i.Use the Bill It Icon to record the Bill for what was finally received j.This action will automatically Close the Purchase Order
3.Cancel - If none of an ordered item is going to be available in the near future from this Vendor, and no other items were ordered on this Purchase Order: k.Delete the Purchase Order l.Then attempt to order the item(s) from another Vendor
4.If Inventory Items on a Purchase Order's Detail Line Item were not yet Checked In, that Detail Line Item may simply be deleted, even if the Purchase Order was created in a Closed Month. 5.When a Purchase Order Form is opened from a Work Order that was created for a Job Task, a.That Purchase Order Form's Ribbon Menu will not include an Insert Icon b.No additional Purchase Order for that Work Order may be created unless it is saved and closed. c.By doing so, it prevents an accidental creation of another Purchase Order which is not associated with the Job Task |
||||||||||||
The revised Payments Form now shows - when appropriate - the Credit Card payment information (Payments on Bills made by Credit Card must be executed using the Credit Card Pay Icon on the Bills Form) ▪See the Credit Card Maintenance & Tracking Chapter Topic for more information about using a Credit Card to Pay a Bill. |
||||||||||||
▪Payments are now listed as either Positive or Negative Values on the Bank Reconciliation Form based on whether they are listing an actual Payment or a Voided Payment respectively. ➢Note: An interim version of the Bank Reconciliation dialog could create duplicate Transactions and those duplicates would not be reconciled. This issue has been corrected. |
||||||||||||
Any line item on the Disbursements Form may be paid with a Hand Check ▪This option is only available when you select a specific line item, Check Pay and modify the Check Type field by using the Drop-Down Selection List to select Hand Check. ▪A Check # must also be entered. |
||||||||||||
The revised Cash Requirements Report will now also report which (if any) Refund Checks will need to be printed. |
||||||||||||
Voided Checks - The Check Register Report will now show any Voided Check(s) with the original date of the Check and its Amount in the Credit column; that same Voided Check Amount will also be listed as an additional entry in the Debit column. |
||||||||||||
The substantially revised and enhanced Disbursements Form now lists of all outstanding Bills, has better error checking and information messages, and allows the User to easily Choose: ▪It also offers four (4) Payment Options for how each Bill will be Paid (i.,e., Auto Check, E-Pay,Credit Card, and Hand Check). ▪A Default Check Type may be selected (Auto Check, Credit Card or E-Pay). It may be overwritten for individual Bills. ▪If Credit Card is chosen as the Default Check Type, a Default Credit Card field will be displayed with a Drop-Down Selection List from which to Choose the appropriate default Credit Card. These Credit Card transactions will appear on the associated Credit Card Register. ▪Which Bills will be Paid, ▪The Amount that will be Paid on each ▪The Date on which the Payment is to be recorded. All of these payment methods may be used during the same Disbursements process with Check # and Confirmation # fields which may be filled in when that information is available. |
||||||||||||
▪To ensure that the Summary Amount and Count of Deposits and Payments are displayed properly on the Bank Reconciliation dialog, once the Reconcile column is Checked, these figures are now stored in a Reconcile Table Summary table. ▪A new set of Navigator Icons have been added to the Bank Reconciliation Form's Payments and Deposits Detail Grid: ▪Use the standard record movement Icons to move from record to record among the listed Payments (and/or Deposits). ▪Will not allow the Reconcile button to be selected if the Value in the Difference field is not $0.00 |
||||||||||||
▪A new AR Taxable? field has been added to the Sale-Purchase Item Form - replacing the original Taxable? field. ▪A new AP Taxable? field has been added to the Sale-Purchase Item Form - thus allowing Purchases and Sales to be identified as Taxable (by default) independently.
▪Canada Tax - This new "CanadaTax" option in the Company Settings dialog is available from within the Company tab of the Users Options Form and "Turns On" the newly revised Canadian Sales Tax tracking system. ▪AP National Tax - This is a new field in the Vendor Form's Edit View and allows new control of managing Taxable Purchases made within Canada. ▪AP Local Tax - This is a new field in the Vendor Form's Edit View and allows new control of managing Taxable Purchases made within Canada. |
||||||||||||
The new Credit Card Balance Widget provides a summary list in the form of a Grid with all of the identified Credit Cards in use (and their associated Balances) |
||||||||||||
A new set of Navigator Icons have been added to the Bank Reconciliation Form's Payments and Deposits Detail Grid: ▪Use the standard record movement Icons to move from record to record among the listed Payments (and/or Deposits). |
||||||||||||
A new Credit Card Reconciliation - Provides a comprehensive Credit Card Reconciliation dialog with: a)Two sections at the top: 1) Statement Date and Amount plus Last Reconciled Balance, and 2) Totals for selected Charges and Payments and a Reconcile Now button; and b)Two Transaction Lists: 1) the all open Charges for Bills and 2) the Payments made to the Credit Card Company (populated based on the specified Statement Date). c)There is a Navigator Menu at the bottom of the Charges and the Payments Girds on the Credit Card Reconciliation Form for moving between records |
||||||||||||
1.To ensure data integrity, the Credit Card Register dialog now blocks any attempt to insert, edit or delete an entry from a Closed Period, and/or to change a Date from a Closed Period to an Open Period. 2.To accommodate the new Credit Card Reconciliation Form, two new columns have been added to the Credit Card Register dialog. which are "Read Only": a.Reconciled - This box will be Checked if that Detail Line Item has been reconciled within the Credit Card Reconciliation Form b.Reconciled Date - This date, if present, represents the Date on which this Detail Line Item was reconciled within the Credit Card Reconciliation Form |
||||||||||||
A new Show History button has been added to the Credit Cards Form to show the new Reconciliation History Grid. ▪Also see Credit Card Reconciliation and Credit Card Register Chapter Topics to better understand this feature. ▪See the Credit Card Maintenance & Tracking Chapter Topic for an overview of how Credit Cards may be used within MKMS. |
||||||||||||
There have been some enhancements to the Print Checks process: ▪The Bills that are being Paid on each Check will be listed on the Check Stub will be ordered by Due Date then Invoice Number. ▪Up to 28 Bills may be now Paid on each Check ▪The system's Vendor ID will no longer be printed on the middle of each Check. |
||||||||||||
The system will now track and report on a Printed Check Stub (created originally using Auto Check) the following: 1)The Gross Amount of the Bill being Paid 2)Any Credit Note(s) which have been applied (Allocated) to that Bill 3)The Net Balance Due of that Bill 4)The Amount of the Check being produced will be that Net Balance Due |
||||||||||||
Once a Check has been Printed, a Payment record cannot be modified! Modifying a previously Saved and Allocated Payment, assuming a Check for which has not been Printed is allowed as follows: ▪Check Type - As noted below: 1)From Auto Check to Hand Check: OK but must enter the Check Number that was used. 2)From Auto Check to E-Pay: OK and system will insert the ePay record number, Payment Type of ePay, and accepts a Confirmation # if available. 3)From Auto Check to Credit Card - Not permitted. 4)From E-Pay to Auto Check: Ok and system will remove the ePay record number, Payment Type of ePay, but leaves the Confirmation # if entered. 5)From E-Pay to Credit Card - Not permitted. 6)From E-Pay to Hand Check: OK but must enter the Check Number that was used. 7)From Hand Check to anything - Not permitted because a Hand Check is already assumed to have been Printed. 8)From Credit Card to anything - Not permitted because all Credit Card transactions must be managed using the Credit Card Register. ▪Bank - May be modified, as needed. ▪Batch Number - May be modified, as needed. ▪Confirmation # - May be added or modified, as needed.
Several changes, enhancements and refinements to the functionality of transactions associated with the Payments Form have been implemented: ▪If a User selects Hand Check as the Check Type, and enters the Amount Paid and a Check Number, but does not save the Payments record, the Check Type may be changed to Auto Check and the system will clear the previously entered Check Number automatically. ▪When an unprinted Auto Check Payment exists for a Vendor, the User will no longer be able to create another Auto Check Payment for that same Vendor. If an additional Payment Amount is required, you may modify the existing Auto Check Payment record to include that additional Amount. ▪When Voiding a Payment (Check), if more than one Payment has been assigned the same Check Number (which is no longer allowed), all Payments with that Check Number will have Void Check entries created and all Allocations will be reversed. ▪When a User Print Checks, the system now assures that all Auto Check Payments are properly assigned a Check Number, even those from a previously Closed Period. |
||||||||||||
If the Payment to be Voided was made using 1] a Credit Card (see the "Paying a Bill using the Credit Card Pay option on that Bills Form" discussion in the Payments Chapter Topic), 2] a Hand Check, or 3] an Auto Check which has been printed (i.e., a Check Number was assigned to that Payment), the system will now: ▪Automatically Unallocate that (Credit Card, Hand Check,or Auto Check) Payment related to those Bill(s); and ▪Create a new (negative Value) Payment record (see "When Voiding a Payment" below) referencing the original Payment's record ID.
When Voiding a Payment, a new Voided Check record is created with a negative Payment value to "balance" the system. ▪Except for now being able to modify the Date Paid field (to a Date on or after the original Void Date), nothing else in this Voided Check record may be changed. ▪Therefore, the Void, Apply Auto and Apply options are disabled, and the Check Type, Bank, Credit Card, Check Number, and Batch Number fields are displayed as Read Only on the record. |
||||||||||||
Payments are now listed as either Positive or Negative Values based on whether they are listing an actual Payment or a Voided Payment respectively. ▪See Voiding a Payment above) respectively. |
||||||||||||
The Accounts Payable System Period Close dialog (only available when the General Ledger System has not been activated) has been substantially changed and now allows different Closing Stages on a month by month basis when Closing a Month in AP: 1)Closed - This Closing Stage restricts all posting to and from all modules ▪This Stage may be changed to Partially Closed, or Open, if necessary; or remain as Closed. 2)Open - This is the default Closing Stage and allows posting to and from all modules. 3)Partially Closed - This Closing Stage temporarily restricts all posting to and from all modules. ▪This Stage may be changed back to Closed, or Open, if necessary. |
||||||||||||
▪For our international users: The State field (which accepts up to 20 characters in the Edit View dialog) now also displays those 20 characters on the Browse View of the Vendors Form. (previously it only displayed the first 7 characters). ▪The History Grid on the Vendors Form now has the Total Value of any listed Purchase Order (i.e., column named "Gross") included in that Grid. |
||||||||||||
When a Sale-Purchase Item has a Check in the Inventory Item field on its Sale-Purchase Items Form it may not be removed until any Detail Line Item on any Purchase Order containing that Inventory related Sale-Purchase Item has been Received, Completed, and/or Billed. |
||||||||||||
You may now Record an (emergency and/or unscheduled) "in-the-field" Credit Card charge in the Credit Card Register Form: ▪It's not unusual for a Technician to have to buy miscellaneous Job Expense Items while still "in-the-field", and often he/she has to pay for them immediately using their Company Credit Card, ▪When an unscheduled Job Expense for a Commission, Expense, Material, and/or Sub Contractor is incurred "in-the-field" and that Job Expense was paid at the time of purchase with a Company Credit Card, that Job Expense may now be recorded as a Credit Card charge directly into this Credit Card Register with the associated Job Number inserted in this JobID field. ▪This Job Expense will also be recorded in the related Job tab (i.e., Commission, Expense, Material, and/or Sub Contractor) with a Credit Card Register ID ("CC Reg. ID") for a cross-reference. |
||||||||||||
The Purchase Date entered on the Bills Form determines the Transaction Date that will be used in the General Ledger System. ▪Therefore, if a Bill is post-dated (a "future" date is entered), the Accounts Payable Account balance reported in the General Ledger will not reflect that Billed Amount until on or after that (post-dated) date arrives.
To prevent an erroneous Bill from being created/modified, a Bill that originated from a Purchase Order may not have a minus Value in the Quantity field of any Detail Line Item.
The Bills Form will no longer separate and post the Sales Taxes that are charged to special Locale and National Sales Tax Expense Accounts in the General Ledger. ▪Instead, with the exception of Canada Sales Tax, these Sales Tax charges will be included in the Accounts Payable Liability Account, and the Expense Account associated with the Sale-Purchase Item (as well as posting that expense to the Current Earnings Equity Account and the special Earnings Posting Account).
Deleting an existing Division Code assigned to a Bill: ▪If a Division Code is assigned to the Bill Header (because the Vendor's default Division was inserted automatically) but you do not want any Division Code assigned: a)Click within the Division field and Press your keyboard's Delete key to remove the Division Code from the Bill Header. b)If one or more Detail Line Items have already been entered, the Division Code assigned to them (internally) will also be removed when the Bill Header Division Code is deleted. ▪However, once a Payment has been Allocated to a Bill, that Bill cannot be changed in any manner without first Unallocating the Payment. |
||||||||||||
To ensure the stability of Credit Card Maintenance setup and subsequent usage: ▪When the General Ledger is not installed, once a Vendor is assigned to a Credit Card and any Financial Transaction is posted to that Credit Card, the Vendor field on the Credit Card Maintenance Form is now disabled (i.e., cannot be changed). If the Credit Card was never used, it may be deleted, if needed. ▪When the General Ledger is installed, once the General Ledger Account, Vendor, and Payment Item is assigned, and any Financial Transaction is posted to the Credit Card, these three fields are now disabled (i.e., cannot be changed). If the Credit Card was never used, it may be deleted, if needed. |
||||||||||||
You may now Process Credit Card Refunds using a Credit Memo ▪When a previous Payment for a Bill was made using a Credit Card and your Company is now eligible for (and getting) a Refund this process may now be recorded within MKMS as follows: a)Create a Credit Note for the Bill that was Paid using a Credit Card b)Use the Credit Card Pay option on that Credit Note Form to post a credit to that Credit Card Account's Register. c)The appropriate General Ledger System Financial Transactions will be posted automatically. |
||||||||||||
To ensure the proper posting certain Financial Transactions, the General Ledger Asset Account assigned to each Bank maintenance record cannot be a Mandatory Account. |
||||||||||||
|
|
|
▪A new Refresh Balance option on the Credit Card Form will recalculate the display the most current Balance Due on that Credit Card Account.
For General Ledger System Users: To ensure the proper posting of all Credit Card Financial Transactions a)The General Ledger Liability Account assigned to a Credit Card record cannot be a Mandatory Account, b)Each Credit Card maintenance record must be assigned to a different Liability Account Number specifically defined for that Credit Card. c)Once a Sale-Purchase Item has been associated with a Credit Card, the Purchase GL# and Item Type (Purchase) fields may not be changed. d)Once assigned to a Credit Card, that Purchase GL# cannot be assigned to another Credit Card. |
||||||||||
|
|
|||||||||||
|
Inventory Tracking/Job Costing
|
|||||||||||
Converting a Proposal to a Job
|
a)When Converting a Proposal to a Job, the order of the Proposal Items on that Proposal is now duplicated in the Item List sub-tab of the Inventory tab on the Job Costing Form. b)When creating a Work Order for a Job Task, that Work Order's Parts List tab may be populated using the Pick From Job option which now imports those parts from the Item List sub-tab of the Inventory tab on the Job Costing Form in the same order as originally entered in that Item List. c)When parts from that Parts List tab are Used, they are now inserted into the Mat.\Inv. (Material\Inventory) Drop-Down Info Box in the same order as those parts were listed in the Parts List tab. |
|||||||||||
The revised Parts List tab on the Work Order Form has some new features and internal validations to ensure the proper tracking of Inventory Items: 1.A Warehouse column (populated with the name of the default Warehouse that previously identified in the Inventory Tracking section of the Inventory Options tab in the User Options Form) 2.A Transfer option - Because the system's default Warehouse (see #1 above) may not be the location from which a Part is to be withdrawn, you may use the new Transfer option to identify and Transfer a Part to the Warehouse from where it is to be withdrawn. a.Once the Transfer is executed, when that Part is Used, it will appear on the Inventory Materials Drop-Down Info Box with that corrected (transferred) Warehouse name. b.However, if the User forgot to use the Transfer option, that Warehouse assignment may still be changed to the correct one from within the Inventory Materials Drop-Down Info Box by using the Warehouse column's Drop-Down Selection List. |
||||||||||||
Deleting a Work Order with Inventory and Non-Inventory items from the Inventory/Materials Info Box is now much easier: 1)When there are Inventory Items entered in the Inventory/Materials Info Box of a Work Order, if the User attempts to delete that Work Order, the program would present this error: "Error -99999: RAISERROR executed: Inventory must be cleared before deleting this work order." 2)When there are Non-Inventory Expense Items entered in the Inventory/Materials Info Box of a Work Order, if the User attempts to delete that Work Order, the program would present this error: "Error -198: Primary key for row in table 'WorkOrder' is referenced by foreign key 'WorkOrder' in table 'WorkOrderMaterialDetail'" ▪In either case, the User had to manually delete all of those Inventory and Non-Inventory items before the Work Order could be deleted.
Now, the program will display a Query asking the User if all Items in the Inventory/Materials Info Box should be deleted. ▪If User answers "Yes", the program now deletes all of those Inventory/Materials Info Box items immediately. |
||||||||||||
On the Parts List tab of the Work Orders Form there are new data entry conditions established to accommodate the features outlined above: 1.Add new Part - You cannot use the Add ▪If you attempt to do so, a "This WO is coming from a job, you must enter the item in "Job Costing \ Inventory \ Item List" and reserve it and then use "Pick from Job" button on this screen." reminder message will be displayed
2.Pick From Job - When the Work Order was created from a Job, and as part of that Job Costing information, an Item List was created, this Pick From Job option becomes active. ▪However, prior to using the Pick From Job option, the Warehouse from which the Inventory is to be taken must have already been identified in the Inventory Reserved sub-tab of the Inventory tab on that Job Costing Form
3.The Transfer option is only available when Inventory Items have already been added to the Parts List tab.
4.Transfer a Part - You cannot use the "Transfer" option when the Work Order was created for a Job Task in the Job Costing record. ▪This must be done using the Reassign/Transfer option on the Inventory Reserved sub-tab of the Inventory tab on the Job Costing Form ▪If you attempt to do so, a "This WO is coming from a job, you must use "Reassign/Transfer Inventory" button in "Job Costing \ Inventory \ Inventory Reserved" reminder message will be displayed. |
||||||||||||
|
|
An issue where: a)An Inventory Item and the Warehouse from which it was taken was recorded on a Work Order in the Inventory/Material Info Box; b)Then the Warehouse from which it was taken was changed (corrected) to a different Warehouse; c)But the Inventory Counts were not properly updated (e.g., added back to the original Warehouse and deducted from the newly assigned Warehouse) has been identified ▪The cause of the problem has been identified and corrected.. |
|||||||||||
|
Inventory/Materials Drop-Down Info Box
|
The initial focus on the Inventory/Materials Drop-Down Info Box on a Work Order Form has been set to the Item field to speed data entry. The Date Used field will default to Today and the User will not be allowed to re-set it to an invalid date (e.g., future, closed month, date prior to the Request Date). |
|||||||||||
Converting a Proposal to a Job
|
1)When Converting a Proposal to a Job, the order of the Proposal Items on that Proposal is now duplicated in the Item List sub-tab of the Inventory tab on the Job Costing Form. 2)When creating a Work Order for a Job Task, that Work Order's Parts List tab may be populated using the Pick From Job option which now imports those parts from the Item List sub-tab of the Inventory tab on the Job Costing Form in the same order as originally entered in that Item List. 3)When parts from that Parts List tab are Used, they are now inserted into the Mat.\Inv. (Material\Inventory) Drop-Down Info Box in the same order as those parts were listed in the Parts List tab. |
|||||||||||
The revised Parts List tab on the Work Order Form has some new features and internal validations to ensure the proper tracking of Inventory Items: 1.A Warehouse column (populated with the name of the default Warehouse that previously identified in the Inventory Tracking section of the Inventory Options tab in the User Options Form) 2.A Transfer option - Because the system's default Warehouse (see #1 above) may not be the location from which a Part is to be withdrawn, you may use the new Transfer option to identify and Transfer a Part to the Warehouse from where it is to be withdrawn. a.Once the Transfer is executed, when that Part is Used, it will appear on the Inventory Materials Drop-Down Info Box with that corrected (transferred) Warehouse name. b.However, if the User forgot to use the Transfer option, that Warehouse assignment may still be changed to the correct one from within the Inventory Materials Drop-Down Info Box by using the Warehouse column's Drop-Down Selection List. |
||||||||||||
On the Parts List tab of the Work Orders Form there are new data entry conditions established to accommodate the features outlined above: 1.Add new Part - You cannot use the Add ▪If you attempt to do so, a "This WO is coming from a job, you must enter the item in "Job Costing \ Inventory \ Item List" and reserve it and then use "Pick from Job" button on this screen." reminder message will be displayed
2.Pick From Job - When the Work Order was created from a Job, and as part of that Job Costing information, an Item List was created, this Pick From Job option becomes active. ▪However, prior to using the Pick From Job option, the Warehouse from which the Inventory is to be taken must have already been identified in the Inventory Reserved sub-tab of the Inventory tab on that Job Costing Form
3.The Transfer option is only available when Inventory Items have already been added to the Parts List tab.
4.Transfer a Part - You cannot use the "Transfer" option when the Work Order was created for a Job Task in the Job Costing record. ▪This must be done using the Reassign/Transfer option on the Inventory Reserved sub-tab of the Inventory tab on the Job Costing Form ▪If you attempt to do so, a "This WO is coming from a job, you must use "Reassign/Transfer Inventory" button in "Job Costing \ Inventory \ Inventory Reserved" reminder message will be displayed. |
||||||||||||
|
Inventory/Materials Drop-Down Info Box
|
The initial focus on the Inventory/Materials Drop-Down Info Box on a Work Order Form has been set to the Item field to speed data entry. The Date Used field will default to Today and the User will not be allowed to re-set it to an invalid date (e.g., future, closed month, date prior to the Request Date). |
|||||||||||
Added a new option on the Job Costing Form to "Un-complete a Job" which will set the field Completed=F and CompleteDate=null. This feature was needed because the system normally does not allow Inventory Items to be added or deleted to/from an Invoice that that was created from a Job. ▪If the CompleteDate is within a closed period, the program will raise the error "Period closed to all edits" ▪The system now also ensures the CompleteDate is not within a closed period when completing or un-completing a Job. |
||||||||||||
To avoid the loss of Job Costing data integrity. once a Subscriber has been identified and a Work Order, Invoice, or Inventory Used entry has been created, the Subscriber assigned to that Job cannot be changed. ▪If an attempt is made to do so, a reminder message will now be displayed. |
||||||||||||
There is a new Job Tasks Report dialog which now provides a list (in a Grid format) of Job Tasks which may be filtered based on the Job Task's (1) Scheduled Start Date, (2) Start Date, (3) Estimated Completion Date, or (4) Completed On Date; and the list may include All Job Tasks, only Completed Job Tasks, or only Not Completed Job Tasks; all of which may be Printed as a report, and/or Exported to an Excel style Spreadsheet. |
||||||||||||
|
|
The Open Job Items dialog has been enhanced with two Go To options: 1.Go To Purchase Order - Right-Click on any Purchase Order line item to display its associated Radial Right-Click Menu. This provides access the Go To Purchase Order Option which displays the related Purchase Order Form. 2.Go To Work Order - Right-Click on any Work Order line item to display its associated Radial Right-Click Menu. This provides access the Go To Work Order Option which displays the related Work Order Form. |
|||||||||||
|
|
|||||||||||
The revised Warehouse maintenance Form has a new Transfer option which provides the ability to Transfer one or more (multiple) Inventory Items from the currently selected Warehouse, to another Warehouse of the Users choosing. |
||||||||||||
The Divisions Form now allow a Company to identify a Default Warehouse for any Division ▪Thereafter, when Invoices, Purchase Orders, Bills and/or Work Orders are created for a Subscriber and/or Vendor who is assigned to a Division (a Division assignment to a Subscriber and/or Vendor is optional), by default, any Inventory related Transaction posted to one of those documents will automatically be assigned to that Warehouse but that Warehouse assignment may be changed when needed. |
||||||||||||
The revised Sale-Purchase Items Form now has a WIP (Work in Progress) field with the Quantity of those items which have been identified as Inventory Items. |
||||||||||||
Tracking Work in Progress 1.The Inventory Usage Report will now exclude any Inventory Items that are WIP Inventory (shown in the Sale-Purchase Items Form in its new WIP field); and will includde the usage once these Inventory Items come out of WIP Inventory (i.e., have been Invoiced). 2.When an Inventory Item is Used on the Job Costing Form which was previously Reserved on that Job Costing Form the Committed on Hand Count will be decreased, and the WIP (Work in Progress) will be increased by the Quantity that was recorded as Used. 3.When an Inventory Item is Used on the Job Costing Form which was not previously Reserved on that Job Costing Form the Available on Hand Count will be decreased, and the WIP (Work in Progress) will be increased by the Quantity that was recorded as Used.
▪When Inventory Usage is recorded on a Work Order Form: 1.If the Service Request was created through the Job Costing Form, and those required Inventory Item(s) were previously identified on that Job Costing Form as Reserved a.The On Hand Count will be decreased by the Quantity that was recorded as Inventory Items Used on the Inventory\Material tab of the Work Order Form. b.The Available On Hand will be decreased by the Quantity that was recorded as Inventory Items Used on the Inventory\Material tab of the Work Order Form. c.The WIP (Work in Progress) will be increased by the Quantity that was recorded as Inventory Items Used on the Inventory\Material tab of the Work Order Form.
2.If the Service Request record was created directly on the Inventory\Material tab (not created from a Job), d.The On Hand Count will be decreased by the Quantity that was recorded as Inventory Items Used on the Inventory\Material tab of the Work Order Form. e.The Available On Hand will be decreased by the Quantity that was recorded as Inventory Items Used on the Inventory\Material tab of the Service Request Form. f.The WIP (Work in Progress) will be increased by the Quantity that was recorded as Inventory Items Used on the Inventory\Material tab of the Work Order Form.
3.When a Service Request - which had Inventory Usage recorded on the Inventory\Material tab of a Work Order Form (see "When Inventory Usage is recorded on a Work Order Form" above) - is then Invoiced g.In the Inventory Tracking System: As part of the Completing the Service Request, when an Invoice is created for the services performed and there were Inventory and Materials recorded as required for the completion of that Work Order, The WIP (Work in Progress) Count will be decreased by the Quantity that was recorded on the Inventory\Material tab of the Work Order Form
4.When a Service Request - which had Inventory Usage recorded on the Inventory\Material tab of a Work Order Form - is Closed, but Not Invoiced (e.g., Warranty Repair, Free-bee, for Office use): h.In the Inventory Tracking System: As part of the Completing the Service Request, when no Invoice is created for the services performed but there were Inventory and Materials recorded as required for the completion of that Work Order, i.The WIP (Work in Progress) Count will be decreased by the Quantity that was recorded on the Inventory\Material tab of the Work Order Form |
||||||||||||
▪Three new fields have been added to the Job Costing Form's revised header: i.Estimated Completion - - Use the Drop-Down Calendar/Date Entry field to enter the expected Finish Date for this Job. ii.Proposal - No entry required. If this Job Costing record is being created by Converting a Proposal to a Job, the Proposal Number is automatically inserted. iii.Proposed RMR - No entry required. If this Job Costing record is being created by Converting a Proposal to a Job, the monthly RMR Rate offered on that Proposal is inserted.
▪There is a new Job Invoice Multi Usage dialog - When the Use Inventory option is selected on the Item List sub-tab or the Inventory Reserved sub-tab of the Inventory tab of the Job Costing Form, the new Job Invoice Multi Usage dialog will be displayed. The User may identify: oEach Inventory Item that has been used on a Job oALL items in the list as having been used oThe Warehouse from which each Item was taken oHow many (Quantity) were used oWhether an Inventory Item should be inserted into the Subscriber's Installed Equipment Form.
➢Note: The most recent Forms.txt file must be installed and the appropriate User Access Rights to the Job Invoice Multi Usage dialog must be granted. |
||||||||||||
The Inventory Replacement Value report has been moved to the Inventory Tracking Reports Menu. ▪This report option will only be displayed when the Inventory Tracking module has been activated (Registered). |
||||||||||||
The revised Job Costing Header has been updated to include Scheduled to Start and Estimated Completion (dates), plus a Job Status field |
||||||||||||
This new Job Status Form is used to define the Progress of Job Costing records (e.g., Status of the Job as it progresses from creation to completion) ▪The Job Status of a Job Costing entry is initially assigned when it is created (see above), and then periodically updated as that Job progresses toward completion. |
||||||||||||
The revised Item List sub-tab on the Inventory Tab of the Job Costing Form provides many capabilities (e.g., maintain a parts list and print it as needed, Order news parts, reserve parts for this Job, identify the parts that were "used"). |
||||||||||||
The Job Tasks Tab on the Job Costing Form has a new Estimated Completion Date field which is used to identify when a specific Job Tasks should (is expected to) be completed. This new field is also used with the new Job Tasks Aging As Of report described below. |
||||||||||||
These is a new Job Tasks Aging As Of report provides an Open Job Task listing (an Open Job Task does not have a Completed date entered) in a Grid format with (among much other data) the Age (in Days) of those Job Tasks, based on the number of Days between the Estimated Completion Date (entered on the Job Task line item) and a User specified As Of Date, and may be Printed as a report, and/or Exported to an Excel style Spreadsheet. |
||||||||||||
When a Purchase Order Form is displayed by Clicking the Purchase Orders Tab on the Job Costing Form, it may be modified as may be needed (and those modifications will update any associated information within the Job Costing record). ▪However, a new Purchase Order may not be created there. |
||||||||||||
The new Inventory WIP Report lists all Inventory Items' Counts that were transferred to Work In Progress via a Job and/or Work Order entry; and may be produced within the Date Range specified, or for an As Of date, and subject to certain filtering and selection options. |
||||||||||||
A new Work In Progress field (WIP) on the Sale-Purchase Items Form tracks that WIP Quantity of Inventory Items as follows: ▪The WIP Quantity is increased when an Inventory Item is Used on a Job; and/or recorded in the Inventory/Materials tab on a Work Order Form. ▪The WIP Quantity is reduced when those Inventory Items recorded on the Inventory/Materials tab on a Work Order are actually Invoiced to the Subscriber after the Work Order is completed; or when a Work Order associated Job Task is Invoiced, and/or the Job itself is marked as Completed. |
||||||||||||
The new Inventory Transfer Report is a fully functional data grid which lists the transfer details for those Inventory Items which have been Transferred from one Warehouse to another, within a Date Range specified by the User, with this data presented as a Grid. ▪As with all fully functional data grids, the User selected columns of data may be filtered, sorted, formatted; and then Printed and/or Exported, as needed. |
||||||||||||
Reason for Change: The note entered in the Edit Warehouse Inventory Form describing why an Inventory Adjustment was made, will now appear in the Reason column of the Inventory Adjustments Report. |
||||||||||||
The new Inventory WIP Report lists all Inventory Items' Counts that were transferred to Work In Progress via a Job and/or Work Order entry, executed within the Date Range specified, and subject to certain filtering and selection options. |
||||||||||||
Exclude Zeros - This new Check box option has been added to allow the User to eliminate any Inventory Items that have no Available On Hand and no Committed On Hand quantities from the report. |
||||||||||||
▪The revised Inventory Listing report has a new sorting option: Sale Item Group - You may now sort the list of Inventory Items by their assigned Sale Item Group Name, then within each Sale Item Group, by the Inventory Item's Part Number (Item ID). ▪The "Used" column has been renamed "Used Value" and an explanation of how it's calculated has been added. |
||||||||||||
The new Inventory Listing (Grid) Report provides a complete list of the Values and Quantities of Inventory Items - based on the "As Of Date" selected and the customized columns, order, format, and filters selected (explained below). ▪Understanding the Cost and Value columns on the Inventory Listing Report: The various Quantities listed on this report are those that are maintained by the Inventory Tracking System as Inventory Items and are tracked as follows: i.Inventory Used in Job Costing (see the Inventory and related sub-chapters in the Job Costing section of the Help Files) ii.Ordered (see the Purchase Orders chapter) iii.Purchased (see the Vendor Bills chapter) iv.Sold (see the Invoices chapter) |
||||||||||||
Previously, in the Item List sub-tab of the Inventory Tab in the Inventory Tracking/Job Costing system, when the Use Inventory function was accessed, the system took a long time to insert that Inventory Usage record because the Use Inventory function ALWAYS attempted to update the Kits table, even though it was rarely necessary. ▪Now the system determines - as an Inventory Item is identified as Used in the Job Invoice Multi Usage dialog, whether or not that Inventory Item was assigned to a Kit, then only calls the Kit Recalculation procedure when it's actually needed. |
||||||||||||
The functionality of the Inventory tab - particularly as it related to Work in Progress - and its Inventory Used, Inventory Reserved, and Inventory List sub-tabs have been substantially redesigned (use those Chapter Topic links to access the revised instructions for Ordering, Reserving and Using Inventory Items). |
||||||||||||
Now when you Choose the Job Listing option to display a list of all Job Costing records previously created for the currently selected Subscriber, that Job Listing includes the Proposal's Title and thje Proposal's Number when that Job Costing record was converted from a Proposal. |
||||||||||||
There is a new Job Aging As Of full functioning Grid dialog which provides an aged listing in a Grid format of the Balances still owed on Job Costing records, based on a User specified As Of Date, and may be Printed as a report, and/or Exported to an Excel style Spreadsheet. |
||||||||||||
There is a new Job Listing Aging As Of dialog which provides a listing in a Grid format of the Job Costing records which have not been Completed. ▪The records are initially sorted by their Start Date, and for each Job Costing record the Grid lists (among many other fields) the number of days between the Estimated Completion Date and an As Of date enter by the User, and may be Printed as a report, and/or Exported to an Excel style Spreadsheet. ▪A Radial Right-Click Menu offers Go To Job and Go To Subscriber options for the Grid's currently selected line item |
||||||||||||
There is a new Job Work Sheets (New Grid) which provides a listing in a Grid format of the Job Costing records based on a User specified status of the Start and End Date fields, and may be Printed as a report, and/or Exported to an Excel style Spreadsheet. ▪There is a Show Job Tasks Check box which, when Checked, will display a Sub-Grid (on the right side) listing the details for all of the Job Tasks entered for the selected Job. a)As with the main Grid, the columns for this Job Task Sub-Grid may be User specified. b)A User may Double-Click on a Job Task record in this Sub-Grid to open any associated Work Order Form c)A Radial Right-Click Menu offers Go To Job and Go To Subscriber options for the Grid's currently selected line item |
||||||||||||
Since the Job Work Sheets (New Grid) was added to STARK 35, a new Show ALL Open Jobs Check box option on the Job Work Sheets (New Grid) will allow the User to quickly list all of the Jobs which have not been Completed. ▪When Checked (and Retrieve Data is selected), the Job Costing System will retrieve and list all open Jobs regardless of the specified Start and End Date Range. |
||||||||||||
|
|
Notes - You may now enter comments deemed important for a Job and can: ▪Double-Click within the Notes field to a basic Rich Text Editor dialog that allows bold, italics and underlines of text, and the selection of Font type, it's size, color, and highlight. ▪Have those Notes (including all Rich Text Editor enhancements) print on the Job Work Sheet ▪That information will vertically expand the size of the Job Information box on page 1 of a Job Work Sheet. |
|||||||||||
|
|
The Job Tasks tab on the Job Costing Form now includes an Import Template option.
The Job Tasks tab now has two additional columns: 1)Comments - A Drop-Down Notes Box for recording comments about the Job Task. 2)Employee - A Drop-Down Selection List containing all of the Employees assigned an Employee Type of either Technician or Administration ▪The list shows the Name, Employee Code and Status (i.e., Active/Inactive) of each of those Types of Employees |
|||||||||||
As Users adopt more of the powerful Job Costing capabilities in MKMS, those Jobs and their associated Job Task entries become more detailed (and complete), and so managing and updating the Job Tasks' data Grid was getting harder. ▪To alleviate this, the Job Tasks Grid now allows Sorting and Filtering capabilities |
||||||||||||
There is a new Job Tasks Report dialog which provides a list (in a Grid format) of Job Tasks which may be filtered based on the Job Task's (1) Start Date, (2) Estimated Completion Date, or (3) Completed Date; and the list may include All Job Tasks, only Completed Job Tasks, or only Not Completed Job Tasks; and it may be Printed as a report, and/or Exported to an Excel style Spreadsheet. |
||||||||||||
When a Sale-Purchased Item is identified as a Kit by Checking the Kit Designation box on that Form, once the entry is completed and Saved, the system will now ask the User if they want to enter the Kit's Components now. ▪If they do not make those Kit Component entries, a second (stronger) reminder with be displayed. |
||||||||||||
Inventory Tab Item List sub-tab |
A new Comments column has been added to the Item List sub-tab within the Inventory Tab of the Job Costing Form. ▪Double-Click within the Comments field to Open a Rich Text Editor to enter a Comment about the Inventory Item. ▪If/when a Work Order is created for the Job, the Comment entry will be transferred to the Work Order's Parts List tab and if/when that Parts List Item is identified as used in the Inventory/Material Info Box of that Work Order, it will be inserted there as well. |
|||||||||||
The Inventory Usage Report has been enhanced to include: 1)Order By - Work Order 2)Work Order - If the Work Order Order By option was selected above, you may now include All of your Work Orders in the report, or the Inventory Usage of One specific Work Order. 3)Selection Type - You may now further Limit the report to the Inventory Items used on a Job, a Work Order, a Sale (Invoices), or include All (the default). i.Job - Include only Inventory Usage from Jobs. ii.Work Order - Include only Inventory Usage from Work Orders. iii.Sale (Invoice) - Include only Inventory Usage from Sales iv.All - Include all Inventory Usage |
||||||||||||
|
|
|||||||||||
A new Due Date column (field) has been added to the Job Tasks tab on the Job Costing Form. ▪By allowing each Job Task to have its own Due Date, the Job Tasks Aging As Of Report and the Job Tasks Report can that field to sort, select, and report that Date and all the data associated with it. |
||||||||||||
The Job Tasks Aging As Of Report has been improved with the addition of a Due Date column. Now, the Job Tasks Aging As Of dialog provides an Open Job Task listing (an Open Job Task will not have a Completed date entered) in a Grid format with (among much other data) the Age (in Days) of those Job Tasks, based on the number of Days between the Due Date (entered on that Job Task line item) and a User specified As Of Date. |
||||||||||||
An additional selection item - Due Date (DueDate) - has been added to the Select Date field Drop-Down Selection List thereby providing that additional functionality. |
||||||||||||
Inventory Tracking/Job Costing
|
1.You are now able to insert Negative Quantities for Inventory and/or Non-Inventory items in Job Costing on the Item List sub-tab within the Inventory tab (You will not need to Reserve these Negative Inventory and/or Non-Inventory item entries). a.The purpose of a Negative Inventory item entry in the Item List is to be able to use that Negative Quantity on a Work Order to signify "returning" equipment to "Stock". b.Inserting a Negative Inventory line item in the Material/Inventory Drop-Down Info Box on a Work Order does not affect Committed On Hand Quantity on the associated Sale-Purchase Item Form . c.Instead, it will increase Available On Hand and decrease WIP on that associated Sale-Purchase Item Form d.When you complete the Work Order, the WIP Quantity will go back up.
2.Also, Negative Quantities for Inventory and/or Non-Inventory items may be inserted directly into a Job Costing record using the Item List sub-tab within the Inventory tab.
3.The purpose of a Negative Non-Inventory item in the Item List is to be able to use that Negative Non-Inventory Quantity to signify a discount on the billable cost of the Work Order. e.In this case, when you create an Invoice for the Work Order, it would match the Proposal (Discount).
4.When a Negative Quantity is used, that Negative Quantity on a Work Order to signify "returning" equipment to "Stock". f.Therefore, the Inventory Item is recorded in the Default Warehouse. g.The Negative Quantity (in the Material/Inventory Drop-Down Info Box on a Work Order) may not be changed to a Positive Quantity (an error will be presented if this is attempted). h.If the Negative Quantity was entered in error in the Material/Inventory Drop-Down Info Box on a Work Order , that record must be deleted; and then if appropriate, a Positive Quantity enter may be made. |
|||||||||||
|
|
|||||||||||
|
|
|||||||||||
|
Inventory Tracking/Job Costing
|
To improve the stability of the Accounting Processes as they relate to the use of Sale-Purchase Items, several changes have been made to better enforce internal accounting system rules: Users may no longer change the Item Type of a Sale-Purchase Item which has already been used after the General Ledger System has been activated (see the GL Setup Wizard chapter for more information).
a)If a Sale-Purchase Item is found in any Invoice, Proposal or Work Order and the Sale-Purchase Item is changed to an Item Type of "Purchase", the system will raise the error "You cannot change the "Item Type" to "Purchase" for an item used on Invoices, Proposals or Work Orders." b)If a Sale-Purchase Item is found in any Bill or Purchase Order and the item changed to a type "Sale", the system will raise the error "You cannot change the "Item Type" to "Sale" for an item used on Bills or Purchase Orders."
▪The User would need to create a new Sale-Purchase Item if they wanted to make that change, then make the initial item "Inactive". Why? After a Sale-Purchase Item is in use, should the Item Type is changed, the wrong General Ledger Accounts would be updated when that Sale-Purchase Item is used in a Financial Transaction, thereby forcing the General Ledger System Out of Balance! |
|||||||||||
Each Invoice, Bill, and Purchase Order Detail Line Item stores the specific General Ledger Financial Transactions that were posted internally for that line item.
|
||||||||||||
WIP Inventory - This is the Asset Account for the Inventory Items that have been identified as part of a Work In Progress. ▪If the Inventory Tracking System has not been Setup (e.g., purchased, installed, and initialized), this WIP Inventory entry in the Re-Declare Mandatory Accounts Form is now optional, not mandatory. |
||||||||||||
There are new Job ID and Job Category fields added to the General Journal Form which allows a General Journal Transaction to be posted (directly charged to a Job) for a Commission, Expense, Labor Cost, Material Cost and/or Sub-Contractor Fee Job Costing Category, to a Job that's identified using the new Job Search dialog to select the appropriate Job ID. ▪When the new Job ID field is populated on the General Journal Form: a)The system will require that a Job Cost Category be identified (using the Drop-Down Selection List in the new Job Category field). b)This combination (i.e., Job ID, Job Category) - along with the General Journal entry's Debit or Credit Amount entered - will create the corresponding Job Costing Transaction c)The Date of this Job entry will be the General Journal entry's Transaction Date, and the Description of this Job entry will be the Description entered for the General Journal entry.
When the selected General Ledger Account Number in a General Journal entry is associated with a Credit Card: ▪As this General Journal entry is saved, the system will create a corresponding Credit Card Register entry setting the Date, Description, Department and Division in that Credit Card Register entry using the General Journal entry's Transaction Date, and Description, plus the Department and Division information if entered.. ▪If the General Journal entry is posted as a Debit, the Credit Card Register entry Amount will be recorded as a negative value, otherwise it is posted as a Credit Amount and will be recorded as a positive value. ▪Also see the "Creating a Job Costing System entry directly from the General Journal" discussion in the General Journal Entries chapter. |
||||||||||||
As part of the capability tro identify a Job Costing Expense entry (Commissions, Expenses, Labor Costs, Material Costs and/or Sub-Contractor Fees) using the General Journal, whenever a General Journal entry is posted to a Bank or Credit Card (GL Account), the corresponding (Bank or Credit Card) Balance field will now be updated. |
||||||||||||
When Modifying a General Journal Transaction Set, the new Job ID and/or Job Category fields (see above) may also be modified. ▪When a Job ID is removed (the field is cleared), the system will remove Job Category and also delete the Job Costing entry in the Job Costing tab (i.e., Commission, Expense, Labor Cost, Material Cost, Sub-Contractor Fee) associated with this General Journal entry. ▪These Job Costing entries (i.e., Commission, Expense, Labor Cost, Material Cost, Sub-Contractor Fee) created in the General Journal may not be deleted in Job Costing. When necessary, the Review GJ Transactions Form may be used for this purpose by Reversing that entry.
Also: ▪If the Subscriber is removed (the field is cleared), the corresponding History record will also be deleted. ▪If the Vendor is removed (the field is cleared), the corresponding History record will also be deleted. ▪When modifying a Transaction for a General Journal Account associated with a Credit Card, the corresponding Credit Card Register will be modified accordingly. ▪When Reversing a Transaction for a General Journal Account associated with a Credit Card, a new Reversing entry (the Amount value will be the opposite of the original Amount) will be inserted in the corresponding Credit Card Register. |
||||||||||||
The General Ledger System has been completely redesigned for MKMS STARK (see the New General Ledger Features in STARK 35, the General Ledger Setup Overview and the General Ledger System Chapter Topics for more information) to be more flexible and powerful for all sizes of businesses. |
||||||||||||
This new Deferred Revenue Setup procedure is used to properly initialize the Deferred Recurring Revenue feature in the MKMS Accounts Receivable module and supported by the General Ledger module.
When the Deferred Revenue Setup process is completed, the User must Click the OK button to acknowledge the successful completion of the Deferred Revenue Setup procedure. ▪The Defer Recurring Revenue ("DeferRecurringRevenue") option in Company Settings will be set to True ("T"). ▪As indicated in a new "Complete! - Deferred Revenue tracking is now active." message, the User is now reminded that they must Logout and then Log In again to fully activate the Deferred Revenue process.
Earned & Deferred Revenues are calculated on a Monthly basis. ▪Sale Day - The Sale Date (Sale Day) of the Invoice being created is not always the "First of the Month" ▪Period Covered Day - The Period Covered Day - which is identified in the Billing Cycle record - is now used to determine when the Recurring Revenue related Services will start being provided (i.e. Earned). ▪Bill in Advance - This means that the Sale Date recorded on the Invoice is within the month before the Period Covered Day on the related Billing Cycle.
See the Automating the calculation of Earned and Deferred Revenue discussion in the Deferred Revenue Setup chapter for additional information. |
||||||||||||
This new General Ledger Checkpoints dialog is used to create and track the manual and system created Checkpoints data which is also "grabbed" when a Month or Year is Closed.
Understanding Checkpoints created from the Trial Balance Report: i.When a Trial Balance Report is created for All Divisions and All Departments, that report's data set is inserted as a Checkpoint. ii.When a Trial Balance Report is created for a set of one or more selected Divisions and/or a set of one or more selected Departments, that report's data set is not inserted as a Checkpoint. |
||||||||||||
After any General Ledger Checkpoint is created (manually or automatically) or an Accounting Period is Closed, the General Ledger Notification dialog is automatically displayed the next time an authorized Employee Logs Into MKMS. |
||||||||||||
The new Account Register Form provides a selectable List of every Debit and Credit Financial Transaction that was posted to a specific General Ledger Account Number - based on a User specified Date Range, various User definable Filters for Source , Document Type, Department and/or Division criteria. ▪This Account Register (Form) documents exactly how each Financial Transaction was recorded to the selected General Ledger Account. |
||||||||||||
There is a completely revised Transaction File dialog which now has many additional features: ▪The User may specify a Date Range and view all General Ledger System Financial Transactions (Debits and Credits) which were posted within that Date Range, ▪Options to specify exactly which Financial Transactions will be listed based on General Ledger Account Number, Division Code, Department Number, and/or Document Type ▪Look-up the original document that created the Financial Transaction, ▪Print (and/or export) a report of those selected Financial Transactions. |
||||||||||||
The Insert, Delete, and Left and Right Arrow Navigation Keys on your keyboard, plus the Ctrl+S combination (for Save) have been implemented on the General Journal Entries Form. |
||||||||||||
|
General Ledger Financial Statements & Reports
|
There are now predefined types of Account Divisions (which are not related to your Company's Divisions if they are being used). ▪All General Ledger Financial Statements and Reports are ordered by Account Divisions as follows: 1.Assets, Secondary Assets 2.Liabilities, Secondary Liabilities 3.Equity 4.Sales, Secondary Sales 5.Expenses, Secondary Expenses
▪One Account Division (indirectly - because an Account Group is assigned to each General Ledger Account, and each Account Group must be assigned to an Account Division) will be associated to every General Ledger Account . ▪Although not an actual Maintenance Entry (these Account Divisions cannot be changed), they are an integral part of the General Ledger System and allow for far greater flexibility when creating your Company's General Ledger Accounts (i.e., Chart of Accounts). |
|||||||||||
Account Groups are used to further sub-sort General Ledger Financial Statements and Reports in a more specific way then the five Primary and baker's dozen of additional Secondary Account Division sub-classifications would allow. ▪Account Groups are used to ensure that Financial Transactions are always assigned to the right Group when posted, and are therefore properly listed within the appropriate Group when reported. |
||||||||||||
When creating your Company's Chart of Accounts: up to 9,999,999 Primary General Ledger Account Numbers may be defined, and each Primary Account may have up to 9,999 Subordinate Account Numbers defined (i.e., resulting is a possible Account Numbering format of: 12345678.1234). ▪To accomplish this expanded capability, each General Ledger Account must be assigned to a General Ledger Group, and each General Ledger Group must be assigned to one of the five Primary or 14 Secondary Account Divisions. ▪Thereafter, when Reporting Financial Transactions, those reports will be sorted first by the assigned Account Division, then within each Account Division sorted by Account Groups, then within each Account Group, ordered by their General Ledger Account Number. |
||||||||||||
The rules for identifying a General Ledger Account as Inactive have been enhanced: ▪An Account may be identified as Inactive even if it has an Account Balance. ▪An Account should not be identified as Inactive if there are Financial Transaction(s) which have been posted to it within an Open Accounting Period! ▪An Account cannot be identified as Inactive if it is one of the Mandatory Accounts ▪An Account cannot be identified as Inactive if it has been assigned to a Bank or Credit Card. |
||||||||||||
The Financial Statements for All Open and/or Closed Financial Accounting Periods may now be re-produced at any time, whenever needed. ▪This "As OF Date" capability has been incorporated into the Balance Sheet, Trial Balance, Profit & Loss Comparison and Income Statement reports. ▪Therefore, "copies" of Financial Statements associated with an open or closed Accounting Period do not have to be maintained because they may be reproduced whenever needed. |
||||||||||||
There is a new Profit & Loss Comparison report which a)Compares Revenue to Expenses for All or a selected set of (one or more) Departments, and/or b)A selected set of (one or more) Divisions, c)For a chosen Custom Date Range, or for one of the predefined Accounting Periods; ▪The report shows the net difference between each of those Periods (or the Month within those Years) as the Profit (or Loss - if those Expenses are greater than the Revenue) for each of the reported Years/Months. |
||||||||||||
The new Profit & Loss Yearly View report is presented in a grid format for a User chosen Year and includes: 1.A list of each Sales and Expense Account (with or without a balance) for the entire Company 2.Each Account's Balance and Net Profit/Loss are shown for each month. 3.A YTD Totals column is also included for each Account along with the net Profit/Loss for the Company's whole Year . |
||||||||||||
▪The Trial Balance Report no longer includes General Ledger Accounts with a zero ($0.00) balance. ▪The Balance Sheet Report no longer includes General Ledger Accounts with a zero ($0.00) balance if Group by GL Account option is not selected. ▪The Income Statement no longer includes General Ledger Accounts with a zero ($0.00) balance if Group by GL Account option is not selected. |
||||||||||||
There are two new General Ledger Accounts (i.e., Mandatory Accounts) which are required for the proper implementation of the General Ledger System, and the successful completion of the General Ledger Setup Wizard procedure.
1.Undeposited Funds - All Receipts are recorded as an increase in this new Undeposited Funds Asset Account; and as either an increase in the Customer Deposit Liability Account or a Reduction in the Accounts Receivable Asset Account. ▪All Receipts must be specifically identified as having been Deposited. ▪Once Deposited , the Undeposited Funds Asset Account is decreased and the appropriate Bank Asset Account is increased.
2.Inventory WIP - This represents the Value of any Inventory Items, a Quantity of which has been identified as being part of a Work in Progress.
Tracking the Value of Work in Progress in the General Ledger System for Inventory Items defined as such in the Sale-Purchase Items Form: ▪When a WIP Quantity is increased in the Sale-Purchase Items Form, the Inventory WIP Asset Account is Debited (Increased) and the Inventory Asset Account is Credited (decreased) by the calculated Value of that increase (i.e., Quantity x the current COGS Value of that Inventory Item). ▪When a WIP Quantity is decreased (because the Inventory Items have been installed and Invoiced), the Inventory WIP Asset Account is Credited (decreased) by the calculated Value of that decrease (Quantity x the current COGS Value of those Inventory Items), and the COGS Expense Account Debited (increased) by the same Value.
Tracking Inventory Item and Non-InventoryValues within the General Ledger System: 2.Invoice - There will be a Credit posted for the Amount of the Retail Price of all Items (added) to the Sales Credit Account (using the GL Account Number assigned in the Sale Purchase Items Form - which may, or may not be an Inventory Item); and a Debit (added) to the Accounts Receivable Asset Account for the same Amount. 3.Sales Tax - If any of the Items that were sold had to be Taxed, the Sales Tax amount that was charged to the Detail Line Item of the Invoice will also be Debited (added to) the Accounts Receivable Asset Account (as part of the General Ledger System Sales transaction), and a Credit posted (added) to the appropriate Sales Tax Liability Account(s). 4.Inventory Item - When any Detail Line Item on that Invoice represents the Sale of an Inventory Item, these additional Financial Transactions are required for tracking the Change of Value for the Expense and Asset for the Cost of Goods Sold ("COGS"), and for recording any resulting Profit: ▪Calculating the COGS Amount - The Value of those Inventory Items (as currently recorded in the COGS Value field on the Sale-Purchases Items Form) is multiplied by the Quantity of the Inventory Item(s) that are being sold is the COGS Amount. a)That COGS Amount is Credited (subtracted) from the Inventory Asset Account b)That COGS Amount is Debited (added) to the COGS Expense Account c)The Net Amount of the Detail Line Item - excluding the COGS Amount (i.e. The Net Amount of the Detail Line Item - not including the Sales Tax charged (if any) - minus the COGS Amount) - is Credited (added) to the Current Earnings Net Income Credit Account. d)The Net Amount of the Detail Line Item - excluding the COGS Amount (i.e. The Net Amount of the Detail Line Item - not including the Sales Tax charged (if any) - minus the COGS Amount) - is Debited (added) to the Earnings Posting Net Income Debit Account. |
||||||||||||
A greatly enhanced and redesigned General Ledger Setup Wizard now walks the Accounting Administrator through a step by step process - using a series of Data Entry Forms ▪Each Form allow the Accounting Administrator to input one specific type of General Ledger information required for proper set-up. ▪The Form must be filled out properly before proceeding to the next one. ▪Using the back arrow - located at the top left corner of each Form - enables the Accounting Administrator to go back to any previously completed Form, if necessary to make corrections. ▪Because this process may take some time, the Accounting Administrator may exit this set-up process at any time and all entries made to that point are saved when the Administrator returns to complete the process.. |
||||||||||||
When an Accounting Period is now Closed in the General Ledger System, there are multiple Closing Stages available to characterize the type of Close that's being performed for each Accounting Period: i.Open - This is the default Closing Stage and allows posting to and from all modules. ii.Partially Closed - This Closing Stage temporarily restricts all posting to and from all modules; and this Stage may be changed back to Open, if necessary; and this Stage may be changed to Closed, GJ Only, or Open, if necessary; and/or reset to Partially Closed. iii.GJ Only - This Closing Stage temporarily restricts all posting to and from all modules, except that it allows entries to be made using the General Journal; and this Stage may be changed to Partially Closed, or Open, if necessary; or reset to Closed. iv.Closed - This Closing Stage restricts all posting to and from all modules, and provides the option to Recalculate the Earnings for this Accounting Period (see Closing the Month below). v.Until the next month has been set to Closed, the Closed Stage may be changed to Partially Closed, GJ Only, or Open, if necessary; or remain at Closed. |
||||||||||||
a) The Description field in the General Journal dialog has been increased in length to 0 characters. b)This revised General Journal entry Form now includes a Subscriber and Vendor option to indicate that the associated General Journal entries are to be included in that Subscriber's History Grid and the Vendor's History Grid. c)Auto Reconcile status is saved to the Transaction File and displayed in the Review GL Transactions report grid. d)If a User selected the "Templates" option before picking a "Transaction Date", the General Journal records were created with the date 1899-12-30. ▪Because this date is never displayed to the User, it could be confusing if trying to troubleshoot a Financial Transaction issue. ▪Now, the "Templates" button is Enabled only after a "Transaction Date" is identified. |
||||||||||||
The revised General Journal Report now allows General Journal Transactions to be listed as follows: a)All - All General Journal Entries (for the specified dates, etc.) will be included in this General Journal report. b)Auto reconciled - Only those General Journal Entries with a Check in the Auto Reconcile column (for the specified dates, etc.) will be included in this General Journal report. c)Non Auto reconciled - Only those General Journal Entries without a Check in the Auto Reconcile column (for the specified dates, etc.) will be included in this General Journal report. |
||||||||||||
Anomaly Corrections: a)When Closing an Accounting Period (changing Stage from Open to Close), the program was not asking the User if she/he wanted to "Generate Late Fee Invoices" which it should. b)When reopening a period (changing Stage from Close to Open), the program was asking user if the User wanted to "Generate Late Fee Invoices" which it should not do. •The correct functionality has been reimplemented. |
||||||||||||
The General Ledger System Period Close dialog (only available when the General Ledger System has been activated) has been substantially changed and now allows different Closing Stages on a month by month basis when Closing an Accounting Period: 1)Closed - This Closing Stage restricts all posting to and from all modules ▪This Stage may be changed to Partially Closed, GJ Only, AP Closed, AR Closed or Open, if necessary; or remain as Closed. 2)GJ Only - This Closing Stage temporarily restricts all posting to and from all modules, except that it allows entries to be made using the General Journal. ▪This Stage may be changed back to Open, if necessary. ▪This Stage may also be reset to Partially Closed, GJ Only, AP Closed, AR Closed or Open, and when necessary, changed to Closed. 3)Partially Closed - This Closing Stage temporarily restricts all posting to and from all modules. ▪This Stage may be changed back to GJ Only, AP Closed, AR Closed or Open, if necessary. ▪This Stage may subsequently be changed to Closed, GJ Only, AP Closed, AR Closed or Open, if necessary; or reset to Partially Closed. 4)AP Closed - No additional Financial Transactions Dated on or before the Ending Date of that AP Closed Accounting Period can be entered in the Accounts Payable module ▪This Stage may also be reset to Partially Closed, GJ Only, AR Closed or Open, and when necessary, changed to Closed. 5)AR Closed - No additional Financial Transactions Dated on or before the Ending Date of that AR Closed Accounting Period can be entered in the Accounts Receivable module ▪This Stage may also be reset to Partially Closed, GJ Only, AP Closed, or Open, and when necessary, changed to Closed. 6)Open - This is the default Closing Stage and allows posting to and from all modules. |
||||||||||||
The General Journal Entries Form now uses the standard Drop-Down Calendar/Date Entry field with no default transaction Date to eliminate entries being mistakenly posted using Today's Date (which is usually not the case). |
||||||||||||
A new Cash Flow Group field has been added to the General Ledger Accounts Form which is populated, as instructed in the Cash Flow Group Chapter Topic, for use in the new Cash Flow Report (see below). |
||||||||||||
There is a new Cash Flow Statement Report providing a typical Statement of Cash Flows that reports the Description and net Amounts of what increased/decreased the Value of your Company's Cash Position. ▪To implement this Cash Flow Statement, certain General Ledger Accounts must be assigned to a Cash Flow Group (i.e., Financing, Investing, or Operating) ▪Thereafter, the Cash Flow Report may be produced for a designated Period (i.e., most recent Month, Quarter, Year) for the entire Company; or produced for a specified Division or Division Group. ▪The Year (based on the selected As Of Date) will always be displayed on the Cash Flow Statement, even when the Period selected is Month or Quarter . |
||||||||||||
|
|
There is a new Review GJ Transactions Form which may be used to Review, Modify, or Reverse a set of previously entered General Journal transactions. |
|||||||||||
The Description field in the Review GJ Transactions dialog has been increased in length to 70 characters.
The Review GJ Transactions Form has some minor fixes relating the Date entry and the associated Bank Transaction register entries implemented.
When Modifying a General Journal Transaction Set the new Job ID and/or Job Category fields may also be modified. ▪When a Job ID is removed (the field is cleared), the system will remove Job Category and also delete the Job Costing entry in the Job Costing tab (i.e., Commission, Expense, Labor Cost, Material Cost, Sub-Contractor Fee) associated with this General Journal entry. ▪These Job Costing entries (i.e., Commission, Expense, Labor Cost, Material Cost, Sub-Contractor Fee) created in the General Journal may not be deleted in Job Costing. When necessary, the Review GJ Transactions Form may be used for this purpose by Reversing that entry.
Also: ▪If the Subscriber is removed (the field is cleared), the corresponding History record will also be deleted. ▪If the Vendor is removed (the field is cleared), the corresponding History record will also be deleted. ▪When modifying a Transaction for a General Journal Account associated with a Credit Card, the corresponding Credit Card Register will be modified accordingly. ▪When Reversing a Transaction for a General Journal Account associated with a Credit Card, a new Reversing entry (the Amount value will be the opposite of the original Amount) will be inserted in the corresponding Credit Card Register. |
||||||||||||
The Balance Sheet report now includes a new Show Percent option. ▪Checking this box (it will be Checked by default) will add a "% Total Assets" column to the report.
The Summary Calculations that normally appear at the end of this Balance Sheet report will not be included unless the report is run for All Divisions! |
||||||||||||
The Income Statement report now includes two new reporting options: 1)Show Percent - Check this box (it will be Checked by default) to have a "% Total Sales" column (which calculates and displays the Percentage of the Total Sales which this Account Balance represents); and a "% Total Expenses" column (which calculates and displays the Percentage of the Total Expenses which this Account Balance represents) included in the Income Statement report. 2)Show YTD - Regardless of the Date Range which is being reported (determined by the From and To dates inserted by the system for the Dates option selected, or by what was entered manually by the User), Check this box (it will be Checked by default) to have the Current Fiscal Year's Year-To-Date Balance shown for each Account. |
||||||||||||
▪The Profit & Loss Comparison report now allows a User to compare User-defined Date Ranges when using the Custom Comparison option ▪The Profit & Loss Comparison report also now supports the Group by GL Account feature found in many of the other Financial Statements. ▪The Profit & Loss Comparison report now shows the full Name of Divisions and Departments - not just the code for them. ▪The system will now save the last setting for the Group by GL Account Check Box and display this as the default until the User changes it. |
||||||||||||
There is a new Balance Sheet Comparison report which will show the General Ledger Accounts and the Account Balances that existed at the end of the selected As Of Date along with the corresponding General Ledger Account and the Account Balances which existing on the same Date in the previous Fiscal Year. ▪The Summary Calculations that normally appear at the end of this Balance Sheet Comparison report will not be included unless the report is run for All Divisions! |
||||||||||||
▪When the Trial Balance is reporting for a selected set of one or more Division(s) (instead of All Divisions), the Summary by Account Type section will not be included in that report. ▪When the Trial Balance is reporting for a selected set of one or more Department(s0 (instead of All Departments), the Summary by Account Type section will not be included in that report. |
||||||||||||
Modifying a General Journal Transaction Set in the Review GJ Transactions Form ▪To ensure data stability, the GL#, Division, Department, Description Value of the Debit or Credit entry, the Auto Reconcile, and/or the Owner (Subscriber or Vendor), Job ID and/or Job Category may be modified. ▪However, the Date of Transaction may no longer be modified. |
||||||||||||
|
|
|
||||||||||
|
|
Latest Updates |
||||||||||
|
|
|
||||||||||
There are now two Message Types in the Record Editing section of the Predefined Messages Form 1)HTML (Email, Web Apps) - This Message Type will have Rich Text Editing functionality and may be used when you are defining a message to be sent as an Email for certain Web Applications 2)Plain Text (SMS,Voice) - This Message Type will be used when you are defining a message to be sent as a SMS Text Message or transmitted as a Voice message |
||||||||||||
The Incoming Alarm Signal Alert is now presented to all available and qualified Operators, the first one who Clicks OK will actually have that signal presented on their Processing Screen. ▪This new functionality prevents an incoming signal from "sitting" on screen at a Workstation where the Operator has stepped away momentarily. |
||||||||||||
Audible Alarm Notification Action - With the installation of the new MKSAudible.exe Service, and setting the AudibleWorkerEnabled Company Setting to True ("T"), an audible Attention Message (the contents of which is created in Predefined Messages) may be sounded alerting the Operator when any Fire Alarm is presented to an Operatori on the Signal Processing screen. |
||||||||||||
Emergency Management Mode - EMM Cases and/or Situational Possibilities ▪More than one Emergency Management Mode definition may now be created: ✓Any of these Emergency Management Mode cases may be implemented "Regionally" or be implemented for some other "Situation Dependent" case. ✓More than one Emergency Management Mode definitions may be implemented (in effect) at the same time ✓All the EMM definitions are defined using the Smooth Operator Form
Any combination of the Cases and/or Situations listed below may be used to define an Emergency Management Mode record ▪Alarm Conditions - The higher the Priority Number, the lower its importance in relation to life safety. ✓Typically, assigning a Priority Level of 6 or higher indicates that the Alarm Condition Code is not directly related to a Life Safety related event. ✓ A specific set of one or more Alarm Condition Codes may be specified ▪Alarm Group - Subscribers assigned to a specific set of one or more Alarm Processing Groups may be specified ▪Account Types - Subscribers assigned a specific set of one or more Accounts Types may be specified ▪CSID List - A list of specific CSID(s) may be defined ▪Town Codes - Subscribers assigned to a specific set of one or more Town Codes may be specified ▪Dealer Codes - Subscribers assigned to a specific set of one or Dealer Codes may be specified ▪City List - Subscribers residing within a specific set of one or more Cities may be specified ▪State List - Subscribers residing within a specific set of one or more States may be specified ▪ Zip List - Subscribers residing within a specific set of one or more Zip Codes may be specified ▪Priority - A minimum Priority may be specified ▪Execution Time - A pre-set Starting and Ending time may be specified.
Multiple Smooth Operator records assigned the Emergency Management Mode Category may be created, as needed, to accommodate any or all of these cases. ▪Each Smooth Operator EMM definition may have its own set of Action List parameters (See Understanding the Action List field's Action Options for more detailed information) |
||||||||||||
The new Smooth Operator Form is used to define and configure those procedures which will provide an Automatic Action (e.g., a predefined, passive alarm signal processing functionality) that may be implemented while Processing Signals. ▪Smooth Operator processing may now: 1)Send SMS (Text) Notifications to Contacts (People To Call) with a Check in the SMS column 2)Send Voice Notifications to Contacts (People To Call) with a Number Type (not identified as any type of Pager) 3)Send Email Notifications to: a)The Email address identified in the Contact Information section if the Edit View of the Subscriber Account b)The Email address identified on the Main tab of a Dealer record c)The Subscriber Contacts (People To Call) with an Email address in the Communication sub-tab d)The Dealer Contacts (People To Call) identified in the Dealer Form's Other tab |
||||||||||||
All General Maintenance - Menus and Items are now displayed in Alphabetical Order |
||||||||||||
Non Related Alarm Notification Skip Value - The value entered for the new Company Setting NonRelatedAlarmNotificationSkipValue option will set the Number of Seconds after which the Operator is notified that there is a Non-Related Higher Priority Alarm Signal Pending ▪Skip Value codes and the related notification wait times are identified in the chart below:
|
||||||||||||
Two new Action Buttons have been added to the Email Accounts Form: 1.Set/Remove as Default for CS - This is (or is not) the default account for CS ▪Click this button to identify this SMTP Account Setting record as the default for your Company's Central Station. ▪When this SMTP Account Setting record has already be identified as the default for your Company's Central Station, Click this button to remove (cancel) that assignment. ▪When removing this CS assignment, a Confirmation Message with Yes/No buttons will be presented. 2.Set/Remove as Default for Management - This is (or is not) the default account for Management ▪Click this button to identify this SMTP Account Setting record as the default for your MKMS program. ▪When this SMTP Account Setting record has already be identified as the default for your MKMS program, Click this button to remove (cancel) that assignment ▪When removing this MKMS assignment, a Confirmation Message with Yes/No buttons will be presented. |
||||||||||||
A new Exclude/Include option on the Panel Info Tab may now be used to create a Master CSID Signal Exception list ▪One or more Signal Identifiers (Signal IDs) may be entered, each separated by a comma, and Wild Cards are permitted ▪The Signal IDs entered may be Excluded from, or Included in the Alarm History of the selected Master CSID: 1)Check this box (the default) to have all listed Signal Identifiers excluded from the Alarm History of the selected Master CSID - instead they will be inserted in the Alarm History of the CSID entered this Panel Info record.. 2)Remove the Check in this box to have only the listed Signal Identifiers included in the Alarm History of the selected Master CSID.
❖When a Master CSID is defined on this Panel Info Tab, and no entries are made in this Exclude/Include Form, all Signals received from this CSID are added to the Alarm History of the Master CSID entered in this Panel Info record |
||||||||||||
A new Action List item in Smooth Operator with these MKS Audible Action with special L, AM# [pmsg: -940],C#[tm:1] Parameters has been created for the Audible notification of Alarm Event be processed by using the new MKSAudible Application
❖See the Audible Alarm Smooth Operator Notification Action chapter for detailed information |
||||||||||||
The new SPA Monitor application provides many features related to assuring SPA is operating correctly. The new SPA Service program should be installed at the Central Station to enable the Audible Alarm feature ❖See the Audible Alarm Smooth Operator Notification Action chapter for detailed information |
||||||||||||
When UL® Central Stations are using Remote Operators, and a remote Operator is subject to a Home Invasion or some other crisis that requires they abandon their station, The new Lock Operator option will: ▪Reset all of the Operator's signals as Pending in the Alarm Stack. ▪Terminate the MKMSCS application. ▪Enter this Operator's Name in the new Duress Lockout Form ▪Use the Duress Lockout Form to reinstate that Operator when appropriate |
||||||||||||
|
|
|||||||||||
STARK 5.1.35.XXXX UL® Version |
This 5.1.35.XXXX version of MKMSCS.exe is the latest UL® version of the MKMSCS Central Station Monitoring Module |
|||||||||||
|
|
The Communications Module and its associated Windows® Service has been discontinued.
MKS now also uses the MKS Connect Service for the services previously supported by the Communications Module, and now offers 1.ASP - Automatic Signal Processing executed using an Automatic Action. ▪Activated using the ASPWorkerEnabled Company Setting ▪Executes the aspProcessAlarm stored procedure to process the signals ▪Signals Not Processed expiration time in Company Setting is ASPExpireMinutes 2.LLP - Interactive Low Level Signal handling using Contacts (People To Call) (communication using SMS and/or IVR). ▪Uses a Predefined Messages for Interactive SMS ▪Uses a IVR for Interactive Voice Messages and uses Predefined Messages for what is "said" ▪Requires that the Contacts (People To Call) phone numbers are subscribed to SMS or Voice Services 3.AAP - Automatic Action Processing (Smooth Operator) which includes the selection of different Contact List Types for certain actions that support sending notification to contact list members. ▪See the Automated Signal Capabilities discussion in the Understanding the MKS Connect Service chapter for additional information. |
|||||||||||
Support for IVR and SMS capabilities are implemented using the Twilio Cloud Service [NYSE: TWLO] (www.twilio.com) which provides those cloud based messaging and telephony services through the use of their Application Programming Interface ("API"). ▪The supported features in Micro Key software using that API include: a.Ability to send Voice Messages to any phone number from any of the MKS apps. b.Ability to make a Voice Call, read a Message, and present a custom IVR to that called person to allow them to interact with MKS software. c.Ability to send SMS Messages to any phone number from any of the MKS apps. d.Ability to handle incoming Low-Level Alarm Signals via interactive SMS Messaging ("LLP-SMS"). e.Ability to handle incoming Low-Level Alarm Signals via interactive IVR ("LLP-Voice"). f.Ability to handle incoming Alarm Signals during Emergency Mode using interactive SMS Messaging ("HLP-SMS"). g.Ability to handle incoming Alarm Signals during Emergency Mode using IVR ("HLP-Voice"). h.Ability to receive voice calls and provide custom IVR to Dealers and Subscribers, and their associated Contacts. i.Ability to create and customize IVR menus. j.Ability to create and customize SMS Predefined Messages. k.Allow CS Operators to send Voice Messages to Contacts while processing a signal. l.Allow CS Operators to send SMS Messages to Contacts while processing a signal. m.Provide an IVR for Technicians in the field to enable them to Place Accounts on Test. |
||||||||||||
The Third Party Services Form is where Services (e.g., Alarm Notification, Registered Subscriber and the associated Webhooks, Registered Subscribers and Registered Users, etc.) may be defined for a Third Party Service Provider ("Provider") which provides the solutions to what had previously been intractable problems ▪Third Party Services allows a Central Station using Micro Key software (MKMSCS) to provide Third Party Service Providers (External Companies) the ability to access specific Subscriber’s accounts and to receive real time notification of incoming alarms that affect their Registered Subscribers. a.These Third-Party Service Providers will be able to use the MKMSCS API to get information in and out of the MKS System but only for the accounts registered to their Third-Party Services. b.The Millennium software will allow the configuration of multiple Third-Party Services and the registration of subscribers’ accounts with these services c.For each Third-Party Service the definition of a Webhook can be added where your Company can identify the URL that points to the external company API for the system to automatically send alarm notification to their system in real time.
▪Third-Party Users using this API will have access to the following: a.Get the list of Subscriptions to a Third-Party Service b.Get individual Subscriber Account Information c.Get specific Alarm Information d.Get Alarm History Detail Information for a specific alarm e.Insert additional Alarm History Details f.Update Alarm Status (Complete Alarms)
▪Real Time Automatic Notifications to Webhooks: a.Send Alarm notification in real time to the Third-Party Service Webhook b.Send New Subscription notifications to the Webhook c.Choose whether all alarm signal types (Alarm Condition Codes) will be sent to the remote third-party system, or that only specific alarm signal types will be sent. |
||||||||||||
The new Smooth Operator Form is used to define (identify and configure) certain procedures that will provide an Automatic Action (predefined alarm signal processing functionality) while the Central Station software is Processing Signals within MKMSCS. ▪See the following chapters for more information a)Automated Signal Processing - Enhanced chapter for the latest information b)MKS Customer Connect Service and Automatic Signal Processing information for a description of its capabilities and how predefined alarm signal processing functionality is setup. c)IVR & SMS Overview and its subordinate chapters for implementing Low Level Processing using Twilio (www.twilio.com) to provide cloud based interactive (Text) SMS and IVR (Voice) communication services |
||||||||||||
The new Contact Lists tab and its three sections provides an interface: 1.To list all Available Contacts accessed from that CSIDs Contacts (People To Call), Alternate Contact list, and/or Dealer Contact list 2.To design specific Contact Lists for specific Purposes, and 3.To assign a specific Schedule for specific Days and Times, and Alarm Events, and 4.To assign a Schedule to a designated Contact List, and/or to an individual Contact (e.g.,Contacts (People To Call), Alternate Contact list, and/or Dealer Contact list member) and/or to List Members
❖See Contacts (People To Call) and Call Order below for related information ❖See the Before Dispatch and/or After Dispatch below for that special new feature |
||||||||||||
▪The Call Numbers section of the Contacts (People To Call) Form has been modified to accept up to 8 character telephone extensions ▪The Call List Verification report has been updated to accommodate 8 character Contacts (People To Call) telephone extensions, and the remaining Contacts (People To Call) data on this report was reformatted. |
||||||||||||
The revised Contacts (People To Call) tab still contains the names, telephone numbers, and other important information for the People To Call ▪Plus, it now includes a Call Order tab which now allows for the Re-Setting the Call Order of the existing Contacts (People To Call) ▪The separate Call Order tab has been removed |
||||||||||||
The information required for the proper installation of certain Micro Key Solutions™ applications, along with a Sybase SQL Anywhere Database application, that will be used by a UL® 1981 Listed Central Stations, are identified in this Chapter Topic (and its associated sub-chapters): 1)Micro Key Solutions Alarm Company Management & UL Monitoring Software Suite includes MKMS Version Number 5.1.35.8209 or later, and MKMSCS Version Number 5.1.35.7109 - each with a compile date one or after after 10/01/2017; 2)MKMS and MKMSCS automation software uses the Windows® Operating System, Version 7 and later; 3)SPA Version 5.0.28.497 or later; 4)MKSSysStatus Version 1.2.0.3 or later; 5)MKSSounds Version 1.0.1.1 or later; 6)MKSCluster Version 3.1.0.4 or later; 7)MKSSysMon Version 1.0.1.33 or later; 8)WatchDog2 Version 1.0.0.3 9)Sybase SQL Anywhere database Version 16 or later. |
||||||||||||
This new UL Signal Processing & Reporting Procedures Chapter Topic (along with many other associated chapters which are identified with Links) will document certain Settings, and the Signal Processing & Reporting Procedures which are required when implementing the Third Edition UL® 1981 Standard. |
||||||||||||
A new Themes capability has been added which allows the User to set their preferred coloration, screen accents (and special occasions) Theme in MKMS and MKMSCS. |
||||||||||||
UL Stale Alarm Priority Cutoff - By default, the ULStaleAlarmPriorityCutoff option in Company Settings is set to Zero ("0"). ▪For those Companies who are using the recommended Priority Levels for UL Certificated Alarm Systems documented in Section 11.1.5 (g) in the Third Edition UL® 1981 Standard, this should be set to seven ("7"). ▪For those Companies who are using an optional set of Priority Levels allowed in Section 11.1.5 (g) in the Third Edition UL® 1981 Standard, this should be set to five ("5") assuming the 2, 3, and 4 recommended Priority Levels have been combined (adjust accordingly).
Inactivity Disconnect - When the UL® 1981 Version is Registered (i.e., Active), this InactivityDisconnect option should be set to True ("T") to comply with Section 6.2.7 in the Third Edition UL® 1981 Standard - "Once communication of a session has been idle for a maximum of 15 minutes the session shall be automatically terminated." ▪When the InactivityDisconnect option should be set to True ("T"): after 15 minutes of inactivity by the current User, a Warning Message is displayed and if not acknowledged, the system will disconnect (log out of the database) and the User must Log In again tro continue to use the system. ▪If the InactivityDisconnect option is set to False ("F"), this Inactivity Disconnect feature will be turned off.
Check UL Password Restrictions - When the UL® 1981 Version is Registered (i.e., Active), this new The CheckULPasswordRestrictions option in Company Settings must be set to True ("T") to comply with Section 6.2.6 relating to Password Restrictions in the Third Edition UL® 1981 Standard. ▪If the CheckULPasswordRestrictions option is set to False ("F"), this Password Restrictions feature will be turned off.
24 Hour Format - By default, in Company Settings the 24HouFormat option is set to False ("F") and so the current Time is displayed in the Status Bar for both MKMS and MKMSCS in usual 12 Hour format with am or pm appended to the Time, as appropriate. ▪However, the Time displayed on the MKMSCS Status Bar may be changed to a 24 Hour format by setting this 24HouFormat option to True("T"). |
||||||||||||
This new Operator Activity Crosstab report provides two views based on a Date Range filtered analysis of Operator Activity data. |
||||||||||||
This new Operator Activity New report provides two views based on a Date Range, and selected Alarm Code(s), and/or Operator(s) filtered analysis of Operator Activity data; and Grouped by the Operator, Alarm Condition, or Load Type (e.g., Stack, Auto, Related). |
||||||||||||
This new Operator Polling report is based on a Date Range, and optionally selected Operator(s) and provides a filtered analysis of Operator Activity data to evaluate their work load and efficiency. |
||||||||||||
The new Condition Code Resolutions Form allows you to designate which Resolution Code may be used when completing certain types of Alarm Signals (i.e., Alarm Conditions). |
||||||||||||
The Monitoring tab - Subscribers Form Edit View now has new: ▪Alarm History Icon on its Ribbon Menu which displays the Alarm History Form for the currently selected Subscriber record. ▪Time Zone field with a Drop-Down Selection List containing all of the US and international Time Zones. ▪Cross Street field for identifying the nearest cross street to this Account's premises |
||||||||||||
The Alarm Stack has been revised with additional Columns of data available and a new History Icon that opens a Signal History sub-grid for the currently selected Signal listed in the Alarm Stack. |
||||||||||||
When an Operator is Processing an Alarm in MKMSCS, she/he may Look Up the Alarm History for the Subscriber currently being displayed on the Signal Processing screen by Pressing F4. This Signal History - F4 dialog has been substantially enhanced. |
||||||||||||
1)The Alarm History Lookup Form has added Subscriber (Name) and CSID to the Primary Signal History data grid's Header row within MKMS. 2)An Export option has been added to the Alarm History Lookup Form. 3)The Alarm History Lookup dialog now includes the full title of the UL® Classification (instead of UL Grade Number). |
||||||||||||
The Sounds tab within the Central Station Options tab of the User Options Form now supports identifying the Sounds for up to 20 Priority Levels (plus the Default sound). |
||||||||||||
The Print Options sub-tab within the Central Station Options tab of the User Options Form now has an additional field created to allow Users to specify a Monitoring Station which is displayed on the printed Alarm Certificate. |
||||||||||||
Alarms - The Alarm History dialog for the currently selected Subscriber may now be accessed from the Subscriber Options Menu and provides the same Alarm History dialog that is available when viewing the Monitoring tab on the Edit View of the Subscribers Form.. |
||||||||||||
This new Notifications sub-tab within the Monitoring tab provides the ability to identify and define one or more specific Alarm Conditions which - when received by SPA - are to be processed internally by sending a Predefined Message via an Email or Pager message (using the Communications Module) to a specific Person. |
||||||||||||
▪The On Test (F5) dialog in MKMSCS (and the matching Place Account On Test option in MKMS) has been substantially updated with additional features including a)Add Hours, and Add Minutes options, b)Subscriber Time, and CS Time fields, and c)Bypass Password Verification and d)Add Additional Test options. e)Require Password to Place an Account on Test
▪The Add New Account dialog - accessible using the On Test (F5) in MKMSCS and/or Place an Account on Test in MKMS - will now store certain User selections (i.e., Salesman. Town Code, Communicator Format, Alarm Group) as the defaults for those fields (any default may be reset by making a different selection). |
||||||||||||
▪If a duplicate Signal ID and Physical Zone combination is entered in the CSID Zones tab in the Subscriber Panels section, a much more informative error message is now presented. ▪When the List option is selected, to avoid any unintended actions, all other options on the Ribbon Menu are disabled until List is Clicked again to return to the regular CSID Zones Form. |
||||||||||||
The CSID Zones tab in the Subscriber Panels section of the Monitoring tab in the Edit View of the Subscriber Form has two columns which list the previously entered Contacts (People To Call) associated with this CSID (Account): 1.the Available to Call list which includes all Contacts in the Subscriber's Global Call List, and 2.the Call Order list which includes a list of the Contacts who are to be called when responding to Alarm Signals sent from this CSID, and the sequence in which those call attempts should be made.
▪By using the Global Call List capability, the Available to Call list may include quite a large number of available Contacts. ▪These Available to Call Contacts were previously displayed in the order in which they were originally entered. This sorting method has become unworkable.
The solution was to sort the Available to Call list in groups: a)S - The Contacts (People To Call) ("Subscriber Contacts") entered specifically for this Subscriber; b)A - The Alternate Contacts associated with this Subscriber (by entering the CSID of the Subscriber who has the desired set of Contacts (People To Call) in the Alt Call List field in the Panel Info tab of this Subscriber; c)D - The Dealer Contact List "Dealer Contacts" of the Dealer who is identified in the Dealer field in the Central Station Data section in the Monitoring tab in the Edit View of the Subscriber Form
▪Using these group codes (S, A, and D), the list of Contacts for each group is now displayed alphabetically with a Prefix added (e.g., S - abc..., A - abc..., D - abc...) representing the source of that Contact, ▪This provides an easier way to locate the desired Contact and the Call Order list is not affected by this change - its order is determined by need, and set specifically for processing and responding to an Alarm Signal received for this CSID Zone. . The Notify Subscriber on Alarm Dispatch and Notify Dealer on Alarm Dispatch fields now have additional options including Email and Voice Message:both of which require the MKS Connect Service be installed and the appropriate Predefined Messages be defined.. |
||||||||||||
In the CSID Zones tab in the Subscriber Panels section of the Monitoring tab in the Edit View of the Subscriber Form, the Notify Subscriber on Alarm Dispatch and Notify Dealer on Alarm Dispatch fields now have additional options including Email and Voice Message:both of which require the MKS Connect Service be installed and the appropriate Predefined Messages be defined.. |
||||||||||||
|
|
The new Schedules Form will display all of the existing (previously created) Schedules and provide for the creation of new ones ▪The Schedules Form has three sections: 1)Schedule List of previously defined Schedules 2)Availability section listing the Days of the Week when a selected Schedule will be in effect 3)Assignments section where the individuals or Subscribers using the selected Schedule are listed ▪Once a Schedule is created, it may be assigned to a Contact List (see Contact Lists Tab immediately below) a)A Contact List is used for a specific purpose (it defines who should respond to a certain Alarm Condition and/or CSID Zone and/or Zone Code) within the specified date and time parameters of the Schedule to which the Contact List is assigned b)Members of a Contact List are individually chosen from existing Contacts (selected from that Account's Contacts (People To Call) , Alternate Contact List, and/or Dealer Contact List) |
|||||||||||
The new Contact Lists tab (associated with the CSID selected in the Panel Info tab within the Subscriber Panels section) has 3 sub-sections that provide an interface: 1.Listing Available Contacts (e.g., Contacts (People To Call) , Alternate Contact List, and/or Dealer Contact List members) 2.For identifying the specific Purpose for a Contact List (identifies the Alarm Condition and/or CSID Zone and/or Zone Code that will trigger the use of the Contact List), and 3.Fro creating the List of Members selected from Available Contacts who would be expected to respond to that Contact List entry ▪Any Available Contact, Contact List, and/or List Member may be assigned to a Schedule representing a specific Alarm Event with specified Day and Time parameter(s)
❖See Contacts (People To Call) and Call Order for more information ❖See the Before Dispatch and/or After Dispatch for more information |
||||||||||||
The revised Dealer Breakdown Report which provides a listing of each Dealer, their Accounts, related reporting and signal data, and summary information about each Dealer, now has a new options to Include Offline Accounts. |
||||||||||||
The Create Mass Accounts Form and Account Templates Forms has been updated with the current standard Navigation, Ribbon Menu systems, and also follows the selected Theme. |
||||||||||||
The Dealers section of the Dealer Users dialog has been enhanced to allow the Dealer User to also be assigned to a Sub Dealer ▪The system assigned Telephone and Contact information will reflect the Dealer's unless a Sub Dealer is assigned, in which case that Telephone and Contact information will be the Sub Dealers' |
||||||||||||
A new Online/Offline Report Check box has been added to the Access section of the Dealer Users Form. ▪When this new Online/Offline Report box is Checked, the currently selected Dealer User may print/view the Online/Offline Report. |
||||||||||||
A new UseCIF option has been added to the Company Settings Grid which, by default, it is set to False ("F") ▪When set to True ("T"), and a UseMasterCSIDForEvents field has been added internally in the Central Station table - thus implementing a visible CSID Forwarding Events Check box in the Central Station section of the Monitoring tab, the Signals for Events and Tests will be forwarded to a previously identified Master CSID Account (see next discussion immediately below) when the new CSID Event Forwarding field is Checked. |
||||||||||||
▪The Notification List on the CSID Zones Form now also supports an RS-232 message Type (in addition to Pager and Email). |
||||||||||||
A new MultipleAlarmStacks option has been added to the Company Settings Grid which, by default, is set to True ("T") thus allowing the Alarm Stack to be opened more than once in MKMSCS, if required If the MultipleAlarmStacks option is set to False ("F"), only one Alarm Stack may be opened by a User. |
||||||||||||
Alarm Stack - Limit Grid - There is a new AlarmStack.LimitGrid option in Company Settings which by default, is set to False ("F"). ▪When the AlarmStack.LimitGrid option in Company Settings is set to True ("T"), the normal Filtering and Sorting capabilities - normally available in the Grid of the Alarm Stack - are disabled. |
||||||||||||
The Panel Zone Overrides Form again allows modification. |
||||||||||||
▪If a duplicate Signal ID and Physical Zone combination is entered in the CSID Zones tab in the Subscriber Panels section, a much more informative error message is now presented. ▪When the List option is selected, to avoid any unintended actions, all other options on the Ribbon Menu are disabled until List is Clicked again to return to the regular CSID Zones Form. |
||||||||||||
Notification List - For Communications Module users, each CSID Zone (and Override) may have an additional Notification List for Paging and/or Emailing an Alarm or Event Signal Notification of this event, as needed. ▪This Notification List will now be automatically sorted in Alphabetical Order based on the Employee's Name (as entered in Contacts (People To Call)) |
||||||||||||
A new Zones option on the Subscriber Form's Reports Menu provides a multi-section Grid with the CSIDs, CSID Zones information, and when available, the associated Call List for the selected Subscriber. |
||||||||||||
The Account Type Form has been updated (see immediately below) to include the Type field. Using the Drop-Down Selection List provided for that field, Choose whether each Account Type should be classified as Commercial or Residential to accommodate this new MEW Factor reporting Option in the new UL Statistic Report (required for the MEW Factor's reporting requirements). |
||||||||||||
To allow for an easier way to re-set the Date and Time for Events, the "Start" and "End" fields in the Next Scheduled Event section have been enhanced with a dedicated Date field and a dedicated Time field for each ("Start" and "End") case. |
||||||||||||
A new MEW Factor reporting Option has been added to the UL Statistic Report. To accommodate this new MEW Factor reporting Option the Account Type Form has been updated (see above) to include a new Type field. ▪MEW Factor = (# of residential accounts) *0.333 + (# of commercial accounts with NO opening and closing events ) *1 + (# of commercial accounts with opening and closing events) *3). |
||||||||||||
While Signal Processing, when entering a Note, Pressing the Tab key will now automatically move the Cursor to the Save button. |
||||||||||||
There is now a Constraint for resizing the Signal Processing Form horizontally to prevent the User/Operator from hiding information on that Form. |
||||||||||||
▪In an interim version of MKMSCS, the Signal Processing Form was modified to "better handle" Screen Scaling changes. It didn't. With some cleanup, the system has reverted to the previious - more stable - Screen Scaling methodology. |
||||||||||||
▪To simplify a Signal Processing procedure, when the Note field is displayed and the Tab F key is pressed, the focus will more to the Save button. ▪The Contacts tab on the Signal Processing Form has a new Comments column which contains the Comments information entered in the Contacts (People To Call) sub-tab on the Subscriber Panels dialog within the Edit View - Monitoring tab |
||||||||||||
A new section has been added to the Sub Info (F2) Form which displays the Current Warranty Status in a Warranty Info box which includes the Contract Type, Warranty Status [Not In Warranty, In Warranty], and the Warranty Ends date for this Account. |
||||||||||||
For those times when an Operator may need to immediately step away from their terminal (for an urgent Family issue, an emergency bathroom break, an immediate termination, etc.) ▪In the MKMSCS Shortcuts tab, Click the new Lock Operator option (or press the key combination Shift + Ctrl + D ) to display a confirmation message that asks if the system should Lock out this Operator, set all of this Operator's signals as pending, log them out of the system, and close the MKMSCS application on this terminal. ▪When Yes is the answer, the system will: a)Set all of the Operator's signals as Pending b)Terminate the application. c)Enter this Operator's Name in the Duress Lockout Form |
||||||||||||
Once an Operator has been Locked Out, to be able to Process Signals again, they must be removed from the new Duress Lockout dialog. ▪To Reinstating an Operator, on the Duress Lockout dialog a)Select that Operator who is to be unlocked b)Click the Unlock bar of the Operator who is to be unlocked (reinstated) c)That name will be removed for this Duress Lockout Grid ▪That Operator will once again be be permitted to log into MKMSCS and Process Alarms |
||||||||||||
|
|
|||||||||||
|
Third Edition UL® 1981 Standard Reports
|
|||||||||||
The UL Grade field's name on the Insurance Information Form has been changed to UL Class and the associated Alarm Certificate now includes the correct description of the Subscriber's UL Classification, when appropriate.
There are several other new fields which have been added and will display on the printed Alarm Certificate: ▪Install Date – This field will be auto populated when adding a new record on the Insurance Information Form. It will be populated with the subscriber “Date Online” field when it’s populated; if not, it is left blank. Users may change/modify this Date in the Insurance record, and it will not affect the “Date Online” field in the Monitoring section of the Subscriber Form. ▪Panel Type – This Drop-Down Selection List now contains entries from the “Installed Equipment” table that are flagged as a Panel. ▪Paid To – Indicates the Subscriber's payment status date. This is a manual entry, and the User will have to populate it appropriately. ▪Signature – Allows the User to Select an Electronic Signature from the Signatures created in the Personal tab on Employees Form. Clicking the E-Signature Icon will present a Search Signature dialog for all Employees with an E-Signature entered. The Icon is only available if the User has Access Rights to the Electronic Signature dialog. ▪Date Signed – Date of the Alarm Certificate. This is also a manual entry, and the User will have to populate it appropriately. |
||||||||||||
|
|
This is the new Employee Hired/Terminated report (documented to comply with the Third Edition UL® 1981 Standard) provides a list of the Company's Employees is displayed in a functioning Grid dialog with an Employee Trace Form Title: ▪It provides a list of the Employees - retrieved based on their Hire, Termination, or original Entry Date - that is displayed in Grid format and so may then be viewed, sorted, filtered, reconfigured, printed, emailed, and/or exported. |
|||||||||||
There is a new Signals While On Test report which is designed and documented to comply with the Third Edition UL® 1981 Standard and will report those signals that were received from a Subscriber (Account), and/or a Subscriber Panel (CSID) that occurred while an Account or CSID was On Test. |
||||||||||||
There is a new Accounts Without Email report which is designed and documented to comply with the Third Edition UL® 1981 Standard and will list those Subscribers (Accounts) without an Email address entered in the Subscribers tab of the Subscribers Form: Edit View ▪The Accounts Without Email Report may be produced for All Accounts, or for UL® Accounts Only. |
||||||||||||
This is the new UL Statistic Report which was specifically designed and documented to comply with the System Wide Reports Section 10.2.1 and 10.22 (a) - (g) of theThird Edition UL® 1981 Standard. |
||||||||||||
This is the new Users Login History Report (designed and documented to comply with the Third Edition UL® 1981 Standard) which will list those Employees who have attempted to, or successfully Logged Into the MKMS database (mkmsdefault.db). |
||||||||||||
This Alarm Activity Report report was revised to display the full title of the UL® Classification (instead of UL Grade Number). |
||||||||||||
The Subscriber Information Forms report now includes the full title of the UL® Classification (instead of UL Grade Number). |
||||||||||||
The Data View tab - which provides a tabular (spreadsheet style) presentation of the selected data - has been added to the Open/Close Report |
||||||||||||
|
|
|||||||||||
|
|
|||||||||||
Additional SPA screen and feature updates through version 5.2.0.XXX currently 5.2.0.287 |
||||||||||||
Many new and updated Company tab & Company Settings have been added to enhance the control each Company has for the operation of MKMS CS. |
||||||||||||
The new SPA Monitor application provides many features related to assuring SPA is operating correctly. |
||||||||||||
The new SPA Service program should be installed at the Central Station to enable the Audible Alarm feature ❖See the Audible Alarm Smooth Operator Notification Action chapter for detailed information |
||||||||||||
New SPA Icon and interface, and Version number with special internal enhancements to comply with certain UL® requirements. |
||||||||||||
Certain menu options have been updated and a new one added: ▪Alarm Stack has been updated. ▪Events list has been updated ▪Refresh Log option and been eliminated ▪A new Log Verbosity Selector has been added to Configure what data is to be included in the Log Files |
||||||||||||
This new option on the SPA - System Menu provides the ability to identify what data is to be reported (included) in the SPA Log File. |
||||||||||||
This Send Log option on the SPA Main Menu is used to send follow up information (e3.g., log files, screen images, user documents) to Tech Support after reporting an issue with SPA. |
||||||||||||
|
|
|||||||||||
New SPA Icon and interface, and Version number with special internal enhancements to comply with certain UL® requirements. |
||||||||||||
Certain menu options have been updated and a new one added: ▪Alarm Stack has been updated. ▪Events list has been updated ▪Refresh Log option and been eliminated ▪A new Log Verbosity Selector has been added to Configure what data is to be included in the Log Files |
||||||||||||
This new option on the SPA - System Menu provides the ability to identify what data is to be reported (included) in the SPA Log File. |
||||||||||||
This Send Log option on the SPA Main Menu is used to send followup information (e3.g., log files, screen images, user documents) to Tech Support after reporting an issue with SPA. |
||||||||||||
Several additional SPA screen and 5.0.28.540 feature updates have been implemented. |
||||||||||||
The Xml MicroKey Receiver Driver has a new /NoACKNAK "Driver Option" which would be entered in the Driver Option column located on the IP Port tab in the SPA Setup Form ▪It shuts off the ACK/NAK response normally sent from the Xml MicroKey Driver. ▪It uses the new (available) Company Settings option named PulseUnattendedRelay which must be defined in Company Settings table (see below) ▪Because of this, it is important to Check the Supervise Receivers field's box found on the System tab in the SPA Setup Form when you implement this /NoACKNAK option. |
||||||||||||
There is a new (available) Company Settings option named PulseUnattendedRelay which must be defined in Company Settings table and when used, is set to True ("T"). ▪When PulseUnattendedRelay is set to True ("T"), SPA will pulse the designated Unattended Alarms relay for 1 second when one or more new (30 seconds of age or less) A126 - Unattended Alarms Activation records are detected in the Alarm History table. a)There is a 60 second anti-race condition timer that limits the maximum Unattended Alarms Activation relay pulse rate to once per minute. b)This implies that there would have to be new A126 - Unattended Alarms Activation - records in Alarm History after the initial 1 minute period. ▪Setting the PulseUnattendedRelay option to False ("F") causes the Unattended Alarms (see User Options > Central Station Options > Alerts tab > Unattended Alarms) relay to remain on until all the A126 - Unattended Alarms Activation alarm records age to 30 seconds or older, which is the original behavior. oTherefore, PulseUnattendedRelay defaults to False ("F") if you do not add it to the Company Settings table. |
||||||||||||
|
|