❑Recurring Revenue is often the lifeblood of any Company, and that is particularly true with the Burglary Alarm Business.
•The ability to accurately and easily create Invoices for Recurring Revenue is a critical step toward the successful implementation of the Accounts Receivable module.
✓The flexibility of this Automatic Billing system will allow the automation of virtually any recurring billing requirement your Company may have.
•The Rates for each Subscriber's Recurring Revenue may be setup and later modified in many ways:
✓Recurring Revenue - A previously entered Custom Pay Amount may be manually modified, and a Pay Group may be assigned to initially set the Rate Amount in the Recurring Revenue Form
✓Custom Pay Increase - An established, user specific Amount for a Subscriber defined in the Recurring Revenue Form, may be modified using the Custom Pay Increase Form
✓Pay Group Change - The Amount assigned to a Pay Group may be changed in the associated Pay Group Form which will then change that Amount for all of the Subscriber's Recurring Revenue records that have been assigned to that Pay Group.
✓Pay Groups - An individual Pay Group Amount may be modified directly in the Pay Groups Form.
•Knowing when, and by whom, the Rates being charged for Recurring Revenue have been changed is an important part being able to properly manage your Company's Recurring Revenue.
❑The RMR Rate Changes fully functional data grid lists (based on a User Defined Date Range) When, by Whom, and by what Amount the Rates being charged for Recurring Revenue have been changed.
•To View, Print, and/or Export this RMR Rate Changes Data:
a)From the Backstage Menu System Select Reports then Choose Receivable Reports, or
b)From the Quick Access Menu, Select Reports then Choose Receivable Reports
✓Select the RMR Rate Changes option
❑Setting Up the RMR Rate Changes dialog's data grid Options:
•Date Range - Initially, the default Start field is set as One Month Ago, and the End field will be set as Today
a)Click on the Date field and type the desired Date using a MM/DD/YYYY format; or
b)Use the Drop-Down Calendar/Date Entry field provided to Choose the desired Date
✓Start - Use the Drop-Down Calendar/Date Entry field to Choose the appropriate Starting Date for the data that is to be displayed in the RMR Rate Change grid.
✓End - Use the Drop-Down Calendar/Date Entry field to Choose the appropriate Ending Date for the data that is to be displayed in the RMR Rate Change grid.
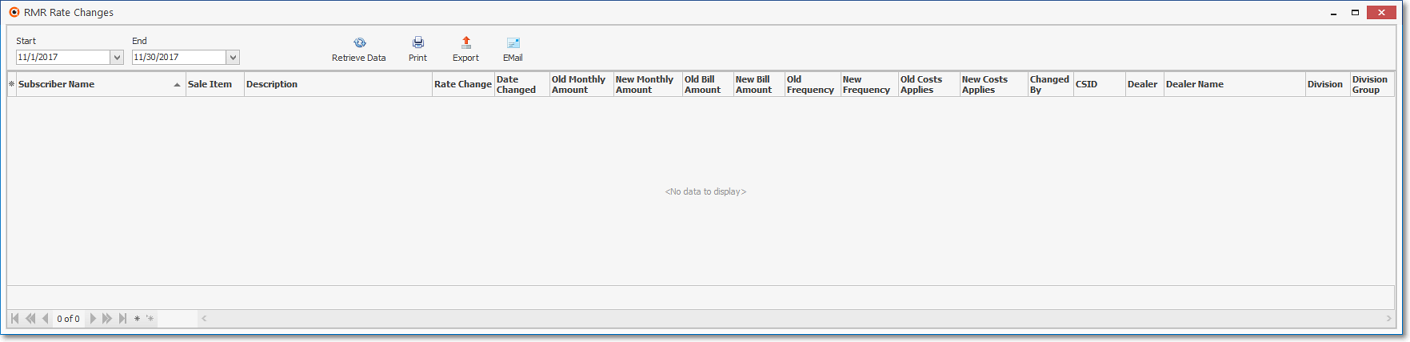
•Retrieve Data - Click this Icon to populate the grid based on the Start and End Date Range that was entered.

•Go To Subscriber - Right-Click on any line item within the Grid to open the Radial Right-Click Menu to access the Go To Subscriber option which will open the associated Subscriber Form.
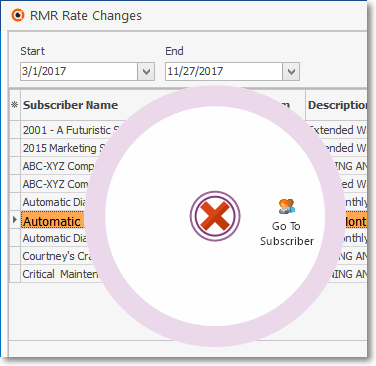
RMR Rate Changes data-grid - Radial Right-Click menu
•Data Column Selection - Which columns of Rate Change data will be displayed may be determined by the User.
✓Click the Asterisk on the far left of the Header to display the Available Columns list.
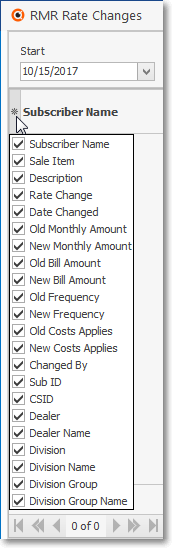
Available Columns list
✓Check, or remove the Check as appropriate.
✓The column names with a Check Mark will be included in the grid.
•Setting the Order in which the data in the grid is Listed within the RMR Rate Changes dialog's data grid:
✓The default sorted order of the RMR Rate Changes List is based on the Date Changed - which is ordered from lowest to highest.
✓Thereafter, the column that determines the sorted order of the List may be easily changed, whenever needed.
✓To do so:
▪Click another column's Header Name to change the sorted order to by on that column of data, with the sorted order automatically set from lowest to highest (a-z or 1 - 9).
▪To change this newly selected column's sorted order from highest to lowest, Click that column's Header Name again.
▪An Arrow next to the Header Name indicates the column that is determining the sorted order of the Grid Data.
o~ indicates lowest to highest (a-z or 1 - 9)
o€ indicates highest to lowest (z-a or 9-1).
•Print - Once you have:
a)Chosen which columns of data are to be included,
b)Set the order in which they are to be listed, related any columns (if appropriate),
c)Adjusted any column's width,
d)Then, you are ready to Print the resulting RMR Rate Changes List.
e)Click the Print Icon at the top of the Form to display the Print Preview dialog.

RMR Rate Change - Report Preview tab
•Export - Click the Export Icon to display the standard Windows® Save As dialog.
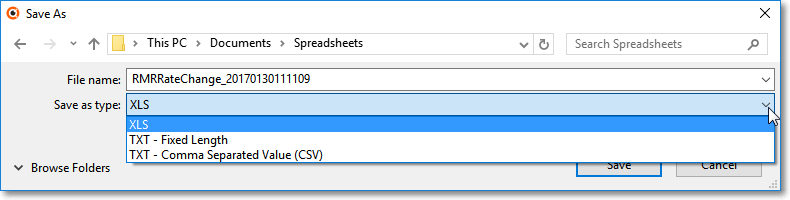
✓Folder Location - The last folder location used will be chosen, but this may be changed, as needed.
✓File name: - By default, the file name inserted will be to form name plus a date string with year, month, day, and time but this may be changed, as appropriate.
✓Save as type: By default, this will be XLS but may also be changed as needed.
✓Save - Click the Save option to export the data to the designated file name, type and location.
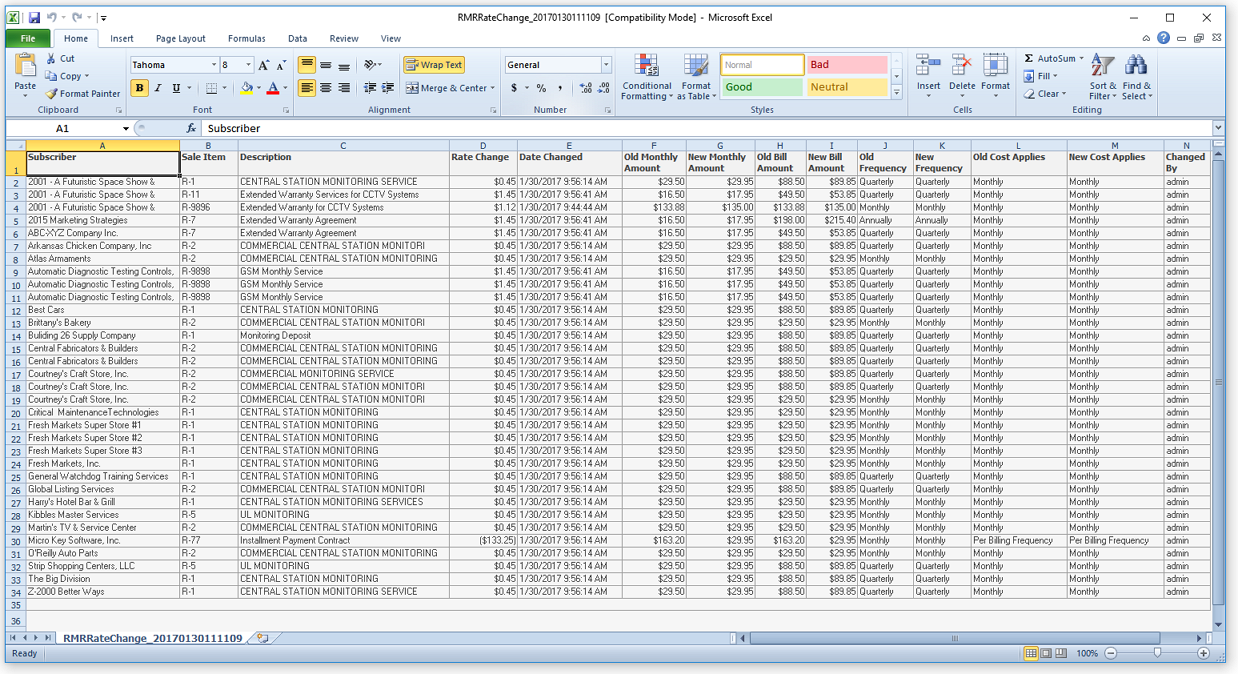
RMR Rate Changes grid - Exported Data Set - shown in Microsoft Excel Spreadsheet
✓See the data grid chapter for more information.
•EMail - Once the data has been formatted, filtered, sorted and configured as needed, Click the EMail Icon to send this data as a PDF attachment to an Email address of your choosing.