Running the General Ledger Setup Wizard
➢Note: If you have not yet done so:
1.You should now Stop entering Financial Transaction into the MKMS Accounts Receivable and Accounts Payable modules, and stop Invoicing any Work Orders at this time.
2.Central Station Monitoring operations are not affected, and should continue as usual.
❑The General Ledger Setup process is a Wizard.
•This Wizard walks the Accounting Administrator through a step by step process - using a series of Data Entry Forms as the interface for this Wizard.
✓Each - of the many Data Entry Forms - allows the Accounting Administrator to input a specific type of General Ledger related information, all of which are required for proper set-up.
✓Each Data Entry Form must be filled out properly before proceeding to the next one.
✓Using the back arrow - located at the top left corner of each Form - enables the Accounting Administrator to go back to any previously completed Form, if necessary to make corrections.
•Because this process may take some time, the Accounting Administrator may exit this set-up process at any time - all entries made to that point are saved.
•The final result is the proper initialization for the General Ledger System.
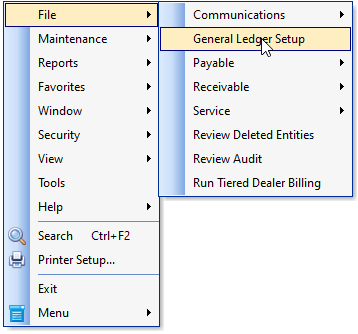
•To execute the General Ledger Setup procedure,
a)From the Backstage Menu System Select File and Choose General and Click the General Ledger Setup option, or
b)From the Quick Access Menu, Select File and Choose the General Ledger Setup option.
•The General Ledger Setup Wizard dialog will appear prompting the Accounting Administrator to Click the Next button.
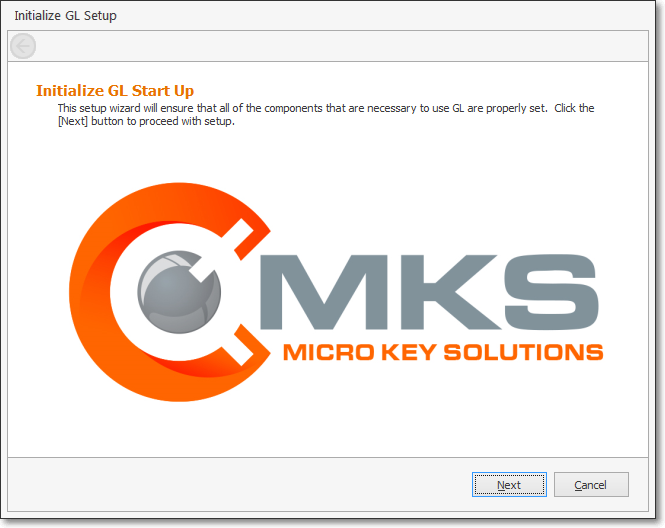
General Ledger Setup Wizard dialog
•All information must be entered in the sequence presented by the Setup Wizard and, at the completion of each step in the process, you will be required to Click the Next button
❑Fiscal Year Start up - Identify the Starting Period (starting month may be any month from 1 to 12) of your Company's established Fiscal Year.
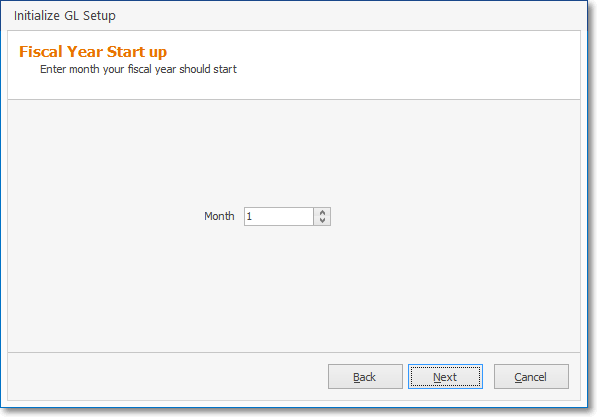
Initialize GL Setup - Fiscal Year Start up
•This Fiscal Year Start up Form requires that the Starting Period of your Company's established Fiscal Year be identified, and for most companies this will be January (i.e., month number is 1).
✓For those Companies whose business model does not use a standard January through December calendar year as their Fiscal Year, that different Fiscal Year's Starting Period (i.e., a month number from 2 - 12) would be entered based on your Company's established Fiscal Year.
✓This is also the time to consider whether your Company's currently chosen Fiscal Year is appropriate, or if it should be changed (be sure to talk first to your Accountant and the I.R.S. about making this change).
a)Month - Enter the appropriate month number which represents the starting Period (Month's Number) for your Company's Fiscal Year.
b)Next - Click the Next button to continue with this Wizard.
❑The instruction line in the box at the top of the Initialize GL Balances Form says it all:

•This Initialize GL Balances Form is used to identify the Starting Balances that existed on the last day of the Period and Year identified below - for any Account that should have a Balance at that time) - with certain sums of those Amounts resulting in sub-sets of Balanced Accounts:
a)A Balanced Balance Sheet (i.e., Assets = Liability + Equity) in your Company's General Ledger, and
b)A Balanced Income Statement (i.e., Sales = Expenses + Profit)
c)A Balanced Trial Balance (i.e., Assets + Expenses = Liability + Equity + Sales) in your Company's General Ledger
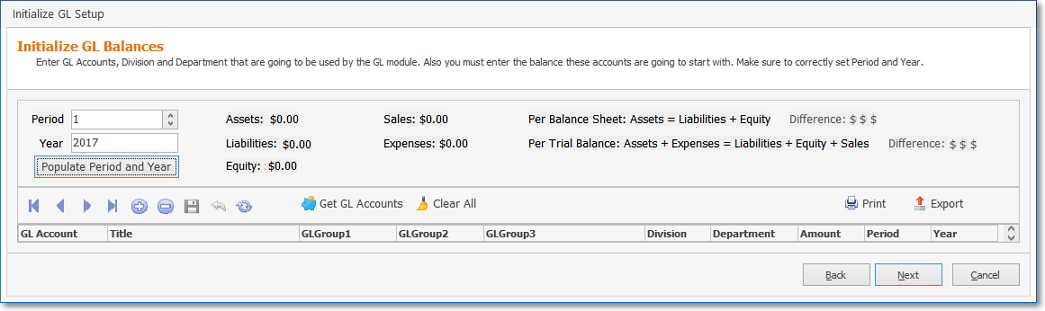
•The five basic steps required to complete this Initialize GL Balances Form are as follows:
1.Enter the Period and Year, the Account Balances of which will be recoded on this Initialize GL Balances Form (see the "The Period and Year Information" discussion below).
2.Retrieve the set of General Ledger Accounts which were previously defined for this purpose (see the "Get GL Accounts" discussion below).
3.Populate Period and Year (as explained below)
4.Enter the Account Balances for these General Ledger Accounts (copied for the Trial Balance created for this purpose following the instructions in the General Ledger New User's Start-up Procedures chapter).
i.By entering the Account Balances that existed at the close of an Accounting Period (which should be the last General Ledger Accounting Period that was "Closed" in your Company's previous Accounting System), those Account Balances will also become the Starting Balances that existed at the beginning of the next (not closed) Period and Year.
5.Confirm that the Balance Sheet, Income Statement and Trial Balance totals for your entries are in balance.
❑The Period and Year Information - This information is entered at the top of this Initialize GL Balances Form and is mandatory:
1.If you are Initializing GL Balances for the Last Day (Date) of your Company's Fiscal Year:
✓When you enter those Ending Balances (see the "Get GL Accounts" discussion below), no Sales or Expense Account balances are required [see Example a) below]
✓This is because those Ending Balances will immediately become the Starting Balances for the first day of the first month of the next Fiscal Year (which, of course, should have no Sales or Expenses posted yet).
✓Those "missing" Sales and Expenses will be identified in the General Ledger Start Up Transaction Entries that are entered through the General Journal, once your Wizard entries are finished.
2.However, you may Initialize GL Balances using the Ending Balances from the Last Day (Date) of a month which is not the Last Day (Date) of your Company's Fiscal Year.
✓If this is what you will be doing, you must enter your Company's Year-to-Date Balances for the Sales or Expense Accounts.
•Period - Enter the last Period that was Closed (by your Company's Accountant, old accounting software) in your Company's previous General Ledger.
▪Examples:
a)December, 2015 was the last period Closed and it was the end of your Company's Fiscal Year, enter 12 for December which is the last closed Period and the last Period of that Fiscal Year.
b)September, 2014 was the last period Closed and it was the end of your Company's Fiscal Year, enter 12 for September which is the last closed Period and the last Period of that Fiscal Year.
c)If the last Period Closed was July, 2014 and it is not the end of your Company's Fiscal Year, then enter 7 for July which would be the last closed Period within that Fiscal Year.
•Year - Enter the associated Year of the last closed Period entered above (by your Company's Accountant, old accounting software) in your Company's previous General Ledger.
▪Examples:
a)December, 2015 was the last period Closed and it was the end of your Company's Fiscal Year, so the associated Year of the last period Closed would be 2015.
b)September, 2014 was the last period Closed and it was the end of your Company's Fiscal Year, so the associated Year of the last period Closed would be 2014
c)If the last Period Closed was July, 2014 and it is not the end of your Company's Fiscal Year, so the associated Year of the last period Closed would still be 2014.
•Populate Period and Year - Click this bar immediately below the Period and Year fields to automatically enter the Period and Year identified above in the appropriate columns for each listed General Ledger Account.

•Ribbon Menu - The Initialize GL Balances Form (see below) offers the standard record movement, Add, Edit, Delete, Cancel, Save and Refresh Icons plus the Get GL Accounts, Clear All, Print, and Export functions.
❑Get GL Accounts - Ideally, your Company's General Ledger Accounts, General Ledger Groups, and if your Company is using more than one Department, those Departments should have already been identified.
•Existing General Ledger Account information may be loaded, and if necessary, new General Ledger Accounts may also be created (see the General Ledger Start-up Overview for New Users chapter for more information):
a.GL Account - Use the Get GL Accounts option to import the General Ledger Account information defined in the General Ledger Accounts Form (new Accounts may also be added, if necessary).
b.Title - The Name associated with the GL Account number entered above.
c.GL Group 1 - This is the Primary Account Division of the GL Account number entered above (i.e., Assets, Liabilities, Equity, Sales, Expenses).
d.GL Group 2 - This is the Secondary Account Division of the GL Account number entered above, if assigned - otherwise it should be the same Primary Account Division as listed in GL Group 1.
e.GL Group 3 - This is the Name of a Group ID assigned to the General Ledger Accounts Form ( what it will become if being manually added, - or if imported, it is the Group ID).
f.Division - The Division field should remain blank except when entering Sales and Expense Account Balance information, where this field is optional.
g.Department - Enter Zero ("0") which is the default, or enter the appropriate Department Number when Multi-Departmental Accounting is to be implemented.
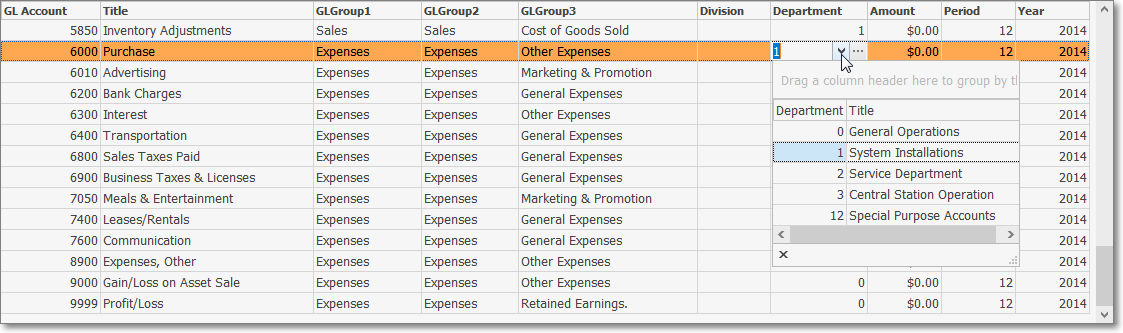
Initialize GL Balances dialog - Department column - Drop Down Selection Box used to Choose the appropriate Department Number
i.Only Sales and Expense Accounts - as shown in GL Group 1 field - may be assigned a different Department Number
ii.Using Departments to separate Financial Transactions into individual Work Groups or Profit-Centers can often provide you a better, more comprehensive view of your Company's finances.
iii.But doing so will require that a Department Number be identified by the User as Sales (Invoices) and Expenses (Bills) are recorded.
h.Amount - Enter the appropriate account balance Amount, which is the ending balance from the "Ending Date" of last closed Period and Year identified above, which comes from the old software/General Ledger information provided by your Company's Accountant, all of which is explained in the more detailed "Amount column" discussion below.
i.Period - The same Period Number should be entered in all of the fields in this column - See "The Period and Year Information" and the "Populate Period and Year" discussion above.
j.Year - The same Year Number should be entered in all of the fields in this column - See "The Period and Year Information" and the "Populate Period and Year" discussion above.
•Amount column - At the completion of this Initialize GL Balances for the Account Balance Entries, these Accounts must be "In Balance" before you will be able to move to the next Form:
✓What does "In Balance" mean?
▪In Balance means that the Balance Sheet (i.e., Assets = Liabilities + Equities), and the Trial Balance (i.e., Assets + Expenses = Liabilities + Equity + Sales) are both required to be "In Balance"
▪So, the goal is to have your Company's General Ledger System be "In Balance" when this General Ledger Setup Wizard process is finished.

✓To accomplish this "In Balance" goal, use the Values listed in the Trial Balance that was created during the Start Up Task - explained in "I. Preparing to use the General Ledger Setup Wizard" of the General Ledger New User's Start-up Transactions chapter - to complete the "Initialize GL Balances" dialog presented in this Setup Wizard.
✓Each Amount entered in the Amount column must represent the Balance of that General Ledger Account as it existed at the end of the Period and Year entered above (see the "The Period and Year Information" discussion above).
✓The status of the two "In Balance" situations described above are displayed at the top of this Initialize GL Balances Form - in real time - as the Amounts are entered. To assist you in finishing this process, the:
▪Assets = Liabilities + Equity totals are displayed at the top of the screen, and is incremented in real-time with the addition of each new/updated GL Account number and/or its Amount, and
▪Assets + Expenses = Liabilities + Equity + Sales totals are also displayed at the top of the screen, and are incremented in real-time with the addition of each new/updated GL Account number and/or its Amount.
▪Amount Differences are also shown.
❖See the Understanding a General Ledger chapter for additional information about a General Ledger being In Balance.
•Click the Next button to continue.
✓You may also Click ![]() at the bottom of the current Form to return to the previous Form.
at the bottom of the current Form to return to the previous Form.
✓You may Click the Cancel button at the bottom of the current Form, if needed, at any time.
✓The data entered so far is preserved, and will be automatically filled in when you return, but may be changed, if necessary.
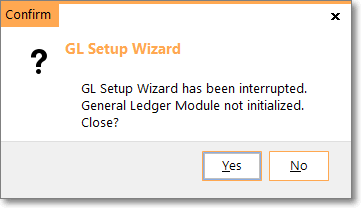
Exit General Ledger Setup?
✓Therefore, if you need to exit the process at any time before completion (because you need to confirm/look-up some requested information, or make an additional entry elsewhere), you may do so and the entries made to that point will be saved.
![]() - To start over, Click this Clear All option at the top of the Initialize GL Balances Form and all General Ledger Account Information will be removed.
- To start over, Click this Clear All option at the top of the Initialize GL Balances Form and all General Ledger Account Information will be removed.
![]() - You may then click this Get GL Accounts option to re-populate this Initialize GL Balances Form.
- You may then click this Get GL Accounts option to re-populate this Initialize GL Balances Form.
Completing the Setup Wizard
❑Entering your Company's Account Declaration Settings:
•This Form is use to defined how certain General Ledger Accounts - those designated as Mandatory Accounts - will be used as Financial Transactions are posted.

General Ledger Setup Wizard - Account Declaration Form
•Current Earnings - Use the Drop-Down Selection List and Choose your Equity Account for Current Earnings.
•Retained Earnings - Use the Drop-Down Selection List and Choose your Equity Account for Retained Earnings.
•Earnings Posting - Use the Drop-Down Selection List and Choose your Special Account for Posting Earnings.
•Accounts Receivable - Use the Drop-Down Selection List and Choose your Asset Account for Accounts Receivable.
•Accounts Payable - Use the Drop-Down Selection List and Choose your Liability Account for Accounts Payable.
•Undeposited Funds - Use the Drop-Down Selection List and Choose your Asset Account for Undeposited Receipts
•Inventory - Use the Drop-Down Selection List and Choose your Asset Account for Inventory.
•Inventory Adjustments - Use the Drop-Down Selection List and Choose your Expense Account for Inventory Adjustments
•WIP Inventory - Use the Drop-Down Selection List and Choose your Asset Account for the Inventory Items that have been identified as part of a Work In Progress.
•Inventory Purchases - Use the Drop-Down Selection List and Choose your Liability Account for Inventory Purchases
•COGS (Cost of Goods Sold) - Use the Drop-Down Selection List and Choose your Expense Account for Cost of Goods Sold.
•Local Tax (Liability) - Use the Drop-Down Selection List and Choose your Liability Account for Local Sales Tax Liability.
•National Tax (Liability) - Use the Drop-Down Selection List and Choose your Liability Account for National Sales Tax Liability.
•Customer Deposit (Liab) - Use the Drop-Down Selection List and Choose your Liability Account for Advance Deposits.
➢Note: Once the Account Declaration Form is completed (properly) the Next button will again become available. If not, check the following:
1.Ensure that every General Ledger Account Number selected is different than any other General Ledger Account Number that was been previously selected, or you will not be able to proceed.
2.Even if you do not need the requested General Ledger Account (e.g., you do not collect National Sales Tax), and/or it currently does not apply to your Company's style of operation, you still must enter a General Ledger Account Number in the field (or you may use a generic Liability and/or Expense account, if in your case these are unnecessary fields).
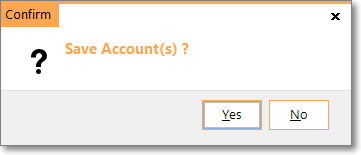
•Click the Next button to continue and Click Yes in response to the Save Account(s) question.
❑Entering your Company's Sale-Purchase Items:
•This Sale-Purchase Items Form is use to identify the appropriate General Ledger Accounts that may be missing from the Sale-Purchase Items that were previously defined.
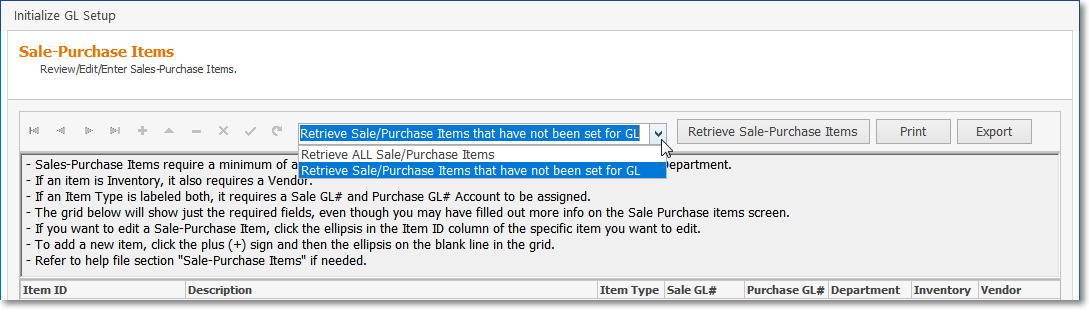
Initialize GL Setup - Sale Purchase Items dialog - Options
✓Using the Drop-Down Selection List provided, Choose the Retrieve Sale/Purchase Items that have not been set for GL option
✓This will allow you to determine how many, and which (if any) Sale-Purchase Items do not have the proper General Ledger Accounts assigned to them.

•To complete the General Ledger Wizard, you must provide/update the General Ledger Account(s) information for any Sale-Purchase Item record requiring it.
✓This may be accomplished one of two ways:
1.By using the Review/Edit/Enter Sale Purchase Items dialog to make the required entries (see the "Using the Wizard's Sale Purchase Items dialog to enter the appropriate General Ledger Account number(s)" discussion in the Updating Sale-Purchase Items Data chapter), or
2.By temporarily exiting the General Ledger Wizard at this time (press the Cancel Button and all entries made will be saved) and use the actual Sale-Purchase Item Form to make the required entries (see the "Using the actual Sale-Purchase Item Form to enter the appropriate General Ledger Account number(s)" discussion in the Updating Sale-Purchase Items Data chapter)
•When this Sale Purchase Items (entry) process is accomplished, Click the Next button to continue.
❑Entering General Ledger Account information for your Company's Bank and Credit Card records:
•The Review Bank and Credit Card dialog is used to identify and enter the General Ledger Accounts that may be missing from the Bank and Credit Card Forms..
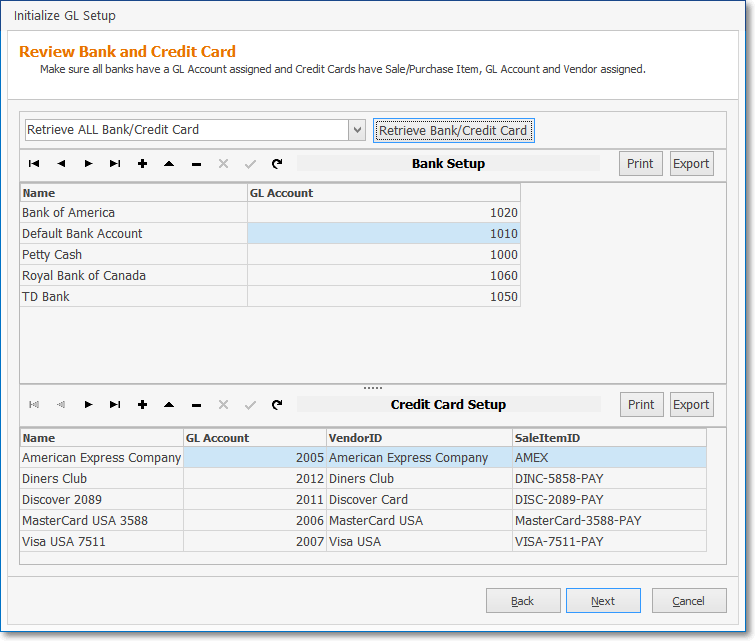
Initialize GL Setup - Bank and Credit Card dialog - Options
✓Using the Drop-Down Selection List provided, Choose the Retrieve Bank/Credit that have not been set for GL option
▪This will allow you to determine how many, and which (if any) Bank and/or Credit Card records do not have the proper General Ledger Accounts assigned to them.
▪Ideally (as shown below), when you are finished entering any missing General Ledger Account Numbers, and then select the Retrieve Bank/Credit Card that have not been set for GL option, the Review Bank and Credit Card dialog will be empty (no General Ledger Account Numbers are missing.
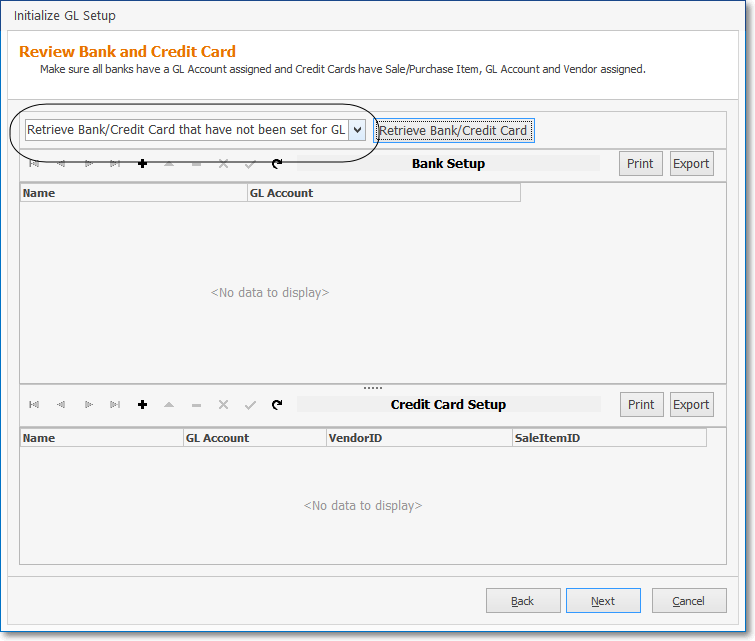
Initialize GL Setup - Bank and Credit Card dialog - No missing General Ledger Accounts
✓For complete instructions on Updating Bank and Credit Card information, see that chapter.
•To complete the General Ledger Wizard, you must provide/update the General Ledger Account(s) information for any Bank and/or Credit Card records requiring it.
✓This is accomplished by using the Review Bank and Credit Card dialog (illustrated above) to make those required entries (see the Updating Bank and Credit Card records with GL # chapter for instructions)
•When this Review Bank and Credit Card (entry) process is accomplished, Click the Next button to continue.
❑Review and Post - Review to confirm that you are "In Balance" and more importantly, that you are satisfied with all of these entries and Totals.
•You may also Click ![]() or the left arrow at the top of the current Form (if available) to return to the previous Form.
or the left arrow at the top of the current Form (if available) to return to the previous Form.
•You may Close the General Ledger Setup Wizard, if needed, at any time and the data entered so far will be preserved.
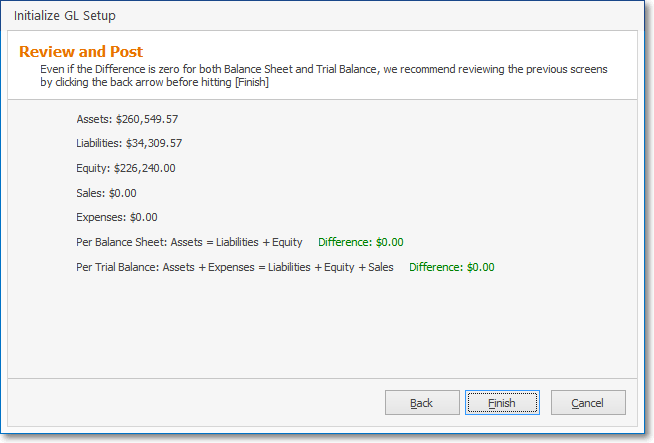
Initialize GL Setup - Review and Post dialog
•If you are satisfied with all of these entries and Totals, Click the Finish button.
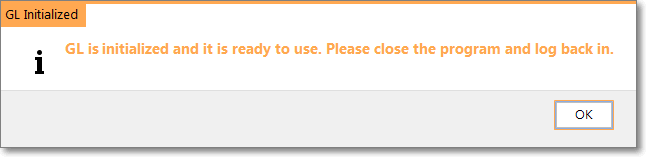
General Ledger Setup Wizard - completion message
•Click OK to confirm that you are done.
✓You have completed the General Ledger Setup Wizard.
✓Once you exit the MKMS application and return to it, the new General Ledger related Menu Options will be activated.
❑What's Next?
A.Continue using the software, as normal.
•From this moment forward, all Financial Transactions entered through either the Accounts Receivable or Accounts Payable modules, will be posted automatically - in the background - while using those modules in the normal manner.
B.Post the Summarized Start Up Transactions.
•The previous Accounts Receivable or Accounts Payable Financial Transactions which existed prior to running the Setup Wizard but were dated after the last Period and Year Closing Date (i.e., "Ending Date"), will need to be posted manually (specifically only those Financial Transactions which occurred after the last Closed Period).
❑There are two procedures available for posting these (manual) Financial Transactions:
1.Month by Month Posting - Individually post each month's data for each module, then close that month for that module, and repeat that process until you have posted all of your Summarized Start Up Transactions in the General Ledger System.
✓General Journal Entries would be created, and months/years closed for the following periods:
i.Previous Year End Financial Transactions Summary, if required.
ii.Summary of each of the Closed Months Financial Transactions within the Current Year (after the Closed Month identified earlier in the Fiscal Year Start up Form).
iii.Summary of the Financial Transactions entered after the most recently closed month (no closing required until the month is actually completed) but before the Setup Wizard was run.
✓This is the method (detailed in the "Summarizing the Start-up Transactions" chapter) that will provide Financial Statements for each month's Financial Transactions that you've taken the time to individually summarize, and then enter using the General Journal Form.
▪It will provides the most detailed General Ledger history that will always be available for future reference within MKMS.
✓The current month's Summary of the Financial Transactions must still be posted as recommended regardless of which option is chosen.
2.Lump Sum Posting - Use the various reports outlined in the Summarizing the Start-up Transactions chapter, but summarize All Transactions for all of the Closed Months (by entering the appropriate Date Range when printing each report) and only post those combined summary values.
✓Three sets of Journal Entries would be entered:
i.Previous Year End Financial Transactions Summary, if required.
ii.Summary of all Closed Months Financial Transactions for the Current Year.
iii.Summary of the Financial Transactions entered after the most recently closed month.
✓This is the method will only provide Financial Statements as a summary of the all the transactions for those Closed Months.
▪It provides one summarized Financial Transaction History for all the Accounting Periods - which have passed since the Ending Date used in the General Ledger Wizard - for future reference within MKMS.
✓The current month's Summary of the Financial Transactions must still be posted as recommended regardless of which option is chosen.
•When must these General Journal Financial Transaction entries of your Summarized Start Up Transactions be completed?
✓The timetable for completing these entries - whichever method you choose - is not as "immediate" as you might think.
✓Once the Setup Wizard is successfully completed, all future Financial Transaction will be posted to the General Ledger System immediately.
✓This means that whether you make all of these "start up entries" before you continue using the Accounts Receivable and Accounts Payable modules, or make them on an "as time allows" process, makes no difference.
✓As long as you have your Transaction Summary spreadsheet documents which contain all of the needed itemized Month End Summarized Financial Transactions (as detailed in the "Summarizing the Start-up Transactions" chapter), the actual posting of these Financial Transactions may be done at any time in the future.
✓But, the sooner the better - because you cannot permanently Close any of the affected Accounting Periods in the General Ledger until these entries is completed!
✓Keep in mind that, until each of these Month's Financial Transactions are entered in the General Ledger System, those month's Financial Statements will be unavailable (or worse, they will be inaccurate because of the missing Financial Transaction entries).
❑What's Next?
•Complete the General Ledger Start-up Entries