❑The Print Proposals dialog is accessible any of three ways (each offers a slight variation of its defaults in the Print Proposals dialog).
•To view or print this Print Proposals dialog:
a)From the Backstage Menu System Select Reports and Choose Prospect And Proposal and Select the Proposals option, or
b)From the Quick Access Menu, Select Reports and Choose Prospect And Proposal and Select the Proposals option, or
c)Open from a Prospect (or Subscribers) Form and locate (F2 Search) the desired record
oThen Choose Proposals from the Prospect Options Menu and locate the Proposal to be Printed
oSelect the Print Icon to display the Print Proposals dialog.

Print Proposals dialog opened from Proposal Form
•Once the Print Proposals dialog is opened, there are three possible dialog views - determined by the Report Type selected and/or from where it was opened:
1.Legacy - This Report Style is used when you want to use the original printed Proposal format.
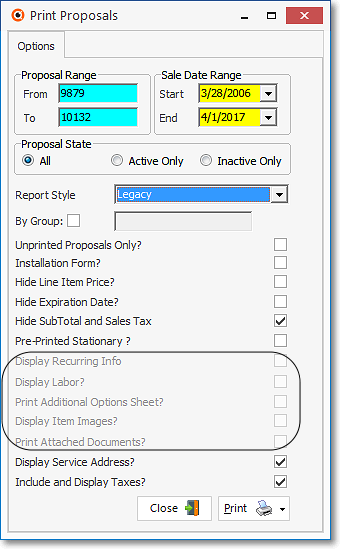
Dialog from Prospect & Proposals Menu - Legacy Style
Circled items are not available when the Legacy Style is selected
2.Contemporary - This Report Style is used when you want to use the newly revised printed Proposal format.
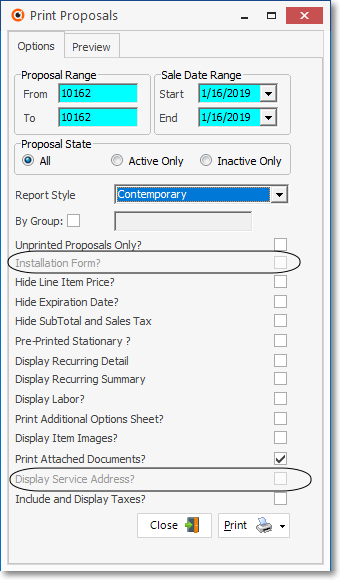
Dialog from Prospect & Proposals Menu - Contemporary
Circled items not available when Contemporary Style is selected
3.Print Proposals option from within the Proposals Form (available in Legacy and Contemporary formats)
➢Note: If the ConfirmHeaderFooter option is set to True ("T") in the Company Settings dialog accessible within the Company tab of the User Options Form, when a Header (and/or a Footer) has not been created for a Proposal, upon exiting the Proposal, you will be asked if you want to do so before exiting the Proposal Form.

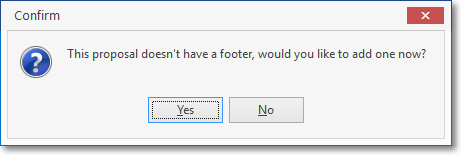
▪Answer Yes and the appropriate Rich Text Editor dialog will be displayed.
Dialog for Print Proposals from within Proposal Form
Circled Proposal Range represents the selected Proposal
❑Print Proposals tabs - There are two tabs on the Print Proposals dialog.
•Options - Initially only the Options tab is shown (until you make your Options selections and Select Print).
➢Important Note: There are some important differences between the Prospect Tracking Reports Menu accessed Print Proposals dialog, and the Proposals Form accessed Print Proposals dialog, as well as whether the Legacy or the Contemporary Report Style is selected.
✓Proposal Range - Specify which range of Proposal Numbers should be included:
▪If the Print Proposals dialog was chosen through the Proposal Form's Print choice, the Number of the Proposal that is selected at that time will be inserted automatically as both the From and To Proposal Range Numbers, and is not alterable.
▪However, if the Print Proposal dialog was selected from the Prospect & Proposal menu, you may set the Proposal Number Range (see below).
oFrom - By default, it will start with the oldest Proposal Number within the system. Enter the starting number in the Range of the Proposal Numbers to be printed.
oTo - By default, it will end with the newest Proposal Number within the system. Enter the ending number in the Range of the Proposal Numbers to be printed.
✓Sale Date Range - Specify which Proposal Expiration Dates (Sale Dates) should be included:
a)Click on the Date field and type the desired Date using a MM/DD/YYYY format; or
b)Use the Drop-Down Calendar/Date Entry field provided to Choose the desired Date
▪If the Print Proposals dialog was chosen through the Proposal Form's Print choice, the Start and End Sale Date Range (actually it will be the Proposal's Expiration Dates) will be inserted automatically, and is not alterable.
▪However, if the Print Proposal dialog was selected from the Prospect & Proposal menu, you may set the range of the Proposal's Expiration Dates (see below).
oStart - By default, it will start with the oldest Proposal Expiration Dates within the system.
> Using the Drop-Down Calendar/Date Entry field provided, Select the Date, on or after which the Proposal expires or was sold.
oEnd - By default, it will end with the newest Proposal Expiration Dates within the system.
> Using the Drop-Down Calendar/Date Entry field provided, Select the Date, on or before which the Proposal expires or was sold.
✓Proposal State - Based on whether the Proposals are, or are not Active:
▪All - By default, All Proposals - regardless of whether or not the Active? box is Checked on the Proposal Form - will be included.
▪Active Only - Click this button to include only those Proposals with the Active? box Checked on the Proposal Form.
▪Inactive Only - Click this button to include only those Proposals without the Active? box Checked on the Proposal Form.
➢Note: For those who are upgrading from a version 5.31.x or older, being able to identify a Proposal as Active or Inactive is a new feature.
All existing Proposals - those that were present when the version 5.32.x was installed - will be considered Active until the Active? box is Checked and then you Remove the Check Mark to change the Proposal status to Inactive.
Therefore, if Inactive Only is chosen, no previously existing Proposals will be listed until this procedure is executed.
✓Report Style - Use the Drop-Down Selection List to Choose the desired Proposal format.
▪Legacy - The original (Version "1.0") printed Proposal Format.
▪Contemporary - The current (Version "2.0") printed Proposal Format.
•Additional Options: Check any of the boxes below, as required. Once Checked, the boxes chosen will become the new defaults for this Print Proposals dialog.
✓By Group: - Check this box and enter a Group Code in the field provided, if required.
▪This will "filter" the Proposals included to only those assigned this specified Group Code.
▪Group Codes are internally converted to All Uppercase Letters so "Apples33", and "applES33", and "AppLeS33" all represent "APPLES33" to the system.
▪Group Codes are optional, free-form codes a User may assign to any Proposal.
▪There is no "Maintenance" Form to pre-define these Group Codes and no restrictions as to how many may be used or for what they are being used.
✓Unprinted Proposals Only? - Check this box if you only want the Proposals that have not been previously printed, to be included.
✓Installation Form? - This option is only available if the Legacy Report Style is selected.
▪Check this box to have the selected Proposals printed as Installation Forms.
✓Hide Line Item Pricing? - If you do not want the Retail Prices that were entered for each individual Proposal Item printed on each Proposal, Check this box. Only the Total Price will be included at the end.
✓Hide Expiration Date? - Each Proposal is assigned an Expiration Date.
▪If you do not want the Expiration Date printed on these selected Proposals, Check this box.
✓Hide Sub Total and Sales Tax - Where applicable, a Sub Total and the Sales Tax amount is included.
▪If you do not want the Sub Total and the Sales Tax amount printed on the Proposals, Check this box.
✓Pre-Printed Stationary? - If you are using a pre-printed form, thereby eliminating the need for the Company Information and Logo to be printed on the top of the Proposal, Check this box.
✓Print Attached Documents? - Check this box to include and print the Documents attached to the Proposal.
▪These attached Documents will print correctly if they can be opened, viewed, and subsequently printed from within Windows® Explorer by Double Clicking on the the Document's file name.
▪This option is only available:
1)When printing a specific Proposal by selecting Print on the Proposal Form itself, or
2)When printing from the Reports Menu, and the By Group options is Checked, and a Group Code has been entered.
▪When printing from the Reports Menu, and the By Group options is Checked, but no Group Code is entered, All Proposals will be printed.
➢Note: Some Documents will not appear in the Preview but will be printed during the actual printing process.
✓Display Service Address? - When an Alternate Proposal Address has been defined and it is to be included on those Proposals when printed, Check this box.
•Contemporary Report Style Options - These options are only available if the Contemporary format has been selected.
✓Display Recurring Info - If you want to include a Recurring Charges information box on each Proposal (when applicable), Check this box.
✓Display Labor? - For items included in the Proposal that have been assigned Labor as the Estimate Type and the installation Labor Hours and the Cost per Hour have been defined within the Sale-Purchase Items Form
▪Check this box to have those calculated Labor Costs shown on the Proposal.
▪These Labor Costs charges will be in addition to the Price of the Purchase Item.
✓Print Additional Options Sheet? - If Proposal Options have been defined, Check this box to have them included on the Proposals. (This option is only available if the Contemporary format has been selected.)
✓Display Item Images? - If you want the Image of a Sale-Purchase Item included on this Proposal, Check this box.
▪Any Images attached to a Sale-Purchase Item record will included, if this option is chosen when Printing that Proposal.
✓Print Attached Documents? - Check this box to include and print the Documents attached to the Proposal.
▪These attached Documents will print correctly if they can be opened, viewed, and subsequently printed from within Windows® Explorer by Double Clicking on the the Document's filename.
▪This option is only available:
1.When printing a specific Proposal by selecting Print on the Proposal Form itself, or
2.When printing from the Reports Menu, and the By Group options is Checked, and optionally a Group Code has been entered.
oWhen printing from the Reports Menu, and the By Group options is Checked, but no Group Code is entered, All Proposals will be printed.
➢Note: Some Documents will not appear in the Preview but will be printed during the actual printing process.
✓Display Service Address? - By default, when the Legacy Format is selected, this option is available, otherwise,
▪Display Service Address?
a)When an Alternate Proposal Address has been defined, this Proposal Alternate Address is used on the Proposal when it is printed, so this option is not available.
b)When printing a Proposal using the Contemporary Format, and it has an Proposal Alternate Address defined, consider including the Installation Location within the body of the Proposal by entering that (Installation Location) information in the Note (Memo) field of the first Proposal Item.
•Print - Click the Print button to Preview and optionally Print (to a File or a Printer) these Proposals.
![]()
✓If you want to Choose a Custom Report Format, Click the small down arrow ‚ on the Print button and make that selection.
✓To Exit this Report dialog, Click the Close button ![]() toward the bottom of the Options tab.
toward the bottom of the Options tab.
❑Print Proposals Preview - The Preview tab presents the Proposals which resulted from the Options you've selected.
•Up Arrow/Down Arrow - hi - Moves the report one line up, or one line down, respectively.
•Page Up/Page Down - Moves the report to the previous or next page, respectively.
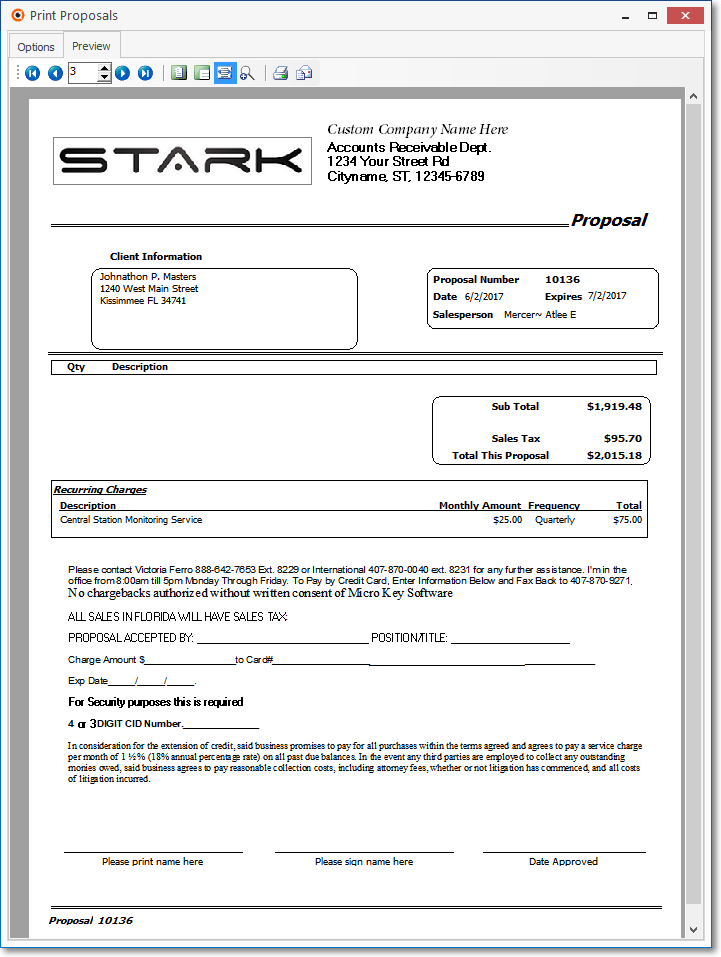
Print Proposals - Preview - Contemporary format Page 3 with Footer
•Home - ![]() - Using either the screen Icon or your Keyboard's Home key, moves the report to the top of the first page.
- Using either the screen Icon or your Keyboard's Home key, moves the report to the top of the first page.
•End - ![]() - Using either the screen Icon or your Keyboard's End key, moves the report to the bottom of the last page.
- Using either the screen Icon or your Keyboard's End key, moves the report to the bottom of the last page.
•Arrows - The arrows allow you to move back and forth, from page to page.
•Number - Indicates the page number you are viewing.
✓You may also type in a specific page number, Press 8 Enter and that page will be displayed immediately.
✓If you enter an invalid page number, it will be ignored.
•Fit To Page - Click the first button after the arrows to size a full page of the report to fit the screen.
•Zoom To 100% - Click the second button after the arrows to display the page at 100% (of the printed view).
•Fit To Page Width - Click the third button after the arrows to size the page of the report to fit the full width of the screen.
•Zoom To Percentage - Click the fourth button after the arrows to re-size the page of the report by percentage.
![]()
✓When you Click the Zoom To Percentage button, the Percentage selector will be displayed.
✓You may then Click the Up or Down ‚ arrows to set the exact amount of Zoom you want.
•Print - Click the Print button to Print (to a File or a Printer) ![]() the displayed Proposal.
the displayed Proposal.
•Email - Click the Email button ![]() to send the Proposal as an attachment via the Web (see E-mail the Proposal) to an Email Address of your choosing.
to send the Proposal as an attachment via the Web (see E-mail the Proposal) to an Email Address of your choosing.
•To Exit the Preview tab and Close this Report dialog Form, Click the Close box ![]() on the right at the top of the Preview tab.
on the right at the top of the Preview tab.
✓If you Print the Proposal(s), you will be asked to Confirm that they have printed correctly.
✓Answer appropriately.

Did All Proposals Print Correctly?
❑Samples of various Proposal formats appear below:
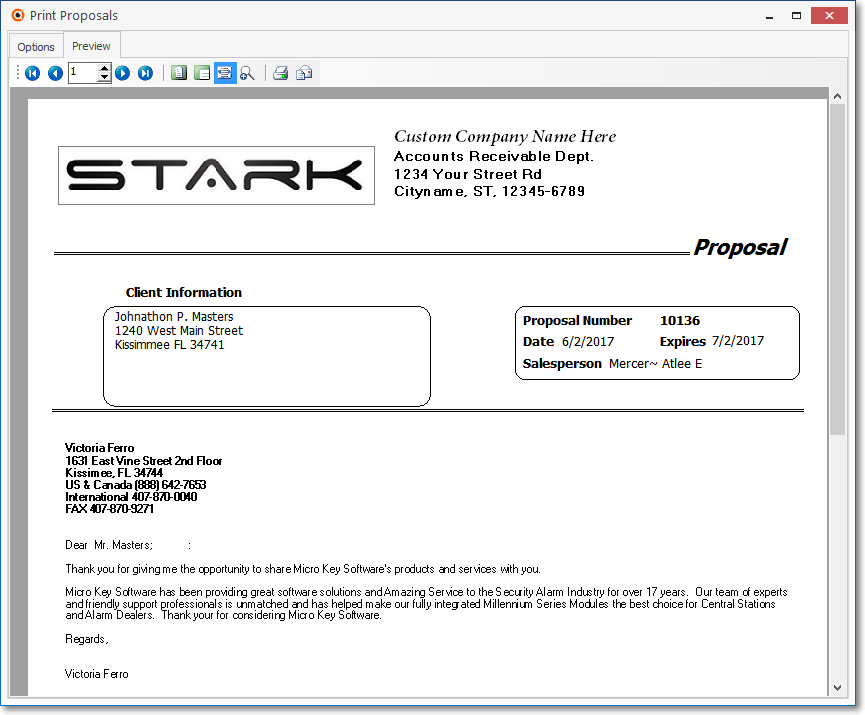
Proposal - Contemporary format with cover page (header) placement illustrated
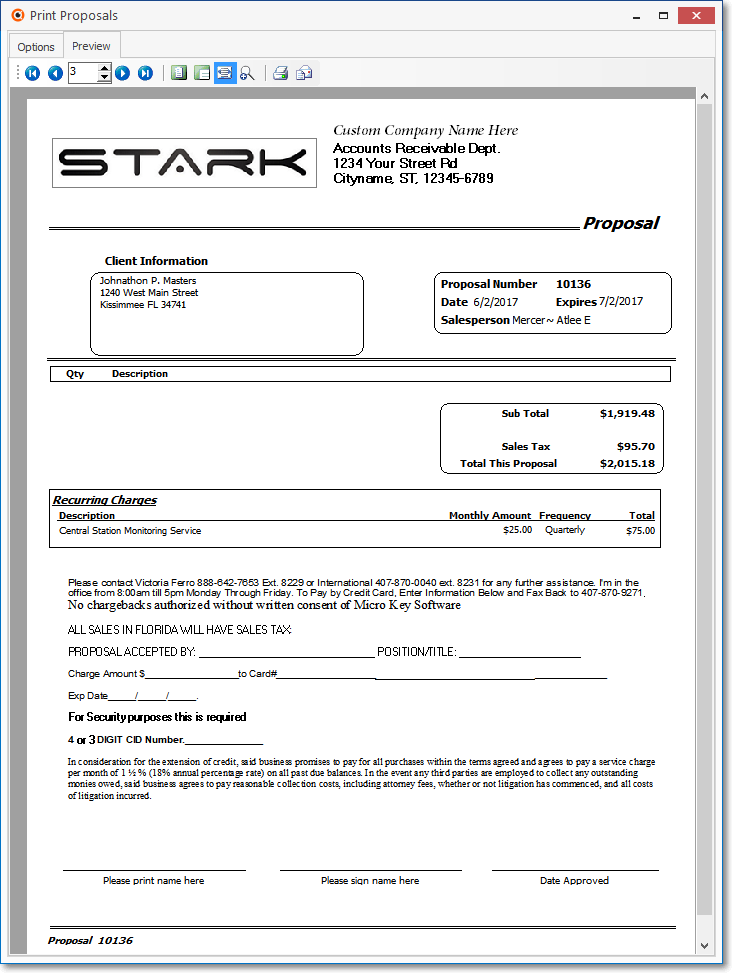
Proposal - Contemporary format with a Page Footer
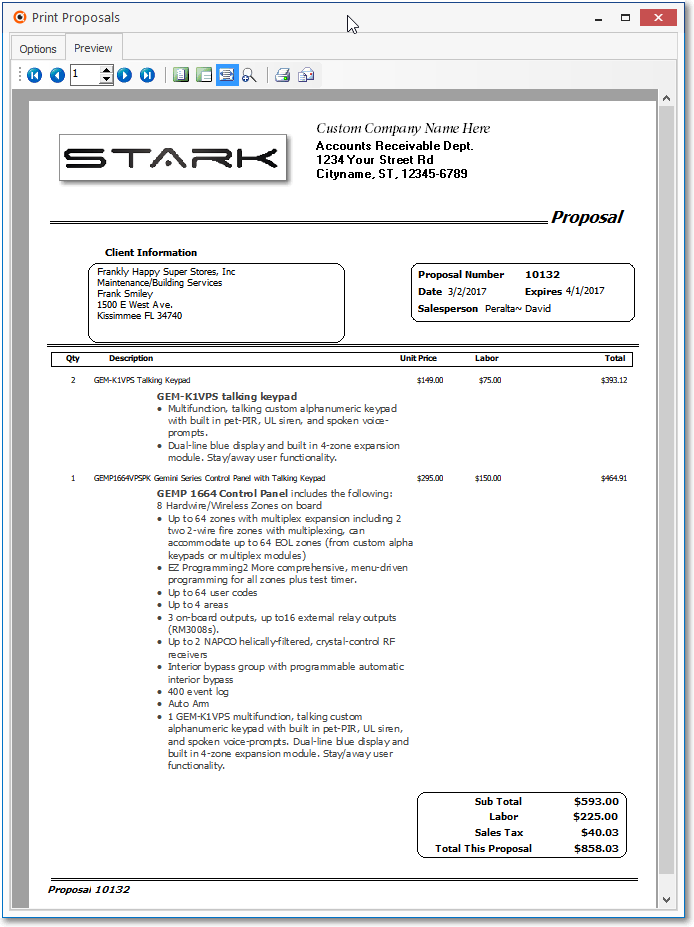
Proposal sample with no Header or Footer