❑Expenses - In most cases, if you are doing Job Costing, you will have miscellaneous Expenses charged against a Job that were not specifically identified as part of the original Proposal but arise as the Job's installation progresses.
•To record an Expense, open the Job Costing Form
a)From the Backstage Menu System Select Maintenance, then in the General sub-menu Choose Job Costing, or
b)From the Quick Access Menu, Select Maintenance and Choose Job Costing.
✓A Job Costing Form will be displayed.
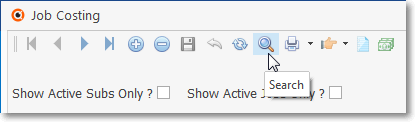
•Locate the Job that needs an Expense added by Clicking the Search Icon at the top of the Job Costing Form which will open the Search Jobs dialog.
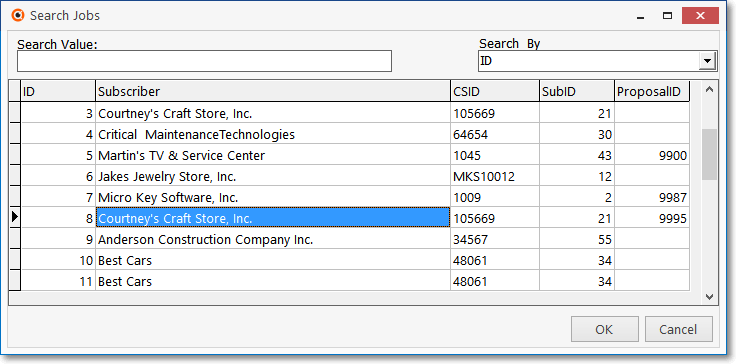
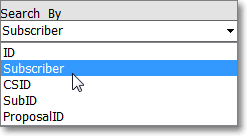
✓Search By - Use the Drop-Down Selection List to Choose the field name on which your search will be performed.
✓Search Value - Enter the characters that will best locate the desired Job. As you enter information, the record pointer4will be continually relocated based on your entry.
✓OK - Click OK when the correct Job is located.
•Select the Expenses Tab on the Job Costing Form first, then use the New Bill option to create a Bill for this Expense in the Accounts Payable module, and then Pay the Bill (e.g., Hand Write, Print a Check) following these steps:
✓Click the New Bill option at the top of the Job Costing Form.
✓Using the Select Vendor dialog, locate the appropriate Vendor (the individual or organization to which you must pay for the Expense).
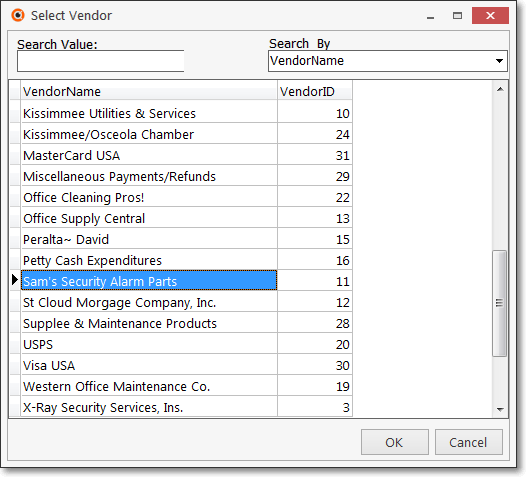
Select Vendor Dialog
▪Search By - Using the Drop-Down Selection List to Choose the preferred Search method. You may search by the Vendor Name (the default), or the Vendor ID.
▪Search Value - Enter the appropriate Search phrase. As you enter characters, the pointer „ relocates to the most appropriate Vendor record.
▪Once the pointer is at the correct record, To Select that Vendor record, Click OK.
•The Accounts Payable module's Bill Form is displayed.
✓Click the ![]() Icon on the Bill Form, and the appropriate Job Number (i.e., 28) is inserted automatically.
Icon on the Bill Form, and the appropriate Job Number (i.e., 28) is inserted automatically.
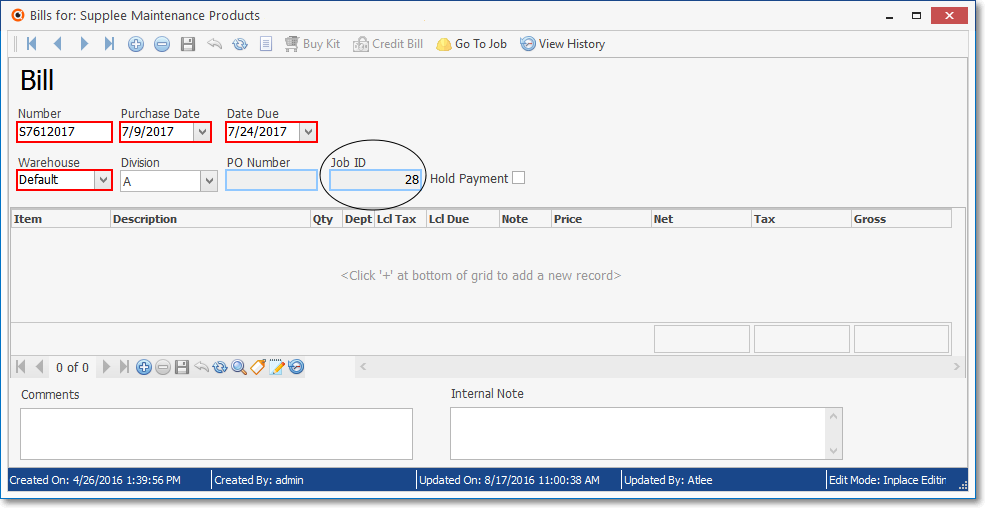
Job Costing Expenses - Bill Form - Starting new Bill for Expenses
✓Number - First, you must enter an Invoice Number. so use that Vendor's actual Invoice Number.
✓Purchase Date - By default, Today's date is inserted.
▪Use the Drop-Down Calendar/Date Entry field provided to reset the Purchase Date to the actual Invoice's (or Statement's) Date.
▪If the Purchase Date is changed from the default, the Due Date will be reset, as well (see below).
▪The Purchase Date for this Bill may not be reset to a Date within a Month which has already been Closed!
✓Due Date - By default, this will be set based on the number that was entered in the Vendor's Terms field within the Edit View on the Vendors Form.
▪If you reset the Purchase Date, the Due Date will automatically be reset.
▪As may be required, a Due Date may be set for any date on or after the Purchase Date entry.
✓Warehouse - By default, the Warehouse selection will be "Default".
▪This will not be changed because Expensed Items are not Inventory Items.
✓Division - If the Vendor has a Division Code assigned on the Edit View of the Vendor Form, that Division Code will be inserted automatically.
▪Use the Drop-Down Selection List to Choose a (new or different) Division Code, when appropriate.
✓Job ID - This Number is entered by the system because the Bill originated from the Job Costing module.
•Enter as many Detail line items as needed to identify the Expenses that is to be paid.
✓Item - Expenses, and other costs associated with this Job, may be included on the same Bill (as long as these were purchased from the same Vendor).
▪Use the Drop-Down Selection List to Choose the Sale-Purchase Item assigned the Job Cost Category of Expenses (using the Item ID of "JOBEXP" as recommended in the Inventory Tracking & Job Costing Set Up chapter).
▪If other costs associated with this Job were also purchased at the same time, use the appropriate Sale-Purchase Item for those items.
✓Description - Modify the default Description entered for this Sale-Purchase Item to include the Job Number (shown in the Job ID field above) and any other relevant information.
▪You may use the Notes field to expand your explanation (see Notes below).
✓Qty - By default, this should be the number 1.
✓Price - Enter the amount of the Expense to be paid.
✓Dept - If using the General Ledger module, use the Drop-Down Selection List to Choose the appropriate Department to be charged for this Expense.
✓Sales Tax - If Sales Tax is charged by this Vendor, confirm that the Sales Tax Information has been assessed correctly; if not, no Local or National Sales Tax field(s) will be displayed.
✓Notes - You may also want to Click the Notes field to enter additional information relating to this Expense Payment.
✓Save - Click the ![]() Icon to record the Bill.
Icon to record the Bill.
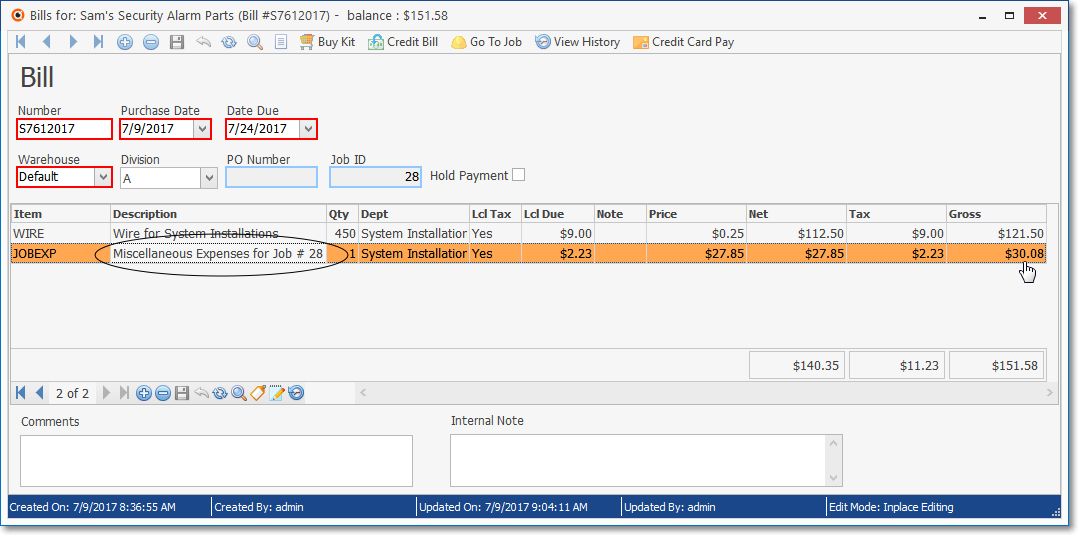
Job Costing Expenses - Bill Form - Billed Miscellaneous Expense ($30.08), with another Cost (Wire at $121.50)
▪Repeat this procedure if you need to record multiple Expense payments.
✓Close - Click the Close ![]() box to exit the Bill Form and return to the Expenses Tab.
box to exit the Bill Form and return to the Expenses Tab.
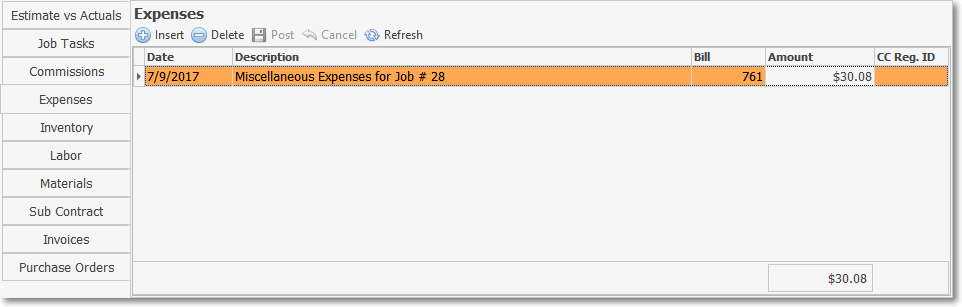
Expense entry within the Expenses tab of the Job Costing Form
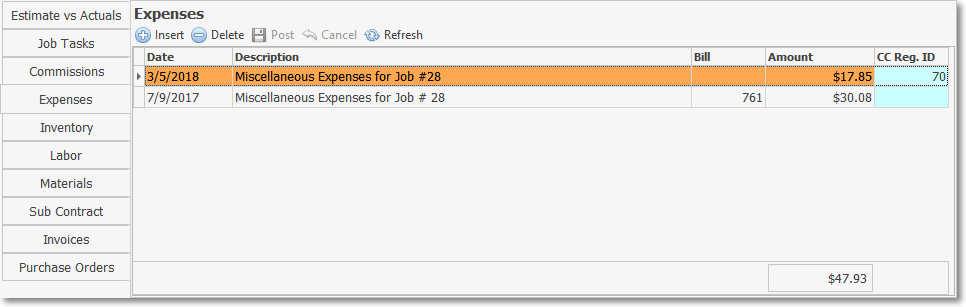
•You will be returned to the Expenses Tab on the Job Costing Form.
✓An Expenses entry will be made which (in addition to the Date, Description, and Amount) will include the Bill record number (594) of the newly created Bill - thereby indicating that this Expense has been properly entered as a Bill.
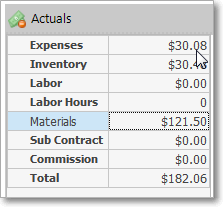
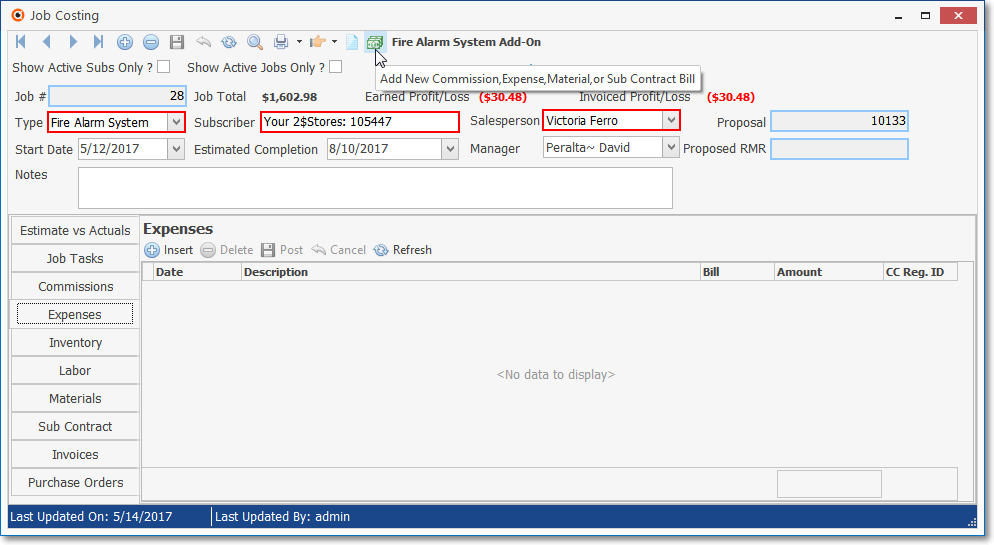
✓You may also view the Estimate vs Actual Tab on the Job Costing Form to see the most current Estimate vs Actual information.
✓The Accounts Payable department will be responsible for Printing the Check.
•When a Technician has Emergency and/or unscheduled "in-the-field" Job Expenses that are charged to a Company Credit Card, those charges are subsequently recorded in the Credit Card Register Form
✓In the process of doing so, a Job ID Number and a Job Expense Item's Purchase Category Code are identified.

✓This Credit Card Register entry automatically inserts a Job Expense record in this Expenses tab.
✓This Job Expense record includes:
a)Date - The Date that this Expense was charged.
b)Description - The explanation of the Expense charge.
c)Bill ID - There will be no Bill ID because this is a direct entry, bypassing the New Bill process described above.
d)Amount - The Amount of the Credit Card charge for the Expense.
e)CC Reg. ID - The Credit Card Register record Number for a Job related Credit Card charge is inserted by the system for cross-reference purposes.
✓This Expense entry is also included in (i.e., added to) the Actuals Expenses Amount reported in the Estimate vs Actual tab.
➢Note: Also read the Recording an (emergency and/or unscheduled) "in-the-field" Credit Card charge discussion in the Credit Card Register chapter for additional information.
▪Also see the "Creating a Job Costing System entry directly from the General Journal" discussion in the General Journal Entries chapter.