❑Micro Key has created a software interface that allows the MKMS and MKMSCS applications to interact (provide a connection) with other Company's software ("Third Party Service Providers")
•Those Third Party Service Providers typically install and service various types of Security Alarm Systems but use your Company's Central Station (running MKMSCS) to monitor their Accounts ("CSIDs")
•That "connection" is provided by using an "API" - which is Micro Key's Central Station Third-Party Application Programmed Interface - that once enabled, will eliminate the need for any user intervention to report Alarms Events and provide other messaging capabilities.
1.Third-Party Users (see below) using this API will have access to the following:
a)Get the list of Subscriptions to a Third-Party Service’s
b)Get individual Subscriber Account Information
c)Get specific Alarm Information
d)Get Alarm History Information for a specific alarm signal
e)Insert Alarm History Details
f)Update Alarm Status (Complete Alarms)
2.Real Time Automatic Notifications are sent to Webhooks:
a)Send Alarm notification on real time basis to the Third-Party Service Webhook
b)Send New Subscription notification to the Webhook
c)Determine whether all Alarm Conditions will be sent to the remote third-party system, or just a specific set of Alarm Conditions will be sent.
❑The Third Party Services Form is where Services (e.g., Alarm Notification, Registered Subscriber and the associated Webhooks, Registered Subscribers and Registered Users, etc.) may be defined for a Third Party Service Provider ("Provider")
•Concepts & Definitions:
✓Third-Party Service Providers:
▪Identifies a Third Party Service - an external company - to which designated Central Station’s Subscriber Accounts ("CSIDs") may be registered.
▪A Third-Party Service definition includes the Webhook configuration that is used to automatically send real time Alarm Notification messages to that remote third-party's software system via an HTTP request.
✓Third-Party Subscriber:
▪The Central Station’s Subscriber Accounts ("CSIDs") of a Third-Party-Service provider who have granted access to and communication with their subscriber account information and alarm/event signals.
▪A Subscriber account can be a subscriber to multiple Third-Party Services.
✓Third-Party User:
▪These are the required credentials needed to permit an external company to access the Central Station Third-Party Application Programmed Interface ("API").
▪These Users are created in MKMS where a specific Security Role will be assigned to them.
▪These credentials will only be used by the external Third-Party Service Companies to access the Third-Party API and will not have any other privileges for security reasons.
▪A Third-Party User can be subscribed to one or many Third-Party Services granting access to all the accounts subscribed to those Services.
▪Third-Party Users can only access subscriber accounts that belong to their designated Third-Party Service.
•Third-Party Users using this API will have access to the following:
a)Get the list of Subscriptions to a Third-Party Service
b)Get individual Subscriber Account Information
c)Get specific Alarm Information
d)Get Alarm History Information for a specific alarm
e)Insert Alarm History Details
f)Update Alarm Status (Complete Alarms)
•Real Time Automatic Notifications to Webhooks:
a)Send Alarm notification on real time to the Third-Party Service Webhook
b)Send New Subscription notification to the Webhook
c)Choose whether all alarm signal types (Alarm Condition Codes) will be sent to the remote third-party system, or only for specific alarm signal types will be sent.
❑Accessing and Using the Third Party Services Form
•To access the Third Party Services Form:
a)From the Backstage Menu System Select Maintenance and Choose the General option, then select the General Maintenance option which displays the secondary Maintenance Menu, or
b)From the Quick Access Menu, Select Maintenance and Choose General Maintenance to display the secondary Maintenance Menu.
✓Once this Maintenance Menu is displayed
1)Choose the Communication sub-menu,
2)Then Click on the Third Party Services option.
✓The Third Party Services Form will be displayed
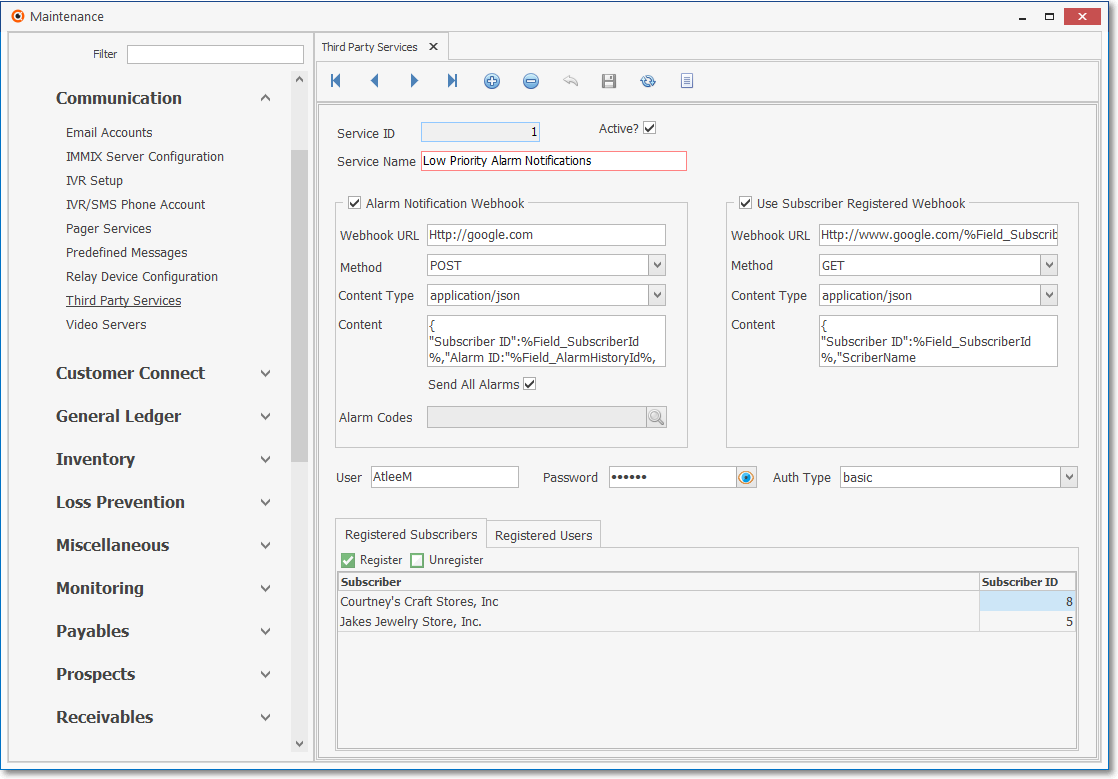
Third Party Services Form
✓This Third Party Services Form may be Re-sized by Dragging the Top and/or Bottom up or down, and/or the Right side in or out.
•Navigation Menu - The Navigation Menu is located at the top of the Third Party Services Form.

✓This Navigation Menu provides the normal Record Movement, New, Delete, Save, Refresh, and List options.
•Record Editing section - The details of the currently selected record are displayed below the Navigation Menu at the center (Main Body) of the Third Party Services Form.
✓Micro Key is available will provide most of this information, as needed.
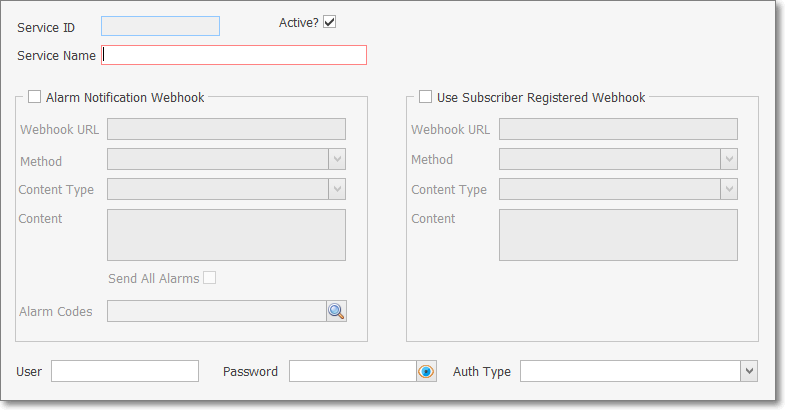
Third Party Services Form - Record Editing section
•Click the ![]() Icon to define a Third Party Service
Icon to define a Third Party Service
✓Service ID - This will be the record number which will be inserted by the system when the record is initially saved.
✓Active - When Checked it indicates this service is Active and allows an authorized User to access the service.
✓Service Name - Enter a Name for the Third Party Service that will use the information that is being identified
✓Alarm Notification Webhook - Check this box to implement this functionality
➢Note: Once the Alarm Notification Webhook information is entered, Alarm Notification messages can be sent to the Third Party Service (using the Micro Key API).
▪Webhook URL - This is the URL that will be used to send real time alarm notifications to the Third Party system (using the Micro Key API)
▪Method - Identifies the HTTP Method to be used to send an HTTP message to the Third Party system
oUse the Drop-Down Selection List provided to Choose the appropriate option
i.POST - The POST method is used to mostly used to SAVE data to the server (e.g., MKMSDefault.db when sent as a "payload"), but may also be used instead of GET (see GET below) in special cases when the URL cannot accommodate the amount id data being sent.
▪The POST URL supports the use of these field templates for automatic value replacement before sending the HTTP notification Message:
▪The message's Content (see Content below) may contain Text in one of the two available Content Types (see Content Type below)
%Field_Dealer%
%Field_Street%
%Field_Address%
%Field_CareOf%
%Field_AlarmHistoryID%
%Field_AlarmCode%
%Field_CSID%
%Field_DateTimeOccurred%
%Field_DateTimePresented%
%Field_PhysicalZone%
%Field_Resolution%
%Field_SignalIdentifier%
%Field_UserNumber%
%Field_UserName%
%Field_SubscriberName%
%Field_Attention%
%Field_Condition%
%Field_Description%
%Field_Area%
%Field_AlarmVideoLink%
ii.GET - The GET method is used in many cases to get data from the server (e.g., MKMSDefault.db)
▪This URL supports the use of these field templates for automatic value replacement before sending the HTTP notification Message:
%Field_AlarmHistoryID%
%Field_AlarmCode%
%Field_CSID%
%Field_PhysicalZone%
%Field_SignalIdentifier%
▪Content Type - Using the Drop-Down Selection List provided, Choose the Content Type that will be used:
a)application/json
b)application/xml
▪Content - Enter the template including the text and data fields to be included in the message sent to Subscribers (see the Predefined Messages chapter for information about creating these types of templates).
▪Send All Alarms - Check this box to have all signals received sent to the Third Party.
▪Alarm Codes - In many cases, the Third Party will only want signals with designated Alarm Condition Codes to be sent to Subscribers.
![]() Click the Search Icon to open the Select Alarm Codes Check List
Click the Search Icon to open the Select Alarm Codes Check List
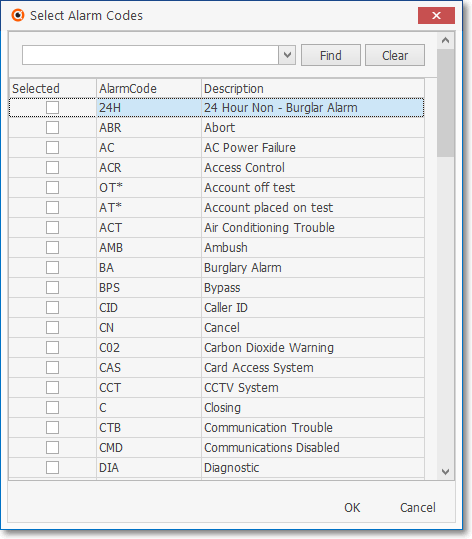
Third Party Services - Select Alarm Codes dialog
oSelected - Check the Selected box to Choose what Alarm Condition Codes are to be sent.
oOK - Click the OK button when done.
▪The Authorization Type must be identified using the Drop-Down Selection List provided
i.None - If None is selected in the Auth Type field, no User or Password information will be required.
ii.Basic - When Basic is selected, a User (name) and Password (Id) must be entered.
oUser - The User Name entered here (to fulfill an API's Authorization Requirement) will be sent as part of the authorization header of the HTTP message
oPassword - The Password ID entered here (to fulfill an API's Authorization Requirement) will be sent as part of the authorization header of the HTTP message
✓Use Subscriber Registered Webhook - Check this box to enter the required to implement this functionality
➢Note: Once the Subscriber Registered Webhook information is entered, Subscriber Registration messages can be sent to the users of the Third Party Service (API)
▪Webhook URL - This is the URL that is used to send Subscriber subscription information to the Third Party Service (API) and supports the use of these field templates for automatic value replacement before sending the HTTP notification Message:
oThe message's Content (see Content below) may contain Text in one of the two available Content Types (see Content Type below)
%Field_Street%
%Field_Address%
%Field_CareOf%
%Field_SubscriberName%
%Field_SubscriberId%
%Field_Type% (Subscriber Registered or Un-Registered)
▪Method - Typically POST
▪Content Type - Using the Drop-Down Selection List provided, Choose the Content Type that will be used:
c)application/json
d)application/xml
▪Content - Enter the template including the text and data fields to be included in the message sent to Subscribers (see the Predefined Messages chapter for information about creating these types of templates).
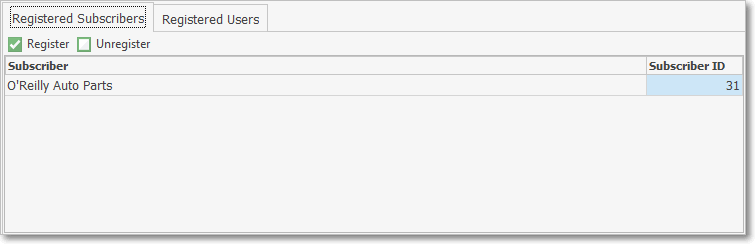
✓This tab will show a list of all the Subscribers who are registered for the current named service (Service Name) entered at the top of this form.
✓Your Company may add and remove individual Subscriber Accounts from this list
✓To add a Registered Subscriber
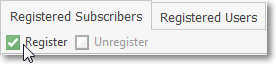
a)Click the Register Icon
b)The Subscriber Search dialog will be displayed
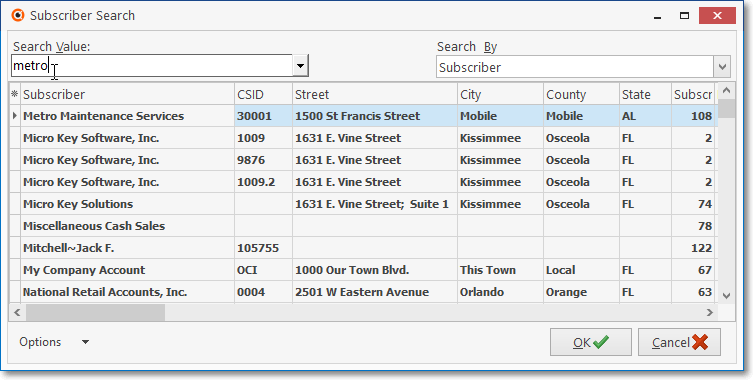
c)Locate for the desired Subscriber record (see the Subscriber Search chapter for those instructions) and Clock OK.
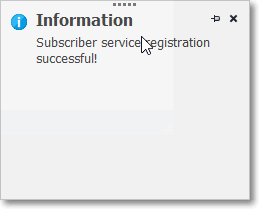
Information - Service registration successful
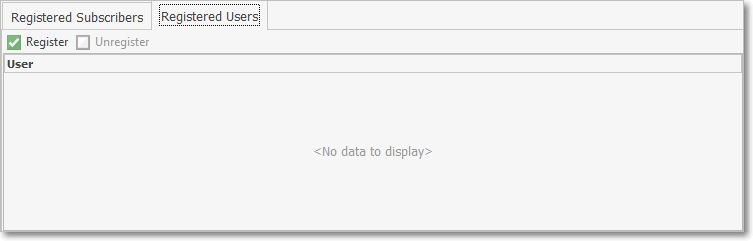
✓This tab will show a list of all the Users who are registered for the current service.
✓Your Company may add and remove individual User Accounts from this list