❑Entering an Purchase (i.e., a Bill) from a Vendor (for when you cannot use the Bill It button to automatically create a Bill for the Received items from a previously issued Purchase Order):
•To create a Bill representing the Purchase of Goods and/or Services:
✓Open the Vendors Form
✓Press F2 (Search for Vendor) or Click the Search Icon to locate the desired Vendor record.
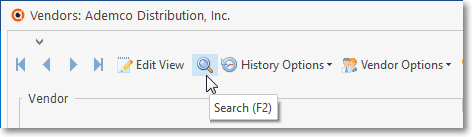
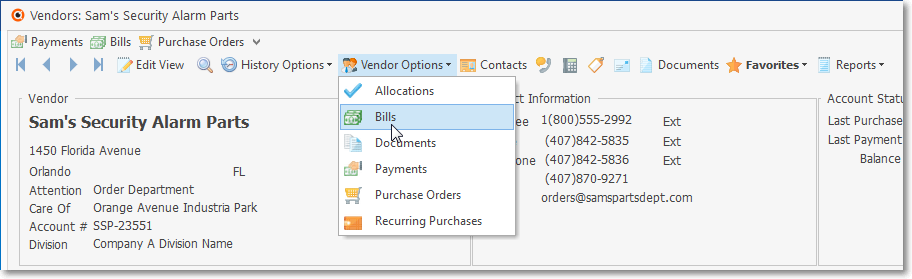
✓Click the Vendor Options Icon to display that menu.
✓Select the Bills option on that Vendor Options Menu on the Vendors Form
![]() Click the Insert Icon at the top of the Bills Form to start a new Bill record.
Click the Insert Icon at the top of the Bills Form to start a new Bill record.
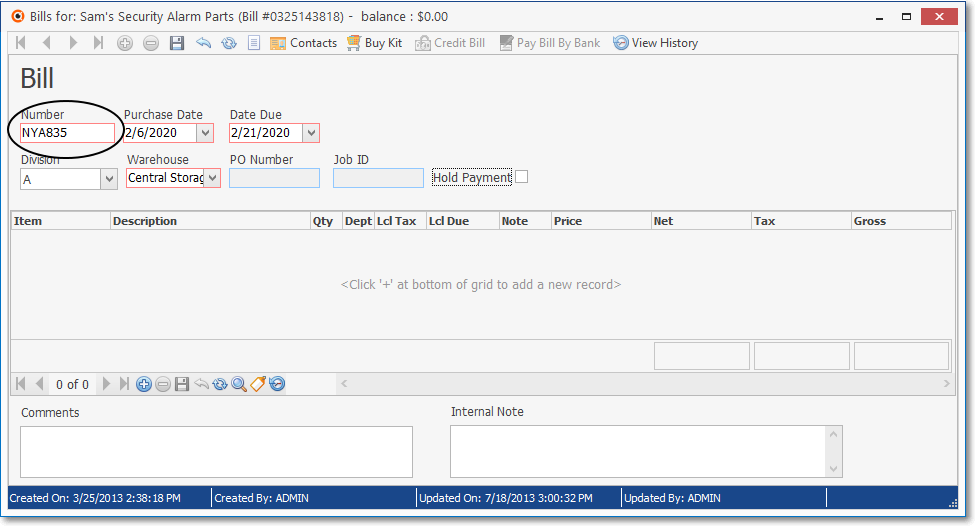
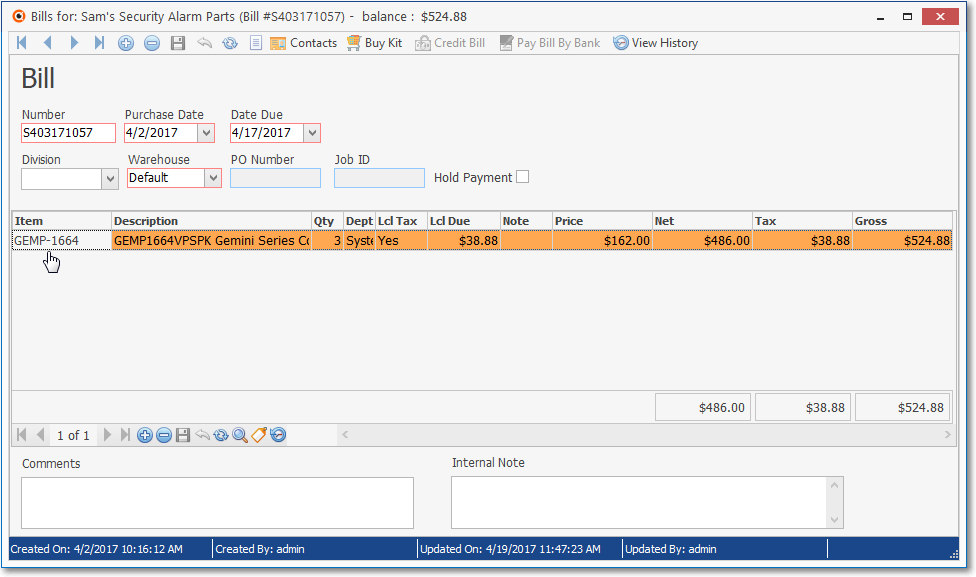
Bill Form shown as it is displayed immediately after Clicking the Insert Icon
❑Entering the Bill Header Information:

•Number - The default is "NYA" which stands for Not Yet Added plus the internal Record Number for this new Bill (e.g.,"NYA683") - and so it Must Be Changed to the actual Vendor's Invoice Number for the Bill being recorded.
✓Do not proceed further until you have entered the Vendor's Invoice Number in this field!
✓You may use upper and lower case letters, numbers, spaces and punctuation - up to twelve (12) characters in all.
✓Enter the Invoice Number of the original document.
▪If the Invoice Number assigned by the Vendor is longer than 12 characters, use the last 12 characters as they are the least likely to be duplicated in the future.
✓Create a tracking Number for any Bills that do not have an assigned number:
▪You could use the last four digits of the Vendor's account number followed by the year and month of the billing cycle ("8422-2015/07") for a Credit Card Statement (see Entering Credit Card Statements below for more information on how to enter this type of Bill).
▪You could use the initials of the bank plus the month and year of the payment's due date ("BOA-2009/07") for a mortgage payment (see Entering Mortgage and Bank Loan Payments for more information on how to enter this type of Bill).
✓No Duplicates - Keep in mind that any Number you assign may not be a duplicate of a number that you've assigned previously for this Vendor.
▪The system will perform Duplicate checking which is based on the specific combination of the Vendor ID and the Invoice Number assigned to a Bill from that Vendor.
▪If another Vendor coincidentally uses the same Invoice Number, that will not create a problem.
•Purchase Date - By default, Today's date is inserted.
✓Use the Drop-Down Calendar/Date Entry field provided to reset the Purchase Date to the actual Invoice's (or Statement's) Date.
✓If the Purchase Date is changed from the default, the Due Date will be reset, as well (see below).
✓The Purchase Date for this Bill may not be reset to a Date within a Month which has already been Closed!
•Due Date - By default, this will be set based on the number that was entered in the Vendor's Terms field within the Edit View on the Vendors Form.
✓If you reset the Purchase Date, the Due Date will automatically be reset.
✓As may be required, a Due Date may be set for any date on or after the Purchase Date entry.
•Division - If the Vendor has a Division Code assigned on the Edit View of the Vendor Form, that Division Code will be inserted automatically.
•Use the the Drop-Down Selection List to Choose a (new or different) Division Code, when appropriate.
❖Deleting an existing Division Code assignment:
▪If a Division Code is assigned to this Bill Header (the Vendor's default Division has been inserted automatically) but you do not want a Division Code assigned:
oClick within the Division field and Press your keyboard's Delete key to remove the Division Code from the Bill Header.
oIf one or more Detail Line Items have already been entered, the Division Code assigned to them (internally) will also be removed when the Bill Header Division Code is deleted.
▪However, once a Payment has been Allocated to a Bill, that Bill cannot be changed in any manner without first Unallocating the Payment.
•Warehouse - By default, the Warehouse selection will be "Default" (see Ø Note immediately below).
➢Note: The Divisions Form allows a Company to identify a Default Warehouse for that Division
Thereafter, when Purchase Orders, and/or Bills are created for a Vendor who was assigned to a Division (a Division assignment to a Vendor is optional), by default, any Inventory related Transaction posted to one of those Purchase Order and/or Bill documents will automatically be assigned to that Warehouse but that Default Division Warehouse assignment may be changed as needed.
✓You may use the Drop-Down Selection List to Choose a different Warehouse into which this Inventory Item will be assigned.
✓This Warehouse field is particularly useful when using the Inventory Tracking & Job Costing System.
•PO Number - This Number is entered by the system when the Bill was created from a Purchase Order, using the Bill It function on the Purchase Order Form.
✓It is only assigned when the Bill is created automatically from a Purchase Order when that Purchase Order is Converted into a Bill.
•Job ID - This Number is entered by the system when the Bill originated from the Job Costing module.
✓If this Bill was converted from a Purchase Order which was initially created through the Job Costing module, that Job ID Number will be entered here.
•Hold Payment - To place the Bill on Payment Hold for whatever reason, Check this box.
✓This will prevent this Bill from being available to pay through the Disbursements Payments, or Allocations Form.
✓This Bill will be included on the Bills on Payment Hold report.
✓This Bill will not appear on the Cash Requirements Report.
•![]() Click the Save Icon at the top of the Bill Form to post this Bill Header Information.
Click the Save Icon at the top of the Bill Form to post this Bill Header Information.
❑Understanding the Bill's Detail Line Items:
•This is where you will itemize the items on the Bill by assigning each of them a Purchase Category and a description (or use the default description assigned to the Purchase Category), enter the price, quantity, tax status, etc., to clearly identify what is being purchased.
•The Detail section for the Bills Form has:
✓a Column Header Names
✓a Grid containing each of the Detail Line Items
✓the Net, Tax and Gross Totals
✓its own Ribbon Menu (at the bottom of the Grid)
•Starting a Bill's Detail Line Items (to identify what is being purchased):
✓Click the ![]() Icon on the Ribbon Menu located on the bottom of the Detail Line Item's Data Grid and fill in the Detail Line Item using an Inplace Editor (i.e., enter the appropriate data into a horizontal - from left to right - data entry grid).
Icon on the Ribbon Menu located on the bottom of the Detail Line Item's Data Grid and fill in the Detail Line Item using an Inplace Editor (i.e., enter the appropriate data into a horizontal - from left to right - data entry grid).
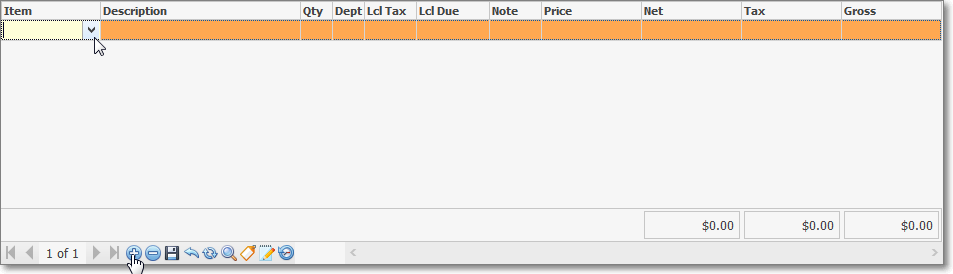
Bill Form's Add Icon at bottom of the Detail Line Items section and the Item Drop-Down Selection Box
❑Entering the Details of the Bill:
•Item - Click the Drop-Down Selection List to Choose the appropriate Purchase Category code.
✓The selection list will include any Purchase Category defined as a Type of either a Purchase (only used for Purchases) or Both (used for Purchases and/or Sales).
▪If you have too many Sale-Purchase Items defined to easily make your selection: activate the Advanced Sale Item Look-up,
a)Click the Advanced Item Search ![]() Icon on the Ribbon Menu at the bottom of the Data Grid, or
Icon on the Ribbon Menu at the bottom of the Data Grid, or
b)Press Alternate and F2 at the same time (Alt+F2) .
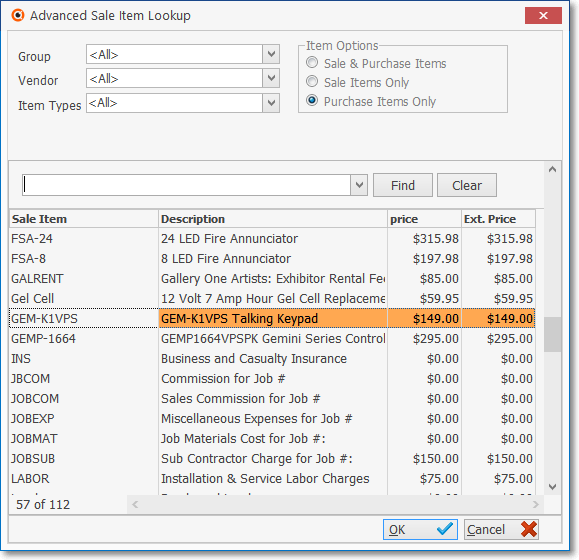
Advanced Sale Item Lookup dialog for Purchase Items Only
❖See the Advanced Sale Item Look-up chapter for more information about this feature.
•Description - By default, this will be the Description entered for the selected Purchase Category.
✓This Description may be edited as needed to better clarify exactly what was purchased.
•Qty - By default, it will be 1.
✓Modify the default Quantity as needed.
✓A minus Quantity creates a Credit line item resulting in a Net minus value for the Detail Line Item.
✓A Bill whose Gross Total is a minus value, is actually a Credit Note.
•Dept- By default, this field is left blank unless the Item selected as the Purchase Category has a default Department defined.
✓If you are using the General Ledger System and/or have defined Departments, use the Drop-Down Selection List to Choose the appropriate Department.
✓If you have implemented multi-departmental accounting, this field is Mandatory.
✓See the "Departments versus Divisions" discussion later in this chapter.
•Sales Tax - Identifying the Sales Tax charges, if required:
✓Lcl Tax - If you have Checked the Charges Tax? box in the Edit Tab on the Vendors Form, this field offers three choices in a Drop-Down Selection List:
1.Yes - This Detail Line Item is Taxable.
2.No - This Detail Line Item is not Taxable.
3.Exempt - This Detail Line Item, or the entire Bill, is completely Tax Exempt.
✓Lcl Due - Local Tax Amount - Unless Yes is selected above, $0.00 will inserted automatically in the Lcl Due column as this item is saved (see System Calculated Fields below).
▪If Yes is selected, the Local Sales Tax Rate(s) and Rule(s) entered within Vendor Tax Information tab on the Vendors Form will be used to automatically calculate the Sales Tax Amount.
✓Nat Tax - If a National Sales Tax has been defined in the Tax Tab of the User Options Form, and the Charges Tax? box has been Checked in the Edit Tab on the Vendors Form, this field offers three choices in a Drop-Down Selection List:
1.Yes - This Detail Line Item is Taxable.
2.No - This Detail Line Item is not Taxable.
3.Exempt - This Detail Line Item, or the entire Bill, is completely Tax Exempt.
✓Nat Due - National Tax Amount - Unless Yes is selected above, $0.00 will inserted automatically in the Nat Due column as this item is saved (see System Calculated Fields below).
▪If Yes is selected, the appropriate National Sales Tax Rate(s) and Rule(s) defined in the Tax Tab of the User Options Form will be used to automatically calculate the Sales Tax Amount.
•Note - If a more detailed explanation for this purchase is needed, use the Note field to enter this information which will then be printed on the Bill immediately below the associated Detail Line Item.
✓Double-Click the Note field which will open a Rich Text Editor dialog.
✓Enter the appropriate information and then Click the Save Icon on the Rich Text Editor dialog to record the entry.
•Price - By default, it will be the Amount (labeled "Price" on the Purchase Items Form) of the selected Purchase Category.
✓If the "Price" field is empty, the Retail Price will be inserted.
✓However, you will still need to Change this Price to the Price that is actually being charged by this Vendor, if that Vendor's Price is different.
❖About Inventory Pricing - If the Item selected above represents an Inventory Item, the default Cost will be based on the Inventory Valuation Method currently in effect with that Cost determined as follows:
a)Original Price - The default Cost will be the "Price" or "COGS Value" entered on the Sale-Purchase Category Form.
▪Be sure to enter the Price (Cost) being charged by this Vendor on this Bill.
▪No change will be entered in the "COGS Value" field on the Sale-Purchase Category Form.
b)LIFO - The default Cost will be the "Price" recorded as the Cost of the most recently purchased Inventory Item of this same type.
▪Be sure to enter the actual Price (Cost) being charged by this Vendor on this Bill for this Inventory Item.
▪Once the actual Price being charged by the Vendor is entered, this will become the new "Price" on the Sale-Purchase Category Form.
▪The "COGS Value" on the Sale-Purchase Category Form will include any Sales Tax that is charged on the most recently purchased Inventory Item.
c)Average Inventory Code - The default Cost will be the Amount (labeled "Price" on the Purchase Items Form) of the selected Purchase Category.
❖For those Companies using (or intend to use) the STARK 35 version of the General Ledger System, the required Inventory Valuation method is Average Cost Inventory.
▪Be sure to update the Price (Cost) being charged by this Vendor on this Bill.
▪Once the actual Price being charged by the Vendor is entered, the system recalculates the Average Price that has been paid based on this purchase, and all of the previous purchases of this Inventory Item.
▪This new Average Price will become the "COGS Value" on the Sale-Purchase Category Form.
![]() Click the Save Icon at the bottom of the Detail Line Items to record this Detail Line Item.
Click the Save Icon at the bottom of the Detail Line Items to record this Detail Line Item.
![]() Click the View Item History Icon at the bottom of the Detail Line Items to display the General Ledger Financial Transactions for this Detail Line Item.
Click the View Item History Icon at the bottom of the Detail Line Items to display the General Ledger Financial Transactions for this Detail Line Item.
•System Calculated Fields:
✓Net - Calculated by the system and equals the Price multiplied by the Quantity of this Detail Line Item.
✓Tax - Calculated by the system and equals the sum of all Sales Tax that was charged on this Detail Line Item.
✓Gross - The total for the Detail Line Item - calculated by the system.
•Delete (key) - To delete a Detail Line Item:
✓Click on the Detail Line Item.
✓Press the delete button on the keyboard.
✓Confirm you want to delete the Line Item, when asked.
▪An Accounting Administrator is permitted to make financial transaction reversals, deletions, and other types of Invoice (Bill) changes.
▪The Accounting Administrator setting is available on the Security tab of the Employee Form.
▪Without this right, the Employee will be required to get an Accounting Administrator's permission to do so.
▪Delete Security Rights are also required to remove a line item.
❖For General Ledger System Users: The General Ledger Transactions (automatically posted in the background) for a Selected Detail Line Item of a Bill may be displayed whenever required.
![]() Click the View Item History Icon (see the illustration below) on the Ribbon Menu at the bottom of the Detail Line Item Grid.
Click the View Item History Icon (see the illustration below) on the Ribbon Menu at the bottom of the Detail Line Item Grid.
▪The Detail for Bill # Form will list each General Ledger Debit and Credit entry that was required to post the Selected Detail Line Item.
▪In the case of the Inventory purchase shown below, the Accounts Payable Liability Account (2000) is Credited (increased) by the Gross Amount [(Price x Quantity) + all Sales Taxes], and the Inventory Asset Account (1200) is Debited (increased) by the same Gross Amount.

Bills Form - GL Detail for selected Detail Line Item
•Departments versus Divisions:
✓Divisions are generally implemented to identify specific business related entities, regions (territorial or functional) or any other sub-divisions within the Company, and/or to allow the creation of custom Invoice and Work Order headers to accommodate multiple offices within the same Company, and/or when your Company is billing the Alarm Dealer's Monitoring Accounts.
▪Each Division may belong to one or more Division Groups
▪Each Division Group may have any number of Divisions as Members of that Group.
▪An individual Vendor may only be assigned to one Division.
✓Departments, unlike Divisions, are used specifically for Financial Transaction Tracking purposes only - usually to identify a Work Group or Profit-Center within the Company.
a.Departments within a Security Alarm Company are generally associated with installing, servicing, or monitoring functions, and so they will identify the Receipts from, and Sales made to Subscribers, and the Purchases from, and Payments made to Vendors as Financial Transactions associated with those Departments,
b.Departments are almost always used as part of an internal Financial Transaction Tracking process within the General Ledger System.
c.Departments are designed for use as an itemization and reporting tool within Financial Statements & Reports.
❑Purchasing a Kit with the Buy Kit button:
•You can Design your own Kits which may contain many different Inventory Items, with different quantities required for each of the Inventory Items that make up the Kit.
✓Once that Kit is defined, the Sale-Purchase Item Code assigned to that Kit may be selected to place an order for all of the Inventory Items required to make the Quantity of those Kits that are to be Purchased.
✓This will insert, on this Bill, as many individual Detail Line Items and Quantities required to make up the contents (Inventory Items and individual Quantities) of the selected predefined Kit.

•To record the purchase of specific quantity of a User-Defined Kit, Click the Buy Kit button on the Actions Menu at the top of the Bill Form.
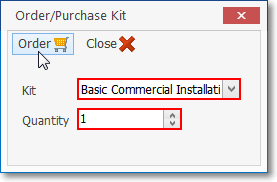
Order/Purchase Kit dialog
a.Kit - Use the Drop-Down Selection List to Choose the desired Kit.
b.Quantity - Enter the number of the Kit that are to be purchased.
c.Order - Click the Order button to execute this request.
d.Close - Click the Close ![]() box or Close
box or Close ![]() Icon to return to the Bill Form.
Icon to return to the Bill Form.
e.The Inventory Items and Quantities required to make up the number of Kits ordered will automatically be inserted into the Bill.
❑Modifying an existing Bill.
•Any Bill which has not been Paid or Credited and whose Purchase Date is within an Open Accounting Period, may be modified as necessary.
•However, if this Bill was created via a Purchase Order using its Bill It option, no additional Inventory Item(s) may be added.
•Those changes must originate from that associated Purchase Order.
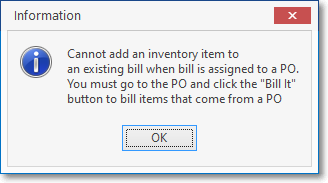
•If you attempt to do so, an Informational reminder will be displayed with appropriate instructions.
❑Contacts - As appropriate, enter Contact information for any individual who your Company may need to communicate with regarding this Bill.

•Contacts - Click this Contacts option to open the Contacts Form to identify anyone who should be associated with this Bill.
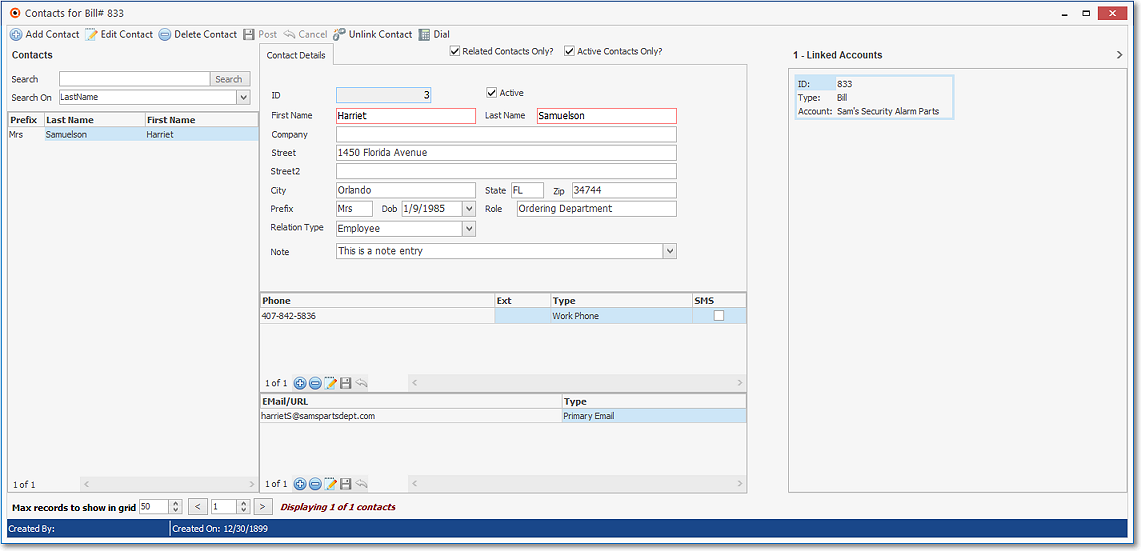
Contacts Form associated with a specific Bill
❑Credit Bill - See the Credit Memos chapter for this information.

❑Credit Card Pay - The currently selected Bill may be Paid (in whole or in part) with a predefined Company Credit Card.

•See the Credit Card Pay discussion in the Payments chapter for more information
❑Paying a Bill using the Pay Bill by Bank option on that Bills Form:

•See the Pay Bill By Bank discussion in the Payments chapter for more information
❑View History - When (if) Changes have to be made to a Bill after it was initially saved:
•Those Changes must be Authorized and documented (as to why they were made)
•Then, those Changes can be saved to the Bill.

•To see what Changes have been made to the currently selected Bill, Click the View History Icon at the top of the Bill Form.
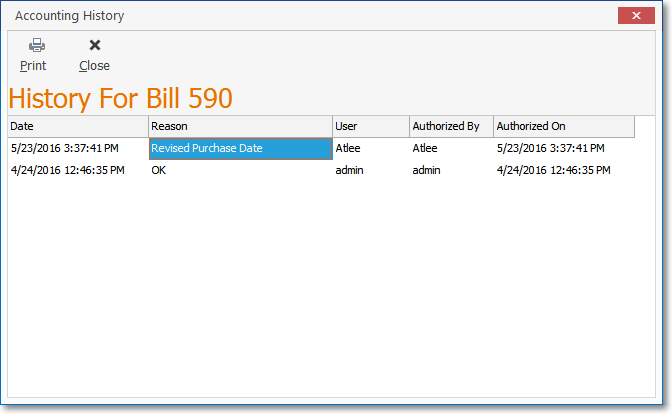
History For Bill Form
•Print - Click the Print Icon to produce a paper copy of this Accounting History information, if necessary.
✓It is printed immediately to the default Printer attached to this computer.
•Close - Click the Close ÑIcon to return to the Bills Form.
❑Entering the Invoice Footer Information:

•Column Totals - automatically maintained by the system - are displayed for all of the Detail Line Items
✓Net - Calculated by the system to equal the Price multiplied by the Quantity for all of the Detail Line Items combined.
✓Tax - Calculated by the system to equal the Sales Taxes charged for all of the Detail Line Items combined.
▪If this Vendor is not taxable, this column will not be visible.
✓Gross - Calculated by the system to equal the sum of all Sales Taxes charged, and Prices multiplied by the Quantities for all of the Detail Line Items combined.
•Comments - Enter whatever will help you better understand this purchase, its payment status, or any other information that would be useful to the Accounts Payable department.
•Internal Note - This field is generally used by General Ledger System Users to enter a note (which is not printed on the Check) that will appear in the Internal Note field of each Detail Line Item on the Account Register Form that has Financial Transactions associated with, and therefore posted for this Bill.
![]() Click the Save Icon when you have entered all the required information.
Click the Save Icon when you have entered all the required information.
❑Entering Mortgage and Bank Loan Payments
•Amortized Payments, such as loans and mortgages, often represent two or three separate types of remuneration:
✓Principal - The part of the payment that actually pays off a portion of your balance.
✓Interest - The part of the payment that is for the Interest or carrying charge for the current month for the balance still owed.
✓Escrow - The part of the payment that is set aside to pay taxes and/or insurance on the collateral (home, car, company boat, office, etc.).
•When you enter the Bill for these types of obligations, be sure to create Detail Line Items for each of the above categories, as appropriate.
✓Mortgage and Bank Loan Payments may also be entered as Recurring Purchases and managed automatically.