❑In today's business envirnment, Credits Cards are frequently used to make Payments on Bills for a variety of reasons:
1)As a Cash Flow Management Tool
2)Provides special - usually customizable - Reports of Spending Categories and Trends
3)Earns Points which can be converted to Cash, Products, Services, and/or Frequently Flier Miles.
4)Full Protection from Fraudulent use is now included.
5)Extended Warranty is provided on most Purchases.
❖Before proceeding: read and confirm that the required steps outlined in the Credit Card Maintenance & Tracking System chapter have been completed!
a)For General Ledger System Users Only: Enter the General Ledger Accounts that will be used to track your Company's Credit Card Debt (Credit Card - Liability Account) and Credit Card "Purchases" (Credit Card Expense Account).
b)Enter a Classification Code which will be assigned to each Vendor record that represents a Credit Card which will be used to Pay Bills (see the "Credit Card Pay" discussion at the end of the Bills chapter).
c)Enter a Vendor record representing each of those Credit Cards.
d)Enter the Credit Card (maintenance) record for each Credit Card that will be used to Pay Bills.
e)Assign each Credit Card (maintenance) record to its associate Vendor, the appropriate Credit Card Expense Account (Payment Item), and its associated General Ledger Credit Card Liability Account.
•Each Credit Card that will be used by your Company to make Payments on Bills is entered as a Vendor including the mailing address that is to be printed on the Checks issued to pay those Credits Cards' Statements.
•All Credit Cards - that will be used by your Company to make Payments on Bills - must be identified in advance using this Credits Cards Form so that:
1.The Credit Card will be listed as a Credit Card Pay option on the Bills Form.
2.When a Payment on a Bill is made using a Credit Card, a list of all those charges, all Payments made to the Credit Card Company, and a running Balance Due for what is still owed to that Credit Card Company will be maintained by the system within a Credit Card Register
•To access the Credits Cards Form:
a)From the Backstage Menu System Select Maintenance and Choose General and Click the General Maintenance option which displays the Maintenance Menu, or
b)From the Quick Access Menu, Select Maintenance and Choose General Maintenance to display the Maintenance Menu.
•Once the Maintenance Menu is displayed, Select the Payables section and Choose Credits Cards.
✓The Credits Cards Form will be displayed.
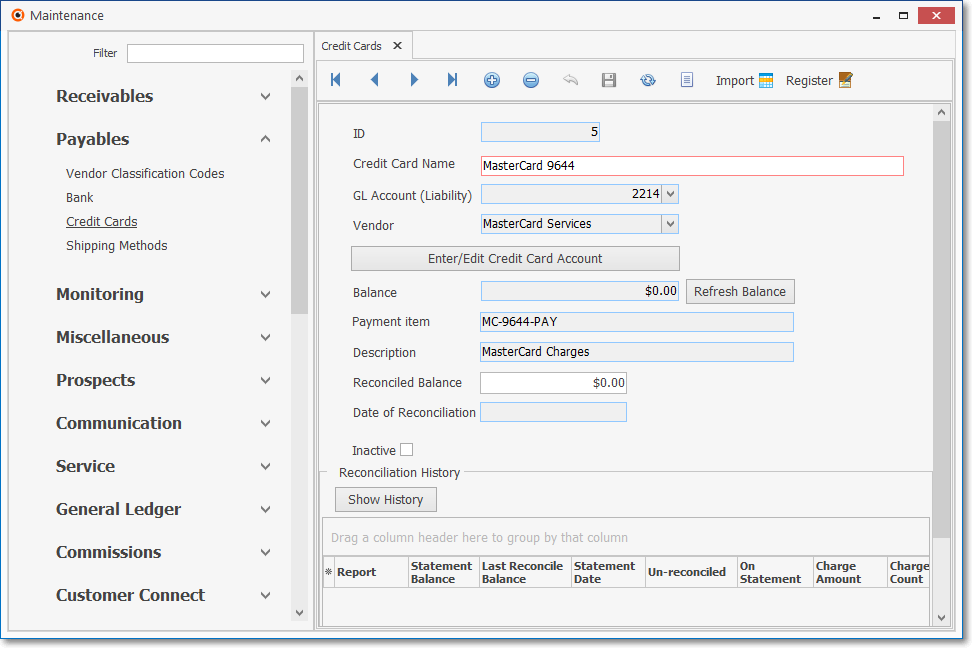
General Maintenance - Payables - Credit Card Form
✓This Credits Cards Form may be Re-sized by Dragging the Top and/or Bottom up or down, and/or the Right side in or out.
•Navigation Menu - The Navigation Menu is located at the top of the Credits Cards Form.

✓This Navigation Menu provides the normal Record Movement, plus Add, Delete, Cancel, Save, and Grid options, plus Import and Register options.
•Record Editing View - The details of the currently selected Credits Cards record are displayed below the Navigation Menu at the center (Main Body) on the Bank Form.
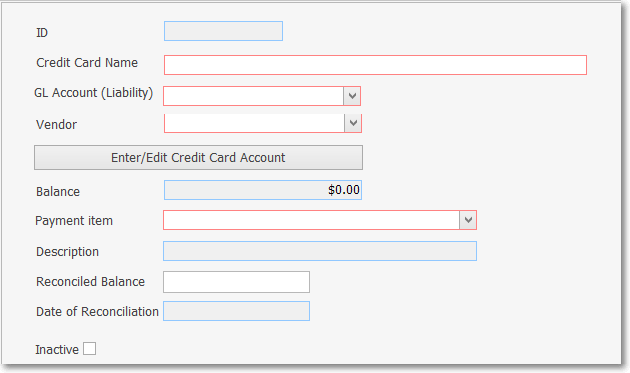
Credit Card Form - Record Editing View
•To define a Credit Card record:
✓Click the ![]() Icon to start a Bank entry in the Record Editing View.
Icon to start a Bank entry in the Record Editing View.
▪ID - The system will assign a Bank ID number.
▪Credit Card Name - Enter the name (up to 30 characters) of this Bank or what ever other Financial Institution you are defining.
▪Enter/Edit Credit Card Account bar - Click this bar and enter the actual Account Number assigned to this Credit Card.
oFor the Subscriber's protection, once entered and saved the Credit Card Number, the Account Number information is hidden from view (replaced with the Enter/Edit Credit Card Account bar) and actually encrypted within the database itself.
▪GL Account (Liability) - If you are using (or preparing to use) the General Ledger module and have defined your General Ledger Accounts:
oUsing the Drop-Down Selection List provided, Select the General Ledger Account number for the Current Credit Card Liability owed to this Credit Card.
▪Vendor - Use the Drop-Down Selection List to Choose the appropriate Vendor previously created for this Credit Card.
oIf no starting balance has been recorded for this selected Vendor, an Information message will be displayed.
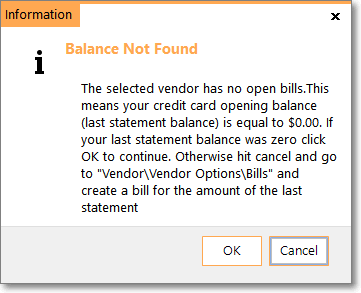
Balance Not Found
oBalance Not Found
a)The selected Vendor has no open bills.
b)This means your Credit Card opening balance (last statement balance) is equal to $0.00.
c)If your last statement balance was zero Click OK to continue.
oOtherwise, Click Cancel and go to "Vendor\Vendor Options\Bills" and create a Bill for the amount of the last statement."
▪Balance - This field will be the Current Balance of this General Ledger Account if using the General Ledger Module.
oOtherwise it will be the Balance from the Bank Transaction Form.
▪Refresh Balance - Click this Refresh Balance option to recalculate and display the most current Balance Due to this Credit Card Account.
▪Payment Item - Use the Drop-Down Selection List to Choose the Purchase Category created to identify the Credit Card "Purchases" (the Credit Card Expense Account)
oThis must be the unique Purchase Category designated for this Credit Card.
▪Description - The Description assigned to the Payment Item's Purchase Category is inserted by the system.
▪Reconciled Balance - This entry is provided by the system once a Credit Card Statement has been Reconciled, but may be manually entered when first defined.
▪Date of Reconciliation - This entry is provided by the system once a Credit Card Statement has been Reconciled
▪Inactive - Check this box if your Company will no longer be using this Credit Card.
oBy doing so, this Credit Card will no longer appear in Drop-Down Selection Lists in any other Forms and dialogs.
✓Click the Save ![]() Icon to record this Credit Card entry.
Icon to record this Credit Card entry.
•Any number of additional Credit Cards may be identified, as required.
•Refresh Balance - This option will recalculate the display the most current Balance Due on the Credit Card Account.
❑Reconciliation History Grid - This section displays a list of the previously completed Credit Card Reconciliation for the currently selected Credit Card.
•Show History - Click this Show History button to display the complete Reconciliation History list
•To view all of the available Reconciliation History Grid's columns, Drag the right border of the Credit Card Form to the Right (as shown in the illustration below).
➢Note: This Reconciliation History section is not retroactively populated with Credit Card Reconciliations that were completed prior to the installation of MKMS STARK Version 5.1.35.8222.

•A Credit Card Reconciliation Summary report created for a completed Bank Reconciliation may be viewed.

✓In the Report column, Click the record line representing the Credit Card Reconciliation Summary report that is to be displayed/re-printed and then Click the Ellipse to open a PDF of that Credit Card Reconciliation Summary report.
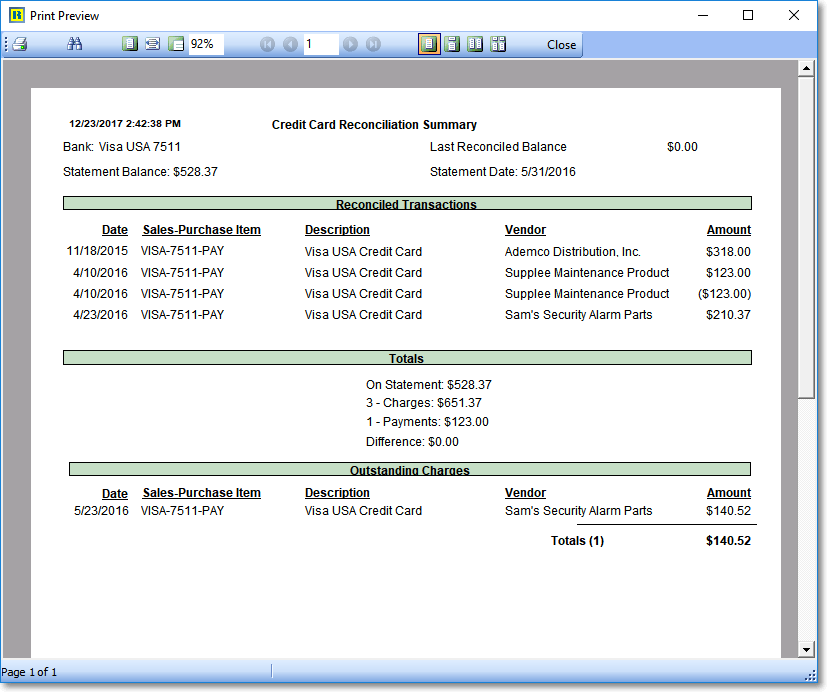
Credit Card Reconciliation Summary - Print Preview
![]() Import - Click the Import Icon to open the Import Credit Card Transactions dialog
Import - Click the Import Icon to open the Import Credit Card Transactions dialog
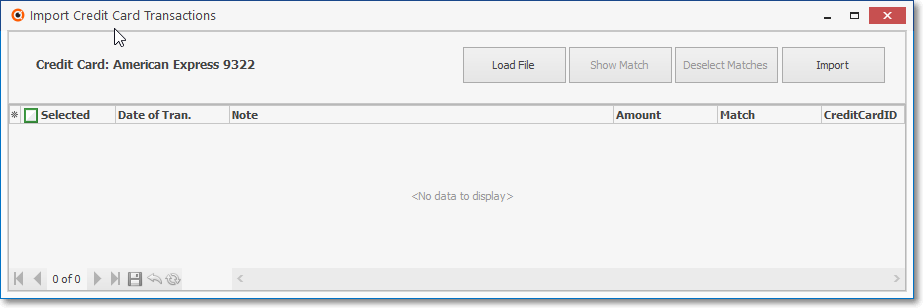
Import Credit Card Transactions dialog
❖See the Import Credit Card Transactions chapter for those instructions
![]() Register - Click the Register Icon to open the Credit Card Register Form
Register - Click the Register Icon to open the Credit Card Register Form
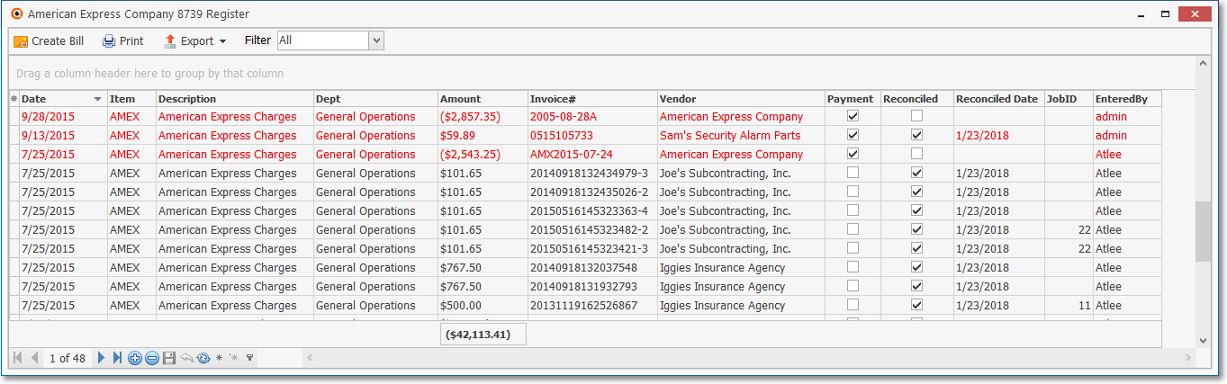
Credit Card Register
❖See the Credit Card Register chapter for those instructions
![]() List Icon - The Navigation Menu also has a List option which provides a tabular view of the Bank records.
List Icon - The Navigation Menu also has a List option which provides a tabular view of the Bank records.
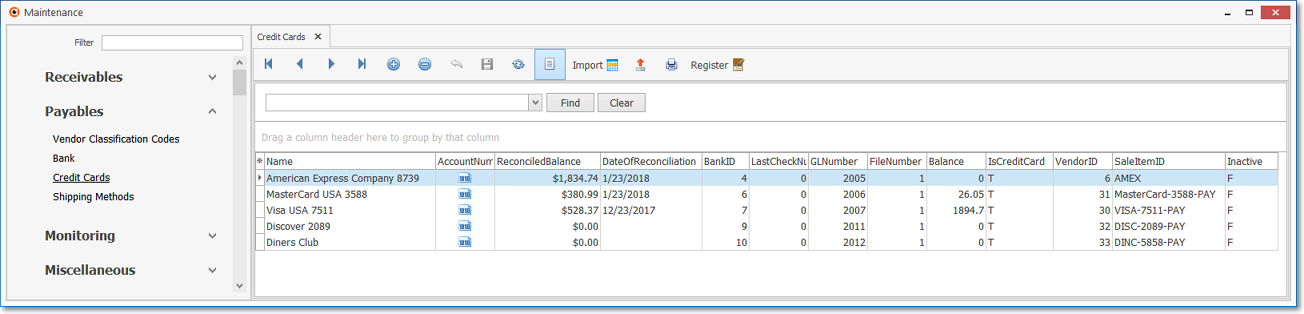
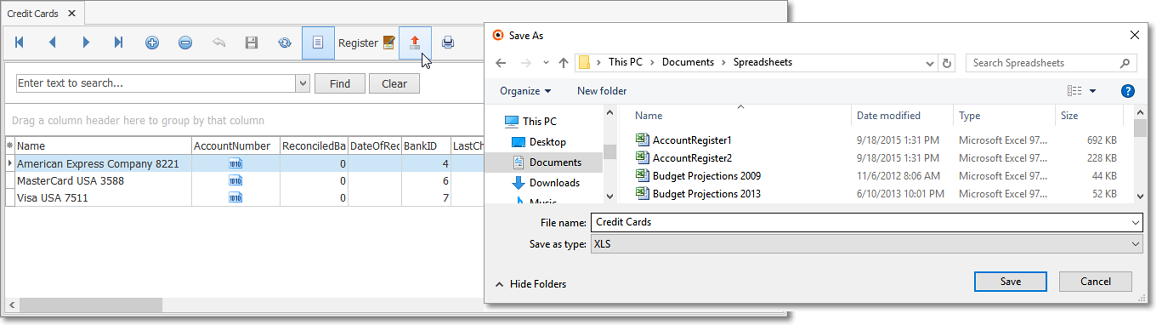
Credit Cards Form - List View
•Click the List Icon to display the associated Grid Data.
•Choosing the Columns to be Viewed:
✓Some columns may contain data fields which may make the List View's display difficult to use.
Ø In the List View, you may Click the Asterisk at the left of the row of Header Names to display a Drop-Down Check List of each column's Headed Name.
✓Check any Header Name to be included in the List View (by default, All Header Names will initially be Checked)
▪In this case, the List View's Header Names are shared by both this Credit Card Form and the Bank Form, so there will be columns that are not needed.
▪Remove the Check for any Header Name (see illustration below) that is to be removed from the List View.
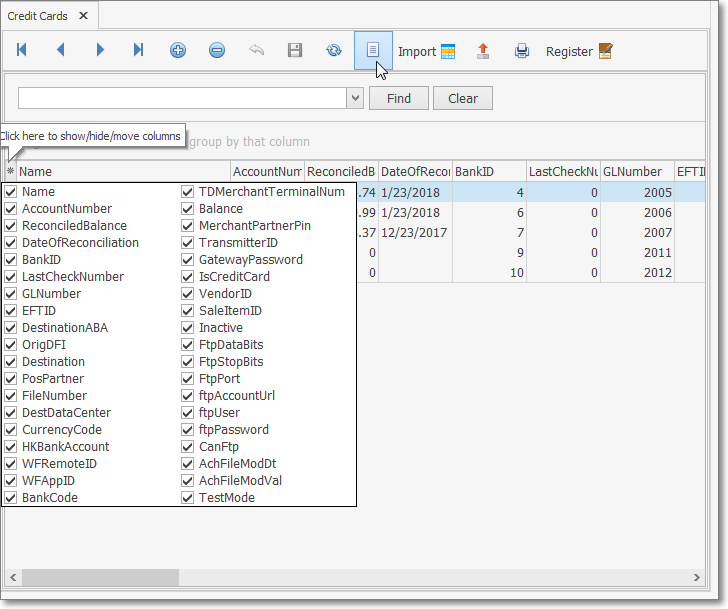
Credit Card Form - List View - Available Columns
✓The columns of Grid Data may also be rearranged, filtered, sorted, and exported as a PDF file and/or an Excel formatted file.

✓Find - Enter text to search for a specific record, then Click the Find option.
✓Clear - To remove the text to search for entry, Click the Clear option

Navigation Menu shown with the List, Import, List Options for Export & Print and Register
✓Click the List Icon again to Close the List View and return to the Record Editing View.
❖See the Grids - Print Preview - Export Data chapter for complete information on using the List View, including its Export & Print options.
•Export - Click the Export Icon to open the standard Windows® Save As dialog which allows you to save the listed data to an Excel® (Spreadsheet) formatted file.