❑Auto Bill - The Manually executed Automatic Billing of Recurring Revenue Cycles
•How to set up MKMS for Automatic Recurring Billing
•Whether or not the Fully Automated Recurring Billing process is being used, MKMS provides this Auto Billing Form for Generating the appropriate Invoices for Selected Billing Cycles (One Cycle at a time).
✓This Auto Billing process will also generate the Payment Batch file if the Auto Draft box is Checked on the Billing Cycles Form and you are using an Automatic Payment Processor (i.e., InnoEPay, Authorize.net and/or Forte.net).
❖See the Auto Billing Recurring Revenue chapter.
❖Also, see the Fully Automated Recurring Billing chapter for information on that feature.
❑One of the most powerful features in the MKMS Accounts Receivable module - with the exception of Fully Automated Recurring Billing - is the automation of Recurring Revenue Billing by Billing Cycles.
•The following steps must have been completed before this automatic billing process may be used:
1.Sale-Purchase Items for the types of Recurring Revenue related services that you provide must be created.
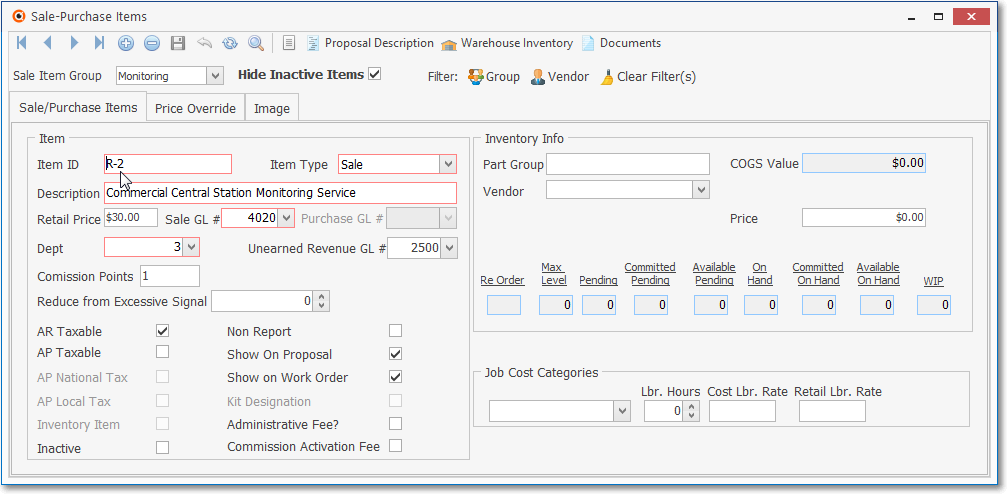
Sale-Purchase Items Form - Recurring Revenue Item
✓These are called the Recurring Revenue Sales Category Codes.
2.Pay Groups need to be entered to establish the normal (default) monthly rates for the Recurring Revenue related services you provide (individual Custom Pay Amounts may be used when necessary).
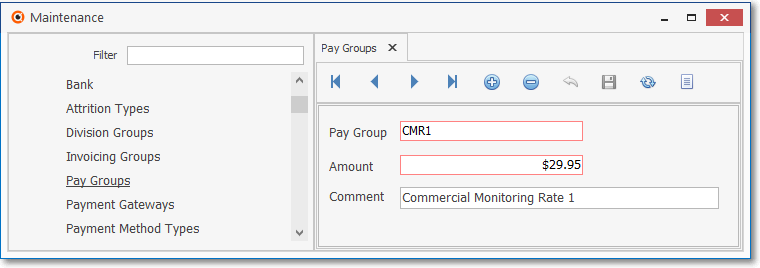
Pay Groups Form
a)See the Recurring Revenue - Defining Open Term Billing chapter for more information about setting a Custom Pay Amount.
b)See the Custom Pay Increase chapter for more information about changing a Custom Pay Amount.
c)See the RMR Rate Change chapter for information on how to track all Rate Changes.
3.If you plan on billing using the Recurring Billing Cycles feature (where different groups or types of Subscribers may be billed automatically at different times throughout the month), a Billing Cycles record for each type must be defined and then assigned to the appropriate Recurring Revenue records as appropriate for that Subscriber.
➢Important Information - See the "Understanding How and Why the Auto Draft and Auto Bill options are used on the Billing Cycles Form" discussion in the Billing Cycles chapter!
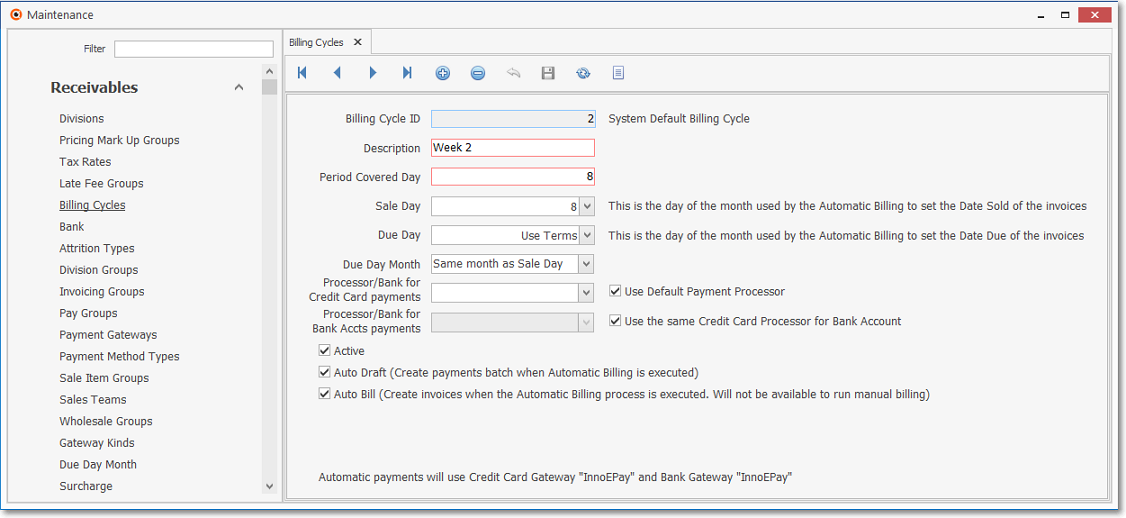
Recurring Revenue Billing Cycles Form
4.Finally, the Subscriber's Recurring Revenue information must be entered for each Subscriber who will be billed for one or more Recurring Revenue Contracts.
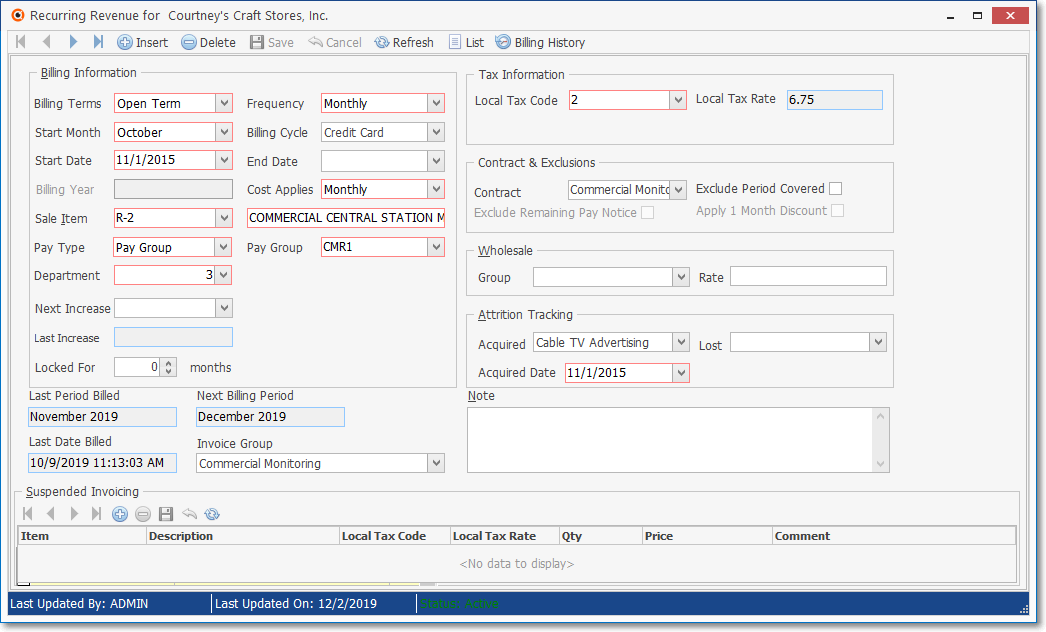
Recurring Revenue Form - Recurring Information Tab - Open Term entry
❑Billing Recurring Revenue - Although simple to do, with the exception of Fully Automated Recurring Billing, this may be the most powerful feature within the Accounts Receivable System module.
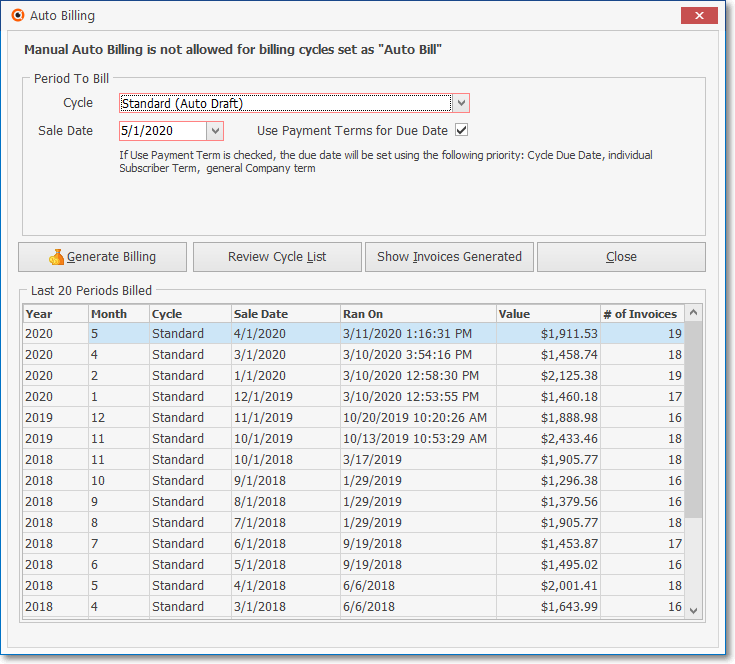
Auto Billing dialog for manually billing (versus Fully Automatic Recurring Billing of) Recurring Revenue
•To open the Auto Billing Form:
a)From the Backstage Menu System Select File and Choose Receivable and Select the Run Automatic Billing option, or
b)From the Quick Access Menu, Select File and Choose Receivable and Select the Run Automatic Billing option, or
c)In the Receivables Tab on the MKMS Desktop, Click the Auto Bill Icon.
✓When all of the Billing Cycles have been set as Auto Bill (that Auto Bill field is Checked), there is no need to use this Auto Billing option because the Fully Automated Recurring Billing process is already tasked with billing all of them.
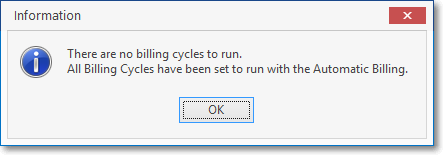
There are no billing cycles to run.
All Billing Cycles have been set to run with the Automatic Billing.
▪OK - Press Enter or Click the OK option.
•Fill in the entries as described below:
✓Period To Bill - Use the Drop-Down Selection List es provided to enter this information.
▪Cycle - Enter the appropriate Recurring Billing Cycle to be billed.
▪Sale Date - Enter the Sale Date to appear on the Invoices generated with this Auto Billing process.
oBy default, this will be a Date estimated by the system to be the next logical Sale Date for the selected Billing Cycle. but may be changed as needed.
1.Click on the Date field and type the desired Date using a MM/DD/YYYY format; or
2.Use the Drop-Down Calendar/Date Entry field provided to Choose the desired Date
▪Use Payment Terms for Due Date - By default this box will be Checked.
oThe Due Date to appear on the Invoices generated with this Auto Billing process will be based on the following Priority
1)The selected Billing Cycle's Due Day
2)In Company Settings, if the UseSubscriberTerms option is set to True ("T"): each Subscriber's Terms (and therefore their Due Date ) will be individually set.
3)In Company Settings, if the UseSubscriberTerms option is set to False ("F"): the Due Date should be set) based on the Terms defined in the Company Options - General sub-tab on the Company Options tab of the User Options Form
✓Last 20 Periods Billed - This area displays the Year, Month and Cycle of (up to) the last 20 Auto Billing procedures executed by the system.
▪Initially, this will be blank (only zeros displayed).
▪Once you have billed the selected billing cycle, the Year, Month and Cycle information will be displayed.
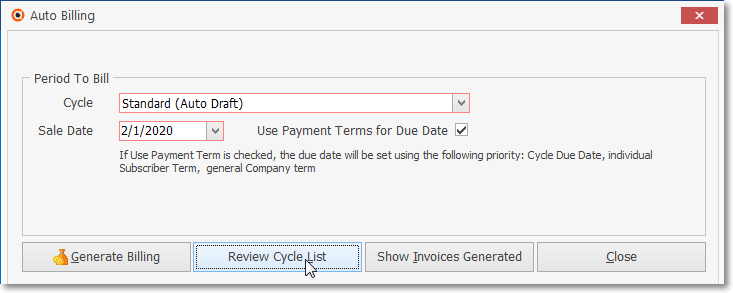
•Review Cycle List - The Show Billing Cycles Form is available by selecting the Review Cycle List button on the Auto Billing Form (see illustration below)
✓This Show Billing Cycles Form displays a complete list of all Billing Cycles and includes the associated Banking, Credit Card and Payment Gateway information when defined (see illustration below) .
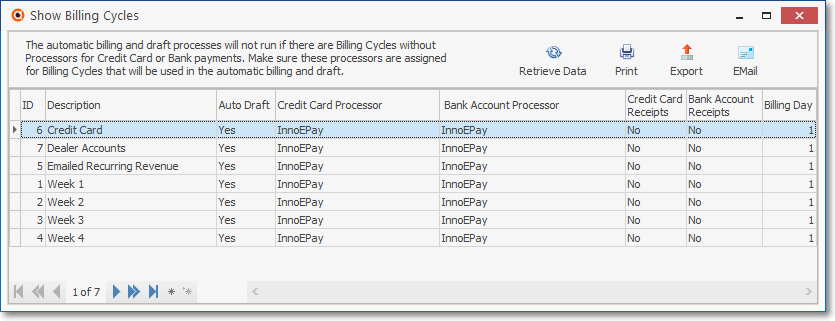
Show Billing Cycles dialog
•Generate Billing - Click Generate Billing to execute the Auto Billing process for the selected Cycle.
![]()
✓When the process is completed, the Value Billed: amount and related data for the Auto Billing process just completed will be inserted at the top of the Last 20 Periods Billed Grid.
✓Well, that was easy!
•Show Invoices Generated - Click Show Invoices Generated button to display the Invoice List dialog containing a list of Invoices created information.
✓This option is only needed when your Company is using an Automatic Payment Gateway (i.e., InnoEPay, Authorize.net, Forte.net), and/or a Manual Payment Gateway to process pre-approved Credit Card and Bank Draft Payments
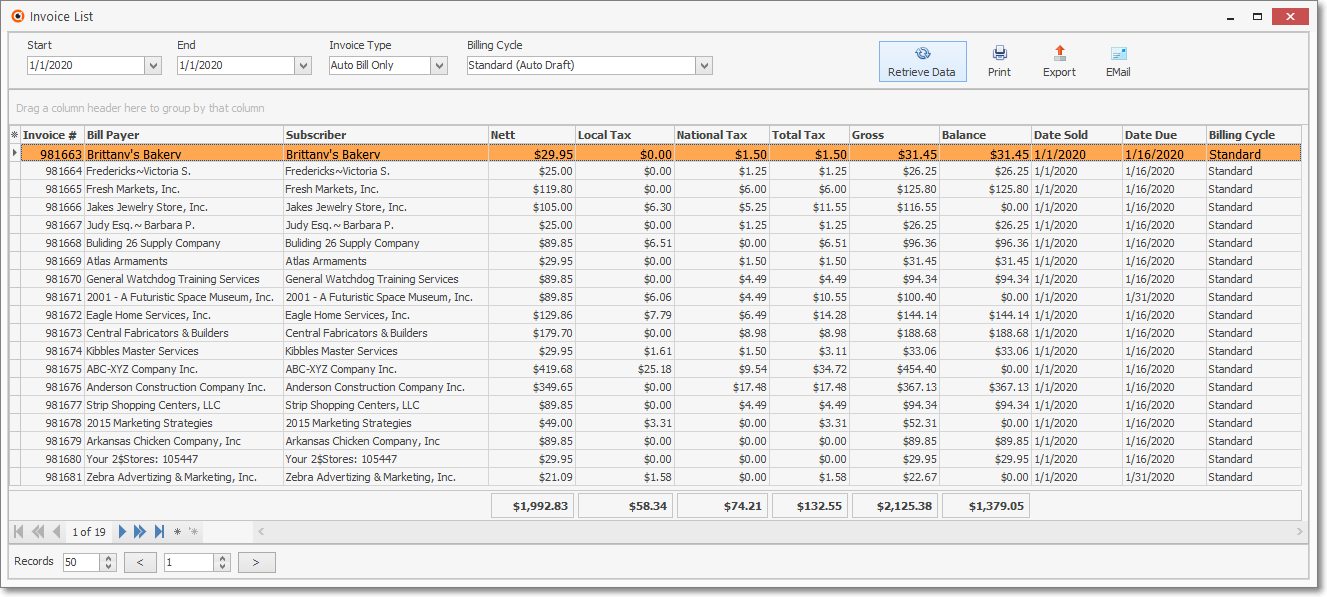
Invoice List dialog is accessed from the Auto Bill Form
•Close - Click the Close box ![]() on the right at the top of the Form to close the Invoice List Grid.
on the right at the top of the Form to close the Invoice List Grid.
❖See the Auto Bill Recurring Revenue chapter for a more detailed explanation of this process and some additional variables which may be presented.
❖For General Ledger System Users - See the Automating the calculation of Earned and Deferred Revenue discussion in the Deferred Revenue Setup chapter for detailed information on tracking Earned and Deferred Revenues.