❑The Custom Pay Increase Form allows the Value of a Custom Pay Amount, that was entered in a Subscriber's Recurring Revenue Form, to be updated.
❖See the Subscriber's Auto Bill Form chapter for more information about setting a Custom Pay Amount.
❖See the RMR Rate Change chapter for information on how to track all Rate Changes.

Recurring Revenue record - Billing Information section
•Normally, when automatically Billing Recurring Revenue, the Value set for the Pay Group code assigned to each Recurring Revenue record will determine the Price charged in the Invoices that are created for those services.
•But when the Pay Type is set as Custom Pay and a Monthly Payment Amount (Mthly Amt) is entered on the Recurring Revenue Form, that Monthly Payment Amount becomes the permanent Price charged for that service and will not be re-set by the Pay Group Change process.
✓When the Pay Type is set as Custom Pay, in addition to a Monthly Payment Amount field being provided, the Rate Increase information fields will be activated in the Billing Information section on the Recurring Revenue Form.
✓Understanding these fields will make using the Custom Pay Increase Form easier to use.
Recurring Revenue Form
Pay Type = Custom Pay
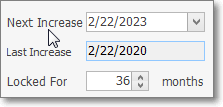
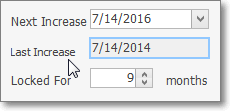
Rate Increase information
a)Next Increase - By default, it will be 12 months from the Date of the entry.
oIf needed, the Drop-Down Calendar/Date Entry field may be used to enter a different Date for the Next Increase.
i.Click on the Date field and type the desired Date using a MM/DD/YYYY format; or
ii.Use the Drop-Down Calendar/Date Entry field provided to Choose the desired Date
b)Last Increase - By default, when a Custom Pay Amount is initially entered, it will be set as the Date of the entry.
oThis is a system maintained field.
c)Locked For - By default, it is set at 12 months.
oIf needed, a different number of months may be defined for how long this rate is to be Locked, and therefore, how often it should be reviewed for an Increase.
•In Summary:
✓There are reasons to not use the Pay Group code method to assigned a Price for Recurring Services (e.g., a friend or family member price, a special agreement made with the Subscriber, a group rate, etc.).
✓When the Monthly Amount for a service needs to be manually set (instead of using the normal Pay Group code method of assigning the Price):
▪Choose the Custom Pay option as the Pay Type and enter the appropriate Monthly Amount.
•Regardless of the reason for establishing the special Custom Pay Amount, eventually there will come a time when it will need to be changed (or at least reviewed).
•The Custom Pay Increase Form described below is used to review/adjust/increase the originally assigned Custom Pay Amount's Monthly Amount.
❖For General Ledger System Users - This Custom Pay Increase procedure has no immediate effect on the General Ledger (until the next time these modified Pay Rates are actually Invoiced).
❑Accessing the Custom Pay Increase Form
•To open the Custom Pay Increase Form:
a)From the Backstage Menu System Select File and Choose Receivable and Select the Custom Pay Increase option, or
b)From the Quick Access Menu, Select File and Choose Receivable and Select the Custom Pay Increase option
•This Custom Pay Increase Form is used to view either All or one of several Filtered sets of the Rate Locked Subscribers whose Next Increase Date in the Subscriber's Recurring Revenue Form has expired.
•There are three methods (see the "Process - Choose an Increase Type to Process Custom Pay Increases" section below) available for changing the Current Amt Value of Custom Pay Amounts to a New Amt Value.
1.Change the Value based on a Percentage increase of their existing Custom Pay Amounts,
2.Change the Value based on an actual Dollar amount increase.
3.Change the Value by having Custom Pay Amounts Manually reset for individually selected Subscribers.
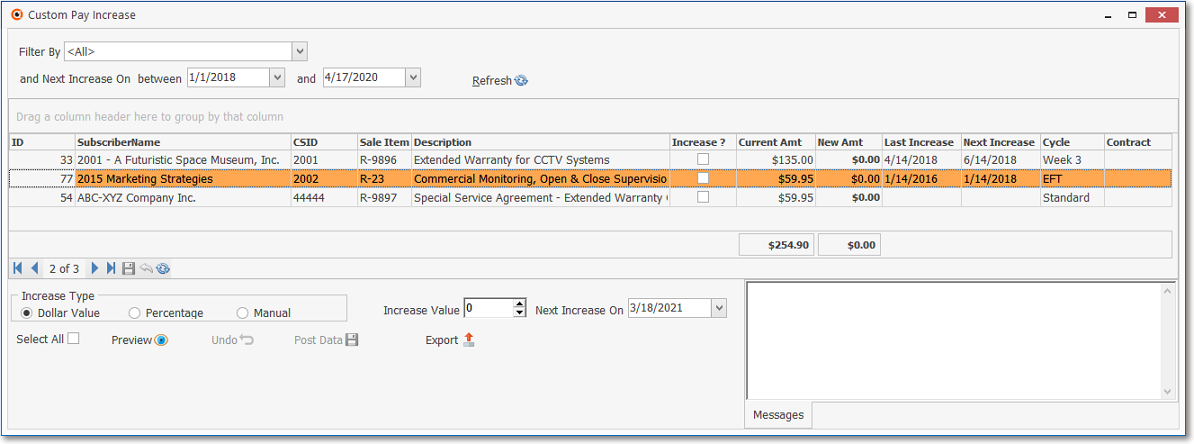
Custom Pay Increase Form
❑Filter - The first section of the Custom Pay Increase Form allows the User to identify a Filter which will determine which Custom Pay Amount records will be listed for review.
•Filter By - By default, <All> of the Subscribers who have Custom Pay Amounts defined, and whose Next Increase Date is within the Date Range set below, will be displayed.
✓If the default of <All> Subscribers does not meet your needs, use the Drop-Down Selection List(s) that will be provided next to the Filter By Drop-Down Selection List to Choose the type of Filter required:
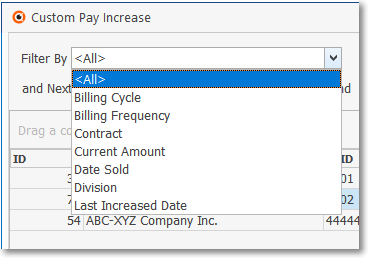
Custom Pay Increase - Filter By option
Partial List of the available Selections
✓Billing Cycle - Select the Billing Cycle that is to be used as a Filter:
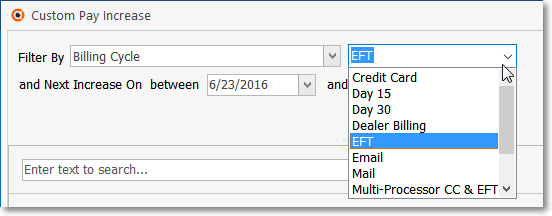
Custom Pay Increase Form - Filter By option - Billing Cycle
▪The result will be that the Data listed below will only contain those Subscribers which have Recurring Revenue records that:
oHave Custom Pay Amounts defined
oHave the selected Billing Cycle defined on the Recurring Revenue Form
oHave a Next Increase Date that falls within the Date Range set below.
✓Billing Frequency - Using the Drop-Down Select List provided, Select the Billing Frequency (i.e., Annually, Bi-Annually, Semi-Annually, Quarterly, or Monthly) to be used as a Filter.
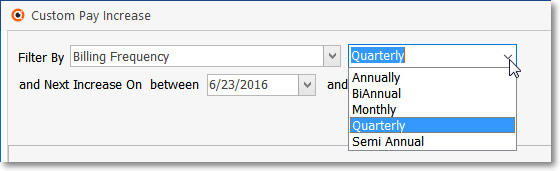
Custom Pay Increase Form - Filter By = Billing Frequency
▪The result will be that the Data listed below will only contain those Subscribers which have Recurring Revenue records that:
oHave Custom Pay Amounts defined
oHave the selected Billing Frequency assigned on the Recurring Revenue Form
oHave a Next Increase Date that falls within the Date Range set below.
✓Contract - Select the Contract Type to be used as a Filter
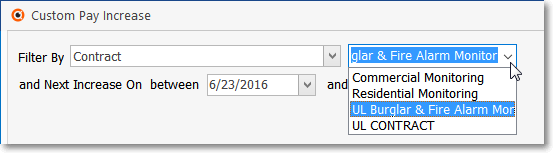
Custom Pay Increase Form - Filter By option - Contract Type
▪The result will be that the Data listed below will only contain those Subscribers which have Recurring Revenue records that:
oHave Custom Pay Amounts defined
oHave the selected Contract Type defined on the Recurring Revenue Form
oHave a Next Increase Date that falls within the Date Range set below.
✓Current Amount - Using the field provided next to the Filter By box, enter the exact Amount (only Numbers and a Decimal Point will be accepted) representing the Custom Pay Amount to be used as a Filter.
▪The result will be that the Data listed below will only contain those Subscribers which have Recurring Revenue records that:
oHave a Custom Pay Amount defined on the Recurring Revenue Form which exactly matches th Amount entered above.
oHave a Next Increase Date that falls within the Date Range set below.
✓Date Sold - Using the Drop-Down Calendar/Date Entry fields provided next to the Filter By box, enter the Date Range to be used as a Filter (the default Date Range provided represents the immediate past year).
a)Click on the Date field and type the desired Date using a MM/DD/YYYY format; or
b)Use the Drop-Down Calendar/Date Entry field provided to Choose the desired Date

Custom Pay Increase Form - Filter By option - Date Sold
▪The result will be that the Data listed below will only contain those Subscribers which have Recurring Revenue records that:
oHave Custom Pay Amounts defined
oHave a Sale Date (as shown below: the Sale Date that was entered on the Service Info Section of the Subscribers Form) which is within the Date Range defined above

Subscriber Form - Edit View - Service Info section - Sale Date field
oHave a Next Increase Date that falls within the Date Range set below.
✓Division - Select the Division to be used as a Filter,
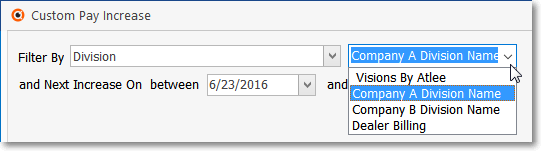
Custom Pay Increase Form - Filter By option - Division
▪The result will be that the Data listed below will only contain those Subscribers which have Recurring Revenue records that:
oHave Custom Pay Amounts defined
oHave a Next Increase Date that falls within the Date Range set below.
oHave the selected Division defined on the Accounting Receivable Section within the Edit View of the Subscribers Form
✓Department - For General Ledger System Users Only, Select the Department that is to be used as a Filter.
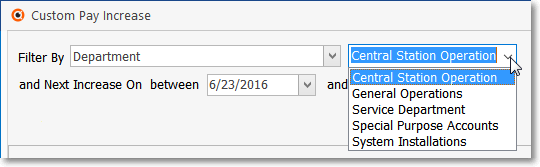
Custom Pay Increase Form - Filter By option - Department
▪The result will be that the Data listed below will only contain those Subscribers which have Recurring Revenue records that:
oHave Custom Pay Amounts defined
oHave the selected Department defined on the Recurring Revenue Form
oHave a Next Increase Date that falls within the Date Range set below.
✓Last Increase Date - Using the Drop-Down Calendar/Date Entry field es provided next to the Filter By Drop-Down Selection List field, enter the Date Range to be used as a Filter (the default Date Range provided represents the immediate past year).
a)Click on the Date field and type the desired Date using a MM/DD/YYYY format; or
b)Use the Drop-Down Calendar/Date Entry field provided to Choose the desired Date
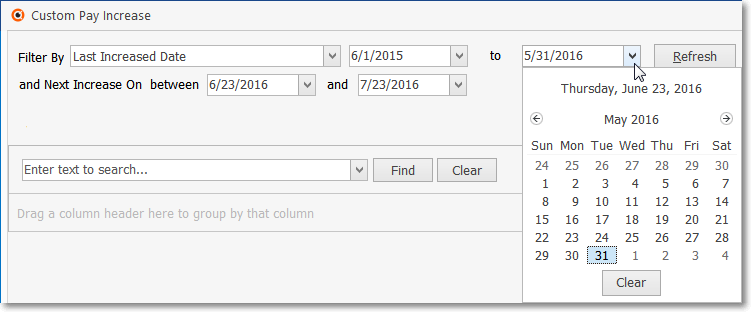
Custom Pay Increase Form - Filter By option - Last Increase Date
▪The result will be that the Data listed below will only contain those Subscribers which have Recurring Revenue records that:
oHave Custom Pay Amounts defined
oHave a Last Increase Date on the Auto Bill Form which falls within the Date Range defined above
oHave a Next Increase Date that falls within the Date Range set below.
✓Recurring Sale Item - Select the desired Recurring Revenue Sale Item to be used as a Filter,
▪The result will be that the Data listed below will only contain those Subscribers which have Recurring Revenue records that:
oHave Custom Pay Amounts defined
oHave the selected Recurring Revenue Sale Item defined on the Recurring Revenue Form
oHave a Next Increase Date that falls within the Date Range set below.
✓Recurring Start Date - Using the Drop-Down Calendar/Date Entry field es provided next to the Filter By Drop-Down Selection List field, enter the Date Range to be used as a Filter (the default Date Range provided represents the immediate past year).
▪The result will be that the Data listed below will only contain those Subscribers which have Recurring Revenue records that:
oHave Custom Pay Amounts defined
oHave a Recurring Start Date on the Recurring Revenue Form which falls within the Date Range defined above
oHave a Next Increase Date that falls within the Date Range set below.
✓Sort Code - Enter the Sort Code to be used as a Filter,
▪The result will be that the Data listed below will only contain those Subscribers which have Recurring Revenue records that:
oHave Custom Pay Amounts defined
oHave a Next Increase Date that falls within the Date Range set below.
oHave the Sort Code that was entered above defined on their Subscribers Form
•Date Range: Identify the Date Range within which the Next Increase Date (defined in the Rate Increase section - see above - of the Recurring Revenue Form) must fall:
✓and Next Increase On between / and - The default Date Range provided represents the next 30 day period starting with Today.
▪ Using the Drop-Down Calendar/Date Entry field es provided, the between (starting with) plus the and (and ending with) Date Range to indicate which of the Next Increase Dates defined in each Subscriber's Recurring Revenue records may be reset.
▪The result will be that the Data listed below will only contain those Subscribers which have Recurring Revenue records that:
oHave Custom Pay Amounts defined
oHave a Next Increase Date that falls within this Date Range .
➢Note: This Date Range Filter is an "additive filter" which further limits the results from the Filter By parameter(s) set above.
•Refresh - Click the Refresh button when any Filter parameter is initially entered or has been modified.

❑Data - This section displays the Custom Pay Amount items based on the results of the Filter(s) and Date Range defined above.
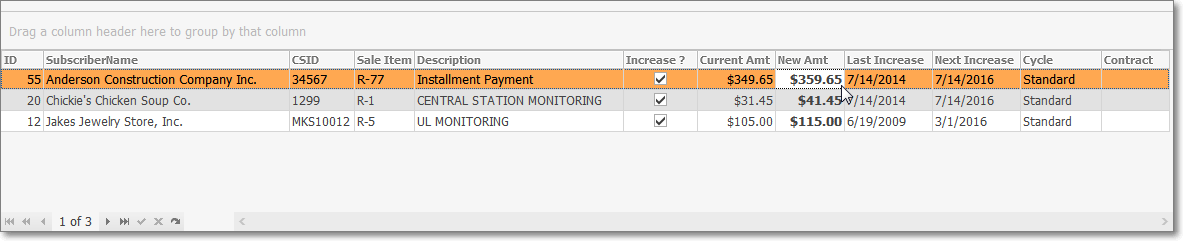
•Column Headings - The information listed in the Data section of the Custom Pay Increase Form has several columns of information.
![]()
These are:
✓ID - The internal Subscriber record number.
✓Subscriber Name - Their Account Name.
✓CSID - The Primary CSID for this Account.
✓Sale Item - The Sale-Purchase Item code for this Recurring Revenue item.
✓Description - The Description of the service.
✓Increase ? - Check this box if you want this specific record to be increased based on the Increase Type and Value entered below.
▪If all of the records that are displayed in the Data section of the Custom Pay Increase Form are to be changed in the same manner, Check the Select All box (see Select All in the "Process - Processing Custom Pay Increases" section below) instead.
✓Current Amt - The current Custom Pay Amount for this Recurring Revenue item.
✓New Amt - When Previewed (see "Preview" in the "Process - Processing Custom Pay Increases" section below), this will be the adjusted amount based on the Increase Type and Value entered.
✓Last Increase - The Date of the last (or initial) rate adjustment.
✓Next Increase - The Date set for the Next Increase.
✓Cycle - The Billing Cycle assigned to this Recurring Revenue record.
✓Contract - The Contract Type assigned to this Recurring Revenue record.
❑Process - Choose an Increase Type to Process the required Custom Pay Increase(s).

Custom Pay Increase Form - Increase Type - Processing options
• Setting the Increase Type - Select the method to be used for the Custom Pay Increase(s).
✓Dollar Value - Click this box if you want to define an exact Dollar Value to be added to the Current Custom Pay Amount being assessed.
✓Percentage - Click this box if you want to define a Percentage Increase to be added to the Current Custom Pay Amount being assessed.
✓Manual - Click this box if you want to manually define a specific New Custom Pay Amount for selected records.
•Process Choices - The following information explains the proper usage of each Increase Type:
✓Increase Value - Enter the Dollar Amount of the increase, the Percentage Rate of the increase, or the actual New Custom Pay Amount:
▪Dollar Value - Enter the Dollars and Cents to be added to their Current Custom Pay Amount.
oExample: $5.00 value added on to a $24.95 Custom Pay Amount results in a $29.95 Custom Pay Amount.
▪Percentage - Enter the Percentage to be calculated and then added to their Current Custom Pay Amount.
oExample: 5.0% added on to a $24.95 Custom Pay Amount (24.95x.05=1.247 rounded to 1.25) results in a $26.20 Custom Pay Amount.
▪Manual - Enter the New Custom Pay Amount to be charged in the New Amt column in the Data section for each record that is to be reset manually.
✓Next Increase On - Important: Using the Drop-Down Calendar/Date Entry field, enter the Date when the Next Increase should be implemented.
✓Select All - Check this box to have all of the Subscriber's Recurring Revenue records currently displayed in the Data section included in the chosen Increase Type (Custom Pay Increase) process.
•Preview - Once you have made your selection and defined the Increase Type and Value (i.e., Dollar Value of Increase, Percentage Value of Increase, or Manual Amount to be set) for that increase, Click the Preview button to view the results.
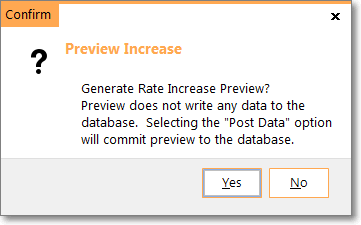
Generate Rate Increase Preview?
✓If Manual is selected, there is no Preview option available.
Post results to database?
▪The Preview option does not actually write the Rate Changes to the Recurring Revenue table.
▪Click the Yes button to create the Preview.
▪Each record with a Check in the Increase? box will have the New Amt calculated based on the Increase Type and associated entries that were chosen.
▪A Preview is displayed to allow the User to Confirm that the Rate Changes created, are what was anticipated.
✓If the New Rate being Previewed has been requested earlier than the Next Increase Date listed in the Data section, a Rate Is Locked warning will be presented.
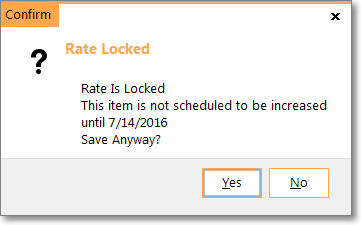
Rate Locked message
▪To override the previously set Date of Increase (Click Yes) and the Custom Pay Increase will be implemented immediately.
▪To cancel (Click No) the Custom Pay Increase(s) requested will be aborted.
![]() Export - Once the data has been formatted, filtered, sorted and configured as needed, the Rate Increase defined and Previewed,
Export - Once the data has been formatted, filtered, sorted and configured as needed, the Rate Increase defined and Previewed,
✓Click the Export Icon to display the standard Windows® Save As dialog. to export this grid in a spreadsheet format.
✓See the data grid chapter for more information.
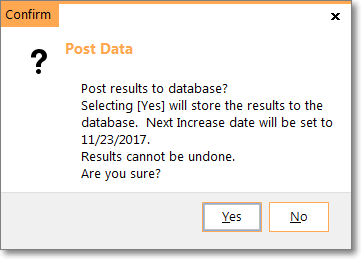
•Use the Post Data option (see mouse pointer below) to actually write the Rate Changes to the Recurring Revenue table once the Previewed results are acceptable.

✓Post Data - Once you are satisfied with the Preview, Click the Post Data button to write this revised payment information to the Recurring Revenue table.
✓Undo - If you are not satisfied with the results of the Preview, Click the Undo button instead and the Data will return to it's original state prior to requesting the Preview.
Post results to database?
✓The Post Data Confirmation dialog provides important information for the User.
✓Once Confirmed (by Clicking the Yes option), the Rate Change process is implemented and cannot be reversed.
➢Note: This message should be carefully read to assure that the Rate Changes about to be written to the Recurring Revenue table, along with the Next Increase Date, are what was required.
•Messages - As you selectively Preview and Post revised Custom Pay Increase information, the process is documented in the Messages area.
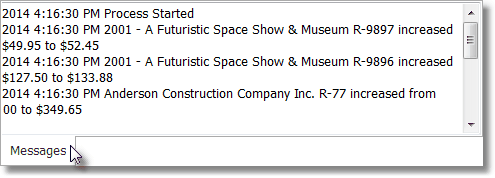
Custom Pay Increase Messages dialog
•Close - To exit, Click the Close ![]() box on the top right corner of the Custom Pay Increase Form.
box on the top right corner of the Custom Pay Increase Form.