❑The Generate Invoices for Job Tasks option is used to progressively Invoice the Subscriber for one or more Job Tasks relating to the currently selected Job.
•Consider Incremental Invoicing - Many Companies Invoice the work which has completed on a Job before the whole Job has been finished.
✓As an example, if the Pre-Wire portion of an installation being tracked in Job Costing has been completed, your Company may want to Invoice the Subscriber for this portion of the Job that has actually been completed.
✓As necessary, an Invoice may be created for a "Zero" and/or even a Negative Amount for a Task
▪To do so, create a Job Task with a Zero" and/or even a Negative Amount
▪When the "Task Invoicing" dialog is opened, the default "Amount To Invoice" is the Task's Balance.
▪An Invoice may not be created for more than the Task's Balance
•Invoicing Job Tasks - This Generate Invoices Option will allow you to create an Invoice for one, some, or all of the Job Tasks you've entered for this Subscriber's Job (which have not been previously Invoiced).
1.Click on the Job Tasks Tab.
2.Select the appropriate Job Task.
3.Choose the Generate Invoices option.
a.If a Work Order was previously created for this Job Task (i.e., a Work Order Number is assigned to this Job Task), that specific Work Order Form will be opened (instead of the Job Task Invoicing Form shown below).
i.Enter the required information for this Work Order, following the instructions in the Entering a Work Order chapter,
ii.Invoice and Complete this Work Order as per those instructions
iii.Save and Close this Work Order Form.
iv.The Job Task's detail line item will be updated with the appropriate Invoiced Amount information.
b.If the Selected Job Task does not have a Work Order Number assigned.
i.The Job Task Invoicing Form will be displayed.
ii.Follow the instructions in the "Using the Job Task Invoicing Form" discussion immediately below.
❑Using the Job Task Invoicing Form: Invoices for the Job Tasks may be created in two ways:
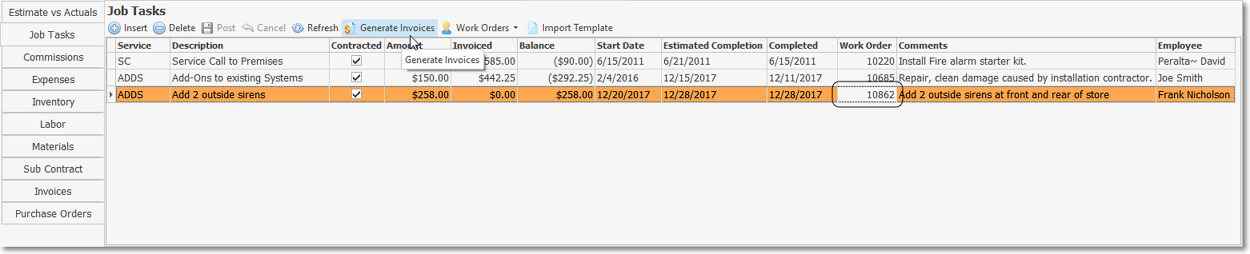
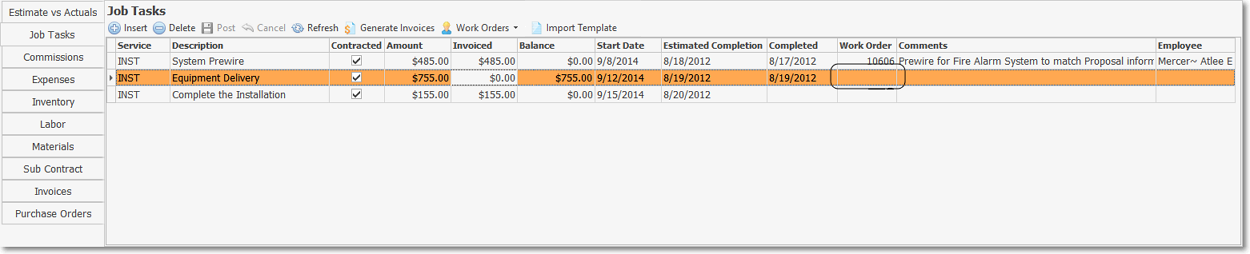
1.Invoicing any Job Task(s) that do not have a Work Order Number assigned (to Invoice those Job Task(s) that do have Work Orders assigned see #2 below).
a.Select any Job Task that has not been Invoiced (no Value in the Invoiced field)and does not have a Work Order Number assigned (no Work Order Number in the Work Order field).
Job Tasks tab - No Work Order Numbers assigned - Ready to be Invoiced
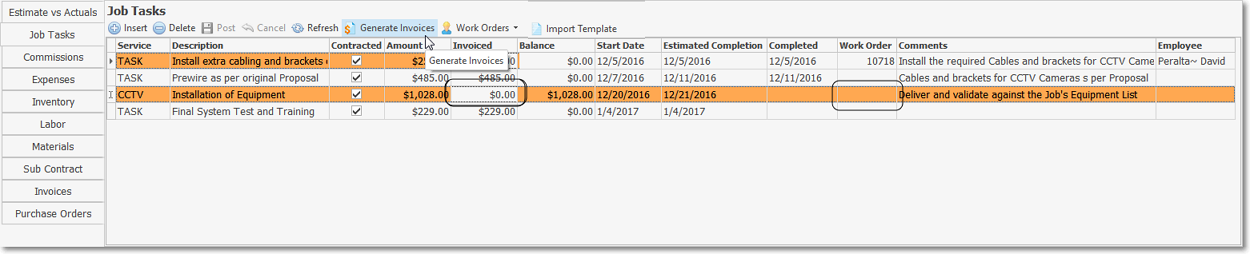
b.Click on the Generate Invoices option to display the Job Task Invoicing dialog.
✓When the "Task Invoicing" dialog is opened, the default "Amount To Invoice" is the Task's Balance.
✓An Invoice may not be created for more than the Task's Balance
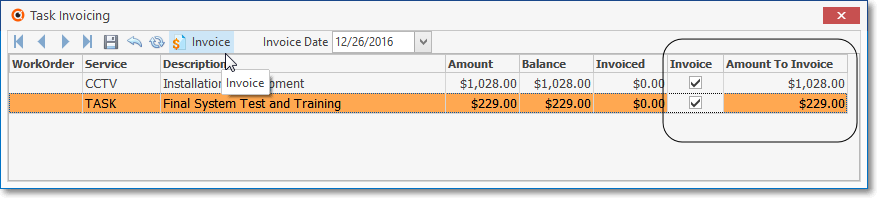
Job Form's Task Invoicing dialog - Invoice item Checked and Amount To Invoice entered - Invoice option selected
c.Amount To Invoice - Enter the Amount to Invoice for each Job Task Item that is to be Invoiced.
✓As necessary, an Invoice may be created for a "Zero" and/or even a Negative Amount for a Task
▪To do so, create a Job Task with a Zero" and/or even a Negative Amount
d.Invoice - Once the Amount to Invoice is entered, for those you want combined on the same Sales Invoice, Check the Job Task(s) Invoice box.
e.Save - Click the ![]() Icon to record these Amount to Invoice Amounts and Checked Invoice boxes.
Icon to record these Amount to Invoice Amounts and Checked Invoice boxes.
f.Invoice option - Click the Invoice option to create the required Invoice.
i.Confirm the Sale Date.
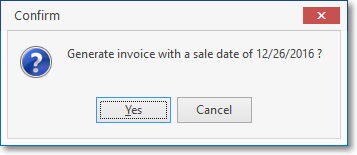
Generate Invoice with sale date 99/99/9999?
ii.Display Invoice? - Answer (Click) Yes or Cancel, as appropriate.
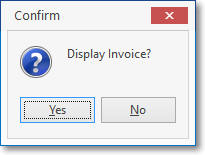
Display Invoice?
a)If requested, display the Invoice and update any information, as appropriate (see examples list below).
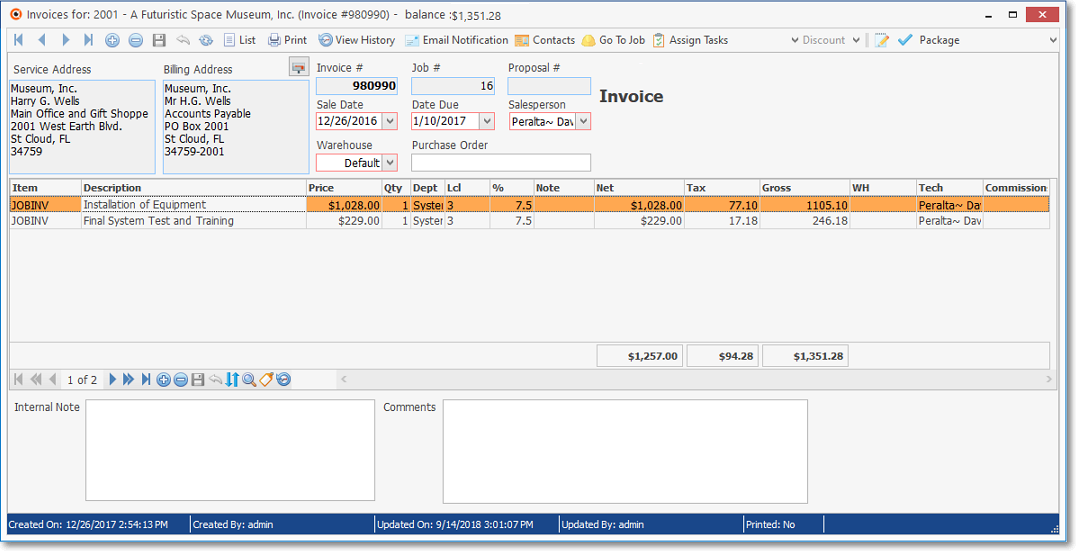
1)Department - General Ledger Users may need to Choose a different Department (other than the default).
2)Tax Status - Verify that the Tax fields are filled in properly (the default Tax Rate in the Sale-Purchase Item might be incorrect)
3)Commission To - Commission Tracking System Users may want to identify a Commission eligible Technician.
4)Billing Address - Before Printing the Invoice, if this Subscriber wants this Invoice for this Job Task to be mailed to a different Address than the normal Billing Address, Click the Select Billing Address Icon (see the illustration above).
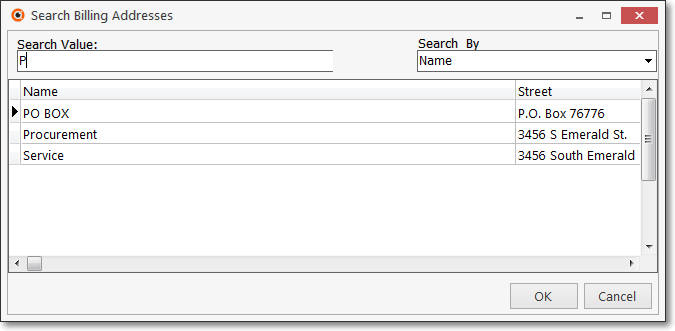
Search Billing Address dialog
oSearch Billing Address - The Search Billing Address dialog will be displayed which allows the User to Select one of the previously defined Addresses as the Billing Address for this specific Invoice.
oSave - Click Save to complete this Invoice.
oClose - Click the Close ![]() box to Exit the Invoice Form.
box to Exit the Invoice Form.
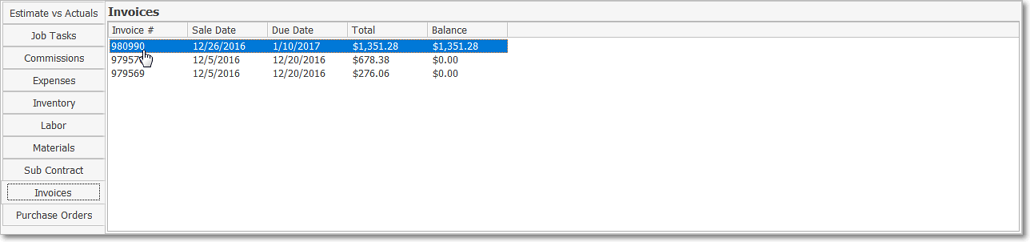
g.The Invoice created this way will also be included in the Invoices tab of the Job Costing Form.
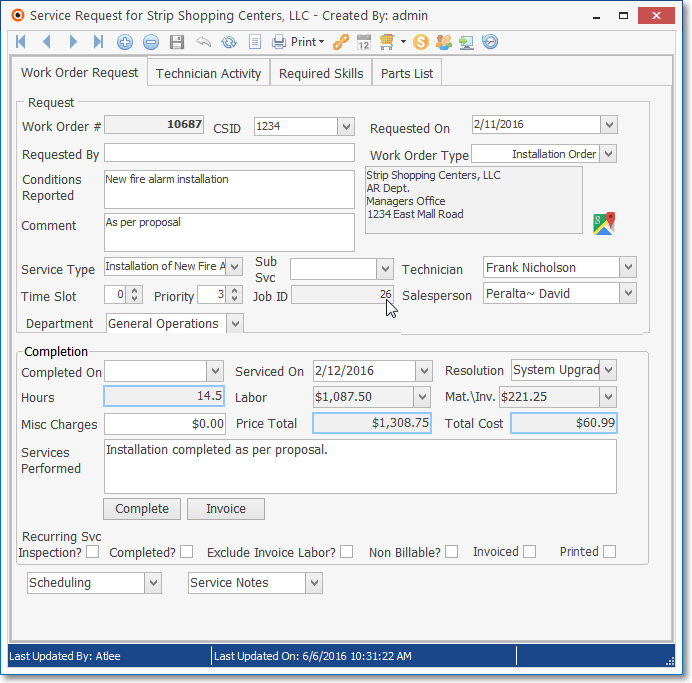
2.Invoicing a Job Task that has a Work Order Number assigned and has been finished, but has not yet been Invoiced.
i.Select the Job Task with a Work Order Number assigned that needs to be Invoiced.

Job Tasks tab - Work Order Number assigned - finished and Ready to be Invoiced
b.Click on the Generate Invoices option which will display that Work Order.
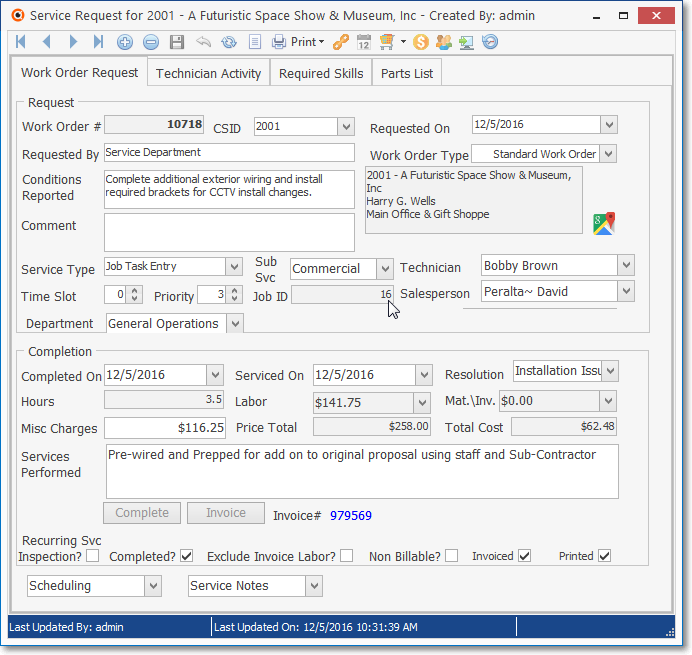
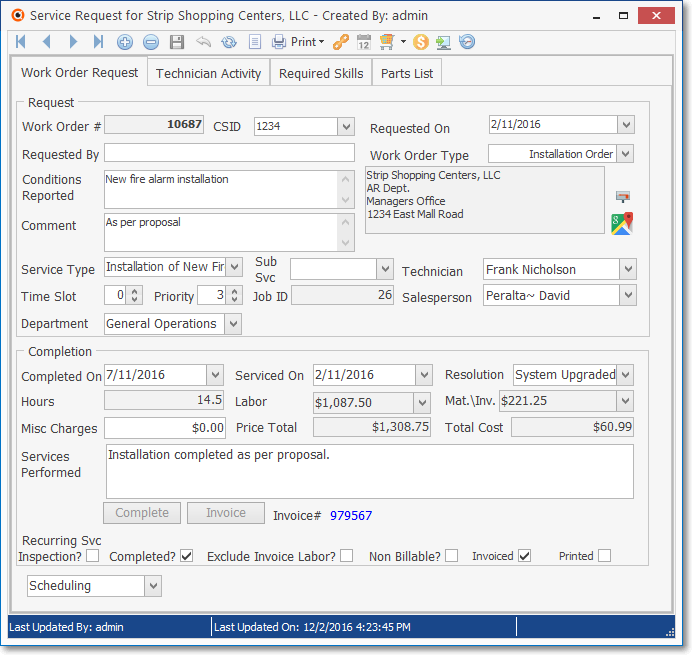
Completed Work Order for Job Task
c.Invoice the Work Order - Complete and Bill that Work Order including the identification of Inventory/Materials and the Labor that was required, by following the instructions in those associated chapters.
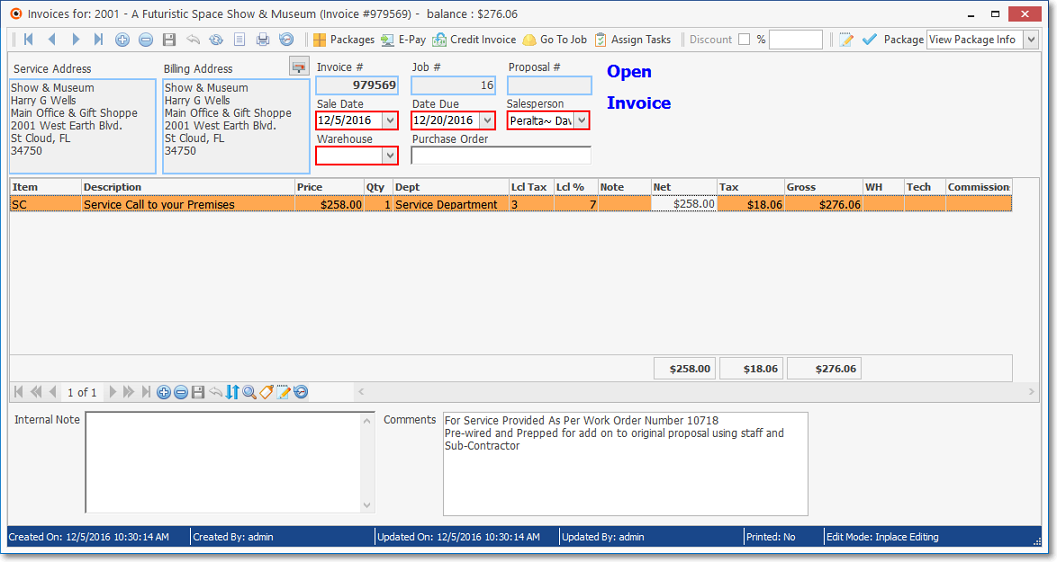
Invoice from Work Order created for Job Task
d.Close - Click the Close ![]() box to Exit the Invoice Form and do the same to Close the Work Order
box to Exit the Invoice Form and do the same to Close the Work Order
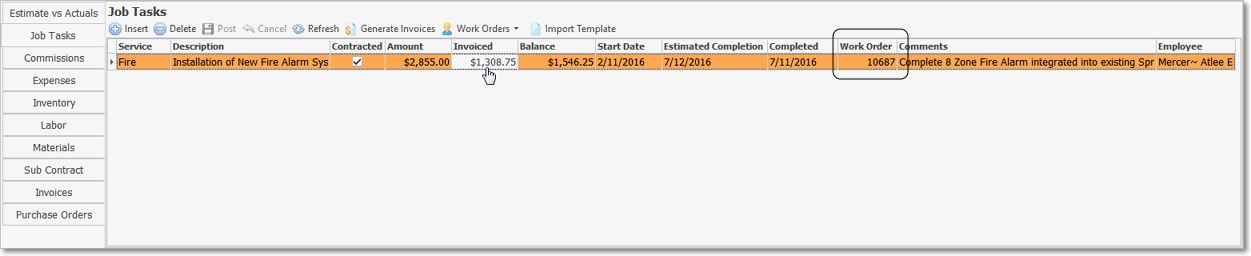
e.You will be returned to the Job Tasks Tab on the Job Costing Form.
f.The Invoice created here will be included in the Invoices tab of the Job Costing Form.
•In either case, once you Save and Close the Invoice Form, You may also view the Estimate vs Actual tab on the Job Costing Form to see the most current Estimate vs Actual and Job Totals information.
❑Completing a Job:
![]()
•When a Job is actually completed (i.e., all Tasks, Commissions, Expenses, Inventory, Labor, Materials, and/or Sub Contractor related costs have been posted) and all associated Work Orders have been appropriately Invoiced, Click the Complete Job button.
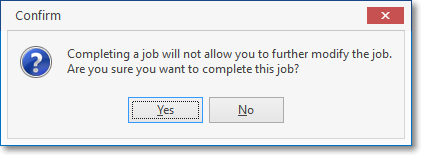
Complete this Job?
✓Click the Yes button to mark the Job as Completed.
✓If certain Job Costing related items have not been properly completed (note the list above), an Open Items Found message will be displayed.
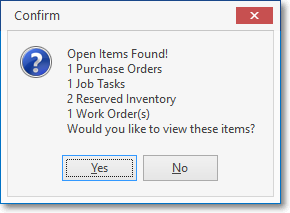
Open Items Found?
✓Click the Yes button to proceed with the closing process.
▪Click the No button to return to the Job Costing Form to compete the missing steps.

An Information message is displayed, Click OK to return to the Job Costing Form
✓If Yes was selected, the Current Date (Today) will be inserted into the Complete Date field next to the Complete Job button.
▪Use the Drop-Down Calendar/Date Entry field to change this Date, if appropriate.
✓Save -Click Save Icon on the Navigation/Options Menu at the top of the Job Costing Form to Complete the Job.
▪The ![]() button will be removed and the selected Completion Date will be locked in.
button will be removed and the selected Completion Date will be locked in.

Complete Date