❑Open Term Billing implements the Automatic Creation of Invoices for continuing services (e.g., Monitoring Service, Service Contracts, Opening & Closing Supervision) on the assumption that billing will continue indefinitely based on having executed an Automatic Renewal Contract with the Subscriber:
•The Recurring Revenue Form is divided into these Sections.
1.Billing Information - When, What, How Much and How frequently this Recurring Revenue item should be Invoiced
2.Pay Type & Rate -- Normally, the selected Pay Type is Pay Group, but Custom Pay (the Payment Amount will be manually entered) may be selected for this Recurring Revenue item.
i.Pay Group - When a Pay Group is assigned , it will determine the Payment Rate for this Recurring Revenue item.
ii.Rate Increase - If the Payment Amount of this Recurring Revenue item will be a Custom Pay Amount, the initial Payment Amount must be defined in this area, and in the future it will always have to be updated manually.
3.Tax Information - If and how this Open Term Recurring Revenue Item will be subject to Sales Tax.
4.Contract & Exclusions - Identifies the type of Monitoring Contract for this Recurring Revenue item, and lets the User determine what should, and should not be included on/excluded from the Recurring Revenue Invoice.
5.Wholesale - If this Recurring Revenue item is being Invoiced for a Wholesale Group (e.g., Chain Store, Alarm Dealer, Condo), identify How Much and for Who this is being billed.
6.Attrition Tracking - Identifies how this Account was Acquired, and/or How it was Lost.
7.Note - This information is printed on the Recurring Revenue Invoice to clarify the purpose of the charge(s).
8.Internal Note - This is not printed on the Recurring Revenue Invoice and is only to be used for internal information.
9.Billing History - Select the Billing History Icon from this Form's Ribbon Menu to display the Billing History Grid for this Recurring Revenue item.
❖See Recurring Revenue Billing History for more information
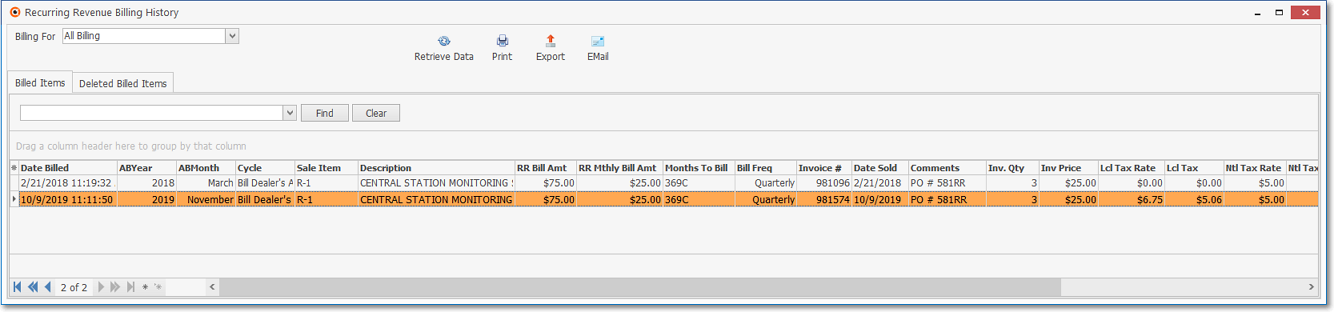
Open Term Recurring Revenue entry - Recurring Revenue Billing History grid
10.Suspended Invoicing - If requested, this contains a Suspended Invoice entry Prorating the first billing period's charges and will be inserted as a Detail Line Item when the initial (next) Automatic Billing process is executed for this Subscriber.
❑Entering an Open Term Recurring Revenue item
•Press F3 to open a Subscribers Form.
•Press F2 Search on the Navigation section of the Subscribers Form to locate the appropriate Subscriber record,
•Open the Subscriber Options Menu on the Navigation section of the Subscribers Form, Select the Receivables sub-menu, then Choose the Recurring Revenue option.
✓The Recurring Revenue Form will be displayed.
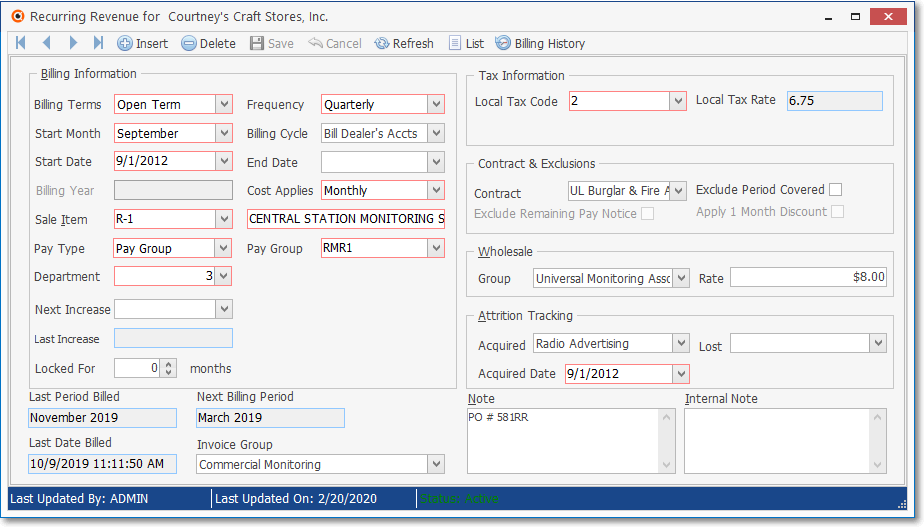
Recurring Revenue Form - Open Term entry
✓Click the ![]() Icon to start an Open Term Recurring Billing record.
Icon to start an Open Term Recurring Billing record.
•Billing Information Section - This Section deals with When, What, How Much and How frequently this Recurring Billing record should be Invoiced.
➢Note: Press Alt+B to instantly return to this Billing Information Section.
✓Billing Terms - Select the Open Term option using the Drop-Down Selection List provided.
Recurring Revenue Form - Billing Information section (open Term)
✓Frequency - Using the Drop-Down Selection List provided, Choose how often (the Billing Frequency) this item is to be Invoiced:
▪Annually - They are to be billed once each year for 12 months of service. Note that, just because you select Annually, the Invoice will reflect a Monthly Rate Amount, show that the bill is for 12 Months and calculate the Total Amount. You may override this behavior: Check Excl Period Covered (see below) and the Monthly Rate and Number of Months being billed will not be printed - only the total Amount and Description and any information that was entered in the Note box (see below) of the service. This "exclude" feature is available for any item being billed for a period greater than one month.
▪Bi-Annually - They are to be billed once every other year for two years of service.
oBilling Year - Enter the Year in which the Bi-Annual billing should start.
oAll other capabilities are the same as they are for Annual billing.
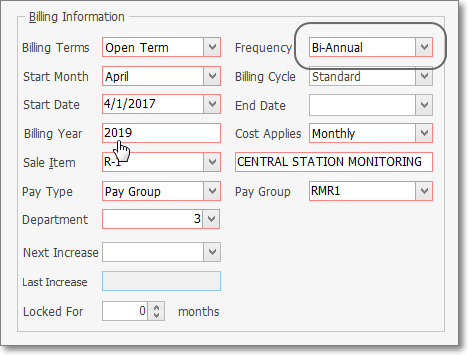
Recurring Revenue Form - Billing Information section (open Term) - Bi-Annual
▪Bi-Monthly - They are to be billed once every two months for two months of service. All other capabilities are the same as they are for Annual billing.
▪Monthly - They are to be billed once every month for one month of service (the default).
▪Quarterly - They are to be billed once every three months for three months of service. All other capabilities are the same as they are for Annual billing.
▪Semi-Annually - They are to be billed once every six months for six months of service. All other capabilities are the same as they are for Annual billing.
✓Start Month - The Next Calendar Month will be the default.
▪Using the Drop-Down Selection List provided, Choose the Month in which this billing should be started.
✓Billing Cycle - Standard is the default.
▪If you have previously defined multiple Recurring Billing Cycles (or are simply using any of the system's Recurring Billing Cycle default choices) to implement the multiple recurring billing process where different groups of Subscribers may be billed at different times within the same month, use the Drop-Down Selection List to Choose the appropriate Recurring Billing Cycle.
▪It is important to remember that when your Company is using the:
a)Fully Automated Recurring Billing process, the entry made in the Billing Day field on the Billing Cycle Form determines the Day within each Month that this Recurring Revenue item will be Invoiced.
b)Manually executed Auto Billing process, the Sale Date will be determined at the time thees Auto Billing process is run.
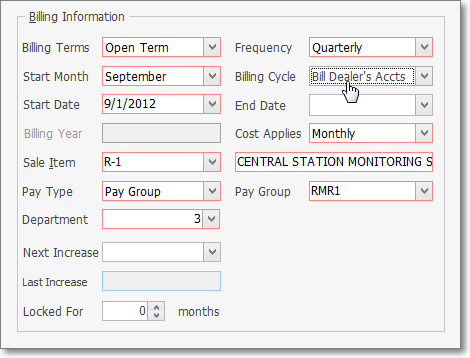
Recurring Revenue Form - Open Term - Alarm Dealer Billing Cycle is chosen
▪In the example above, this Subscriber is being Monitored for an Alarm Dealer and has agreed to have their Monitoring Service Payment billed Quarterly so this Recurring Billing entry will be included in that batch of Recurring Revenue Invoices for that Dealer.
➢Note: The system will not allow a Billing Day Number greater than 28 to be used.
oThis is because an Auto Billing Invoice with a Billing Day Number greater that 28 would not be generated in February - even if it should have been.
oTherefore, no Recurring Billing Cycle will have a Billing Day Number greater that 28
oThis fact should be kept in mind when creating Recurring Billing records and running your Company's Auto Billing process(es).
oWhen assigning a Start Date (see immediately below), the Billing Day Number of the selected Billing Cycle (see above) will be inserted in between the Month and Year entered to compose a complete Start Date.
✓Start Date - Choose the appropriate Starting Month and Year.
▪By identifying when the Invoicing should start, the start month may be set for next month, a later month, or even years later.
▪This is useful when you provide some months of free service(s) prior to commencement of Invoicing.
▪By setting it up in advance, that Invoicing will start automatically later, when appropriate.
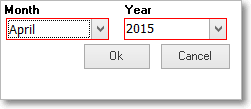
Month and Year Selector
▪Using the Drop-Down Select Month/ Select Year box - with a Drop-Down Selection List for each - Choose the Month and Year in which Invoicing for this Service should start (or started in the past if defining this item retroactively).
▪Click OK to save the selections.
✓End Date - Optionally, enter the Date when the Automatic Billing for this Open Term item should End (i.e., if their Contract was not renewed; or because of some other separation arrangement was made with that Subscriber).
❖See the "Options when Entering an End Date" instructions below.
✓Cost Applies - There are two ways the predefined cost for this service may be applied. Use the Drop-Down Selection List to make your choice.
1.Monthly - The charge will be the preset Pay Group Amount multiplied by the number of months of service being billed - unless you override the default price with a Custom Pay Amount (see below).
2.Per Billing Frequency - The charge will be the preset Pay Group Amount regardless of the number of months of service being Invoiced - the default price may be overridden with a Custom Pay Amount (see below).
✓Sale Item - Using the Drop-Down Selection List provided, Choose the Recurring Revenue Service to be billed from among those previously defined in the Sale-Purchase Items Form.
▪The Pay Group (assigned below) determines the Price that will be billed during the Automatic Recurring Revenue Billing process.
▪To assign a special Recurring Billing Price for this specific Subscriber, use the Custom Pay Amount feature (see below).
➢Note: However, the default Price for this service, that was set when this Recurring Revenue Sale-Purchase Item was defined, is still the default Price that is inserted when manually entering a Recurring Revenue Service item on an Invoice.
❖The Department assigned for this Sale-Purchase Item will be used for recording the associated Financial Transactions to the General Ledger for the Recurring Revenue Invoice, but this Number may be changed, if appropriate.
✓Description - By default the system will enter what was defined in the Sale-Purchase Items Form.
▪Modify the Description for this Service for this specific Recurring Billing, if needed.
✓Pay Type - Using the Drop-Down Selection List provided, Choose the appropriate Pay Type (i.e., Pay Group, or Custom Pay)
1.Pay Group - If Pay Group is Selected. a Pay Group will determine the Price that will be billed during the Automatic Recurring Revenue Billing process.

oUse the Drop-Down Selection List in the Pay Group field to Choose the appropriate Pay Group for setting the Payment Amount for this Recurring Billing record.
oAssigning a Pay Group to establish the Payment Amount allows you to globally re-set all Recurring Billing records assigned that Pay Group's Payment Amount by simply changing the Payment Amount in the Pay Groups Form.
oRemember this Pay Group's Payment Amount is also subject to how you assess that Payment Amount (identified in the Cost Applies field as either Monthly or on a Per Billing Cycle basis - see Cost Applies above).
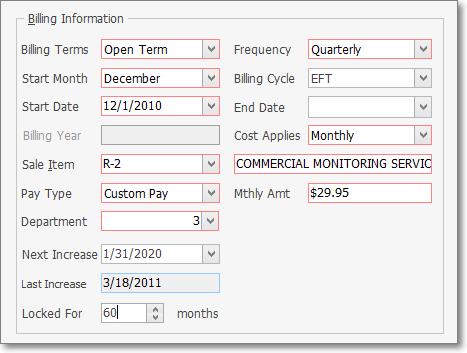
2.Custom Pay - To assign an individual Recurring Billing Price for this specific Subscriber's Recurring Billing record, use the Custom Pay Amount feature.
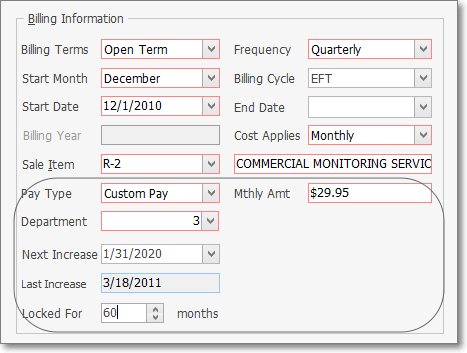
Recurring Revenue Form - Pay Type = Custom Pay - Rate Increase information
oMonthly Amount - If Custom Pay is Selected, enter the Payment Amount (the appropriate Monthly Rate) to be Invoiced for this Recurring Billing record.
a)The default Price for a Recurring Revenue Service, that was set when that Recurring Revenue Sale-Purchase Item was defined, is the Price that will be inserted when an Invoice for that Recurring Revenue item is created manually.
b)The Custom Pay Amount entered in the Mthly Amt becomes the permanent price
c)It will not be re-set by the Pay Group Change process
d)If the record was previously assigned a Pay Group Code, once a Custom Pay Amount has been set, the previous Pay Group assignment is canceled automatically.
oWhen the Custom Pay Amount box is Checked, the Rate Increase information fields will appear.
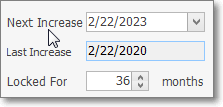
Recurring Revenue Form - Next Increase
i.Next Increase - By default, it will be 12 months from Today. If needed, use the Drop-Down Calendar/Date Entry field to enter a different date for the Next Increase.
a)Click on the Date field and type the desired Date using a MM/DD/YYYY format; or
b)Use the Drop-Down Calendar/Date Entry field provided to Choose the desired Date
ii.Last Increase - By default, when initially entered, it will be set as Today. This is a system maintained field.
iii.Locked For - By default, it is set at 12 months. If needed, enter a different number of months that this rate is to be Locked For.
➢Note #1: See the Custom Pay Increase chapter which describes a simple way to selectively increase, when appropriate, these Custom Pay Amounts.
➢Note #2: See the RMR Rate Change chapter for information on how to track all Rate Changes.
➢Note#3: Keep in mind the following information when manually creating Recurring Revenue Invoices:
a)The defined Recurring Revenue types in the Sale-Purchase Items Form, in addition to its Description, a Price was also specified for that service.
b)That Description and Price will be inserted when manually creating an Invoice for that service.
c)Both the Description and Price can be manually changed on any manually created Invoice.
✓Department - If you are using the General Ledger System and have defined multiple Departments for tracking Revenue by Department, use the Drop-Down Selection List to Choose the appropriate Department Number.
▪By default, this will be the Department Number assigned to the Selected Sale-Purchase Item.
▪If you are not using Departments, the default is zero ("0").
❖Also, see the Wholesale Section below.
•Tax Information - Identify the appropriate Sales Tax Code as needed.
➢Note: If the ShowTaxAndTotalPerLineItemScreen option is set to True ("T") in Company Settings, the Local Tax Rate field will display a Tax Percentage Rate with up to three (3) Decimal Places, otherwise only two (2) Decimal Places will be displayed.
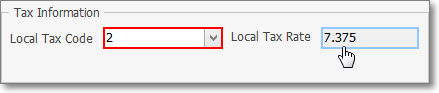
✓Sales Tax Rate Codes - based on the Sales Tax ID assigned to the Subscriber - there are two possible Sales Tax Rate & Code field sets that may be displayed:
1.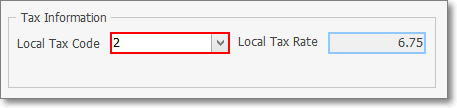
Sales Tax Codes & Rates for Users with only a Local Sales Tax
2.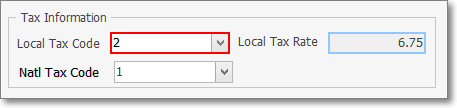
Sales Tax Codes & Rates for Users with both Local & National Sales Tax Rates
▪The following is a list of all of the possible Sales Tax Rate Codes:
oY = Yes the item is Taxable and there is only one Sales Tax Rate defined for this Subscriber's Sales Tax Code.
oE = The Subscriber is Tax Exempt.
oN = No this Subscriber is not Taxable for this item.
o1 = (2 or 3) The item is Taxable and among the multiple Sales Tax Rates defined for this Subscriber's Sales Tax Code, this is the appropriate Tax Rate
▪Local Tax Code - Use the Drop-Down Selection List to Choose the appropriate Sales Tax Code Sales Tax Rate Code (Y,N,1,2 or 3) representing the Sales Tax Rate that must be charged.
▪Local Tax Rate - The Sales Tax Rate will be inserted automatically based on the assigned Sales Tax Rate Code.
▪National Tax Code - This field is only displayed if you must charge a National Sales Tax.
oUse the Drop-Down Selection List to Choose the correct National Sales Tax Rate Code.
oSee the Canada Sales Tax chapter for more information about charging a Canadian National Sales Tax.
➢Note: Once this (Local and/or National) Tax Code and Tax Rate information is saved, and if this information is subsequently modified on the Accounting Receivable Section within the Edit View of the Subscribers Form, a Rate Change Detected message will be displayed with the option to Update the affected Auto Bill records with the correct (Local and/or National) Tax Code and Tax Rate information.

Rate Change Detected - Update Tax Percentage on Recurring Revenue records?
•Contract & Exclusions - Enter this information, if available and/or needed.
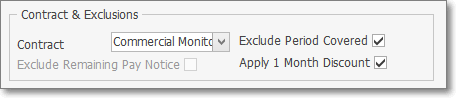
✓Contract - If recorded for this Subscriber in the Contracts Form, use the Drop-Down Selection List provided to Choose the specific Contract for Monitoring for which this Recurring Revenue item is being Invoiced.
❖See the Contracts Tracking System chapter for more information about various Contract options.
✓Exclude Period Covered - Labeled Excl Period Covered - If you do not want the Monthly Rate and Number of Months being billed to be printed on the Invoice, Check the Excl Period Covered box.
✓1 Month Discount - Check 1 Month Discount to provide the Subscriber One Month Free for Annual Payment of this service.
▪Only available for Annually billed services (see Frequency above),
oIf selected, a One Month Free for Annual Payment message will be printed on their Invoice.
oA separate line item, subtracting one monthly amount will be included on the Invoice.
✓Exclude Remaining Pay - This option is Not Available for an Open Term entry.
✓ Click the ![]() Icon to record this Open Term Recurring Revenue record.
Icon to record this Open Term Recurring Revenue record.
❑Once the basic Open Term Recurring Revenue item is defined, there are additional fields which may require information to accommodate the special circumstances outlined below:
•Options when Entering an End Date
✓When either your Company, or the Subscriber cancels this Recurring Revenue service, insert the End Date at that time.
➢Note: If using the General Ledger System and the last Automatically Billed Invoice that was generated has Unearned Revenue, the Amount of that Unearned Revenue will automatically be removed by system generated General Journal Entries.
✓End Date - Click the Down-Arrow on the End Date field to display the Recurring Revenue Date to End dialog.
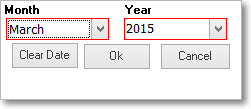
▪Enter the Month and Year using the Drop-Down Selection Lists provided.
▪Click OK.
✓Lost - The reason for this cancellation should be identified by using the Drop-Down Selection List provided to Choose the appropriate Attrition Type.
▪Click the ![]() Icon.
Icon.
✓If the Lost field is not filled in, a reminder warning query is displayed with a choice to enter a reason, or skip this entry.
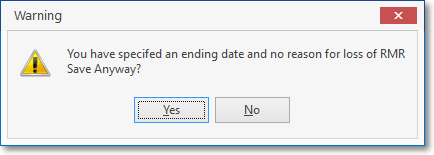
You have specified an ending date and no reason for the loss of RMR
Save Anyway?
▪Answer accordingly.
oYes - This option saves the Recurring Revenue record without noting why this Account was Lost - Bad
oNo - This option does not save the Recurring Revenue record and allows you to go back and enter the appropriate Lost reason code - Good
▪Click the ![]() Icon.
Icon.
•Canceling a Recurring Revenue record when there are Multiple Recurring Revenue Items defined for this Subscriber
✓When the Subscriber has more than one Recurring Revenue Item defined, and an End Date was newly assigned to one of them;
1)And, there is more than one Recurring Revenue records defined for this Subscriber
2)Then, a confirmation query is displayed with the option to have the system End (or Restore if the End Date was Cleared - see the "Restoring Multiple Recurring Revenue Items" discussion below) more than one Recurring Revenue item
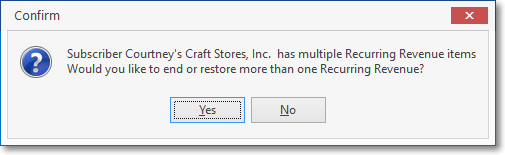
Subscriber (name) has multiple Recurring Revenue items
Would you like to end or restore more than one Recurring Revenue?
Yes / No
▪A Multiple Recurring Revenue query will be displayed asking if there are other Recurring Revenues Items that should also be Ended (or Restored).
a)Answer Yes to do so and identify any other Recurring Revenue Items that should be ended (or restored) using the Select Recurring Revenues to End or Restore dialog shown below.
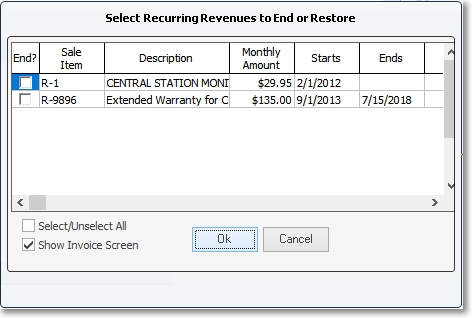
Select Recurring Revenues to End dialog
oEnd? - Check each Recurring Revenue Item that should also to be ended.
oOK - Click the OK button to execute this process.
b)Answer No to skip this step thereby leaving all remaining Recurring Revenue records active.
✓If there has been a Recurring Revenue Invoice created which covers a portion of the service ("an Unearned Period") that includes any period of time after the End Date that was entered here, the User will be given the opportunity to request that a Credit Memo be issued for this unused service period.
▪When there is an Unearned Period which has already been billed for this Recurring Revenue item, the Create Credit dialog will be displayed.
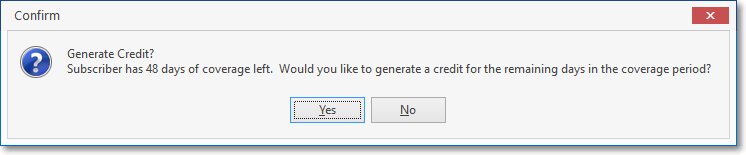
Create Credit message
oClick the Yes button to automatically create that Credit Memo, or No to ignore this suggestion.
oThis Closing Date information is also used in the Attrition Report to identify terminating services.
❖In those cases where you have arranged an escalating Billing Rate for a Recurring Revenue related service
oEnter multiple Auto Bill records, each with a different starting date (one year after another), and each with a End Date indicating when that Billing Rate will should end (and the next one begins).
oIn this way, at the time of the original system's sale, you could define multiple future rate increases (and not forget to do them later) that would then occur, automatically.
![]()
➢Note: The Status bar at the bottom of the Recurring Revenue Form reports an Active status as Green on Light Gray when this Open Term item is currently being billed, and an InActive status as Bold Red on Light Gray when that assigned End Date has passed.
✓Restoring Multiple Recurring Revenue Items
▪If an End Date was entered in error (or the Subscriber has re-subscribed to this service):
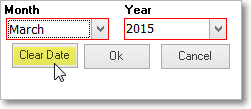
▪ Click the Clear Date button (see the mouse pointer in the illustration above) to reinstate this Recurring Revenue item.
•Wholesale Section
➢Note: Press Alt+W to instantly return to this Wholesale Section.
✓Wholesale Billing - Group & Rate Information - For those who are providing Contract Monitoring, and for those who use a Contract Monitoring Provider:

▪This area accommodates Billing an Alarm Dealer's Accounts when your Company is their Contract Monitoring Provider, and the tracking of what is owed when your Company uses a Contract Monitoring Provider.
oFor those Subscribers that your Company bills for another Alarm Dealer - because your Company is their Contract Monitoring Provider - enter the Wholesale Rate that your Company is charging that Dealer (see the Billing an Alarm Dealer's Accounts and the Wholesale Collections chapters for more information).
oFor the Subscribers whose Monitoring Service is outsourced to a Contract Monitoring Provider, enter that Company's Wholesale Group information using the Drop-Down Selection List provided, and enter the Wholesale Rate which is being billed by that Contract Monitoring Provider. (see Wholesale Groups, and the Wholesale Groups Report chapters for more information).
▪Billing an Alarm Dealer's Accounts in MKMS allows you, as the Contract Monitoring Provider, to Invoice the Recurring Billing for the Dealer's Accounts, collect the Receipts and so be assured of accurate and reliable payment for the contracted monitoring services you are providing.
oThe Wholesale Rate field allows you to define the internal billing rate to that Dealer for the Monitoring/Services you are providing for their Accounts.
oEach Subscriber's Accounting Receivable Section within the Edit View of the Subscribers Form should be assigned a Division Code, and a specific Recurring Billing Cycle entered in this Recurring Revenue Form, with both the Division Code and the Recurring Billing Cycle Code created specifically for this Dealer.
oThereafter, detailed Wholesale Collections Report will list what was Invoiced and Collected and so will allow your Company to easily identify, manage, and collect what's owed from these Accounts.
•Attrition Tracking Section - Used in conjunction with the Attrition Tracking to help your Company better understand How and Why Subscriber Accounts were added and/or lost:
➢Note: Press Alt+A to instantly return to this Attrition Tracking Section.
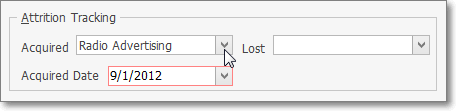
✓Acquired - Use the Drop-Down Selection List provided to Choose the appropriate Revenue Acquired Attrition Type code that best explains how you got this Account.
✓Lost - Use the Drop-Down Selection List provided to identify the appropriate Revenue Lost Attrition Type code that best explains the reason why this Account was Lost.
✓Acquired Date - By default, this will be the Today but this may be changed, as appropriate.
▪This Date is used when calculating a Prorated Invoice (see the "Suspended Invoicing Section" discussion below) for the time between the Acquired Date and the Start Date (entered above) when the Auto Billing process will generate the Subscriber's first Recurring Revenue Invoice for this service.
▪Use the Drop-Down Calendar/Date Entry field to reset the Date, as appropriate.
a)Click on the Date field and type the desired Date using a MM/DD/YYYY format; or
b)Use the Drop-Down Calendar/Date Entry field provided to Choose the desired Date
•Note Section - This information is printed on the Recurring Revenue Invoice to clarify the purpose of the charge(s).

➢Note: Press Alt+N to instantly return to this Note Section.
✓Note - Enter any comment or additional information for the service being billed.
▪This information is printed on the Recurring Revenue Invoice to clarify the purpose of the charge(s)
▪The additional information will be included on the Invoice when created and may include:
a)a Purchase Order Number,
b)a more detailed Explanation of the Service being provided,
c)any other Reference Information that will help the Subscriber better understand this recurring charge.
✓Internal Note - Enter any comment or additional information for internal use only. This information will NOT be printed on the Recurring Revenue Invoice
•Suspended Invoicing Section: If (when) asked to Create a Pro-Rated Invoice?
➢Note: Press Alt+S to instantly return to this Suspended Invoicing Section.
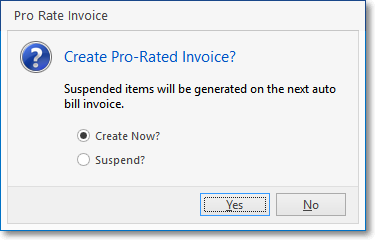
Create Pro Rated Invoice?
✓Create Now? - Choose this option to create a Pro-Rated Invoice Invoice for the appropriate amount (see "The Create Now? option" information below)
✓Suspend? - Choose this option to create a Pro-Rated Invoice entry in the Suspended Invoicing Section (see the "The Suspend? option" information below).
✓Click Yes to perform the chosen option, or No to finish the process without implementing either Prorated Invoicing options.
❖The Create Now? option - If the choice is to Create a Pro-Rated Invoice, that Invoice will be calculated as follows:
1.An Average Month is assumed to be 30 days.
2.The number of Days Remaining from today's date to the end of that Average Month is calculated and inserted in the Detail Line Item's Qty field of the Invoice
3.The Payment Amount (determined by Payment assigned to the Pay Group Code, or a Custom Pay Amount entry) is divided by 30 to establish a Daily Rate which is inserted as the Detail Line Item's Price.
4.That Daily Rate is multiplied by the number of Days Remaining between the Acquired Date (entered in the Attrition Tracking Section - see above) and the Start Date (entered in the Billing Information Section - see above) to establish the Detail Line Item's Net.
5.The Item and Description as entered on the Recurring Revenue Form are inserted in the appropriate fields.
▪The Invoice is displayed (as in the example below).
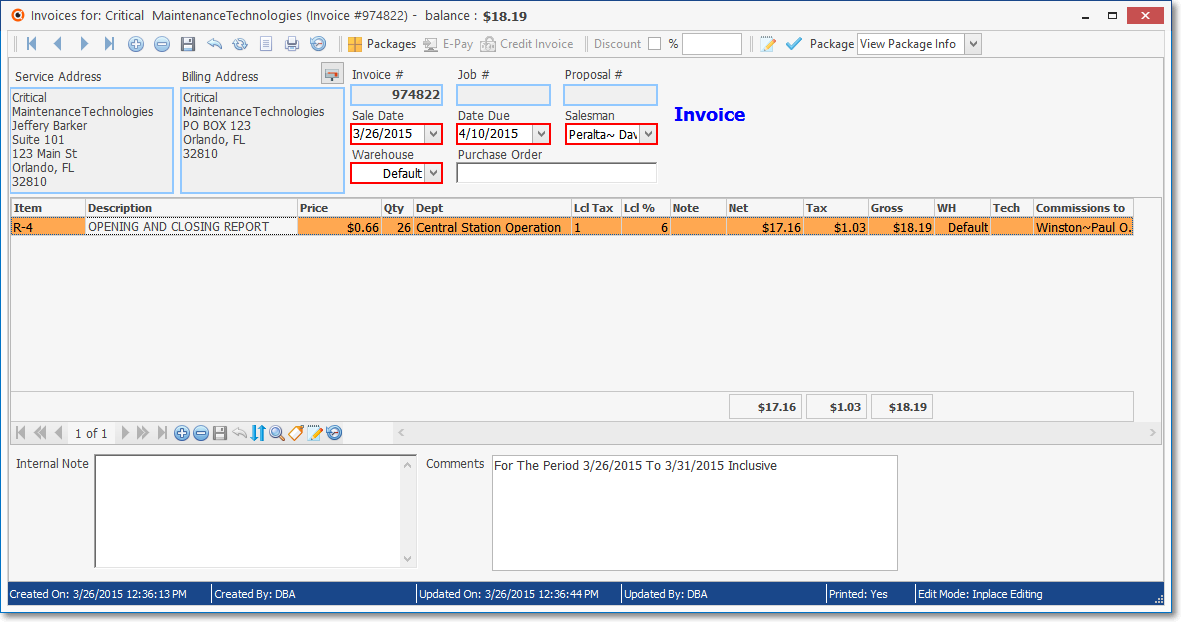
Pro-Rated Invoice showing the pro-rated daily rate of $0.66 - the Price - and the Qty as 26 days with the Comments field itemizing the period billed
▪To accept the Invoice as presented (or after modifying it in some manner), Click the ![]() Icon.
Icon.
❖The Suspend? option - If the Suspend? option is chosen, an entry is made in the Suspended Invoicing section.
▪This entry is calculated as described above in the "The Create Now? option" discussion.

Recurring Revenue Form - Suspended Invoicing Section
▪It is stored as part of the Recurring Revenue item record until this Subscriber is due to be Invoiced using the Automatic Billing Procedure, at which time it is inserted as the first Detail Line Item of that Invoice.
▪After the Automatic Billing process is executed, the Suspended Invoice entry is automatically deleted.
✓For General Ledger System Users - When Earned and Deferred Revenues are being tracked:
▪If there are any records in the Suspended Invoicing Section of any Recurring Revenue items, those records will be managed as a standard Sale (they will be assigned to the General Ledger Account associated with its Sale-Purchase Item ) - and will not be treated as a deferred Recurring Revenue item when they are actually Invoiced during the Auto Billing process.
▪Why?
a)The system does not know exactly when the Suspended Invoice item will be added to a future Invoice;
b)Suspended Invoice items are ignored on the Earned and/or Deferred Recurring Revenue related reports;
c)They are also ignored during the "Post Earned Revenues" process because of reason # 1).
▪Therefore it does the safe thing and assumes these Suspended Invoice items are Earned immediately when Invoiced during the Auto Billing process.
•The Payment Methods dialog is used to identify the various Credit Card and Bank Draft payment method(s) which this Subscriber has authorized for use when they decide to pay outstanding balances on Recurring Revenue and/or regular Invoices by using a Credit Card or approved Bank Draft.
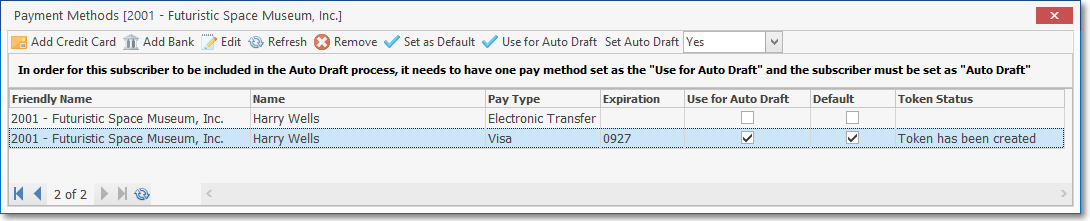
•Use the Subscriber Payment Methods Form:
1.To enter new Credit Card information, Choose the Add Credit Card option from the Ribbon Menu at the top of the Payment Methods Form
2.To enter new Bank Account information, Choose the Add Bank Draft option from the Ribbon Menu at the top of the Payment Methods Form
3.To edit existing Bank or Credit Card information, Double-Click on that line item or Choose the Edit option from the Ribbon Menu at the top of the Payment Methods Form
4.Once you have defined the available payment Methods, Select the line item of the one to be used form Recurring payments and as the default for regular payments and then Choose the Set as Default option from the Ribbon Menu at the top of the Payment Methods Form
5.Use the Refresh Icon to see if an existing Credit Card Payment Method has been Tokenized.
•See the Subscriber Payment Methods chapter for more detailed information.
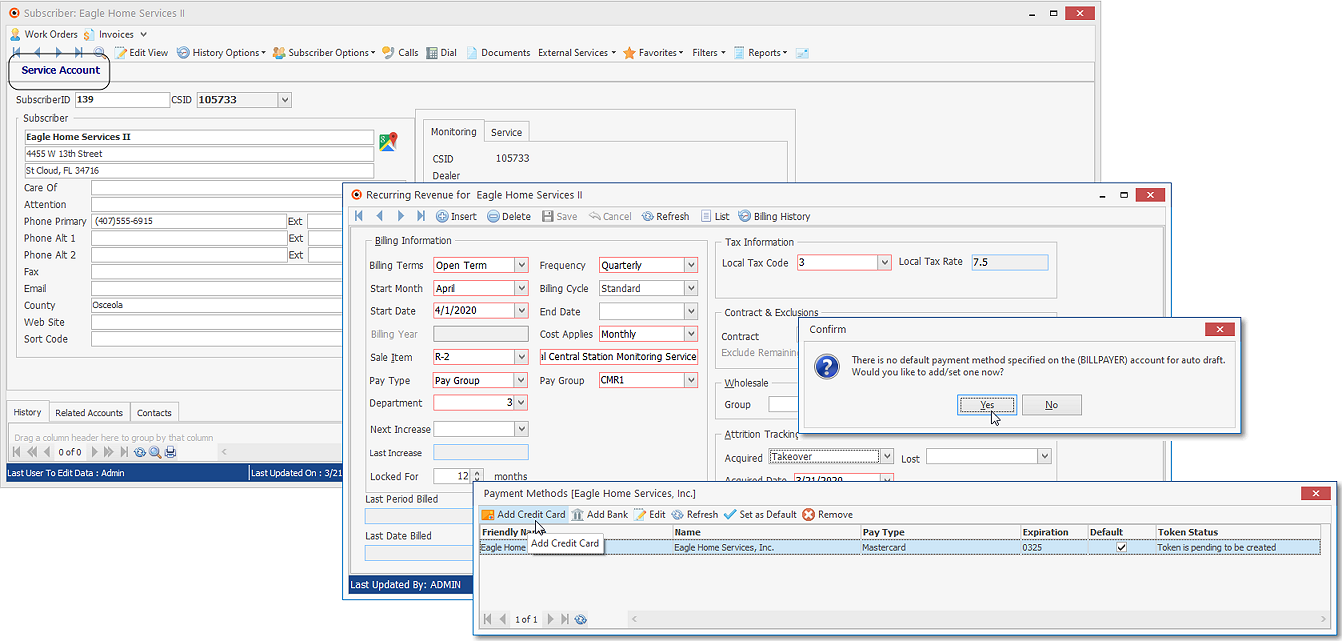
➢Note: Once a Recurring Revenue record is entered for a Service Account that has no Payment Method entered for this or the associated Bill Payer Account:
After the presentation of the Create a Pro-Rated Invoice? process
a)A Confirmation pop-up message is presented reminding the User that no Payment Method has been defined.
b)Answering Yes to this message will present the Payment Methods dialog
c)New Credit Card and/or Bank Draft information may then be entered.
❑Other System Maintained fields are populated as that data becomes available.
•The Special Function Invoice Group field is populated when appropriate:
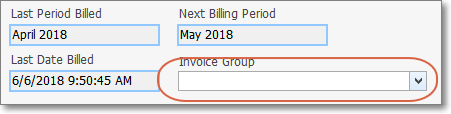
✓Last Period Billed - The Month and Year in which Auto Billing was executed for this Recurring Revenue item.
✓Last Date Billed - The Billing Date assigned to that Recurring Revenue item's Invoice.
✓Next Billing Period - The Month and Year in which Auto Billing should be executed for this Recurring Revenue item.
•Invoice Group - The Invoicing Groups Form (located in General Maintenance) is provided for those Companies who have a large number of Accounts (Subscribers), many of whom are Invoiced for on-going monitoring and recurring maintenance services, and often these services are provided at multiple locations for varying sets of those recurring services.
✓Under these circumstances, the associated Recurring Revenue Invoices can become extremely long, complicated to read, and difficult to comprehend.
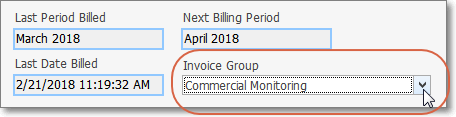
Invoice Group field on the bottom left of the Recurring Revenue (definitions) Form
•Use the Drop-Down Selection List provided in the Invoice Group field located at the bottom of the Recurring Revenue Form to Choose the appropriate Invoicing Groups Description from that list, when appropriate.
✓See the Summarize Recurring Items discussion in the Print Invoices chapter for more information.
✓If an Invoice Group was entered in error and needs to be removed:
▪Click on the Invoice Group field's Drop-Down Selection List,
▪Press the Delete key, then
▪Press the Tab F key.
❖When a Recurring Revenue Item (Recurring Revenue Sales Category) should be grouped with other similar items to simplify and clarify the resulting Recurring Billing Invoices: the Summarize Recurring Items option should be chosen on the Print Invoices dialog,
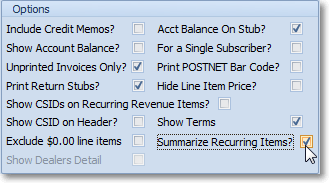
Print Invoices - Summarize Recurring Items? option
❑Modifying a Recurring Revenue record:
•Generally, if changes must be made to a Recurring Revenue record, a User with the appropriate Access Rights may simply locate that record and make the modifications, as needed.
✓However, when the RestrictRRModification option is set to True ("T") in the Company Settings dialog - accessed from the Company tab of the User Options Form - and a previously entered and saved Recurring Revenue record is being modified:
a)The User - determined by their specific Access Rights - will either be presented with an Authorize Transaction dialog requesting that User to specify the reason for this modification
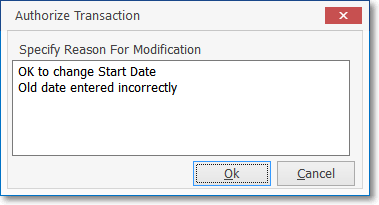
Authorize Transaction for a Recurring Revenue record change
b)Or the User will need their Administrator to provide that information and also enter their Admin User Name and Admin Password.
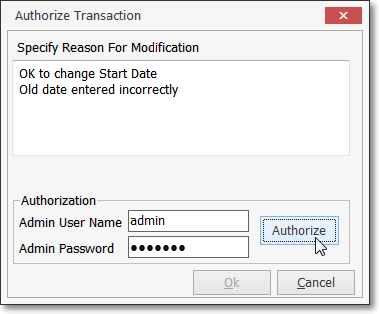
Authorize Transaction dialog with ADMIN and Password required
❑Deleting a Recurring Revenue record:
![]() Click the Delete Icon to remove the current Recurring Revenue record.
Click the Delete Icon to remove the current Recurring Revenue record.
✓Confirm that this is the desired action.
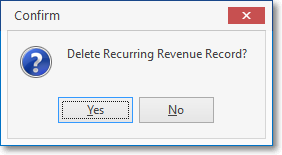
Delete Recurring Revenue Record?
✓If this Recurring Revenue record has a Suspended Invoice, the User will be reminded that they exists and must be deleted or paid before the Recurring Revenue record can be deleted.
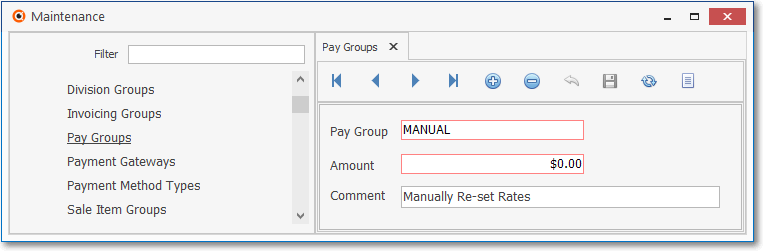
❑Manual Changes for Open Term Recurring Revenue Billing
•Sometimes it is necessary to set the Payment Amount to $0.00 for special customers (like the Boss's daughter who is not going to pay anything):
✓Create a Pay Group that will allow you to manually increase rates for special customers, should that become necessary.
•To update pay rates by Pay Groups, use the Pay Group Change Form to globally change the rates charged with one simple procedure.