❑Taking Requests for Service (and then creating a Work Order) is an integral part of the Service Department's role with your Company - and perhaps the entire office's - daily routine.
❖Note: Within these Help Files, the terms "Work Order" and "Service Request" mean the same thing and so either may be used to reference a record of (or the printed document stating) what tasks are to be performed at a Subscriber's premises - whether requested by the Subscriber themselves, or created by the system as part of an Automatically Generated Work Orders (i.e., a Recurring Service Requests) creation process.
•The Service Tracking System offers two types of Work Order Formats:
1.The Quick Work Order Format which is accessible from:
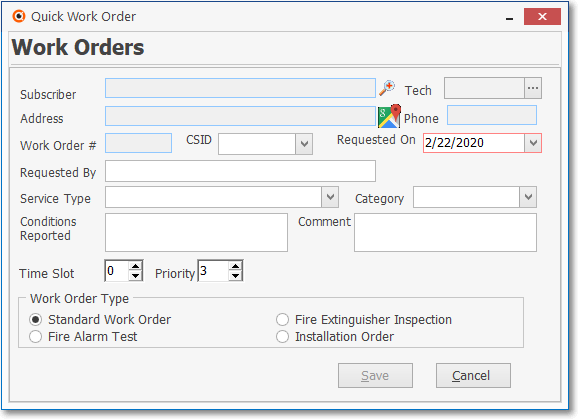
Quick Work Order Form in MKMS
a.The Service Tab on the MKMS Desktop
b.By selecting the Quick Work Order option on the Quick Access Menu's Service Tracking sub-menu of its Maintenance Menu
c.By selecting the Quick Work Order option on the Backstage Menu's Service Tracking sub-menu of its Maintenance Menu
d.By selecting the Work Orders option on Short Cuts tab on the MKMSCS Desktop
2.The standard, full length Work Order Format (described below) which is accessible using the Work Orders option on the Service sub-menu on the Subscriber Options Menu of the Subscribers Form.
❑This Work Orders - Entering a Service Request chapter explains how to use #2 above (i.e., the standard, full length Work Order Format).
•The sample illustration below shows how a Completed Work Order Form might appear.
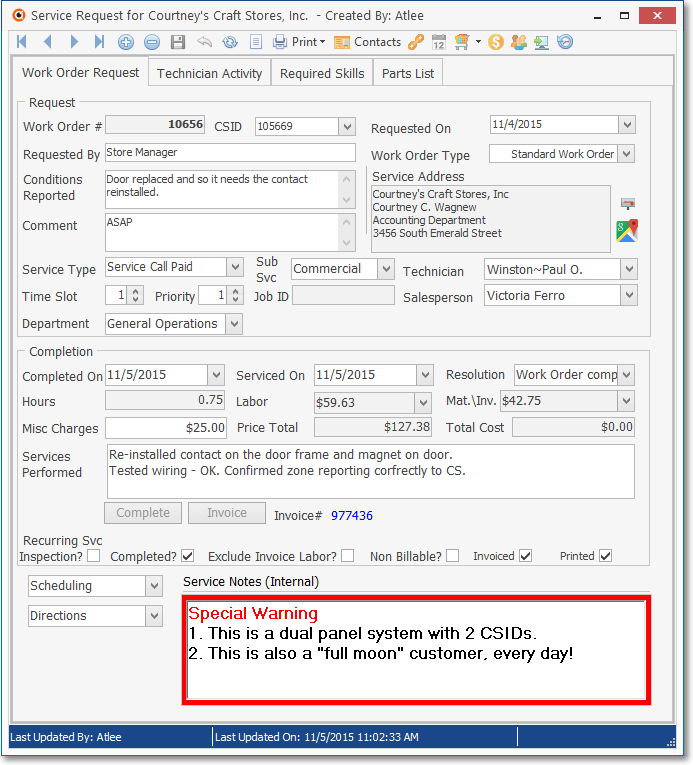
Service Request Form - Invoiced and Completed
❑Accessing the Service Request Form:
•Open the Subscribers Form
✓Use F2, the Subscriber Search function, to locate the required Subscriber record.
✓Click the Subscriber Options Icon
✓Choose the Service sub-menu,
✓Select the Work Orders option.
•The full length Service Request Format provides these processes (the default version - showing a New Work Order record being started - is shown below):
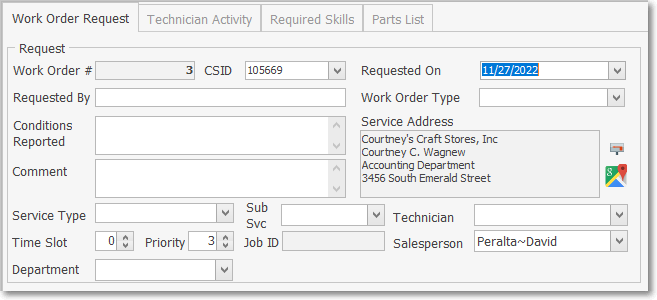
Work Order Requests tab - Defaults for new Work Order entry
1.Work Order Request Tabs, which are the Technician Activity which displays the most recent (listed newest to oldest) Technician Status changes for any Technician who is assigned to this Work Order, the Required Skills Tab for identifying the Technician Skills that will be required to complete this Work Order, and a Parts List Tab for the Inventory required to complete this Work Order
2.Scheduling for, and tracking the Status of Technician(s), Viewing the History of Changes, and Printing a copy of the Work Order
3.Completing the Work Order including recording Labor Hours and Costs, and the Inventory and Materials that were used
4.A list of previous Work Orders may be viewed using the List Icon which may also be used to retrieve a different existing Work Order (see the "List Icon" section below)
•Work Order Type - The most recently entered Service Request will be displayed in the default Work Order Request Tab (if there were any previously entered Work Orders).
✓This Work Order Requests Tab on the Serviced Request Form is used to create Work Orders for one of several different purposes, identified by assigning the appropriate Work Order Type to the Service Request Form:
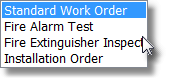
Work Order Types
1.Standard Work Order - The most common Work Order Type that is used to specify the service related work that is to be performed at a Subscriber's premises.
2.Fire Alarm Test - When this Work Order Type is selected, it creates a specific Work Order Format that is designed to facilitate a system wide Fire Alarm Testing procedure.
3.Fire Extinguisher Inspection - When this Work Order Type is selected, it provides a specific Work Order Formatted to perform a Fire Extinguisher Inspection procedure.
4.Installation Order - When this Work Order Type is selected and the Parts List tab is properly populated, it enables the User to create a specific Work Order Format designed to identify all of the Inventory Components required for a new (or add-on) type of installation.
•List Icon (see mouse in illustration below) - To retrieve a different existing Work Order, Click the List Icon to display the List View
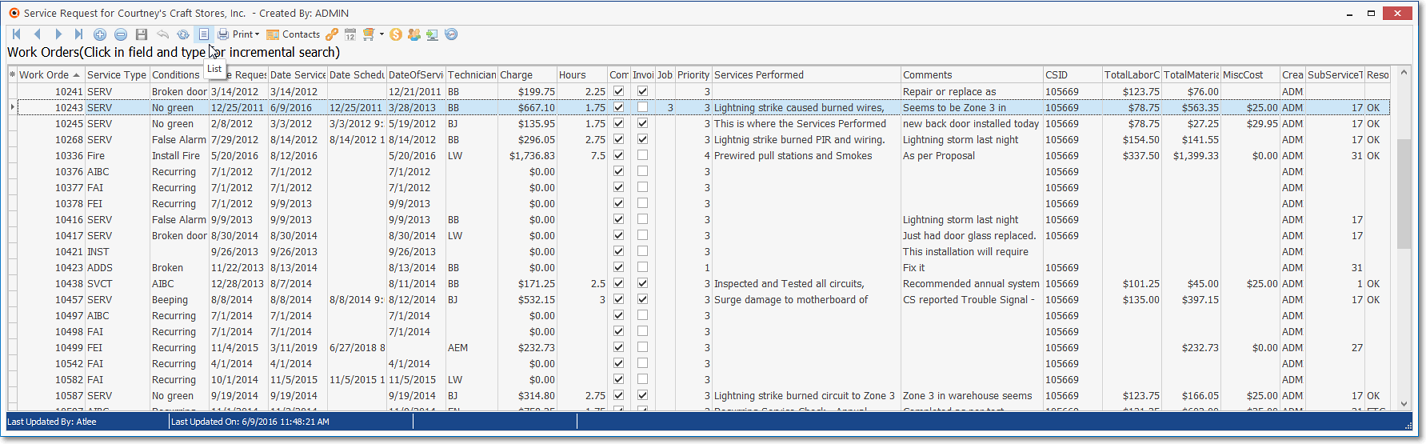
Work Order Requests Form - List View
✓This presents a tabular (spreadsheet style) view of all previously entered Work Orders.
✓Select a row (record), then Click the List Icon again and that record will be displayed in the Work Order Requests Tab.
✓Whenever the previous Work Orders List View is displayed, just Click the List Icon to Close the List View and return to the Work Order Request Tab.
•The User may Select which Columns of data will be included in the Grid. To do so:
✓Click the Asterisk (*) at the top left of the Grid's Header to display a list of all available Columns (Header Names).
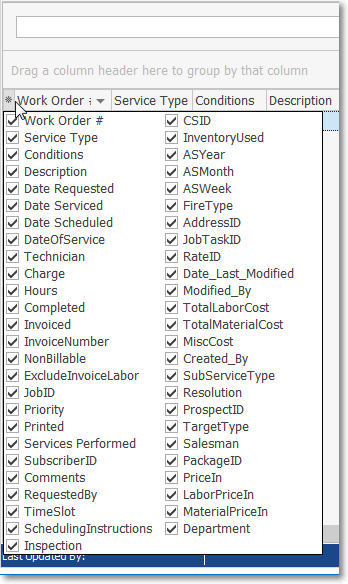
Work Orders - List of available Columns (header Names)
✓Check each column that is to be included (by default all columns will be Checked).
✓Remove the Check to exclude that column (Header Name).
✓The columns of Grid Data may also be chosen, rearranged, grouped and sorted, as needed.
✓Custom Grid Filters - This Work Orders List View is a Data Grid, and as such, the information listed within the Grid may be filtered - as needed - to refine which of the previous Work Orders records are displayed within that Data Grid.
•There are four sub-tabs below the Work Order Requests Tab at the top of the Work Order Form
1.Work Order Request - (the default) - This sub-tab is where the information required to activate a new Work Order is entered (see example below).
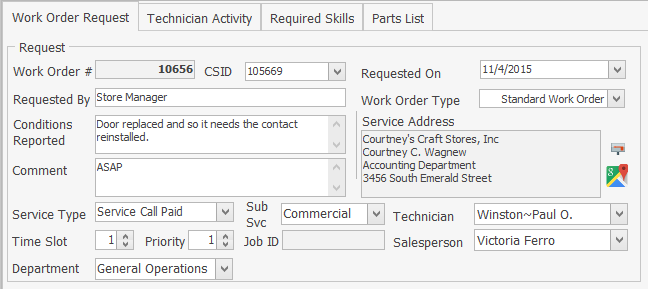
Work Order Request sub-tab on the Work Order Form
2.Technician Activity - Direct updates are received from Technician Status Form entries.
▪As the Technician Status changes for this Work Order, the previously completed Status is inserted automatically.
![]()
▪Click the Refresh Icon on the Technician Activity Tab to get their most up-to-the-minute Technician Status.
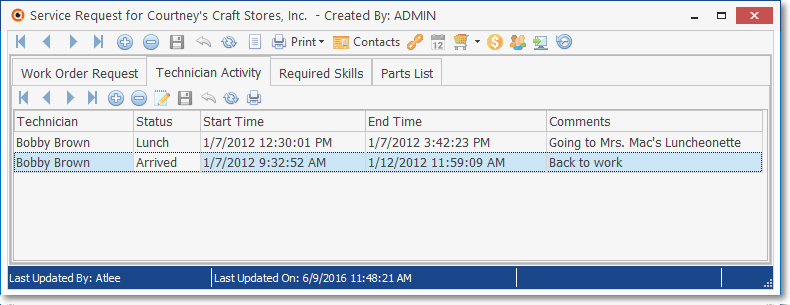
Technician Activity sub-tab on the Work Order Form
▪This Technician Activity sub-tab allows the User to build a chronological record of Technician's Time that is spent on this Work Order.
▪The Current Technician's Status should be assigned through the Tech Status Form.
▪If not using the Tech Status Form, each Technician's Time may be directly recorded on this Service Request using this Technician Activity sub-tab.
▪Additional Comments as needed - regardless of the source of the entry may be added, as appropriate.
3.Required Skills - Allows the Technician Skills needed to properly complete this Work Order to be identified
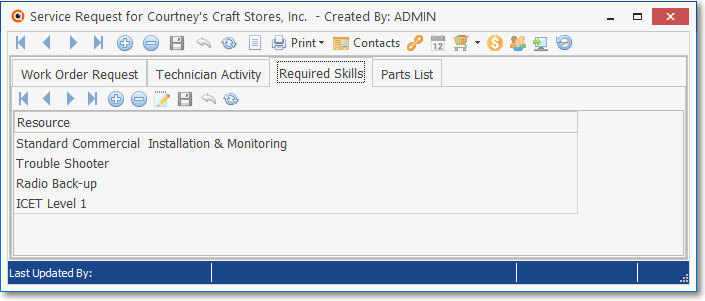
Required Skills sub-tab on the Work Order Form
▪Technician Skill requirement(s) may be manually entered, if appropriate.
▪The Technician Skill requirement(s) defined in the assigned Service Type Form will automatically be inserted into the Required Skills sub-tab if:
a)That Service Request is assigned a Service Type which has one or more Technician Skills identified.
b)An Appointment is created for a Work Order on the Technician Scheduling Form when a Filter was in place identifying certain required Tech Skills (see the "Using the Filter Menu Icons" section in the Technician Scheduling chapter for more information).
4.Parts List - The Installation List tab allows the Service Department to itemize the Inventory that will be required to perform an installation or major upgrade/addition.
▪A Parts List may be created for any Work Order, regardless of the assigned Work Order Type.
▪A Parts List may be created by using the Order Inventory option, and when that Purchase Order is created, indicate that those Inventory Items are to be added to the Parts List.
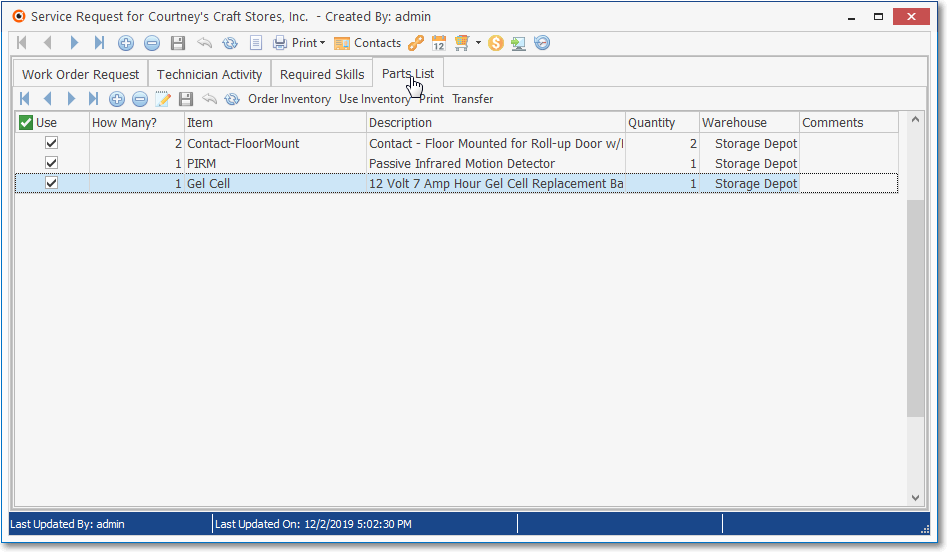
Parts List sub-tab on the Work Order Form
Ribbon Menu Options on the Work Order Form:
❑The two sets of Special Icons on the top of the Work Order Form are listed below along with the purpose of the Icons in each set.
❖Each purpose and use for these Icons are explained in the Ribbon Menu Options on the Work Order Form chapter:
•Navigation related Icons:
![]()
1.Record Movement (First, Prior, Next, Last)
2.Insert new Work Order
3.Delete a Work Order
4.Save the Work Order
5.Cancel the editing changes made to a Work Order
6.Refresh the currently displayed Work Order data.
7.List - Display a list of the previous Work Orders in a Data Grid.
8.Plus Work Order Option Icons (see below)
•Work Order Option Icons:
❖See the Ribbon Menu Options chapter for more information
![]()
1.Print (Menu) - Print the Service Request Form, or print the Service History for this Subscriber.
a.Print - Opens the Service Request Form dialog with the current Work Order Number set as the default Work Order to be Printed
b.Print History - Prints the Work Order History of the currently selected Subscriber
c.WO Detail - Opens the Work Order Details dialog where the User may customize the contents of the report, and then Print or Email those results
2.Contacts - Click this Contacts option to open the Contacts Form to identify anyone who should be associated with this Work Order.
3.Link WO - Link a previously entered Work Order with new Work Order
4.Schedule a Work Order using the available Technician Scheduling Form
5.Order Inventory that will be used to complete for this Work Order
6.Show Total for the currently recorded charges on this Work Order
7.Subscriber for this Work Order (this option is only displayed when the Work Order was retrieved using the Search by Work Order feature).
8.E-Payment - Enter an Electronic Request for Payment for this Work Order
9.View History of the changes that were made to this Work Order after it was initially saved
❑What's Next?
•Ribbon Menu Options - See the Ribbon Menu Options on the Work Order Form chapter for that information.
•Start a New Service Request - See the Starting a New Work Order chapter for complete information.
•Enter the Service Request - See the Entering a Work Order chapter for more information.
•Verify Skills - Assure that the Lead Technician has the necessary Tech Skills by using the Required Skills tab
•Using the Schedule Button - See Using the Schedule Button for information on how to assign a Technician to, and Schedule a Service Request.
•Track each Technician's Time - See Technician Activity tab for important information about tracking each Technician's Time.