❑Creating and Using a Parts List for a Work Order:
•The Work Order Form is used to create Work Orders for several different purposes, with each type (these formats are included with the initial installation of MKMS) of Work Order identified by assigning the appropriate Work Order Type:
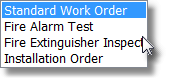
Work Order Types
1.Standard Work Order - The most common selection used to specify the work that is to be performed at a Subscriber's premises.
2.Fire Alarm Test - When selected, creates a specific Work Order Format designed to facilitate a system wide Fire Alarm Test.
3.Fire Extinguisher Inspection - When selected, provides a specific Work Order Format for performing a Fire Extinguished Inspection procedure.
4.Installation Order - When selected, creates a specific Work Order Format designed to identify all of the Inventory Components required for a new (or add-on) type of installation.
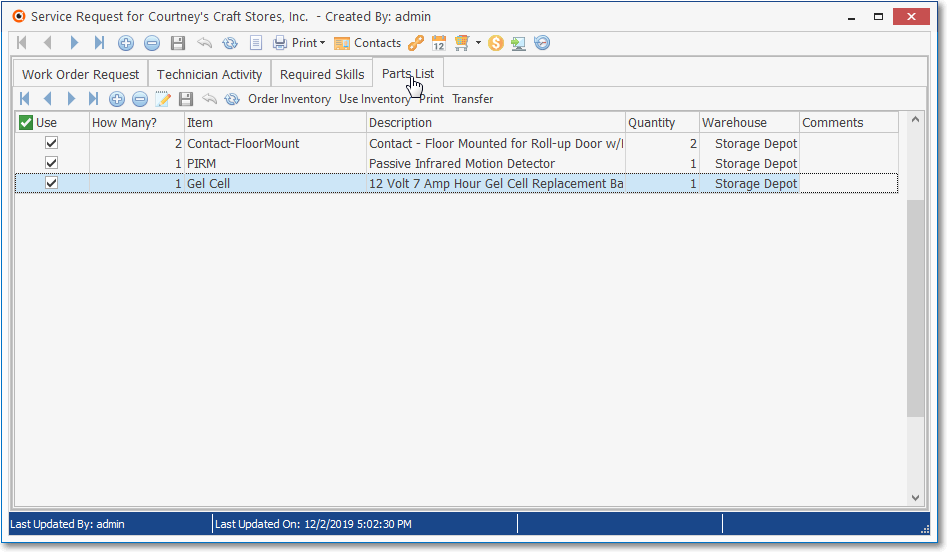
•Parts List - The Parts List tab allows the Service Department to itemize the Inventory that will be required to perform this installation/service.
➢A Parts List may be created for any Work Order, regardless of the Work Order Type that was assigned to the Work Order.
✓Note: You cannot use the Add ![]() Icon (see "Click Add
Icon (see "Click Add ![]() Icon on the Parts List tab" below) to populate the Parts List tab
Icon on the Parts List tab" below) to populate the Parts List tab
when the selected Work Order was created for a Job Task in the Job Costing record.
If you attempt to do so, a reminder message will be displayed as follows:
This WO is coming from a job, you must enter the item in "Job Costing\Inventory\Item List"
and reserve it and then use "Pick from Job" button on this screen.
✓When no items have been entered in, or imported into, the Parts List, the Parts List tab Ribbon Menu has (in addition to the usual record movement, Add, Delete Save, choices) only the Order Inventory option
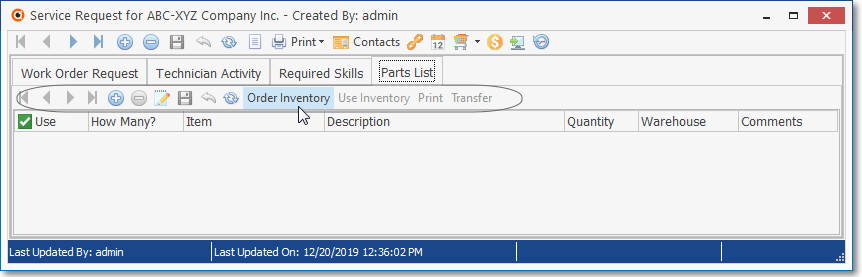
Parts List sub-tab on the Work Order Form with No Entries
▪The Order Inventory option appears but will no work until a Parts List of at least one item is defined.
▪You may add any number of items to the Parts List (see "How to create a Parts List" immediately below)
•How to create a Parts List.
Parts List sub-tab on the Work Order Form
•Click Add ![]() Icon on the Parts List tab
Icon on the Parts List tab
✓Use - Check the Use box to indicate that this item was actually used to complete the Work Order.
▪Later, when you have finished identifying all of the Parts that were actually used:
▪Select the Use Inventory option
▪This will insert the Inventory Items - where Use Checked - into the Inventory/Materials Drop-Down Info Box for this Work Order (See the "Use Inventory" discussion below)
✓How Many? - If you Check the Use box, indicate How Many of this Item will be/has been Used.
✓Item - Using the Drop-Down Selection List provided, Choose the Inventory Item (i.e., Sale-Purchase Item) to be added to the Installation List.
✓Description - By default, the Description entered for this item in the Sale-Purchase Items Form will be inserted.
▪The Description may be modified to better describe its specific purpose for this installation.
✓Quantity - By default, 1 will be inserted as the Quantity.
▪The Quantity may be modified as needed to indicate the maximum number of this Item that may be Used.
✓Warehouse - If any Sale-Purchase Item entered in the Item field ( see above ) was defined as an Inventory Item, the Default Warehouse will be inserted.
▪However, if the Subscriber whose Work Order's Parts List is being updated has been assigned to a Division which has its own default Warehouse assignment, that Warehouse will be inserted automatically.
▪As needed. you may also use the Drop-Down Selection List to Choose the Warehouse from which this Inventory Item was actually taken, if it was not the Default.
✓Comments - Double-Click within the Comments field to Open a Rich Text Editor to enter a Comment about this Inventory Item.
•Click the Save ![]() Icon to record this needed Inventory Item.
Icon to record this needed Inventory Item.
❑A Parts List may also be created (or added to) by using the Order Inventory option on the Work Order Form (which has a different functionality from the Order Inventory option on the Parts List Tab)
❖This is an either, or, or both decision:
a)If you enter the needed Inventory Item(s) in the Parts List tab, then create a Purchase Order for the same ones, you will end up with a duplicated Parts List
▪Therefore, choose which way you want the Parts List to be populated (i.e., using Order Inventory option, or using the Order Inventory method).
b)However, you may want to order some Inventory Item(s) on a Purchase Order (because they are not currently "in-stock"), and enter others manually because they are already available
▪Therefore, so no Purchase Order is needed.
c)Finally, you may order some Inventory Item(s on a Purchase Order and not have them inserted into the Parts List tab (answer No when that question is presented - as shown below).
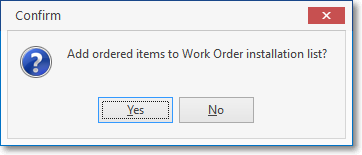
Add ordered items to Work Order installation list?
•To use the Order Inventory method, Click the Order Inventory option to open the Vendor Search dialog.
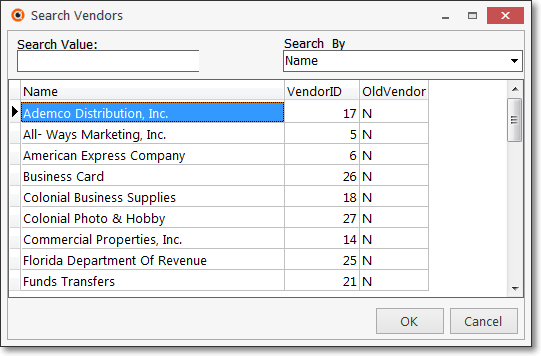
Vendor Search dialog
✓Select the desired Vendor from whom the Inventory Item(s) will be ordered.
✓Click the OK button to Close the Vendor Search dialog and display the Purchase Order Form for that Vendor.
a)Click the ![]() Icon to enter a new Purchase Order for the required Inventory Items.
Icon to enter a new Purchase Order for the required Inventory Items.
b)Enter the required Inventory Item(s)
c)Click the Save ![]() Icon
Icon
d)Click the Close ![]() box to Close the Purchase Order Form.
box to Close the Purchase Order Form.
Add ordered items to Work Order installation list?
e)Indicate whether or not these ordered Inventory Items should be added into the Work Order's Parts List.
oIf Yes was Chosen, the Inventory Items ordered using the Purchase Order Form will immediately be inserted into the (existing) Parts List.
❑Icons and Options on the Parts List tab:
•Navigation Icons - Provides the standard navigation commands (begin, previous, next, end, add, delete, edit, save, cancel, refresh).
![]()
•There are up to four Special Purpose Options:

Work Order Form - Parts List tab - Special options
1.Use Inventory - Adds all of the Inventory Items that were Checked as Used in the Parts List tab into the Inventory\Material tab.
✓Used - Check the Used box for each item that was actually used on the Work Order.
✓How Many? - If you Check the Used box, indicate How Many of this Item have been Used.
✓Then,
▪Select the Use Inventory option
▪This will insert How Many of the the Checked Inventory Items will be entered in the Inventory/Materials Drop-Down Info Box for this Work Order
✓Missing Technician - If a Technician has not yet been assigned to this Work Order a warning message will be displayed.
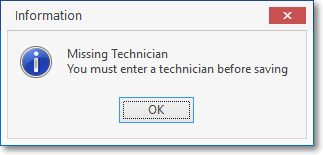
▪Click the OK button.
▪Select the Work Order Request tab.
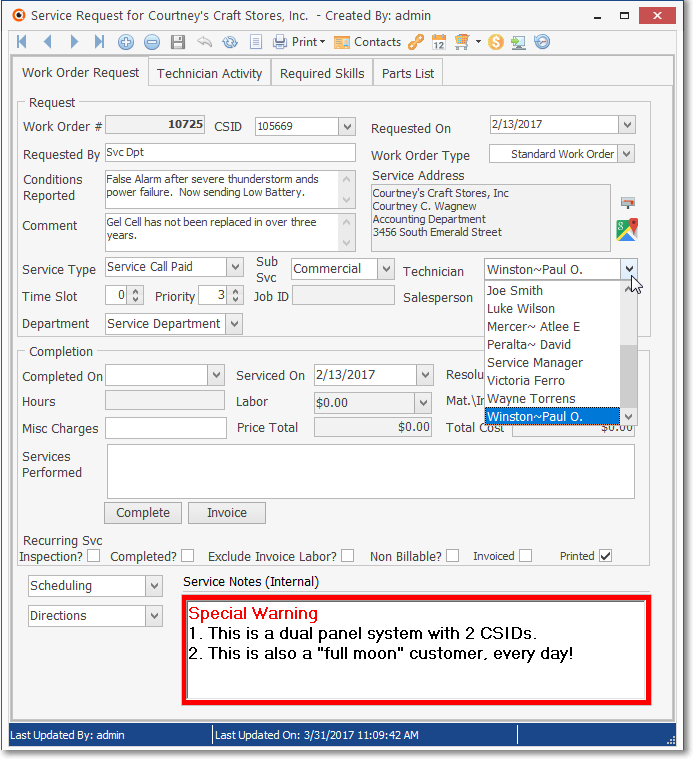
Work Order Request tab - Tech field Drop-Down Selection List
▪Using the Drop-Down Selection List provided, Choose the desired Technician.
✓Click the Save ![]() Icon to record this update.
Icon to record this update.
✓Select to the Parts List tab.
▪Click the Use Inventory button again to add all of the Checked Inventory Items in the Parts List tab into the Inventory\Material tab.
❖Warning - If one or more of the Inventory Items in the Installation List have an insufficient Quantity On Hand to meet this request, a Warning Message will be displayed.
Warning! One or more items will go negative in inventory.
Add items anyway?
oClick the Yes or No button, as appropriate.
✓The Use Inventory Option will insert the indicated Parts into the Inventory\Material tab.
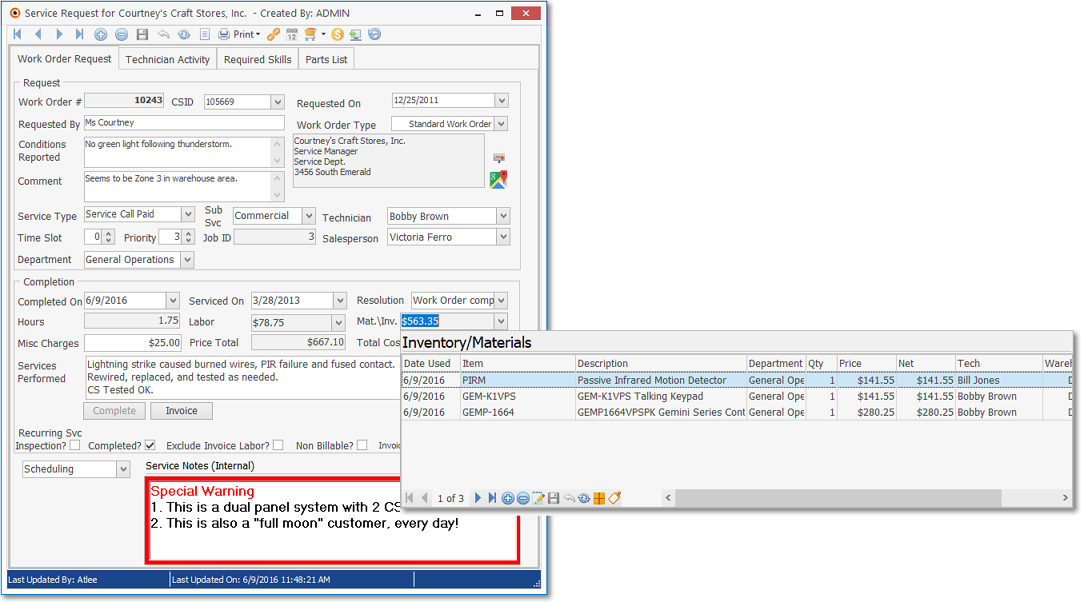
Work Order Form Inventory/Materials Drop-Down Info Box
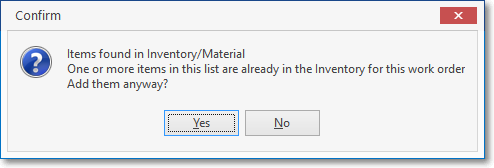
✓Once this insertion process has been executed, if the Use Inventory option is selected again, a warning message will be displayed to remind the User that the insertion has already been executed.
Items found in Inventory/Materials
▪If several more Inventory Items were added since the last insertion process, you may want to answer Yes, then Delete those in the Inventory\Material tab that are duplicates.
▪However, it is best to wait until the Installation List (and the Work Order) has been completed, then make the insertion at that time.
2.Print (Parts List) - To print the contents of the Parts List for a Work Order, Click the Print option.
✓The Parts List for this Work Order will be displayed on screen.
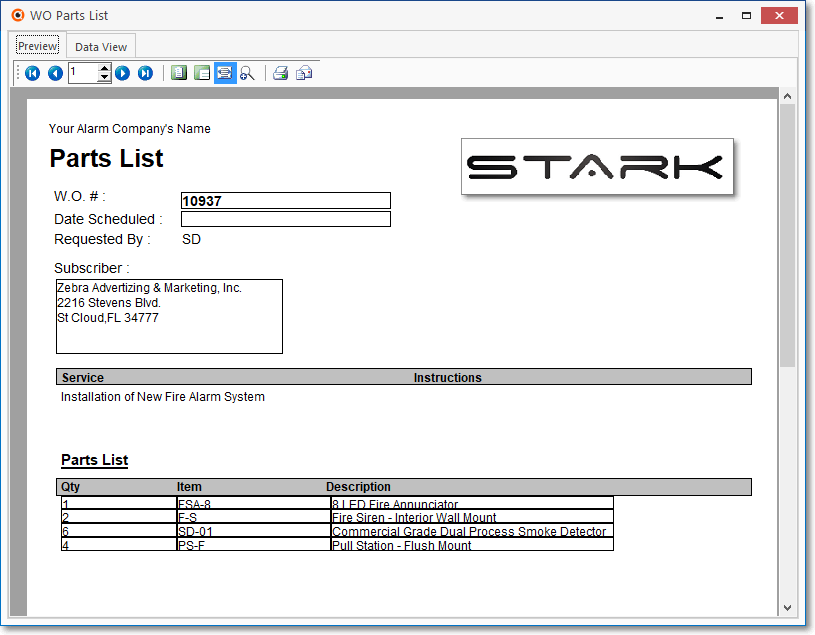
Work Order Form - Parts List sub-tab - Parts List report
➢Note: If the Work Order Type (see the Entering a Service Request chapter) is Installation Order, Selecting the Print the Current Work Order option at the top of the Service Request Form will produce a Work Order with a Page 2 containing the Parts List.
3.Pick From Job - When the Work Order was created from a Job, and as part of that Job Costing information, an Item List was created, this Pick From Job option becomes active.
➢Note: Prior to using the Pick From Job option, the Warehouse from which the Inventory is to be taken must have already been identified in Inventory Reserved sub-tab of the Inventory tab on the Job Costing Form
✓Click the Pick From Job option.
▪If the Inventory List from the Job Costing Form was previously imported, a reminder message will be displayed.
✓Otherwise, this Pick From Job option will import all Received Items in that Item List (which have not yet been identified as Used) into the Pick From Job of the Work Order Form.

Work Order Form - Parts List sub-tab - Pick From Job option - Job Pick List dialog
✓The Job Pick List dialog will be displayed.
▪Add? - Check the Green Check Box to the left of the Add? Header to Select all items on the Job Pick List, or individually Check those specific items that are to be Added to the Parts List tab.
▪Item - The Sale-Purchase Item code for each Inventory Item.
▪Description - The description of each Inventory Item.
▪Quantity - The Quantity entered in the Inventory List tab on the Job Costing Form.
oThat Quantity field value may be changed, if appropriate.
✓Click the Add Icon at the top of the Job Pick List dialog.
✓Click the Close ![]() box to close the Job Pick List dialog and populate the Parts List tab.
box to close the Job Pick List dialog and populate the Parts List tab.
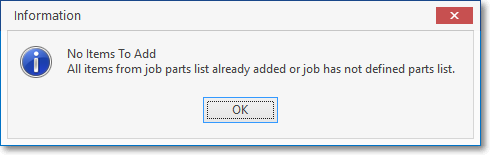
➢Note: If there are no items defined in the Item List sub-tab on the Job Costing Form, or those Inventory Items have already been inserted into the Work Order's Parts List tab, a No Items Found message box will be displayed.
✓On the Parts List tab of the Work Order Form:
▪The How Many? and Quantity fields on the Parts List tab will both be initially populated with the Quantity identified on the Job Pick List dialog.
▪Item - Will match what on the Job Pick List dialog.
▪Description - Will match what on the Job Pick List dialog.
▪Warehouse - The system's default Warehouse name is inserted automatically.
➢Note: The Divisions Form allows a Company to identify a Default Warehouse for that Division
Thereafter, when Invoices, Purchase Orders, Bills and/or Work Orders are created for a Subscriber who was assigned to a Division (a Division assignment to a Subscriber is optional), by default, any Inventory related Transaction posted to one of those Invoice, Purchase Order, Bill and/or Work Order documents will automatically be assigned to that Warehouse but that Default Warehouse assignment may be changed as needed.
Work Order Formm - Parts List tab - with data
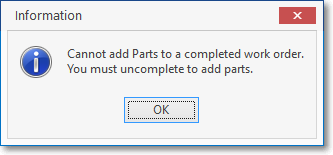
✓However, if the Work Order has already been Completed, an Information Message will be displayed.
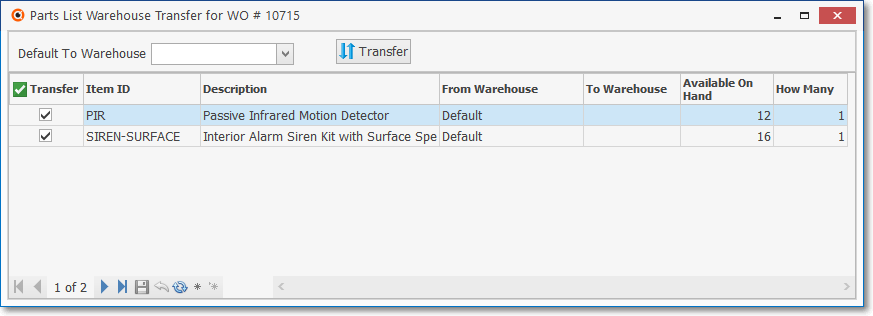
4.Transfer (a Part) - Because the system's default Warehouse may not be the location from where a Part is to be withdrawn, you may use this Transfer option to identify the Warehouse from where it is to be withdrawn.
✓Click the Transfer option to display all of the Parts identified on the Parts List tab that have a sufficient Available On Hand Quantity to allow a transfer.
✓The Parts List Warehouse Transfer dialog is used to Transfer one or more Inventory Item(s) previously identified on a Work Order's Parts List tab from its current Warehouse location to a different Warehouse.
➢Note: You cannot use the "Transfer" option when the Work Order was created for a Job Task in the Job Costing record.
This must be done using the Reassign/Transfer option on the Inventory Reserved sub-tab of the Inventory tab on the Job Costing Form
If you attempt to do so, a "This WO is coming from a job, you must use "Reassign/Transfer Inventory" button in "Job Costing \ Inventory \ Inventory Reserved" reminder message will be displayed
Parts List Warehouse Transfer dialog
✓Default To Warehouse - Using the Drop-Down Selection List provided, Choose the Warehouse to which this Part is to be transferred.
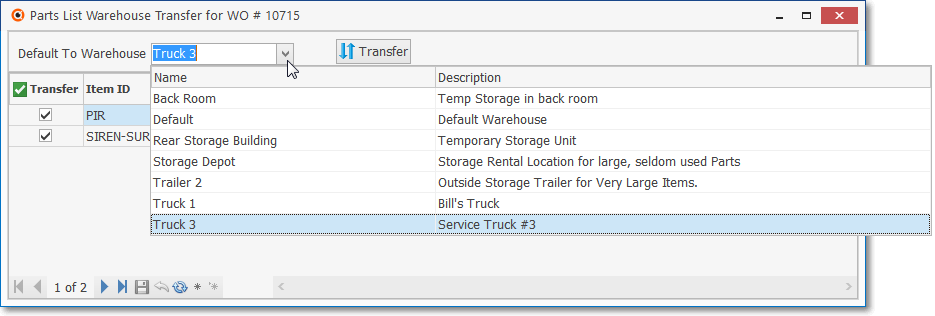
Parts List Warehouse Transfer dialog - Select Warehouse field
✓Save - Click the Save ![]() Icon to record this selection.
Icon to record this selection.
✓Transfer - By default all Parts will have a Check Mark in the Transfer column.
▪To remove all of the Check Marks, Click the Green Transfer Icon ![]()
▪To add all of the Check Marks, Click the Green Transfer Icon ![]() again.
again.
▪To individually select which Parts are to be Transferred, Check those individual Part's line item(s).
✓Transfer option - Click ![]() to execute the Warehouse Transfer.
to execute the Warehouse Transfer.
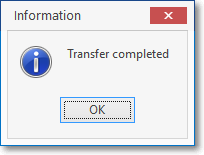
Transfer Completed message
✓OK - Click the OK button to acknowledge the Transfer.
❖Once the Transfer is executed:
a)When that Part is Used (see Use Inventory above), it will appear in the Inventory Materials Drop-Down Info Box with that corrected (transferred) Warehouse name.
b)However, if the User forgot to use the Transfer option, that Warehouse assignment may still be changed to the correct one from within the Inventory Materials Drop-Down Info Box by using that Inventory Materials Drop-Down Info Box's Warehouse column's Drop-Down Selection List.
5.Order Inventory - Inventory items may be ordered directly from the Parts List tab.
✓See the "Understanding the Order Inventory option on the Work Order's Parts tab " discussion immediately below
❑Understanding the Order Inventory option on the Work Order's Parts tab:

Work Order - Parts tab - Order Inventory option
•Possible Warning messages:
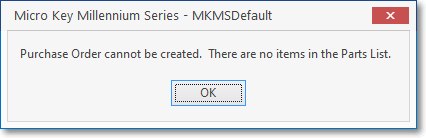
a)When the Order Inventory option is selected but no items have been added to that Parts tab, a warning message will be displayed and the process is canceled
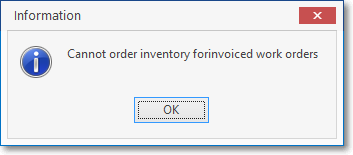
b)When the Order Inventory option is selected but the Work Order has already been Invoiced, a warning message will be displayed and the process is canceled
c)When the Order Inventory option is selected but the Work Order has already been Completed, a warning message will be displayed and the process is canceled

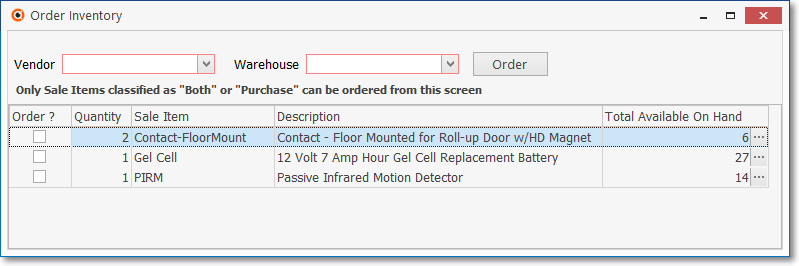
•Order Inventory Form
✓All of the Inventory Items listed in the Parts List tab of the selected Work Order will be included in this Order Inventory dialog
Order Inventory dialog
✓Enter the required information as describer below:
a)Vendor - Identify the Vendor from whom the Inventory Item(s) are be ordered
b)Warehouse - Select the Warehouse into which the Inventory Item(s) should be delivered
•Columns in the Order Inventory dialog :
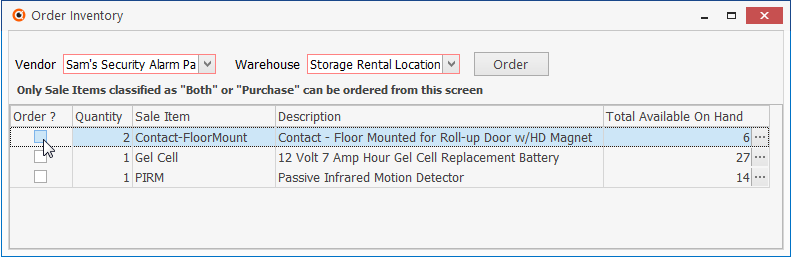
Order Inventory dialog - Order check box
✓Order? - Check the Order box of the item(s) that are to be ordered (for which a Purchase Order should be created)
✓Sale Item - The code of the Inventory Item
✓Description - The description of the Inventory Item
✓Total Available On Hand - If Zero, proceed with the Ordering process described below.
▪If the On Hand quantity is greater than Zero, Click the Ellipse to view the Warehouse Inventory Form for the currently selected Sale Item

Warehouse Inventory dialog for selected Item with Transfer option selected
▪Transfer - Optionally Transfer the required Sale Item to a more convenient Warehouse location
oClick the Transfer button to Move Inventory Item(s) from one Warehouse to another.
•Executing the Ordering process:
✓To order Inventory Items so this Work Order may be completed as requested:
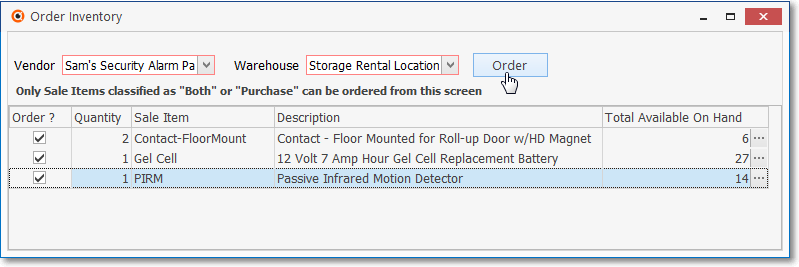
Order Inventory dialog - Order option
✓Order button - Click the Order button to automatically create a Purchase Order for the "Order?" items checked
▪An informational message will be displayed indicating the the required Purchase Order has been created.
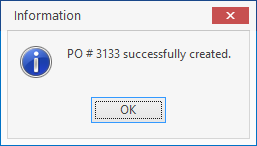
✓That Purchase Order may be viewed whenever necessary.
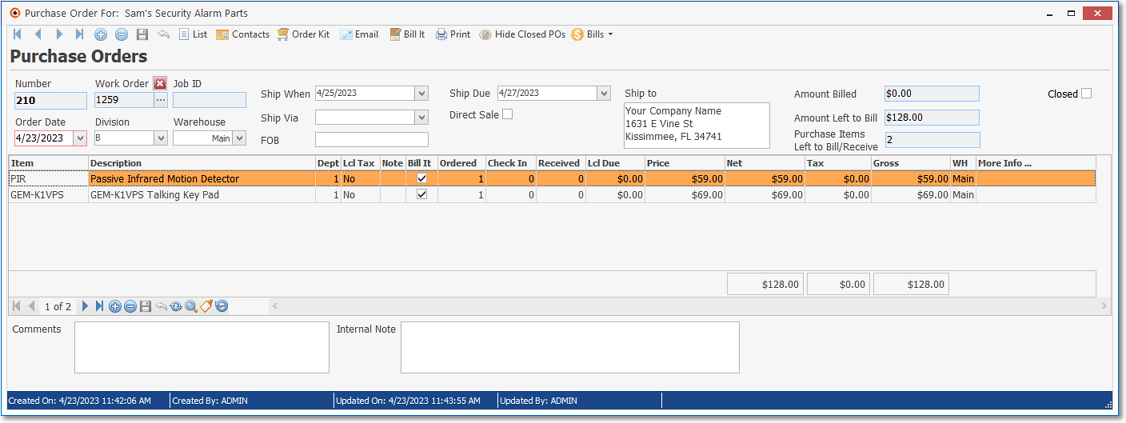
Purchase Order created for Inventory Items ordered using the Order Inventory dialog
❖Follow the Purchase Orders - An Overview instructions to complete the Inventory Check in and Billing processes to properly Close this Purchase Order