Subscribers - The Reason for an Accounts Receivable System
❑The Subscriber Form is the anchor of the Accounts Receivable System just like your Company's Subscribers are the anchor of your Alarm Company.
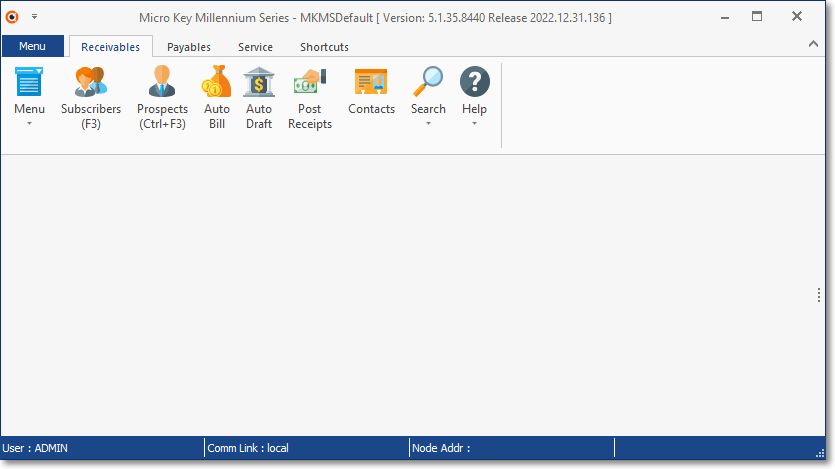
MKMS STARK Desktop - Receivables Tab
•To access the Subscribers Form, on the MKMS Desktop and Press F3, or Select the Receivables Tab on the MKMS Desktop and Click the Subscribers Icon on the Receivables Tab's Ribbon Menu which also provides Icons for certain Periodic Tasks required in the Accounts Receivable module and access specialized Search Options, plus an Icon to open the Prospects Form (Ctrl+F3).
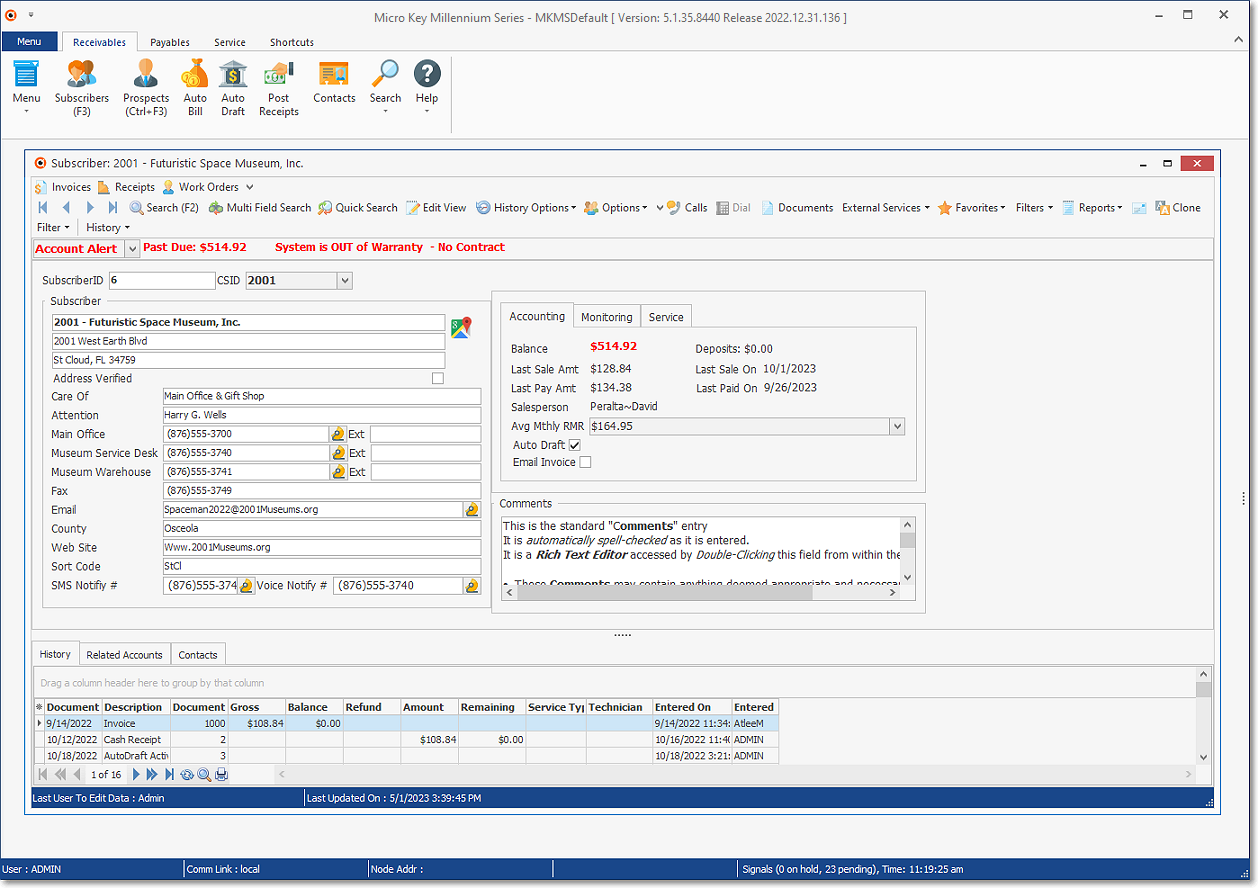
MKMS Desktop - Receivables Tab - Subscribers Form
•This Subscribers Form, its Ribbon Menu, the Edit View and other specialized Icons and an Information Bar (see below) is the base Form and the access point to the Accounts Receivable System.
✓The Ribbon Menu on the Subscribers Form provides:
▪A Navigation section with Record Movement and Search Icons, the History Options, the Subscriber Options Drop-Down Menus which provides One Click access to most Daily Procedures (e.g., Entering Invoices, Posting Receipts, setting up Auto Billing)
▪An Actions section with special Actions Icons - Search (F2), Multi Field Search, Quick Search, Edit View, History Option, Options, Calls, Dial, Documents, External Services, Favorites, Filter (Select this option to cancel any Filter established using the History option), Reports, Email.and Clone Icons
▪An Information Bar (for Alert Messages such as a Past Due notice)

Subscribers Form - Ribbon Menu (Navigation & Actions Icons) - Information Bar
✓Most Accounts Receivable System Reports are accessed through the Backstage and/or Quick Access Menus, but some are also available using the Subscriber Form's Actions section Reports Icon.
•You may also Customize a Quick Access Tool Bar (highlighted in Yellow in the illustration immediately below) using the Add or Remove Buttons option (Down-Arrow ˆat the top of this Form), and when defined, those options will appear above the regular Ribbon Menu on the top of the Subscribers Form

Subscribers Form - Customized Quick Access Tool Bar
❑Record Information - A view of the Subscriber Information is displayed on the Subscriber section
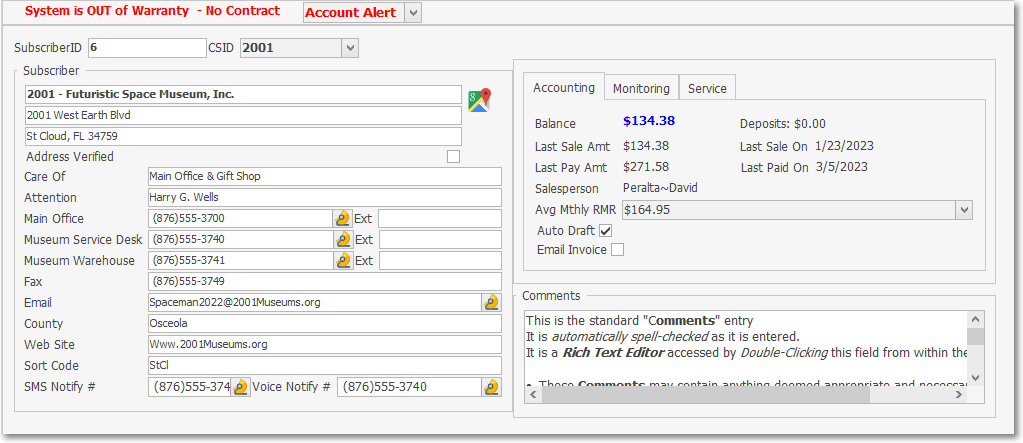
•Subscriber ID - The Subscriber's internal record number assigned by the system.
•CSID - The Primary CSID
✓Using the Drop-Down Selection List provided (see the Mouse Pointer in the illustration immediately above), you may view all CSIDs defined for this Subscriber.
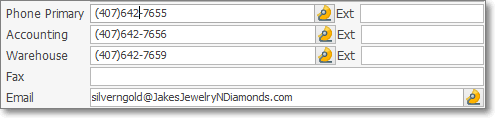
•Contact Icons on the Subscribers Form (and the Prospects Form) displays the Contact dialog from while the User may Phone, Page, Text, and/or send an Email to that location.
Contact Icons on the Subscribers Form
![]() - Click any Contact Icon to open the Contact dialog
- Click any Contact Icon to open the Contact dialog
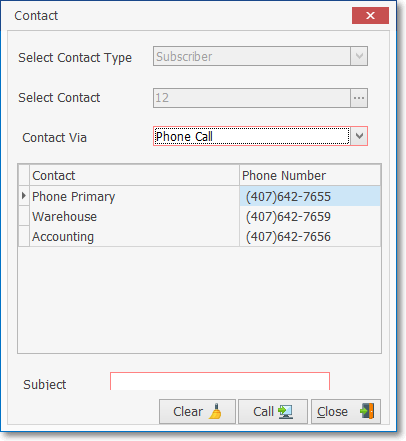
Contact dialog - Contact Via - Phone Call
•Using the Contact dialog to make contact with this Subscriber
a)Select Contact Type - This will default to contact the Subscriber
b)Select Contact - This will default to the Subscriber ID of the current Subscriber
c)Contact Via - This will default to Phone Call but may be changed
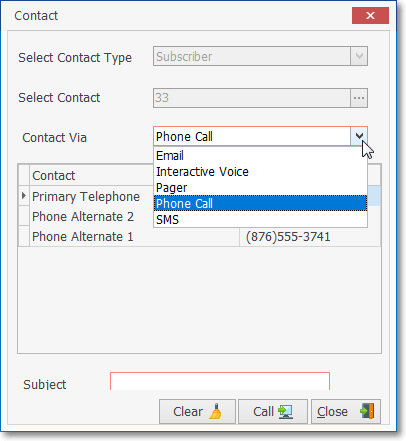
Contact dialog - Contact Via options
i.Email - Send an Email message [see f), i., ii & iii. below]
ii.Interactive Voice - Make an Interactive Voice Call
iii.Pager - Send a Pager Message [see f), i., ii & iii. below]
iv.Phone Call (default) - Make a Telephone Call
v.SMS - Send a Text message [see f), i., ii & iii. below]
d)Available Contacts Grid - This will default to the Telephone Numbers Grid but may change based on Contact Via selection described above
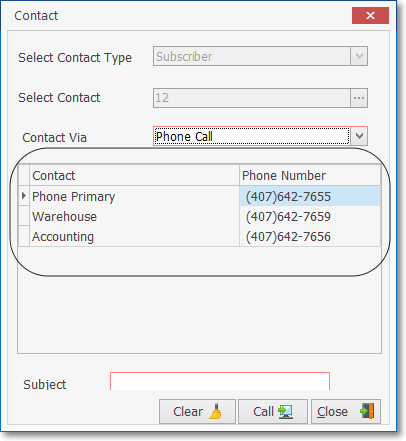
Contact dialog - Available Contacts Grid
e)Subject - Enter a brief description on the purpose for this Contact
f)When Email, Pager, or SMS is the Contact Via Choice [see c) above]:
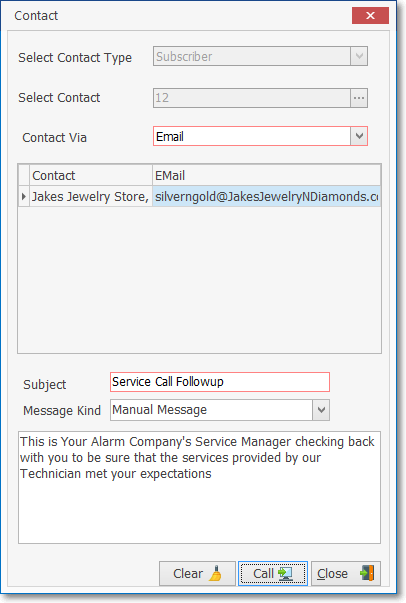
Contact dialog - Contact Via - Email option
i.Subject - Enter a brief description of the purpose for this Contact (sample illustrated above)
ii.When Message Kind selection = Manual Message - enter the text for this message to the Contact (sample illustrated above)
iii.When Message Kind = Predefined Message - use the Drop-Down Selection List to Choose the appropriate Predefined Message (sample illustrated below)
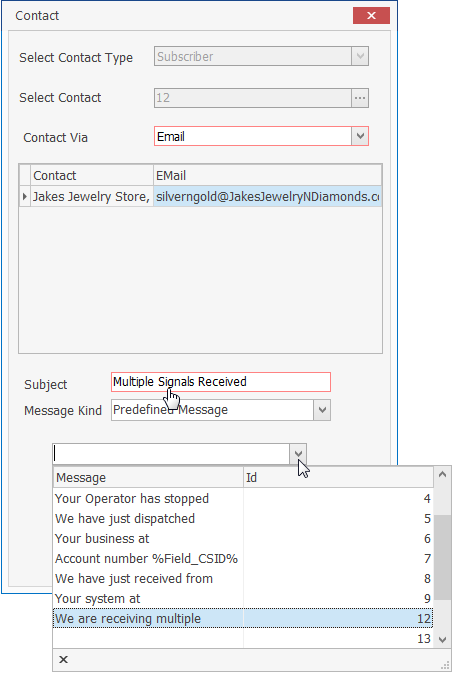
Contact dialog - Contact Via - Email option - Subject and Predefined Message
g)Clear - Remove whatever has been entered in the Contact dialog
h)Call - Execute the Contact
i)Close - Close the Contact dialog
•The Subscriber Information is displayed in a main Subscriber section - three additional Tabbed sections and a Comments box - each has its own Title as describer below:
✓Subscriber section - Account's Name, Address, Contact information, etc.
✓Accounting tab - Balance (displayed in Blue if Current, Red if Past Due), Last Sale Amount and Last Payment Amount information, Salesperson assigned to the Account, Average Recurring Revenue , Email Invoice, outstanding Deposits (if any) and the Last Sale Date and Last Payment Date information.
▪The Average Recurring Revenue field(Avg Mthly RMR) has a Drop-Down Selection List which displays the associated Recurring Revenue Detail Grid that documents the source of the Average.
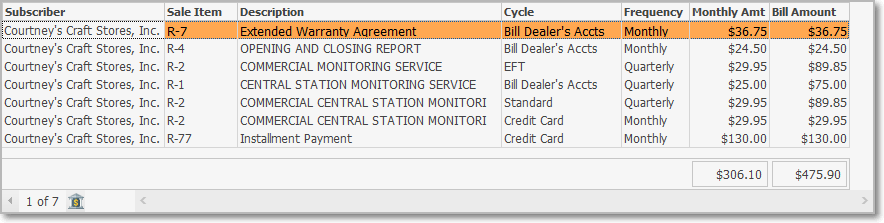
Recurring Revenue Detail Grid
✓Monitoring tab - Primary CSID, Dealer information and On Line (and Off Line) Dates
✓Service tab - Service Contract and Warranty Expiration date
✓Comments field - A read-only Edit Rich Text field where notes, comments and other information previously entered in the Edit View of this Subscribers Form is displayed
❑Entering a New Subscriber record
•Open the Subscribers Form by Clicking the Receivables Tab on the MKMS Desktop and Pressing F3 (or Clicking the Subscribers Icon on the Receivables Tab's Ribbon Menu)
![]()
•The Edit View on the Subscribers Form (shown below) is where a new Subscriber record is entered, and updated when required.
✓Select the Edit View Icon on the Subscribers Form
✓Choose the Subscriber side-tab (which should be the default)
✓Click the Insert Icon to start a new Subscriber record entry.

Edit View on the Subscribers Form - Insert new Subscriber record selected
❖See the Subscribers Form Edit View chapter, and each of its sub-chapters, for complete information on how to enter a new Subscriber record.
❑Google Maps® - Once the Subscriber record is saved, Click the ![]() Icon to the right of the Subscriber's address to open a Digital Map Display showing the exact location of this Subscriber.
Icon to the right of the Subscriber's address to open a Digital Map Display showing the exact location of this Subscriber.
MKMS STARK |
A special MKGM.dup file is included to enable the use of Google Maps® without incurring the map views limitation. Google Map® may initially display either in the "roadmap" (default) view, or in the "satellite" view, as your Company's Central Station and/or Operations Manager prefers. ▪For those who want to use this capability, it requires the installation of a new Company Setting which may be accomplished by using the dbisql utility to run this script: INSERT INTO "DBA"."CompanySettings"("Section","SettingName","SettingValue") VALUES('Feature','DefaultMapType','roadmap') ▪To change the default map display to "satellite": update dba.companysettings set settingvalue = 'satellite' where settingname = 'DefaultMapType' Commit |
•Any Technicians having a Coverage Area Zip Code that matches that of the Subscriber, will also be identified on this Google Map®.
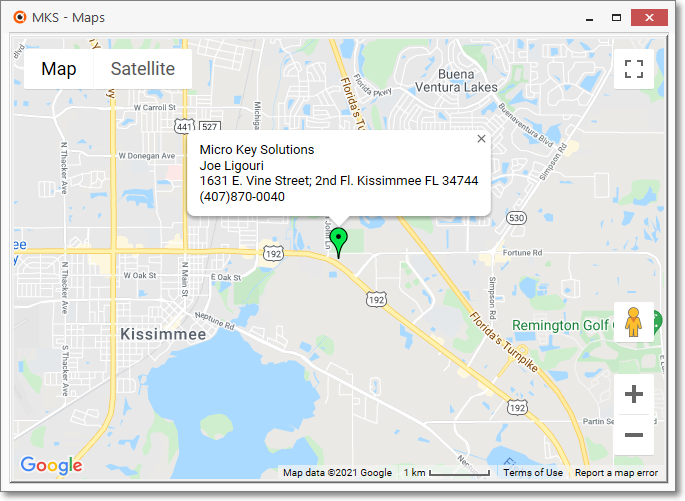
Google Maps showing Subscriber location in 'roadmap' View

Google Maps showing Subscriber location in 'satellite' View
❑The Search Icon is used to look up a specific Subscriber record.
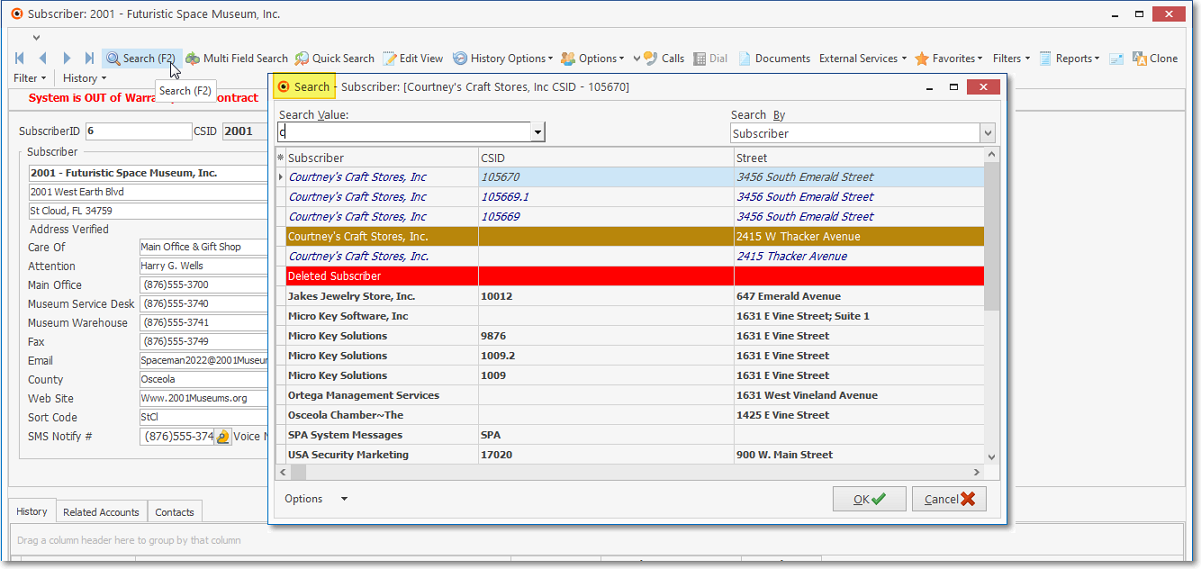
Subscriber Form - Search Icon - opens the Search dialog
•This Subscriber Search dialog (also accessible by Pressing F2), Multi Field Search, and Quick Search may be used when you need to locate a specific Subscriber record or an individual CSID.
❑Updating Subscriber information: Changes to the existing information on the Subscribers Form may be made at any time, assuming the User has the appropriate Access Rights.
•Use the Search Icon at the top of the Subscribers Form to look up a specific Subscriber's record that will be Updated.
•Select the Subscriber Form Edit View, Locate the required field(s), and make the changes, as needed.
•To make entries, Click on the field(s) needing a revision, then add or change the data, as required.
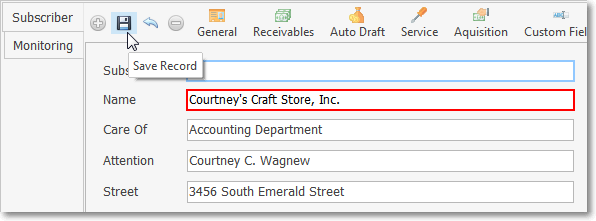
•Click the Save Icon to store these changes.
❑Duplicate Account Warning - If the Telephone Number of the Subscriber record you are saving already exists in another Subscriber record, a Duplicate Account dialog will be displayed.
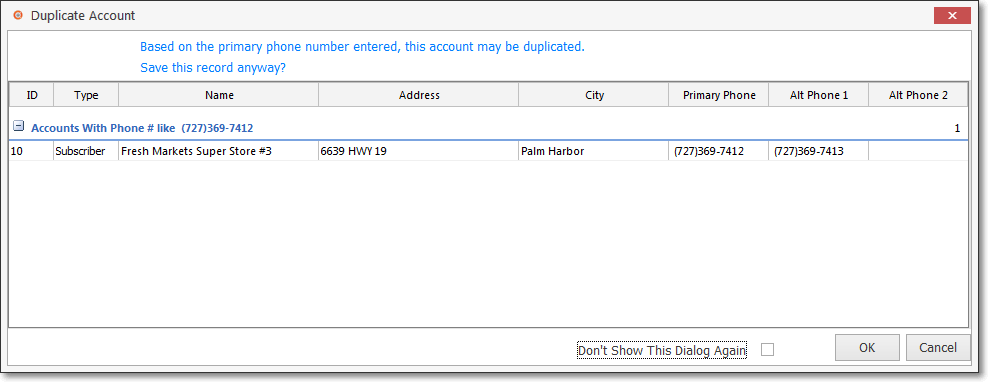
Duplicate Account Warning dialog for Subscribers Form
•In most cases this display indicates that the current record, to which modifications were made, is the only record with the Telephone Number in question.
✓If this is the case, Click the OK button to save the record as requested.
✓If this is not the case, and multiple Subscriber records are listed, determine whether duplicates are acceptable, whether you need to correct this, or another record's primary telephone number.
▪Click the Cancel button to change the current record, or Click the OK button to accept the current record.
✓Go to the other record(s) and make the primary telephone number changes, if appropriate.
✓Don't Show This Again - Check this box if you want to turn off the Duplicate Account checking process.
➢Note: Once the Duplicate Account checking process is turned off, Technical Support must be contacted to re-activate this feature!