❑MKS Connect Service is the Windows® Service ("service") that processes the MKMS communication requests such as Notification Emails for Invoices and Receipts processed by the Fully Automated Recurring Billing process, Signal Processing Notifications, and all other types of Email Communications and Reports sent to Subscribers and/or Dealers.
❑The Customer Connect History (Grid) displays the history of the Customer Connect Service's Communication transmissions.
•It is a Grid with full search, column selection and rearrangement, sorting, filtering, etc., features and also provides Print, Export, and Email capabilities.
•To open the Customer Connect History Form:
a)From the Backstage Menu System Select Reports and in the General sub-menu Choose Customer Connect History or,
b)From the Quick Access Menu, Select Reports and Choose Customer Connect History.
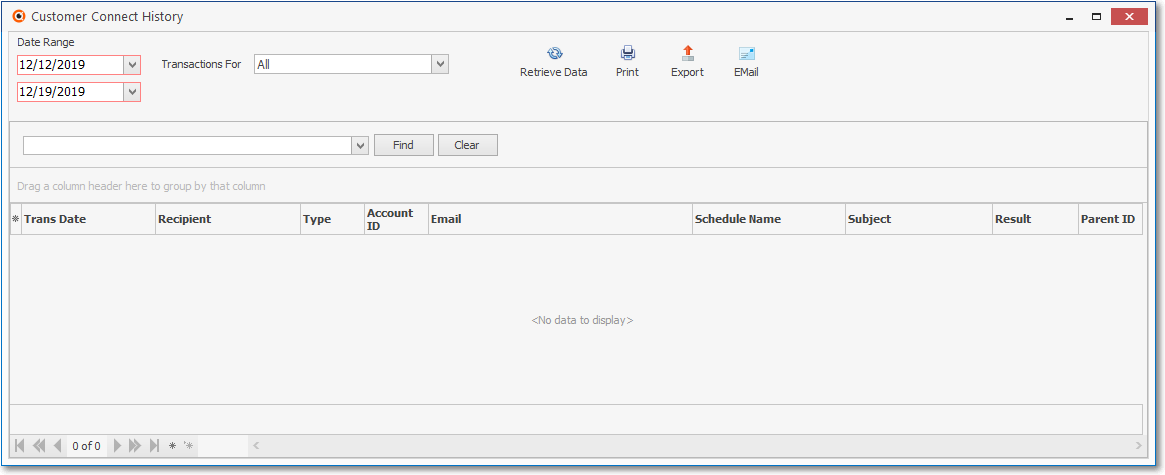
Customer Connect History Grid
❑Setting Up the Customer Connect History dialog's data grid Options:
•Date Range - Establish the Starting and Ending Dates for what will be displayed in the Customer Connect History Grid.
✓Starting Date - By default this will be the 7 Days Ago but the Starting Date may be changed by using the Drop-Down Calendar/Date Entry field provided.
a)Click on the Date field and type the desired Date using a MM/DD/YYYY format; or
b)Use the Drop-Down Calendar/Date Entry field provided to Choose the desired Date
✓Ending Date - By default this will be the Last Day of the Current Month but the Ending Date may be changed by using the Drop-Down Calendar/Date Entry field provided.
a)Click on the Date field and type the desired Date using a MM/DD/YYYY format; or
b)Use the Drop-Down Calendar/Date Entry field provided to Choose the desired Date
•Transactions For - By default this will be set to All.
✓Use the Drop-Down Selection List to Choose Prospect or Subscriber instead, if appropriate.
•Retrieve Data - Once the Date Range and Transactions choices have been made, Click the Retrieve Icon to populate the Customer Connect History Grid.
❑Arranging and Using the Customer Connect History Grid
•Columns - Select which columns of data are to be displayed:
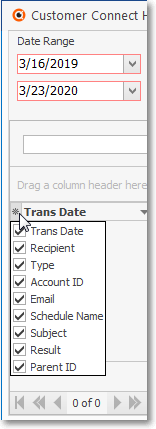
✓Click the asterisk (¬) at the left of the data grid's Header row (see the mouse pointer in the illustration above) to display a list of all of the column names - and associated data - which may be displayed.
✓By default, all Column Names will be Checked.
✓Remove the Check mark (Click on the Check to remove it) to hide that column of data from the data grid.
•Sorting the List - Setting the Order in which the Customer Connect History dialog's data grid is Listed within the Customer Connect History Form:
✓The default sorted order of the ePay Review dialog's List is based on theTransaction Date - which is ordered from oldest to newest
✓Thereafter, the column that determines the sorted order of the List may be easily changed, whenever needed.
•Filtering the List - This Customer Connect History dialog's data grid may also be filtered, as needed to define/identify the data that is actually needed.
✓See the Grids & Lists and the Filter Builder Dialog chapters for more information about formatting and printing (and exporting) the Customer Connect History dialog's data grid
•Print - Once the data has been formatted, filtered, sorted and configured as needed, a copy of thisCustomer Connect History Grid. data may be printed (see Understanding the Print Preview Dialog chapter).
•Export - Once the data has been formatted, filtered, sorted and configured as needed, Click the Export Icon to make an Excel spreadsheet, Text or comma delimited copy of this Customer Connect History Grid.data.
•EMail - Once the data has been formatted, filtered, sorted and configured as needed, Click the EMail Icon to send this data as a PDF attachment to an Email address of your choosing.