❑Sometimes your Company may need a special report that is not available in MKMS.
•To accommodate this need, a Reports Icon on the Shortcuts tab provides access to the Reports Module where Custom Reports may be created, Updated, Deleted, Tested, etc.
•Select the Reports Icon on the Shortcuts tab to open the Reports Module dialog which allows the creation of any number of User defined Custom Report Formats.
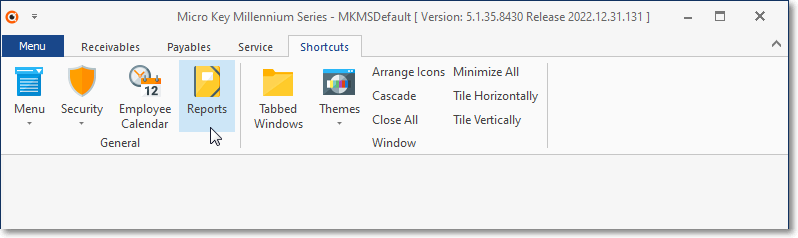
Short Cuts tab - Reports option
❖Important Notice - A working knowledge of SQL is required to be able to properly use this Reports Module.
•The Reports Module dialog will be displayed.
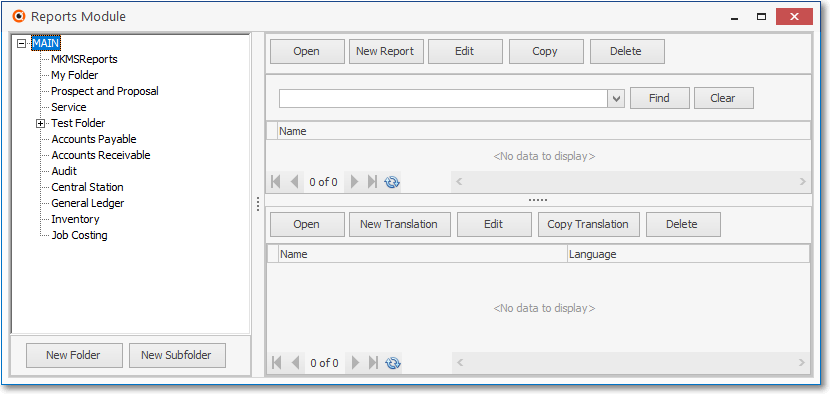
Short Cuts tab - Reports option - Reports Module dialog
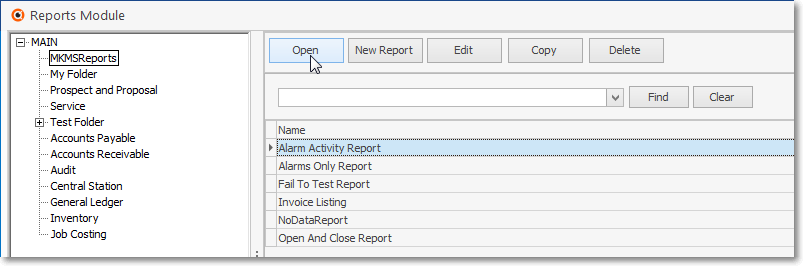
✓MAIN - This option presents a list of all Predefined and User Defined Folders, within each Folder will be the User defined and the Custom Reports that have been previously created
▪MKMS Reports - This folder contains sample reports created as examples (which actually produce the report) to help understand how this Custom Reports feature may be used
oClick on any Folder name to display the list of all previously defined Custom Reports
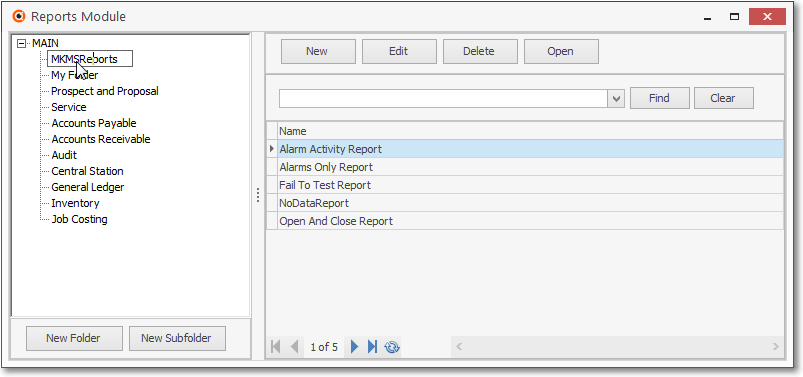
Short Cuts tab - Reports option - Reports Module dialog - MKMS Reports listing
▪My Folder - This folder is presented as an example of a User Defined Folder
▪Specific Module Folders - Folders representing the available modules in MKMS.are already created.
✓New Folder option - Click the New Folder button at the bottom left of the Reports Module dialog to open the Create Folder dialog
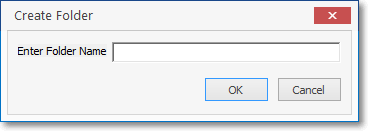
Create Folder dialog
▪Enter Folder Name - Enter the Name of the Folder that's to be created
▪OK - Click the OK button to insert this Folder at the bottom of the list of Folders
✓New Subfolder option - Click the New Subfolder button at the bottom left of the Reports Module dialog to open the Create Subfolder under folder [selected folder name) dialog

Create Subfolder dialog
▪Enter Subfolder Name - Enter the Name of the Subfolder that's to be created
▪OK - Click the OK button to insert this Subfolder below the currently selected Folder
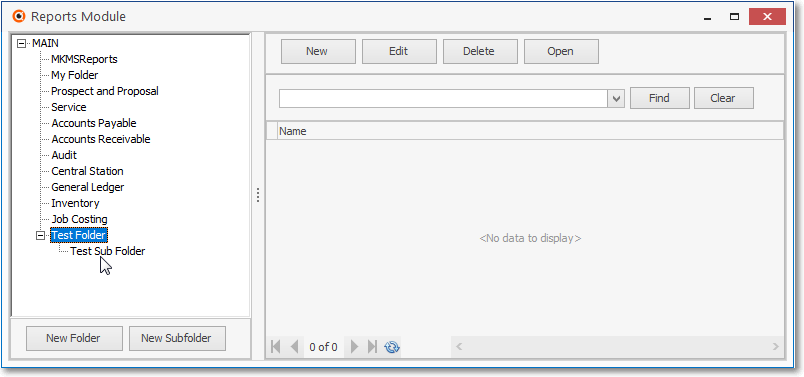
Short Cuts tab - Reports option - Reports Module dialog - New "Test" Folder and "Test" Sub Folder
❑Using the Reports Module
•To view an existing Report
✓Select the Folder in which that Report is listed
✓Double Click on the existing Report's Title
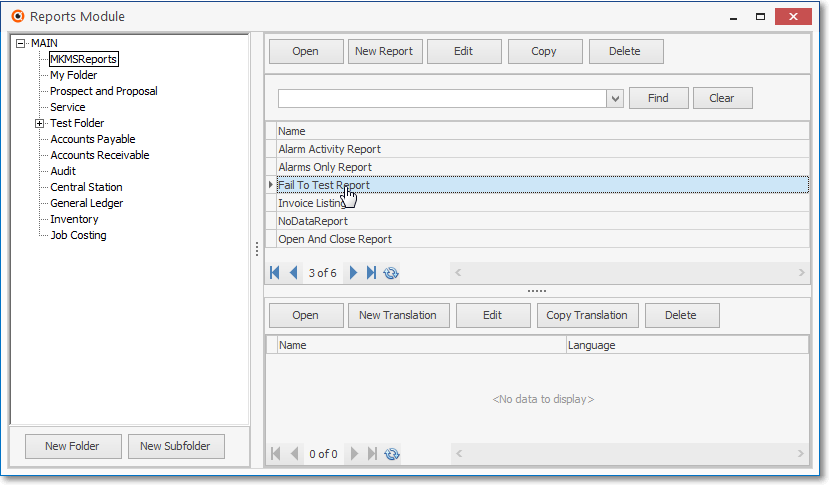
Short Cuts tab - Reports option - Reports Module dialog - Reports Listing
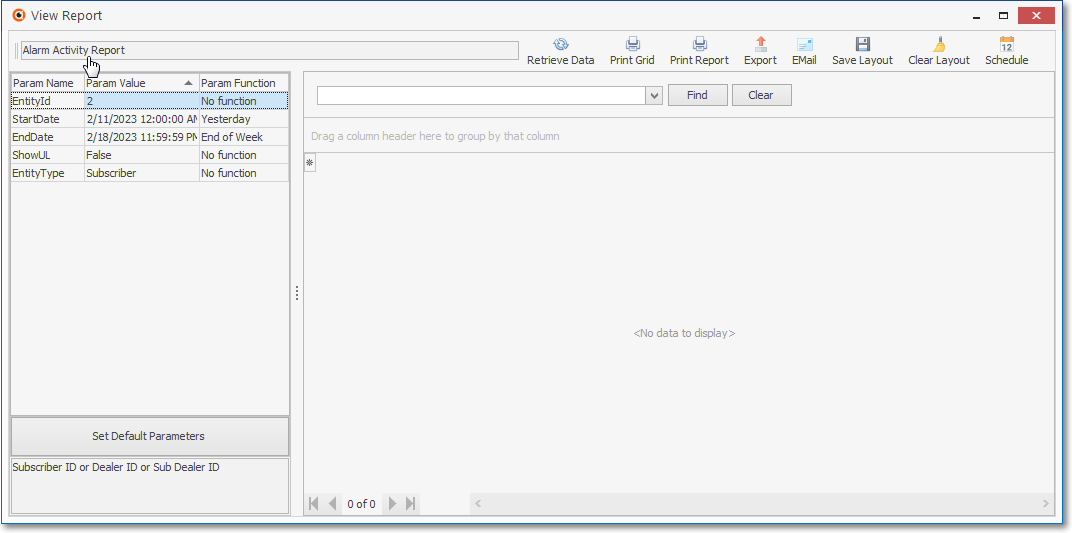
✓View Report - The View Report Form is where the structure of a previously defined Custom Report may be displayed, populated with data, printed, exported, and/or Scheduled
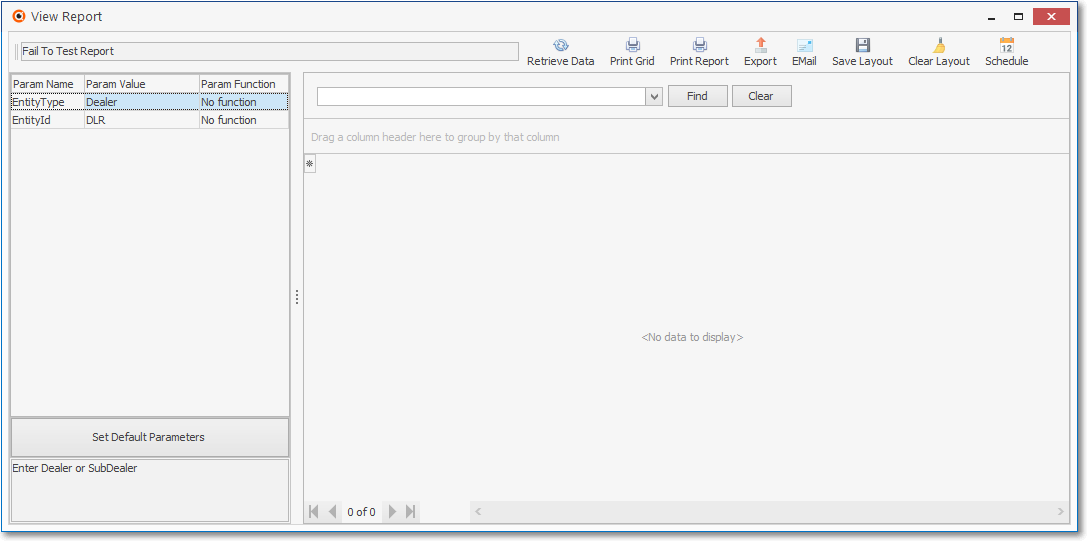
Short Cuts tab - Reports option - Reports Module dialog -Reports Listing - View Reports dialog
▪Ribbon Menu options on the View Report Form
oRetrieve Data - Click this option to retrieve the data based on the selected report's design
oPrint Grid - Click this option to display a Print Preview of the data based on the selected report's design
oPrint Report - Click this option to Print a Report of the data based on the selected report's design
oExport - Click this option to open a Windows® Save As dialog with .XLS, .TXT (fixed length), and .TXT (comma delimited) file formats offered
oEmail - Click this option to open an Email Message dialog with the selected report attached as a PDF document
oSave Layout - Click this option to Save the current Report
oClear Layout - Click this option to Clear the Layout of the current Report
oSchedule - Click the Schedule option on this View Report Form's Ribbon Menu to open the Schedule Reports Form to set up when, how, and to whom this report should be sent
▪Click the Close ![]() box to Exit this View Report dialog
box to Exit this View Report dialog
•Adding a New Report:
✓Select the Folder within which you want a New Report to be created
✓Click the New Report button
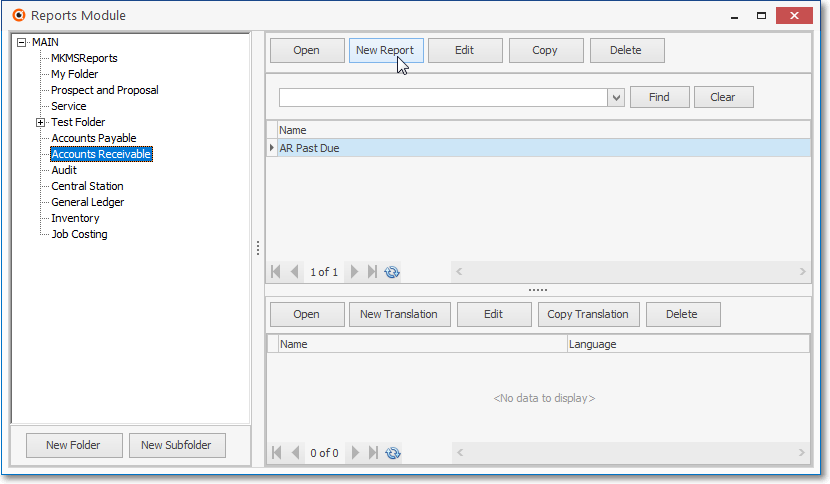
Short Cuts tab - Reports option - Reports Module dialog - Reports Listing - Select Folder - New Report Option
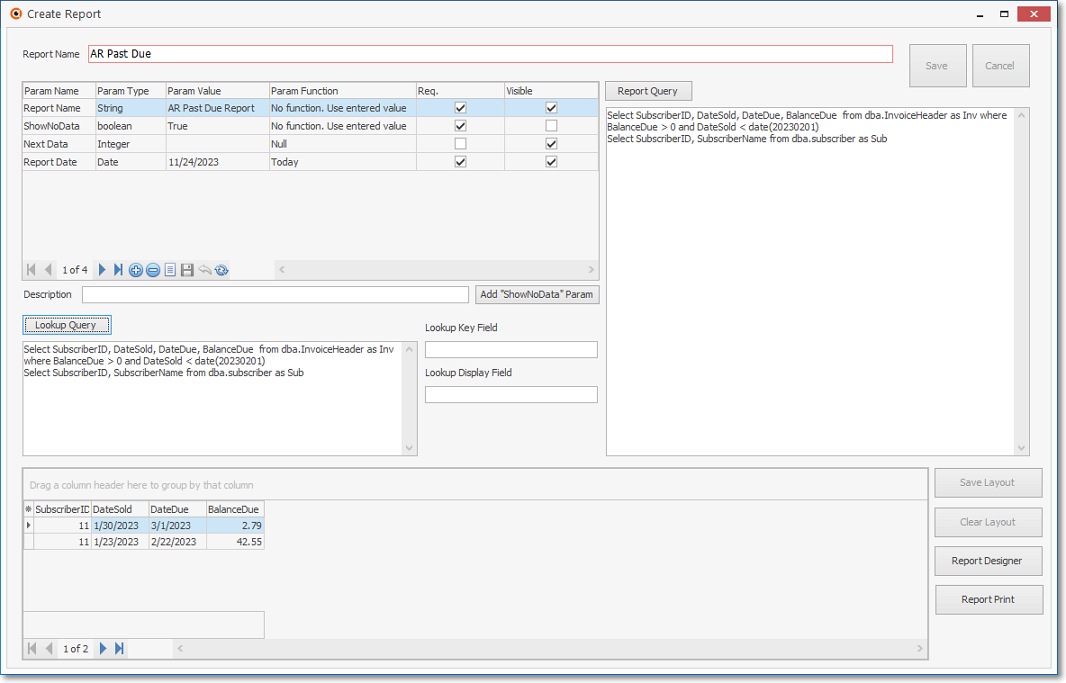
✓Create Report - The Create Report dialog will be displayed where a new Custom Report may be defined and tested
❖See the Using the Create Report dialog discussion immediately below for detailed information about this Form
Short Cuts tab - Reports option - Reports Module dialog - Reports Listing - Select Folder - New Option - Create Report dialog
•Using the Create Report dialog:
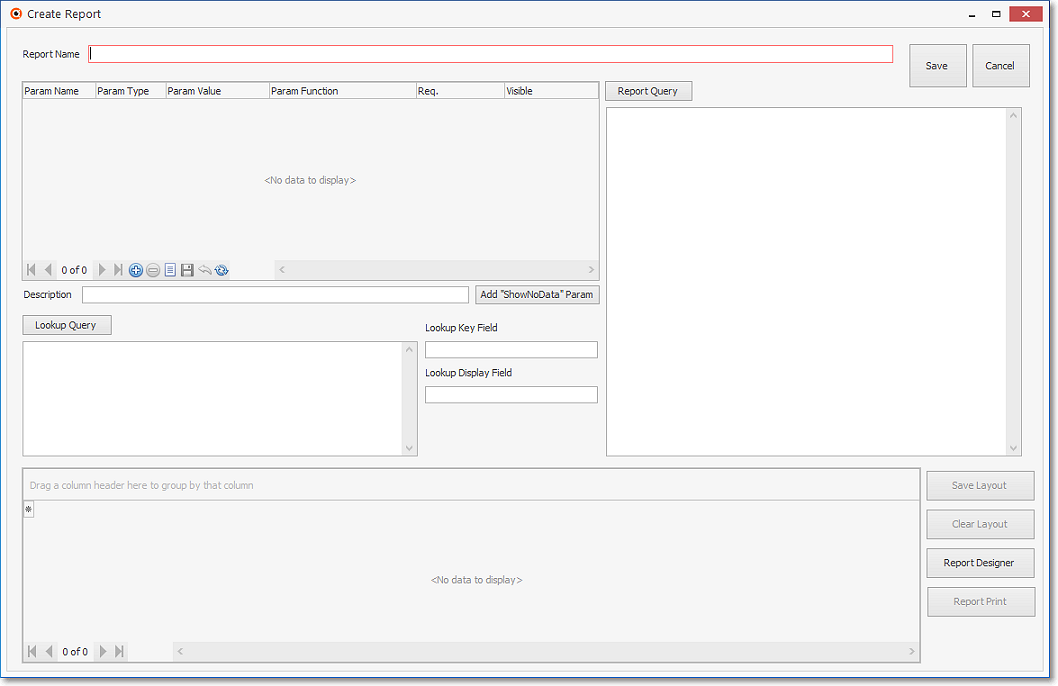
✓Report Name - Enter a unique name for this Report
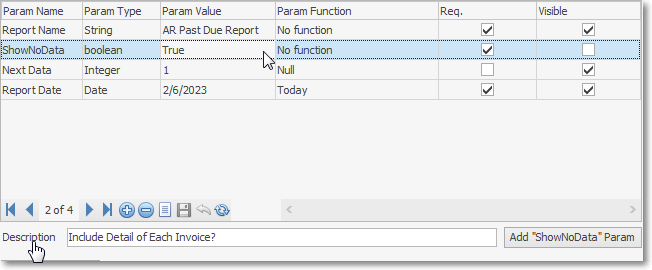
✓Define Parameters - Click the Inset Icon on the Ribbon Menu at the bottom of this Parameters section - Fill in each column as appropriate
▪Param Name - Enter a Name for this Parameter
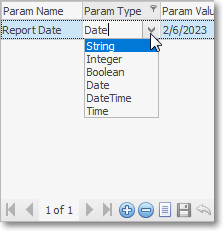
▪Param Type - Select this field and then Click the Down Arrow to display a Drop-Down Selection List of all Parameter Types. Choose the appropriate Parameter Type for this Parameter Name
▪Param Value - Enter a Parameter Value. This will establish the data format or a default Value for the select Parameter Type ???????
▪Param Function - Select this field
oThen Click the Down Arrow to display a Drop-Down Selection List of Parameter Functions
oThe Contents of this List will be determined by the Parameter Type selected above
a)Date - This is the list of Parameter Functions for the Date Parameter Type
 '
'
b)String - This is the list of Parameter Functions for the String Parameter Type

c)Boolean - This is a True/False option, no Function, with Description of the Question entered
d)Integer - No function required
e)DateTime - Typically Today or Now will be selected
f)Time - Typically Now will be selected
▪Req. - Check this box of this Parameter entry is required
▪Visible - Check this box of this Parameter entry will be visible on the Report
✓Report Query - Enter the SQL Query required to retrieve the data needed to produce this report, then Click the Report Query button to display that data in the Results section at the bottom of this Form
✓Lookup Query - To test the Report Query, enter the SQL Query that will be used to retrieve the data needed to produce this report and then Click this button to display that data in the Results section at the bottom of this Form
✓Results section at the bottom of this Form is where Query Data results are displayed
✓Save Layout - Click this button to save this Report format
✓Clear Layout - Click this button to remove this Report format
✓Report Designer - Click this button to open the Overview of the Report Designer interface below
✓Report Print - Click this button to Print the Report designed with the MKS Report Writer.
❑Overview of the Report Designer interface -
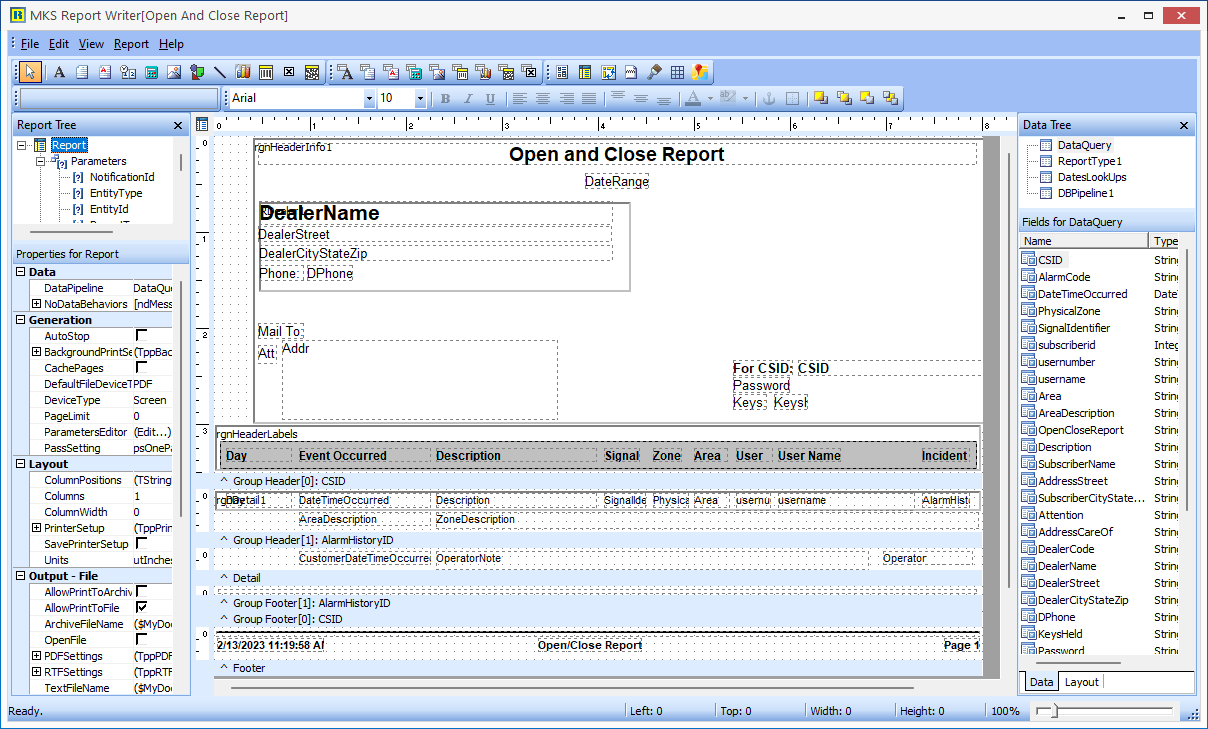
MKS Report Write interface
❑View Report - To open the View Report dialog
•Choose the Report to be viewed on the Reports Module's Main Form, then
Reports Module dialog - Open button
✓Click on the Open button to display the View Report dialog
View Report dialog
▪Select the Retrieve Data Icon to populate the Data Grid resulting from the report's design and the SQL statement assigned to it.
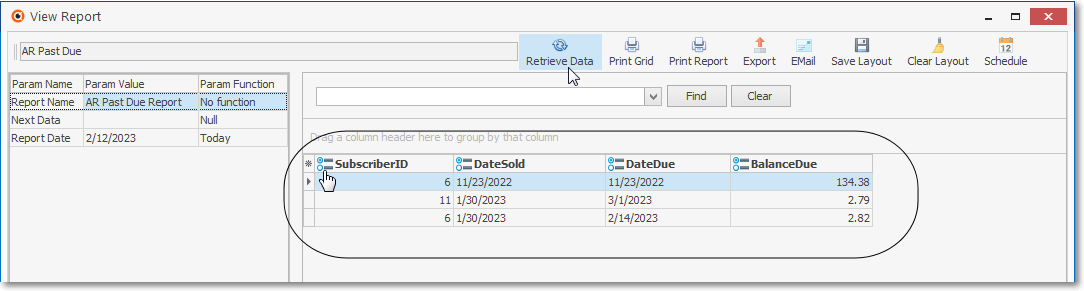
View Report dialog - Retrieve Data Icon - Data Grid
▪Each Column's Header Name has a special Configure Icon (on the left side of the Header Name) which displays two choices, with each choice having a sub-menu of options:
a)Summary Options - Allows for the creation of a Summary entry for the selected Column
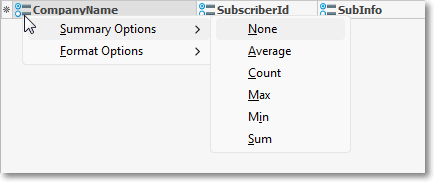
View Report - Summary Options with sub-menu choices
i.None - No Summary column required
ii.Average - Calculate an Average of the Values listed in the selected Column
iii.Count - Calculate the number of items in the selected Column
iv.Max - Display the Maximum Value of the items in the selected Column
v.Min - Display the Minimum Value of the items in the selected Column
vi.Sum - Calculate the Sum of the Values listed in the selected Column
b)Format Options - Allows for the designation of a Format for the selected Column
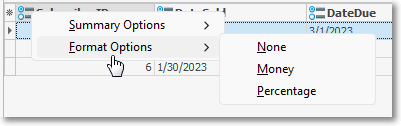
View Report - Format Options with sub-menu choices
i.None - No Format required for the Values listed in the selected Column
ii.Money - Format Values listed in the selected Column as Money (2 decimal places with any Summary Total preceded with a $ sign)
iii.Percentage - Format Values listed in the selected Column as a Percentage (with any Summary Value followed by a % sign)
▪Select the Print Grid Icon to display the Print Preview dialog produced from the report's design, column formatting, and the SQL statement that retrieved the data.
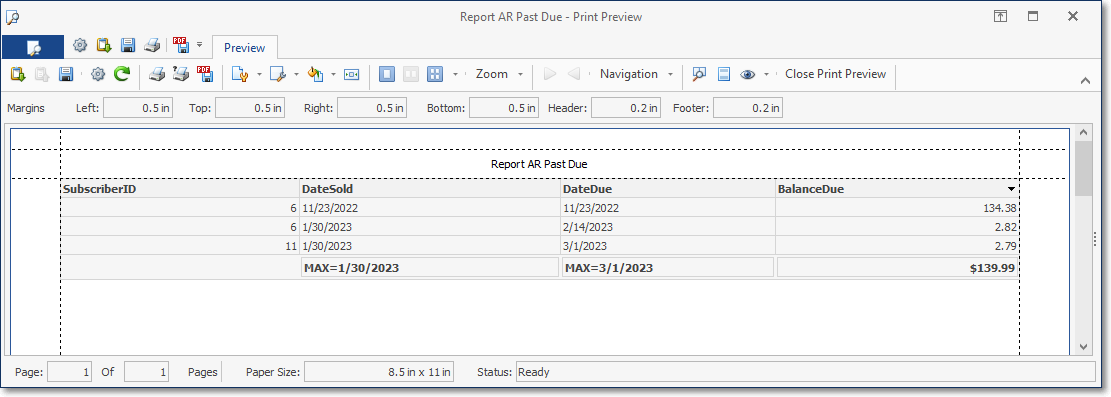
View Report dialog - Print Grid Icon - Print Preview
❖See the Understanding the Print Preview Dialog chapter for more information about this using this Print Preview dialog
![]() Export - Click the Export Icon to display a standard Windows® Save As dialog
Export - Click the Export Icon to display a standard Windows® Save As dialog
▪Export - This Export option allows the User to create a file with the contents shown in the View Report Dialog
oThe File Location is specified using the standard Windows® Save In dialog
oThe File Name is be specified (by default it is the Name of the Form from which the Export options was chosen).
oThe File Type is be specified (by default it is "XLS" but "TXT - Fixed Length", and "TXT Comma Delimited (CSV)" options are also available).
▪Email - Click the Email Icon to open the Email Message to send an Email of this Report.

▪Save Layout - Click the Save Layout Icon to save the changes made to this Report
▪Schedule - Click the Schedule Icon to open the Schedule Reports dialog (see below)
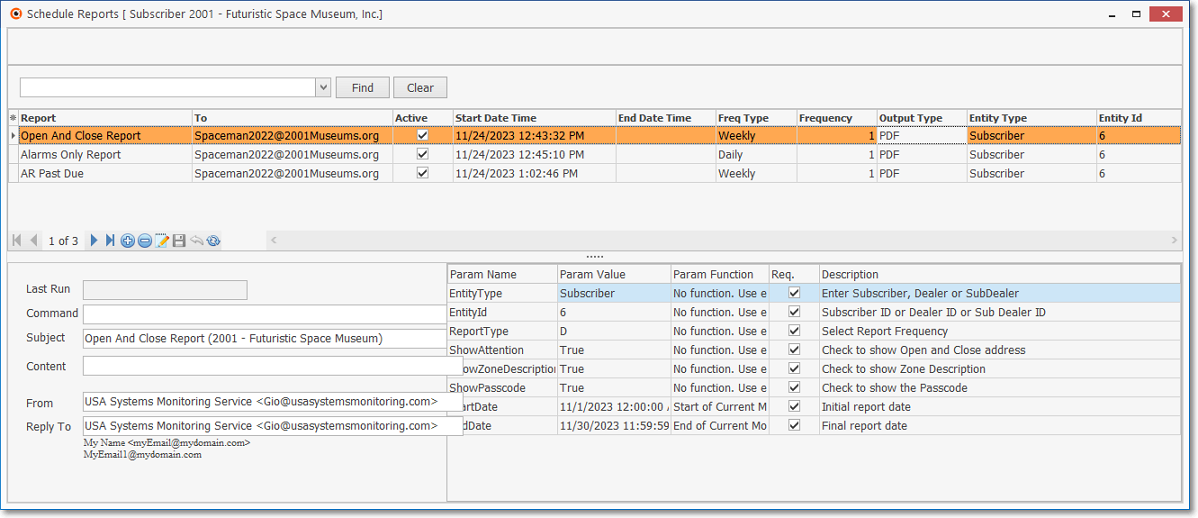
❑Using the Schedule Reports dialog - Select the Schedule Icon on the View Reports dialog's Ribbon Menu to open this Schedule Reports dialog
❖The Reports Module is used to create custom Reports (see the Create Report discussion),
•The Communications Module and/or the MKS Connect Service must be installed to use the Scheduled Reports feature.
a)The Scheduled Reports option (found in many places throughout MKMS) provides a list of those previously created custom Reports
b)One of which may then be selected as a Scheduled Report using the Scheduled Reports dialog explained below (and elsewhere in these Help Files)
❑The Scheduled Reports option is available
1.From the Subscribers Form's Options Menu, Select General Menu then select Schedule Reports to list those for that currently selected Subscriber
2.On the Dealers Form where the selected Schedule Reports will be for the currently selected Dealer
3.As an option in the View Reports dialog within the Reports Module where the selected Schedule Report may be set to any specified email address
View Report - Schedule Icon-Schedule Reports dialog Insert Icon
•The Schedule Reports dialog will display a Reports Grid containing all of the previously defined Custom Reports
✓Creating a New Report - Click the Insert Icon ![]() on the Ribbon Menu at the bottom of the Reports grid to Add a new Schedule
on the Ribbon Menu at the bottom of the Reports grid to Add a new Schedule
▪Each Report entry will Schedule a selected Report to be periodically sent an Email (with that Report as an attachment of a defined type) to a defined individual or entry's Email address.
▪These are the minimum required fields to implement this Schedule:
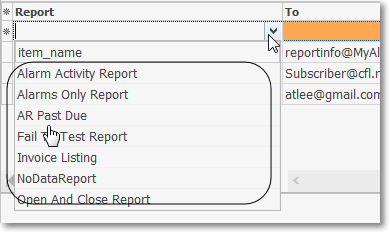
a)Report - Using the Drop-Down Selection List provided, Choose the Report to be sent
b)To - Enter the Email Address to which the selected Report should be sent
c)Active - By default, this box will be Checked. To deactivate the transmission of this Report to this Email address, remove the Check mark for this field
d)Start Date Time - by default, this will be Now. Edit this entry as appropriate
e)End Date Time - by default, this will be empty, but an end date/tine may be entered using the available Drop-Down Date/Time Calendar

Drop-Down Date Time Calendar dialog
f)Freq Type - Using the Drop-Down Selection List provided, Choose the Frequency (Yearly, Monthly, Weekly, Daily, Hourly) for when this Report should be emailed
g)Frequency - System defined field
h)Output Type - Using the Drop-Down Selection List provided, Choose the Output Type (CSV, HTMl, PDF) in which this Report should be emailed
▪Save - Click the Save Icon ![]() on the Ribbon Menu at the bottom of the Reports grid to record this new Schedule
on the Ribbon Menu at the bottom of the Reports grid to record this new Schedule
✓Navigation, Edit, Delete, Cancel, and Refresh options are also available on the Ribbon Menu at the bottom of the Reports grid (See the Detail Data Grid Options chapter for information on how to use these choices
✓Last Run, Command, and Detail fields are also available below the Report grid
✓A Grid containing the Parameter Names, Values, Functions and Descriptions when defined, are also listed below the Report grid (see Using the Create Report dialog above for information related to these Parameters)