❑Refunding a Previously entered Receipt:
•Refunds happen, either because of an error in billing that the Subscriber paid anyway, a duplicate Payment made by the Subscriber for the same Invoice, or necessitated by an adjustment offered by your Company.
✓Refunds are different from Bounced Checks (see the Bounced Checks chapter for that information).
▪Refunds refer to an actual Payment made to a Subscriber for the refund of a previously posted and deposited Receipt.
▪Keep in mind that a Receipt cannot be Refunded unless it has been Deposited in your Bank.
✓Refunds are initiated by you, the Company, Bounced Checks are caused by the Subscriber.
▪Identifying a Receipt as one that should be Refunded to the Subscriber is simply that.
i.No special action - transactional or otherwise - is required in the Accounts Receivable System if this Receipt was a Customer Deposit., or was never Allocated to an Invoice
a)See the "1. Refunding a Receipt that has not been Allocated " discussion below).
ii.If the Receipt was Allocated to an Invoice:
a)See the "2. Refunding a Receipt which has been Allocated" discussion below for the step that must be taken to Unallocate the Receipt which must be Refunded.
❑An Overview: Creating a Refund Check for a Receipt using the Refunds For dialog along with the Accounts Payable System
•The Refund option on the Receipts Form allows the User to Print the Check for a Refund within the Accounts Payable System. This process works as follows:
1.To Print a Refund Check, the Cut Check field on the Refunds For dialog is Checked - thus indicating that this Refund is to be processed through the Accounts Payable System.
2.All Refunds that have been identified for payment by inserting a Check in the Cut Check field [and have not yet been marked either as Ready To Print nor Printed by the system - see steps 3., a. and 4., a. below] will be listed in the Disbursement Form
▪The Disbursement Form lists all of the outstanding Bills and any Refunds that are to be paid - the Invoice # of these Refunds will be "REFUND".
▪The User must Check the Pay field for each item REFUND (and Bill) for which a Check should be created.
▪Once all of the Bills and Refunds have been identified, the User must then Click the Pay Bills button.
3.When a Check is entered in the Pay field for a REFUND item on the Disbursement Form:
a.On the associated Refunds For dialog each Refund selected for payment by Check will automatically have the Ready To Print field Checked by the system.
b.The REFUND item may be paid from any Bank Account (it does not have to come from the Bank to which the original Receipt was Deposited).
c.These Refund Payments become available to Print during the next Print Checks process.
4.Once the Refund Payments are printed using the Print Checks process:
a.On the associated Refunds For dialog the Printed field will be Checked, and Check # field will be populated with the Check Number assigned to the Printed Check.
5.On the Bank Reconciliation Form
a.Those Refunds which have not been identified on the Refunds For dialog with a Check in the Cut Check field will be displayed on the Deposits (right) side of the of the Bank Reconciliation Form as a negative Amount with a Description of Refund .
b.Those Refunds which are identified on the Refunds For dialog with a Check in the Cut Check field and a Check in the Printed field will appear under the Payment (left) side of the Bank Reconciliation Form as a positive Amount and the appropriate Check Number displayed.
➢Important Reminder: Refunds should not be issued until you are certain that the Subscriber's Check (or whatever form of payment was used) has cleared!
❑Refunding a Receipt:
•If a Receipt must be Refunded - regardless of the reason:
✓Press F-2 Search on the Navigation section of the Subscribers Form to locate the appropriate Subscriber record,
✓Open the Subscriber Options Menu on the Navigation section of the Subscribers Form, Select the Receivables sub-menu, then Choose the Receipts option.
✓Use the List option (see the Grid Data View information in the Receipts chapter) to Locate and Select the required Receipts record
✓Click the List option again to return to that selected Receipt's Record Editing View on the Receipts Form.
•When a Refund is issued to a Subscriber within the Accounts Receivable System, no General Ledger entry and no actual Refund Check is created unless you also have the Accounts Payable System in use.
✓If your Company is not currently using the MKMS Accounts Payable System, the Refund must be paid to this Subscriber using a separate, manual process determined by your Company's Accountant.
✓See the "Creating the actual Refund (Payment)" discussion at the very end of this chapter for more information when your Company is not using the Accounts Payable System.
1.No Receipt may be Refunded - the Refunds option will not be available - until it has been recorded as Deposited in the Bank!
2.No Receipt may be Refunded - the Refunds option will not be available - if it has been Allocated (therefore that Allocation must be reversed).
•Once the Receipt has been Deposited in the Bank, there are two cases that may present themselves when considering a Refund:
1.The Receipt that is to be Refunded has been Deposited but has not been Allocated to any Invoice(s).
2.The Receipt that is to be Refunded has been Deposited and has been Allocated to one or more Invoice(s).
✓The recommended processing of a Refund for each of these cases is explained below.
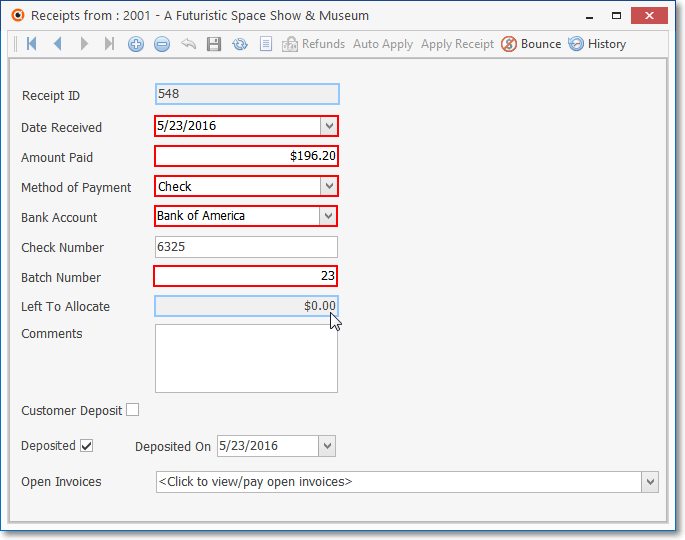
1. Refunding a Receipt that has not been Allocated (the Left To Allocate value is equal to the Amount Paid value):
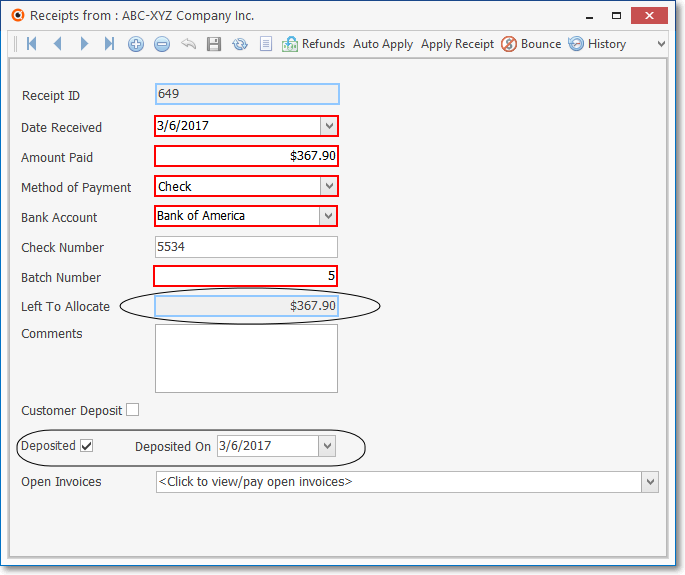
Receipts Form - Amount Paid is Deposited but not Allocated
•Having located the correct Receipt, Click the Refunds Icon located in Ribbon Menu on the Receipts Form.
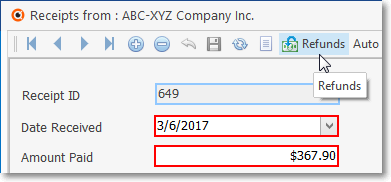
•The Refunds dialog will be opened.
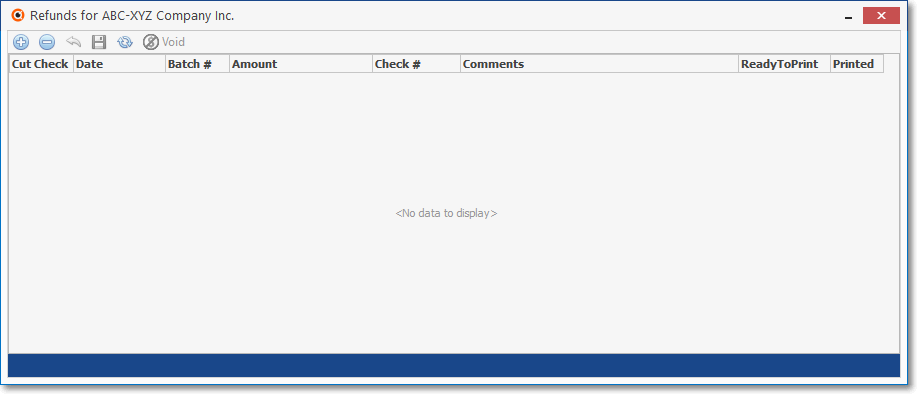
Refunds for dialog - Click Insert to enter the required Refund Information
•Click the ![]() Icon to enter the Refund information.
Icon to enter the Refund information.
✓Cut Check - Check this box to allow MKMS to create and Print a Check for this Refund
▪The Accounts Payable System - if activated - will be used to actually Print the Check.
▪See the "Creating a Refund Check for a Receipt using the Refunds For dialog and the Accounts Payable System" discussion at the beginning of this chapter for a complete explanation of this Check Printing process.
✓Date - By default, Today will be inserted.
▪Use the Drop-Down Calendar/Date Entry field to change that Date, if required.
a)Click on the Date field and type the desired Date using a MM/DD/YYYY format; or
b)Use the Drop-Down Calendar/Date Entry field provided to Choose the desired Date
✓Batch # - By default, Today's Day Number will be inserted.
▪This Batch Number should be changed, as appropriate.
➢Note: See the "Batch Number Assignment" discussion in the Receipts chapter for more information about assigning Batch Numbers.
Also, see Defining your Company's Batch Numbers discussion in the E-Payments chapter.
✓Amount - Enter the Amount of the Refund to be returned to the Subscriber.
▪The Amount entered may not exceed the Amount of the original Receipt.
▪A negative Amount [e.g., -1.00, or (1.00)] is not permitted.
✓Check # - When this Refund Check is Printed within the Accounts Payable System, the Check Number assigned to that Check will be inserted here automatically.
✓Comments - Enter a comment which explains why this Refund was issued.
✓Ready To Print - A Refund with a Check mark in the Cut Check field will not be marked by the system as Ready To Print until the appropriate actions are taken in the Accounts Payable System.
✓Printed - Refund with a Check mark in the Cut Check field will not be marked by the system as Printed until the appropriate actions are taken in the Accounts Payable System.
✓Click the ![]() Icon to record this Refund.
Icon to record this Refund.
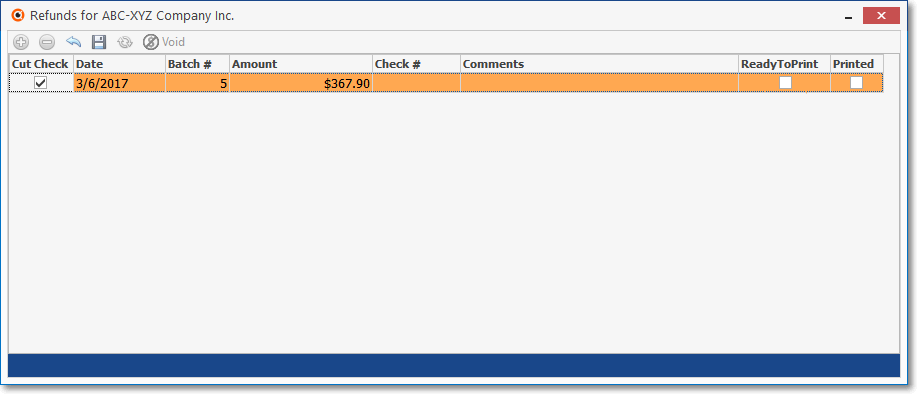
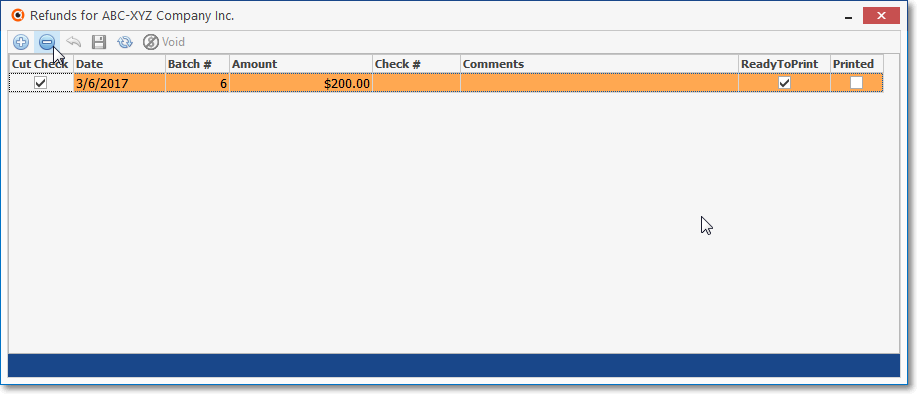
Refunds for dialog - with data
✓Click the Close ![]() box when you are finished.
box when you are finished.
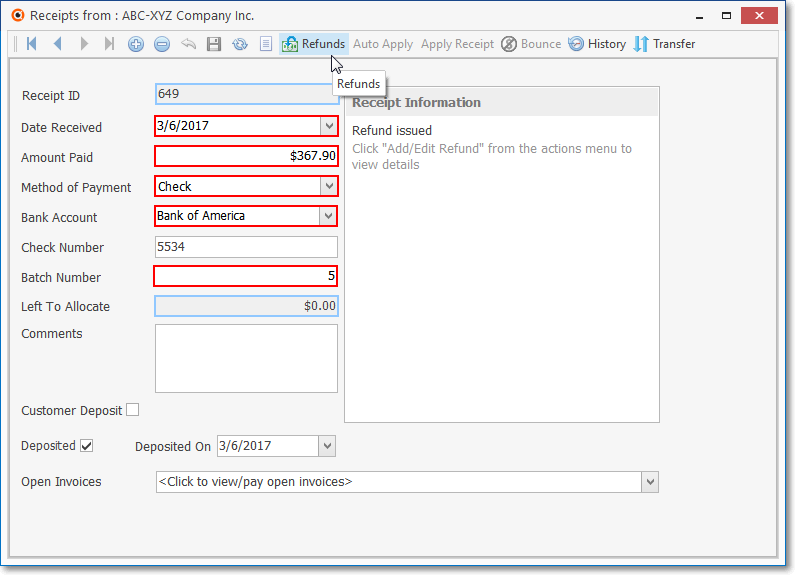
•The Receipts Form will be re-displayed noting that the Refund has been Issued.
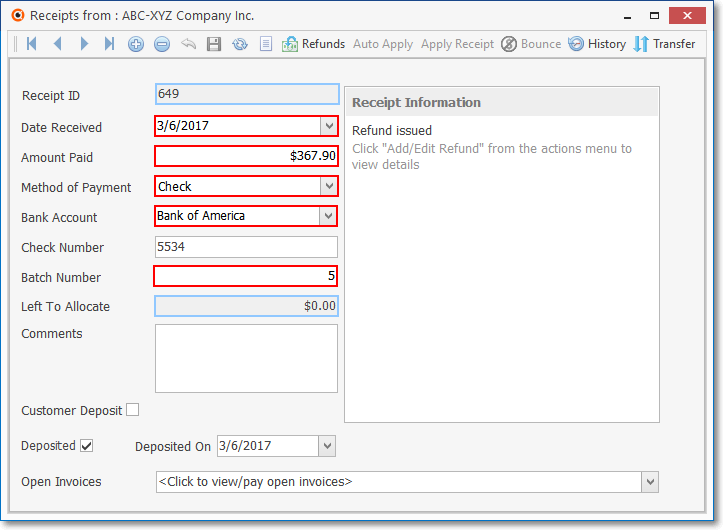
Receipts Form - "Refund Issued" message displayed
•Once the Refund Check has been Printed, the Refunds for record will be updated with the Check # field containing the associated Check Number, and the Printed field will be Checked.
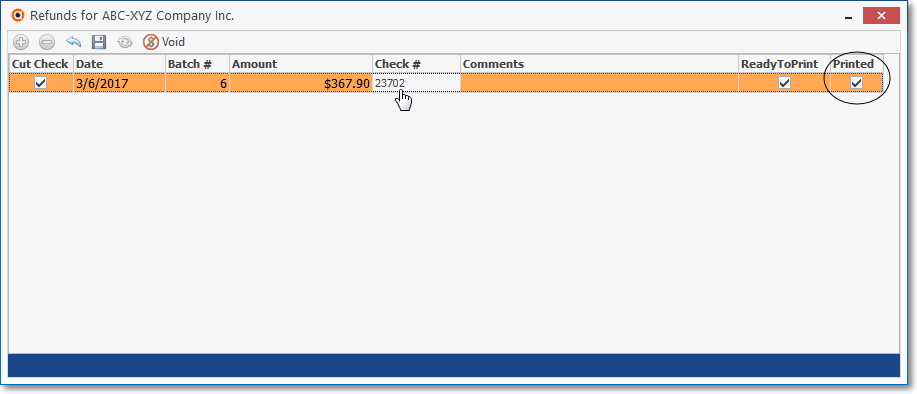
Refunds for dialog - with completed Refund data
❖See the "Creating the actual Refund" discussion at the very end of this chapter for the instructions on how to actually provide that Refund Payment to the Subscriber when your Company is not using the Accounts Payable System.
❖For General Ledger System Users - When a Refund Action is executed on the Receipts Form,
a)A Debit (addition) of this Refund Amount will be posted to the Accounts Receivable Asset Account
b)A Credit (subtraction) of this Refund Amount will be posted to the Bank Asset Account
❑Voiding a Refund - Although a rare event, a User may at some time have to Void a Refund Check. To allow a User to Void a Refund Check:
•A Void option is available on the Refunds For dialog's Ribbon Menu - which only becomes enabled after the Refund Check has actually been Printed.
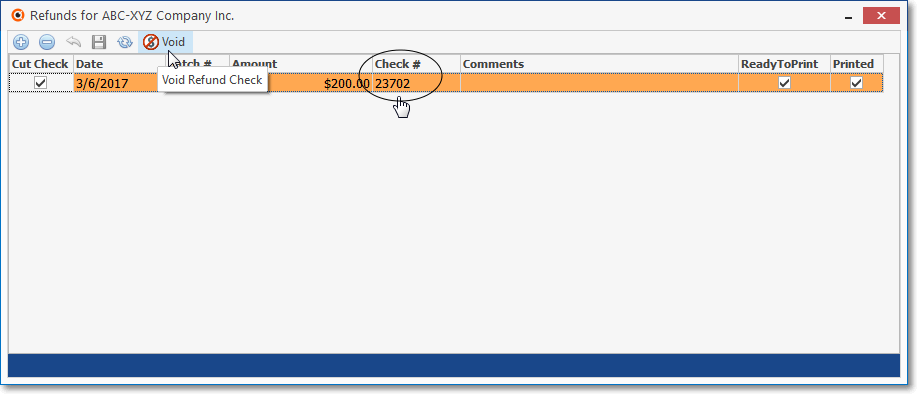
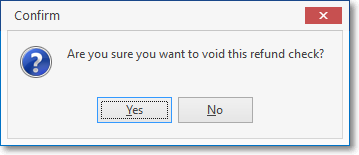
✓The User must Click on the appropriate Refund record, Select the Void Icon, and Confirms this action
✓The Check mark in the Printed field will be removed, and the Check # field will be cleared.
✓If you do not intend to Reprint this Check, you should Delete the Refund record in the Refunds For dialog.
a.The Left To Allocate Amount on Receipts Form record is adjusted automatically.
b.Voided Refund Checks do not appear in the Bank Reconciliation Form.
c.The Voided Refund Check Number will be included in the Check Register Report.
❑Reporting a Refund on the Cash Receipts Report:
➢Note: Refunds appear on the Cash Receipts Report just below the original Receipt, with the refunded Amount, and the Date the Refund the Refund was issued.
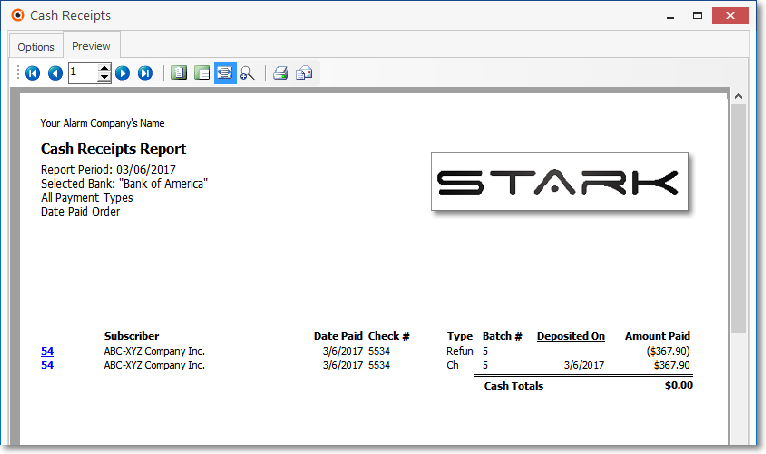
Cash Receipts Report with Refund - ($367.90) - and Deposit - $367.90 - information
•Generally, a Refunded Receipt was originally intended to pay an Invoice that had already been entered and which, because of the Refund, the Subscriber now will not be paying for it.
•Therefore, unless this was a Duplicate Payment,
✓A Credit Memo needs to be created (see the Issue a Credit Memo chapter for that information) and then applied to that unnecessary Invoice.
▪The only exceptions to the Credit Memo requirement is:
i.When the Refund was issued because the Subscriber accidentally paid an Invoice twice, or
ii.Paid a Deposit and then canceled the order before an Invoice was ever entered.
oIn these two cases, no other step is required except for the issuing of that Refund, using this Refunds option on the Receipts Form.
2. Refunding a Receipt which has been Allocated:
•Because the Receipt has already been allocated to one or more Invoices, that Allocation must be reversed before a Refund may be issued.
✓Locate the Receipt record which is due the Refund.
✓Confirm that the Left To Allocate value is 0.00.
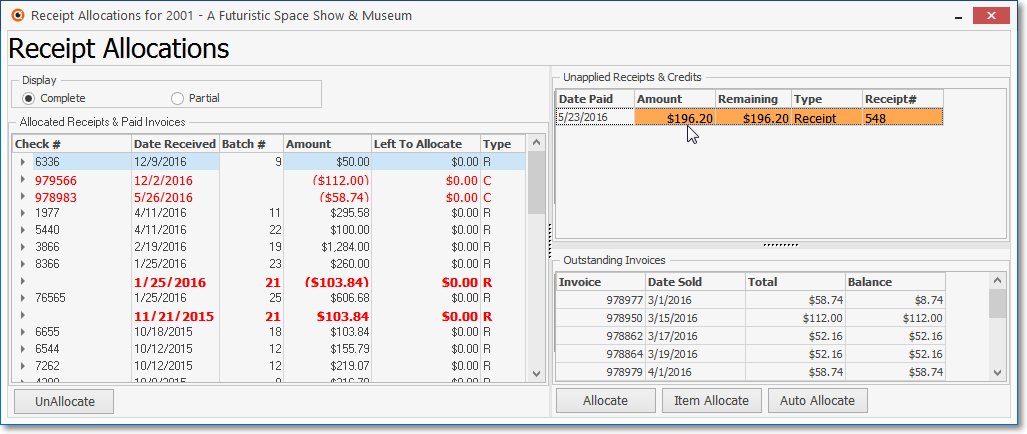
✓Open the Receipt Allocations Form - see Allocating Receipts.
✓Select the Receipt that is to be Refunded. following the directions below
▪In the Display box of the Receipt Allocations Form, Click the Complete Allocations button.

▪Locate the Receipt in the Allocated Receipts & Paid Invoices section.
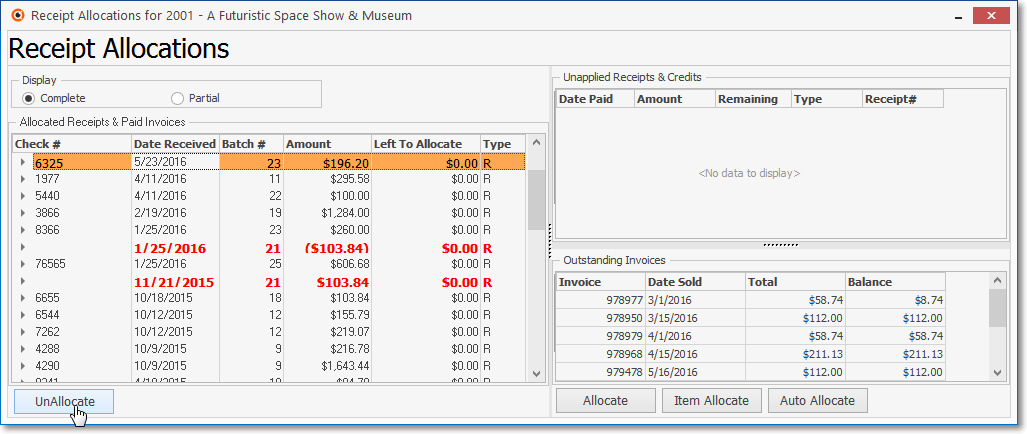
Receipts Allocation Form
▪Select (Click on) that Receipt record.
![]()
▪Click the UnAllocate button.
▪The Authorize Accounting Transaction Form may be displayed.
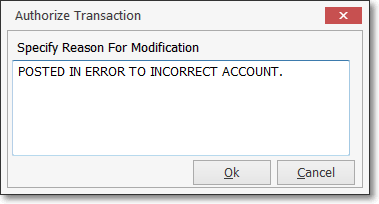
Authorize Transaction dislog
▪If you do not have the Security Rights to modify or cancel an existing transaction, you will need to have the appropriate person do so.
oThey must enter their User Name and Password - the same one they use to login.
▪Specify the Reason for the Modification.
▪Click Authorize.
✓Once you complete the Authorize Accounting Transaction process, the UnAllocate Confirmation dialog will be displayed.
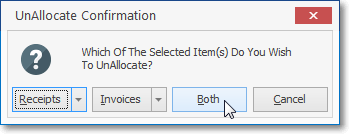
UnAllocate Confirmation dialog
▪Click Both to Unallocate the Receipt and the Invoice(s) satisfied by it.
oThe Receipt will be completely unallocated.
oAny Invoices Paid by the Receipt will be marked unpaid.
▪Thereafter, the Unallocate process is fully automatic.
▪Click the Close ![]() box when it's finished to exit the Receipt Allocations Form.
box when it's finished to exit the Receipt Allocations Form.
✓The Receipt is now unallocated and will be available for Refund.
•Then Issue the Refund following the steps in " 1. Refunding a Receipt that has not been Allocated" outlined above, and Issue a Credit Memo for the Invoice that was just Unallocated.
3. Edit Refund - Adjusting a Refund for a Receipt:
•If a Refund was recorded in error:
✓Locate that Receipt record.
✓Click the Refunds option to open the Refunds for dialog.
✓Click on the Refund record that was entered incorrectly.
✓Click the ![]() Icon to remove the Refund record.
Icon to remove the Refund record.
▪Confirm that you do want to Delete this Record.
✓Click the Close ![]() box to Close the Refunds for dialog.
box to Close the Refunds for dialog.
•If the Refund Amount was entered incorrectly (but some portion of the Refund is still owed):
✓Locate that Receipt record.
✓Click the Refunds option to open the Refunds for dialog
✓Locate the incorrect Refund record
✓Modify the Refund record, as needed.
✓Click the ![]() Icon to record the change(s).
Icon to record the change(s).
✓Click the Close ![]() box to Close the Refunds for dialog.
box to Close the Refunds for dialog.
✓Automatic Cleanup:
a)The Left to Allocate Amount on the Refunds Form will be modified be the system, as required, to accommodate any change made to the Amount on the Refunds for dialog.
b)If the Refund was already marked to be Paid on the Disbursement Form (the Pay box was Checked and the Pay Bills option selected), the actual Refund Payment Amount (i.e., the Refund Check's Amount) will be changed internally to match the Value to which the Amount was re-set in the Refunds for dialog.
❑Reviewing a Receipt record for the Refund issued to a Subscriber:
•To Confirm that the Refund process was properly executed,
✓Press F3 to open the Subscribers Form and use F2 Search to Retrieve the appropriate Subscriber record.
✓Open the Subscriber Options Menu on the Navigation section of the the Subscribers Form and Choose the Receipts option to open the Receipts Form.
✓Use the Grid option (see the Grid Data View information in the Receipts chapter) to Locate and Select the required Receipts record
✓Click the Grid option again to return to the Record Editing View on the Receipts Form.
Receipts record with Refund Issued
✓The Receipts record should have a Refund issued message displayed.
➢Note: The Cash Receipts Report contains this Refund information.
The Refund will be dated when it was Issued, not the Date of original Receipt, but will be listed immediately below the refunded Receipt on that Cash Receipts Report.
Cash Receipts Report containing Refund information
❑Creating the actual Refund Payment
•So, if for some reason your Company is not using the Accounts Payable System (Why?), the final tasks are:
i.Write the Refund Check and Mail it to the appropriate Subscriber.
ii.Record that Check (as a Voided Check Number).
iii.Be sure to notify your Company's Accountant of this action.