❑The Employee Hired/Terminated report (designed and documented here to comply with Section 6.1.6 - User Tracking of the Third Edition UL® 1981 Standard) provides a list of your Company's Employees - retrieved based on their Hire, Termination, or original Entry Date - and is displayed in Grid format so it may viewed, sorted, filtered, reconfigured, printed, emailed, and/or exported, as may be needed to comply with the Third Edition UL® 1981 Standard.
•The Employee Trace dialog may be accessed as follows:
a)From the Backstage Menu System Select Reports and Choose Employee Hired/Terminated, or
b)From the Quick Access Menu, Select Reports and Choose Employee Hired/Terminated
✓The Employee Trace dialog will be displayed as shown below.
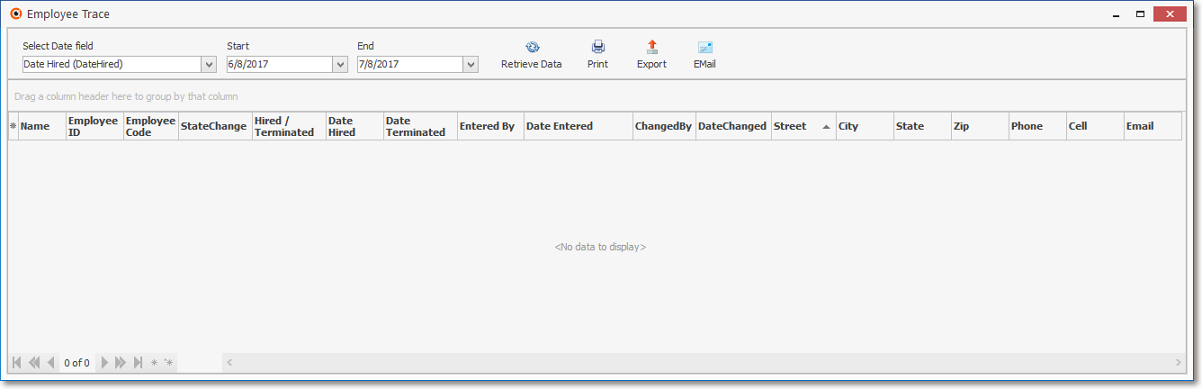
Employee Hire/Terminated (Employee Trace) dialog
❑Understanding & Using the Employee Trace dialog:
Employee Hire/Terminated (Employee Trace) Grid
•Options - Use the options to specify the rules for how, and what the data will be included:
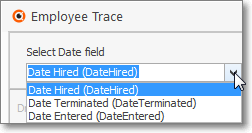
✓Select Date field - Use the Drop-Down Selection List provided to Choose which Date field will be used to compare the Start and End Dates specified below.
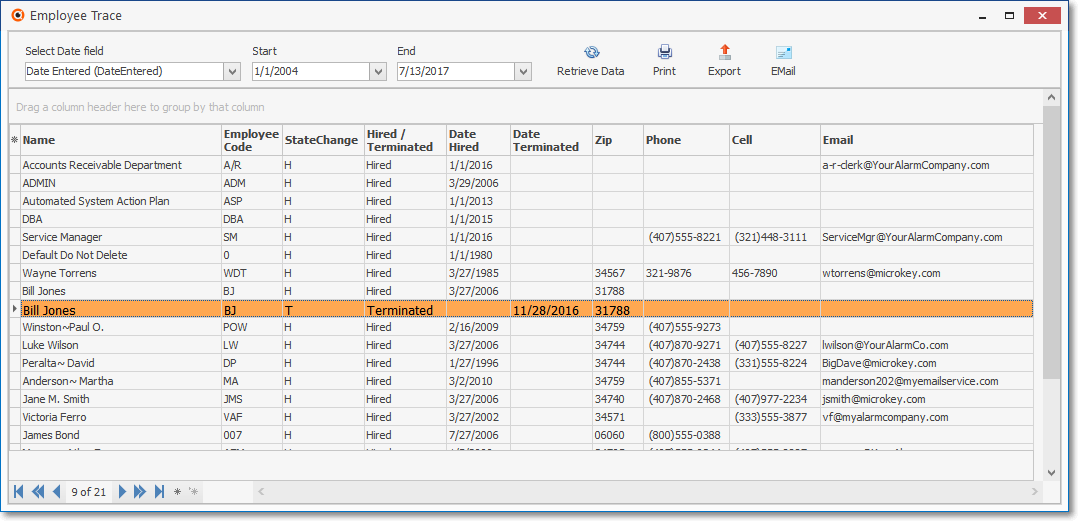
Employee Trace Grid
Select Date field options
✓Set the Date Range to be included:
▪Start - Using the Drop-Down Calendar/Date Entry field provided, Select the Starting Date - based on the Date field identified above - of the data to be listed
▪End - Using the Drop-Down Calendar/Date Entry field provided, Select the Ending Date - based on the Date field identified above - of the data to be listed
a.Click on the As Of Date field and type in the desired Date using a MM/DD/YYYY format; or
b.Use the Drop-Down Calendar/Date Entry field provided to Choose the desired Date
✓Retrieve - Once the Date field and Date Range is chosen, Click the Retrieve Icon to populate the Employee Trace dialog with that data.
✓Print - Once the data has been selected, columns specified, sorted, filtered, and/or reconfigured as needed, if required, the data - as currently presented - may be printed as an Employee Hired/Terminated Report by Clicking the Print Icon.
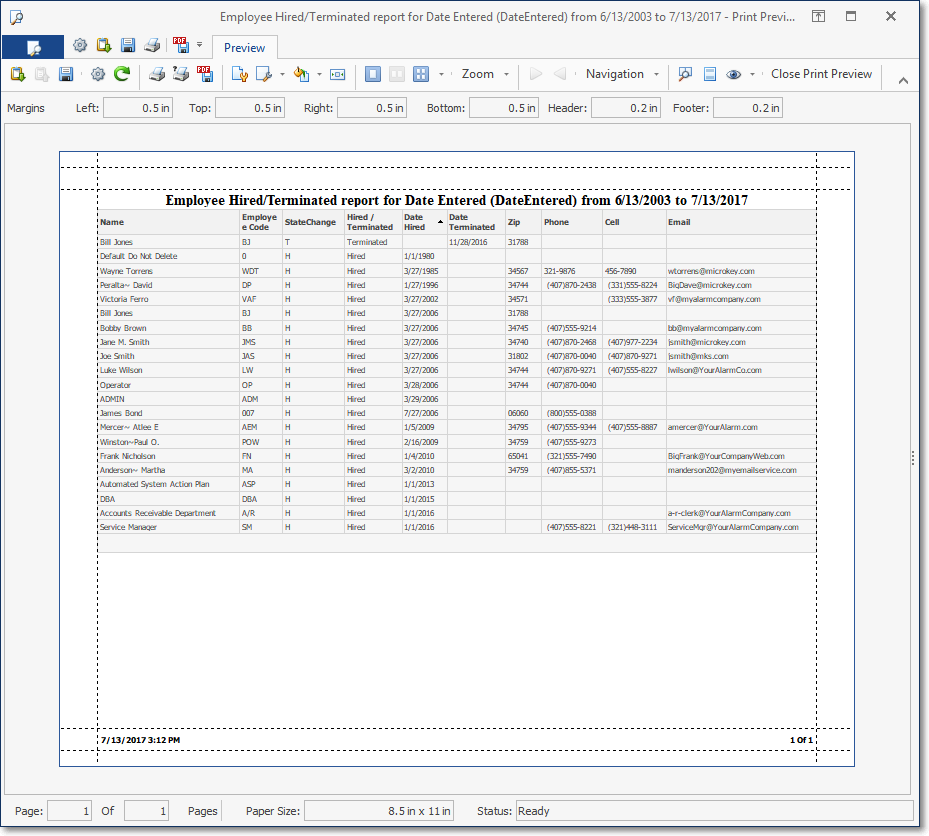
Employee Hire/Terminated (Employee Trace) - Print Preview
▪See the Print Preview chapter for more information.
✓Export - Once the data has been formatted, filtered, sorted and configured as needed, a copy of this report data may also be Exported, if required.
✓EMail - Once the data has been formatted, filtered, sorted and configured as needed, Click the EMail Icon to send this data as a PDF attachment to an Email address of your choosing.
❑Choosing, Arranging and Filtering the Data Columns in the Employee Trace Grid:
•Columns - Select which columns of data are to be displayed:
Employee Trace Grid
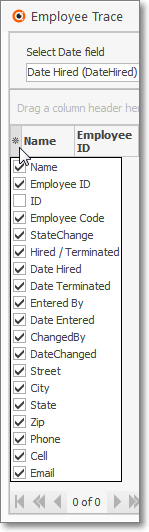
Column Names List
✓Click the asterisk (¬) at the left of the data grid's Header row (see the mouse pointer in the illustration above) to display a list of all of the column names - and associated data - which may be displayed.
✓By default, all Column Names will be Checked.
✓Remove the Check mark (Click on the Check to remove it) to hide that column of data from the data grid.
•Setting the Order in which the data in the grid is Listed within the Employee Trace dialog (Report):
✓The default sorted order of the Employee Trace List is based on the Employee's Name - which is ordered from lowest to highest (A - Z).
✓Thereafter, the column that determines the sorted order of the List may be easily changed, whenever needed.
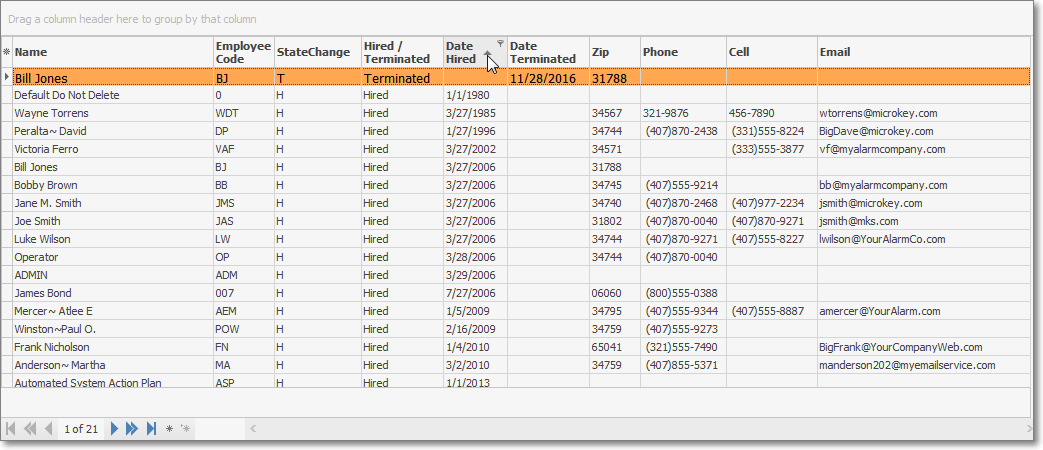
Employee Hire/Terminated (Employee Trace) - sorted by Date Hired
✓To do so:
▪Click another column's Header Name (the mouse points to the sorting arrow within the Date Hired Header Name in the illustration above) to change the sorted order to by on that column of data, with the sorted order automatically set from lowest to highest (a-z or 1 - 9).
▪To change this newly selected column's sorted order from highest to lowest, Click that column's Header Name again.
▪An Arrow next to the Header Name indicates the column that is determining the sorted order of the Grid Data.
o~ indicates lowest to highest (a-z or 1 - 9)
o€ indicates highest to lowest (z-a or 9-1).
•Grouping the Grid Data - The data grid may be separated into Groups based on a selected column's Header Name.
✓To do so: Drag & Drop a Header Name to the Drag a column here to group a column area above the data grid's Header.
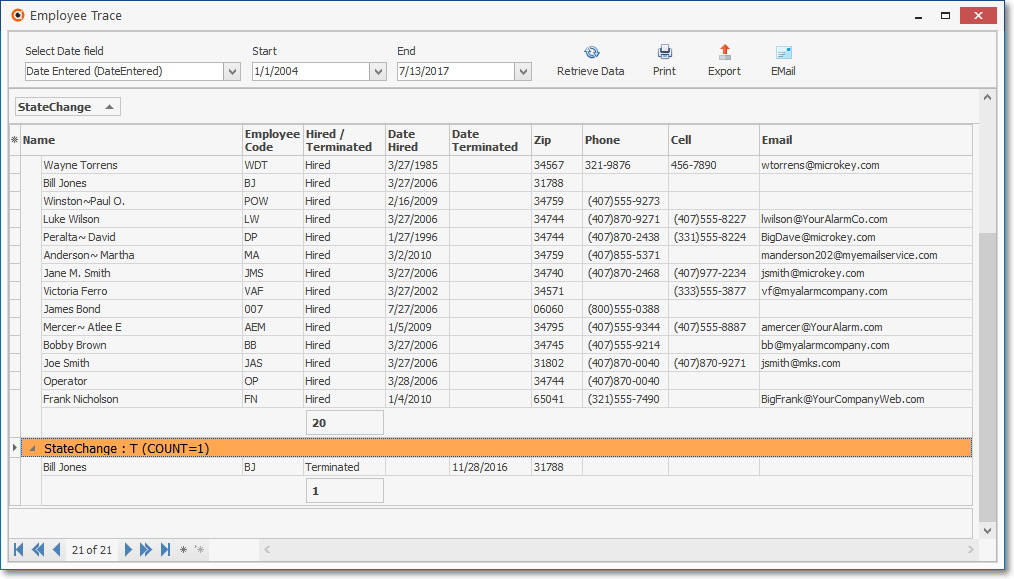
Employee Hire/Terminated (Employee Trace) - grouped by State Change
▪All the rows associated with the selected Header Name will be Grouped together, followed by the next Header Name and its associated rows, etc.
✓To cancel the Grouping, just Drag & Drop the selected Header Name back to the Header itself.
▪If this Employee Trace data grid is closed when Grouping is still in effect, once reopened, the previously established Grouping will still be in effect.
❖See the Grids & Lists - Print Preview - Export Data chapter for complete information on using those additional Sort, Filter, Print and Export options.