❑Closing a Month means that you are telling MKMS to no longer accept Financial Transactions within the Accounts Payable module - whether they be additions, changes, and/or corrections - that are dated on or before the month closing date (which is automatically set as the last day of that Month).
a.It is standard business accounting practice to close a month soon after it has ended, from 15 - 30 days at the most, from the end of that month.
b.Because you still will have access to the Credit Bill and Void Payment processes, any Financial Transactions that must be reversed at a later time are easily done with these two available methods, so there is really no reason not to close a month.
c.Closing a Month will also prevent anyone from accidentally entering the wrong (older) date.
d.The problem which could occur when months are not closed is that a User could go back and make a (fraudulent) entry that you might never see - providing an easy avenue for possible embezzlement.
e.Closing a Month is the only Accounts Payable module control available (when the General Ledger System is not in use) that will prevent someone from accidentally (or deliberately) entering the wrong (older) date when entering a Financial Transaction (e.g., Bill, Payment) in the Accounts Payable System.
•At least one Employee must be authorized to view a Accounting Administrator
✓The Accounting Administrator authority is granted to a User by Checking the Accounting Administrator? box in the Security tab of the Employee Form
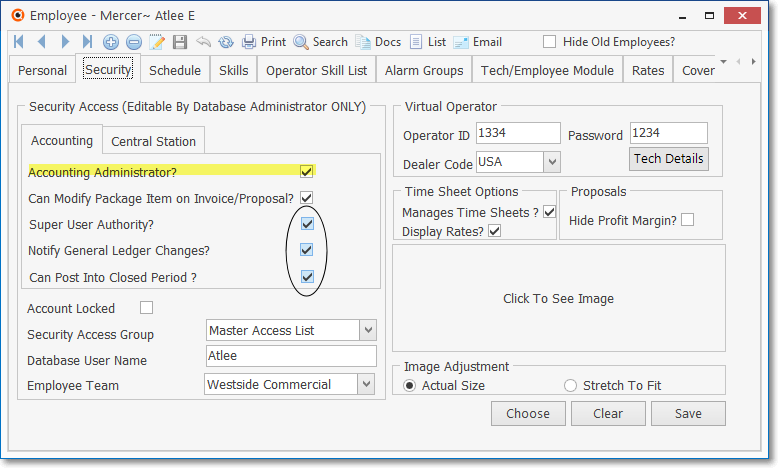
Employee Form - Security tab - Super User, Notify General Ledger Changes, Can Post Into Closed Period Check boxes
✓In that Security tab of the Employee Form, that User may (and often will):
a)Be identified as an Accounting Administrator by Checking the Accounting Administrator? box .
b)Be classified as a Super User by Checking the Super User Authority? box.
c)Be Notified of General Ledger Changes by Checking the Notify General Ledger Changes? box (only available when the General Ledger System has been activated).
d)Be permitted to Post into a Closed Period by Checking the Can Post Into Closed Period? box.
❑About the Month Closing Process as it relates to General Ledger System Users (When the General Ledger System has or has not been Registered and the GL Startup Wizard has not been completed):
1.This Month Closing Process is only required when the General Ledger System is not active (i.e., the General Ledger Setup Wizard has not been successfully executed).
2.When the General Ledger System is active, this Month Close menu option will not be available.
3.Instead, Closing an Accounting Period (a specified Month) in the General Ledger System will also Close that Month in the Accounts Payable System
4.By doing so, it will prevent Financial Transactions from being posted with a Date prior to a General Ledger Closed Period in all other financially oriented modules (i.e., Accounts Receivable, Accounts Payable, Inventory Tracking).
❑Your End of Month Procedures - The steps outlined below cover what normally should be done when an accounting period has been completed in the Accounts Payable System.
•This closing procedure should be executed shortly after the month actually ends (certainly within 15 days or so) to prevent Financial Transactions from being accidentally posted to the wrong month.
✓When you "close a specified month" you are locking that month - freezing it results - so the reports covering the Financial Transactions that occurred within that month will forever be the same, regardless of when they are printed in the future.
✓If you didn't close a month, the reports for that month could be ever-changing documents because there would be no restrictions on entering any new any Financial Transactions for that month.
❑If this is the first time you will Close a Month in the Accounts Payable System,
•Identify the oldest Date of any Transaction that you entered as you Established Starting Balances for your Vendors.
•Have Micro Key's Technical Support service remotely set your Accounts Payable Month Closed Date to the month prior to the oldest transaction that you've entered (if you don't do this, you will have to close more than a decade of months until you actually get to the month that really needs to be closed).
❑Accounts Payable module Close Month procedure Overview:
•Prepare the Month for Closing:
✓Enter all Bills received on or before the date of the end of the month that's being closed - that month's closing date - being sure to match the Purchase Date on the actual Bill with what is entered in the Bills Form in the Accounts Payable System.
✓Make all the Disbursements you intend to make before the end of the month that's being closed, particularly if those Payments will be Due on or before that month closing date.
✓Using the Unallocated Payments and Credits Report as a guide, ensure that all Payments that are not Deposits for a future Purchase, are Allocated to the appropriate Bills
✓Print the Checks for those Payments (you cannot close a month which has (Auto Check) Payments entered, but not yet printed).
✓Calculate the Sales Taxes Owed (see the instructions in that chapter)
•View and/or Print Month End Reports - Remember, this is your chance to start going Paperless. After you've completed the steps above:
✓View or Print the Accounts Payable Report for All Accounts for that (As Of) month's closing date.
✓View or Print your Purchases Analysis Report - This and most other reports may be Viewed and/or Printed at any time in the future with the same information - based on your report option tab's selections, so unless you have a very specific reason to actually "Print" it, don't.
✓Print all Unprinted Checks.
✓View or Print the Check Register for each Bank
✓View or Print the Taxes Billed Report to Confirm that you have appropriately paid Sales Tax on all applicable Purchases.
✓Review any other Accounts Payable Related Reports appropriate for your business needs.
❑Calculate the Sales Taxes Owed - One of more of these Reports will be needed for calculating Sales Taxes that are Owed to the the governing State, Local, and/or Federal Taxing Authority (which is usually the responsibility of the Accounts Payable Department)
•Prepare for your Company's Sales Tax Reporting and Sales Tax Payment requirements using the appropriate Accounts Receivable System Report(s)
a.Sales Taxes Collected Report - Used when your Company must Remit the required Sales Tax on an "As Collected" basis (i.e., based on the actual Receipt for that Sale).
b.Sales Taxes Invoiced Report - Used when your Company must Remit the required Sales Tax on an "As Billed" basis (i.e., based on a Sale being Invoiced - regardless of whether or not is was ever Paid).
c.Sales Tax Breakdown Report - Provides the detailed information required for those Sales Taxing Authorities that have multiple Local Option Sales Tax Rates (see the "Assessing Multiple Sales Tax Rates" discussion in the Sales Tax Rates chapter for more information).
•Accounts Payable module steps to Remit the required Sales Tax:
a.Create a Vendor for each of the Departments of Revenue (each Taxing Authority) to which your Company must remit Sales Tax.
b.Determine whether your Company will Remit Sales Taxes based on Invoices or Receipts.
c.Print the report that will Calculate the Sales Tax in the way that your Company is required to remit that Sales Tax to each Taxing Authority by using either the Sales Taxes Collected Report or Sales Taxes Invoiced Report.
d.Create a Bill for the Amount of Sales Tax that is due to be Paid to each Taxing Authority
e.Create a Payment for each of those Sales Tax Bills.
f.Print the Checks and mail them in a timely manner, and with the required reporting documentation.
❑Close the Month
•Perform the Closing Month procedure:
a)From the Backstage Menu System Select File then Choose Payable, or
b)From the Quick Access Menu, Select File then Choose Payable
✓The Period Close dialog will be presented.
•When the General Ledger System is not active, the Period Close dialog will appear and function as illustrated and described below:
❖Also see the "When the General Ledger System is active" discussion at the end of this chapter.
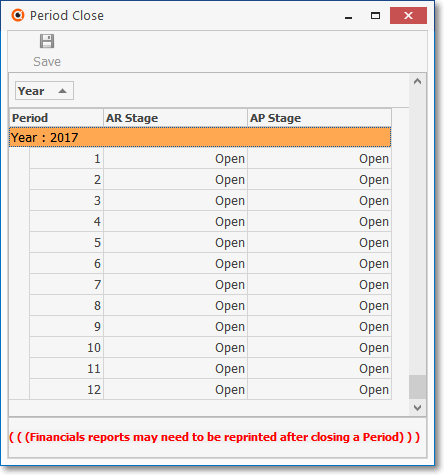
Period Close dialog only available if the General Ledger is not Active
✓AP Stage - Locate the Period Number to be Closed
▪Use the Drop-Down Selection List to Choose the AP Stage which is to be set.
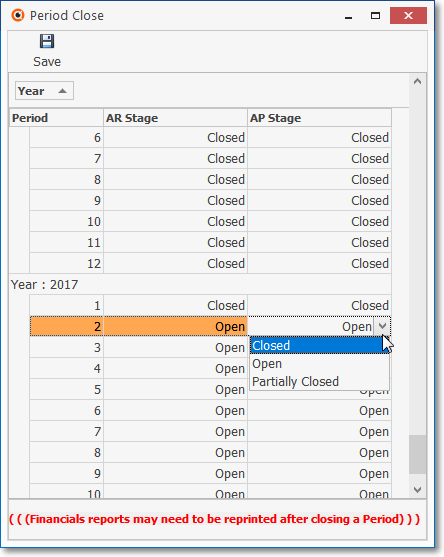
Period Close dialog - AP Stage options
a.Closed - This Closing Stage restricts all posting to and from all modules
▪This Stage may be changed to Partially Closed, or Open, if necessary; or remain as Closed.
b.Open - This is the default Closing Stage and allows posting to and from all modules.
c.Partially Closed - This Closing Stage temporarily restricts all posting to and from all modules.
▪This Stage may be changed back to Closed, or Open, if necessary.
➢Note: When closing a month for the first time, you will have to step through this process many times until you get to the month you actually want to close.
You may contact Tech Support and ask them to modify the Last Closed Date (within MKMS) to match the Date that was previously Closed in the previously used software.
Thereafter, MKMS will present the correct month to be closed next.
• Click the ![]() Icon to identify this Period as Closed.
Icon to identify this Period as Closed.
✓You are finished Closing The Month in AP .
•Thereafter, if attempting to make an entry in the Accounts Payable System dated within a Closed Period, an Information message will be displayed reminding you that the Accounting Period is Closed.;
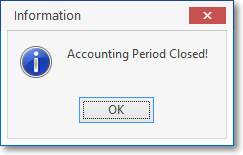
Accounting Period Closed!
❑When the General Ledger System is active, the Period Close dialog will appear and function as illustrated and described below:
•Period To Close - Locate the Period Number to be Closed
•Stage - Select the AP Close option.
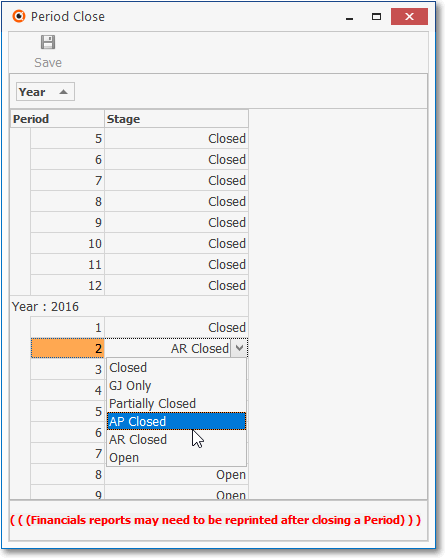
Period Close dialog - available when the General Ledger is Active
•Save - Click the ![]() Icon to identify this Period as Closed.
Icon to identify this Period as Closed.