❑Running an Automatic Billing Process
•MKMS provides two way of running an automatic recurring billing process to generate Recurring Revenue Invoices for each defined Billing Cycle
1.Automatic Billing Setup (Set it and Forget it)
a.The Fully Automated Recurring Billing process will run every day and generate the billing for all Billing Cycles with a “Billing Day” set to the same day of the month for which this process is running.
b.Automatic billing can be set to run a few days before the actual billing day. For example, you can generate the billing for the 1st of each month 5 day before the 1st, giving you time to validate your billing
c.If the Billing Cycle is set (Checked) for Auto Draft, the Fully Automated Recurring Billing process will also generate the Payment Batch file for those Invoices generated for each Billing Cycle, which is needed when you have an Automatic Payment Processor established.
d.Even when the Fully Automated Recurring Billing process is run a few days before the billing day (established by the Day Prior to Cycle Start in Company Setting), the Payments for those Recurring Revenue Invoices will not be processed until the actual Due Date for those Invoices.
2.Manual Billing using the Auto Billing Form
a.If the Fully Automated Recurring Billing process is not used, MKMS also provides a Form for Generating the Billing (Recurring Revenue Invoices) for any selected Billing Cycle (One Cycle at a time).
b.This process will also generate the Payment Batch if the Billing Cycle is set (Checked) for Auto Draft and you are using an automatic Payment Processor
❖The Fully Automated Recurring Billing and the Manual Billing using the Auto Billing Form may both be used when appropriate for your Company. (e.g., a specific Billing Cycle is to be billed manually using the Auto Billing Form based on a specific condition or business requirement.
❑Features of the Fully Automated Recurring Billing process:
a)It will run automatically, Generating Recurring Revenue Invoices each morning at 4:00am [this requires that the Automatic Billing Setup Wizard be run to set the “AutoBillingOn” option in Company Setting to True (‘T’)]
b)Selects only those Accounts (Subscribers) who have Recurring Revenue billing records with a Billing Cycle Billing Day matching the day number of the current Date ("Today" at 4:00am).
c)Recurring Revenue Invoices may be created in advance of the Invoice's Sale Date [this requires the “DayPriorToCylceStart”option in Company Setting be set to the appropriate Value (= the Number of Days to be billed In Advance)] - This requires that the Automatic Billing Setup Wizard be run to set the “DayPriorToCylceStart”option in Company Setting to the appropriate Number of Days.
d)The generation of Recurring Revenue Invoices respects the Separate RMR Invoice option to specifically generate a separate Invoice for designated Service Accounts
e)Includes any unbilled Suspended Invoicing charges on the Recurring Revenue Invoices
f)Generates Late Fees during the Automated Recurring Billing process [this feature requires the “GenerateLateFees” option in Company Setting be set to True (‘T’)]
g)Supports the grouping of Detail Line Items on the Recurring Revenue Invoices (this feature requires the definition of Invoicing Groups and the assignment of an Invoice Group to the appropriate Recurring Revenue records)
h)If the Auto Draft box is Checked on a Billing Cycle record the automatic billing process will also generate the Payment Batch file for the Invoices generated for those Billing Cycles, generates and submits those Auto Draft Payment Transactions to the Payment Gateway (InnoEPay is the recommended Payment Gateway but also supports the Authorize.net and Forte.net Payment Gateways) any of which requires that 1) that a Company's Payment Gateway account has been setup, 2) the “ePayAPI" option in Company Setting is set to True (‘T’), and 3) the MKSePayService is running].
i)In addition to InnoEPay, other Automatic Payment Gateways: (Authorize.net and Forte.net) are also supported.
j)Generates Receipt records for each of the Approved Batch Payment Transactions when acknowledged by InnoEPay (or your Company's selected Automatic Payment Gateway).
k)Allocates those Receipts to the appropriate Recurring Revenue Invoices
l)Generates e-mail notifications for Invoices to customers (The emailing of the Invoice notification - using the MKS Connect Service - during the Fully Automated Recurring Billing process is activated in Company Setting by setting the "email_invoice_notification" to True ("T") and the Subscriber must have a valid Email address. Requires that all SMTP settings be properly entered.).
m)Generates e-mail notification for Receipts (The emailing of the Receipt notification - using the MKS Connect Service - during the Fully Automated Recurring Billing process is activated in Company Setting by setting the "email_receipt_notification" to True ("T") and the Subscriber must have a valid Email address. Requires that all SMTP settings be properly entered.).
n)Generates an e-mail notification to the designated Employee if the Fully Automated Recurring Billing process fails.
▪By default, thie AutoBillingNotificationEmail option in Company Settings is blank.
▪This option stores the Email address of the Employee who is to be notified if (when) the Fully Automated Recurring Billing process has failed.
▪If an Email address is not entered for the AutoBillingNotificationEmail Company Setting option, no Failure Notification can occur.
•See the Fully Automated Recurring Billing chapter for more information.
❑Overview of the Set-Up for the Fully Automated Recurring Billing process:
•The Auto Billing Setup Wizard allows an authorized User to establish the rules which are to be implemented when using this totally automated billing process.
➢Note: Before running this Auto Billing Setup Wizard, the Billing Cycles entries should be updated following the instructions in that chapter!
The Auto Billing Setup option is only visible when the Auto Billing Setup Wizard has not been successfully run.
The value of the "AutoBillingOn" option is initially set to False ("F") in Company Settings which makes this option visible.
•To open the Auto Billing Setup Wizard:
a)From the Backstage Menu System Select File and Choose Receivable and Select the Auto Billing Setup option, or
b)From the Quick Access Menu, Select File and Choose Receivable and Select the Auto Billing Setup option.
✓Immediately after selecting this Automatic Billing Startup option, and Before continuing, you are notified that Activating "Automatic Billing" [Fully Automated Recurring Billing (set it and forget it)] process will disable the manual "Auto Bill" process for any Billing Cycles set as "Auto Bill" (see Auto Bill in the Billing Cycles for more information)
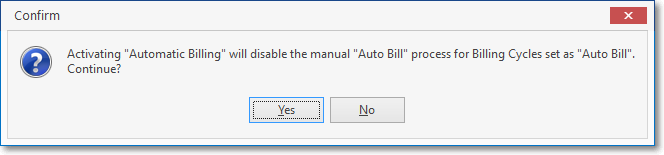
Activating "Automatic Billing" will disable the manual "Auto Bill" process for Billing Cycles set as "Auto Bill"
▪Select Yes to continue.
✓The Automatic Billing Setup Wizard dialog will be displayed.
❑Using the Auto Billing Setup Wizard
•Automatic Billing Startup - This setup wizard will ensure that all of the components that are necessary to run the Fully Automated Recurring Billing (set it and forget it) process are properly setup.
✓Click the Next button to proceed with the setup.
Automatic Billing Setup - Automatic Billing Start up dialog
•Billing Cycles - Mark the Billing Cycles that are going to be processed automatically.
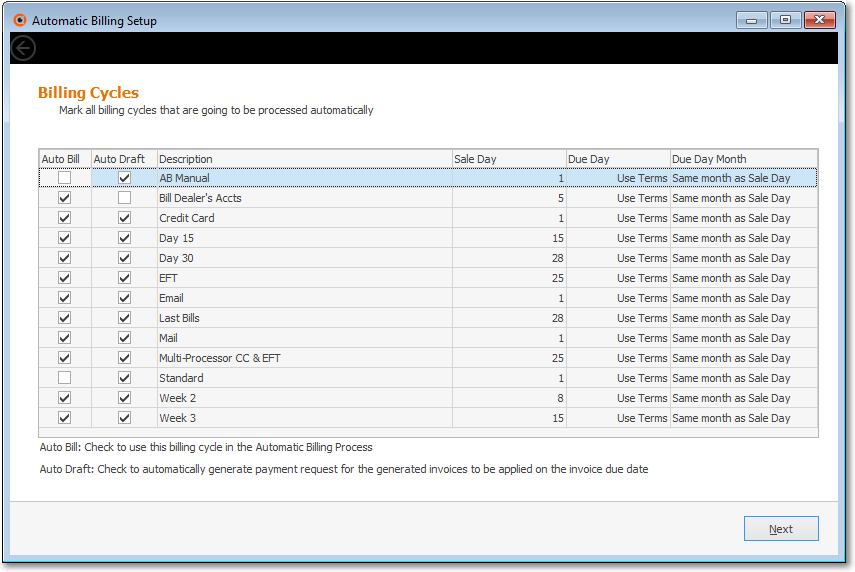
Automatic Billing Setup - Billing Cycles setup
➢Note: You may want to read the Understanding How and Why the Auto Draft and Auto Bill options are used on the Billing Cycles Form in that chapter for a better understanding of these options:
✓Auto Bill - Check to use this billing cycle in the Automatic Billing Process.
a)Billing Cycles that are Checked will be Invoiced by the Fully Automated Recurring Billing procedure.
b)Billing Cycles that are not Checked must be manually selected during a Manual Auto Billing process
✓Auto Draft - Check to automatically generate a payment request for the generated invoices to be applied to the invoice due date.
c)Billing Cycles that are Checked will have a Payment Transaction added to a Payment Batch file during the Fully Automated Recurring Billing procedure.
d)Billing Cycles that are not Checked will not, and so those Billing Cycles will need to use the Post Auto Draft process to create the required Payment Transactions in a Payment Batch file .
oAlso, see the Payment Batch / File Generation chapter for more information.
✓Click the Next button accept this entry and to continue with the setup.
•Date and Days in Advance - Set automatic billing start date.
✓Read this dialog carefully.
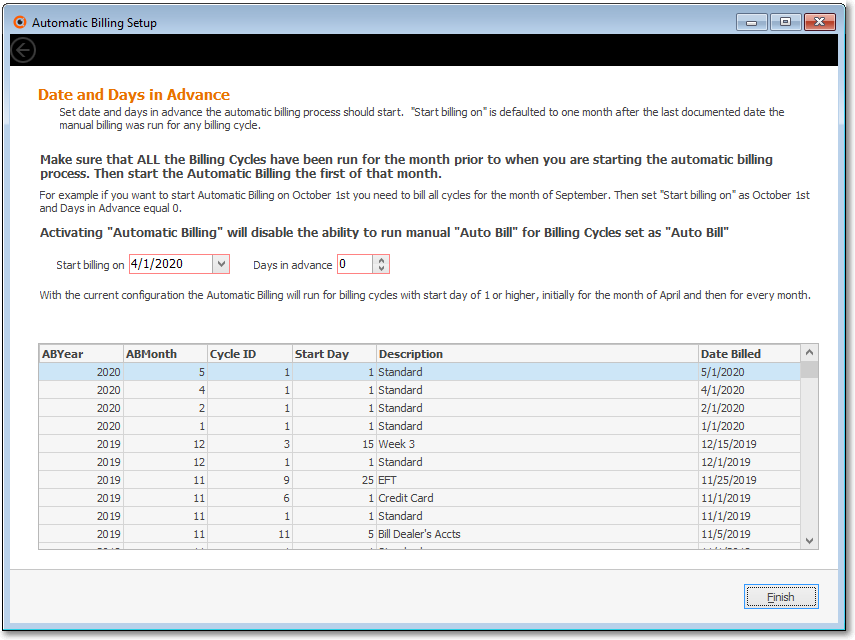
Automatic Billing Setup - Date dialog
Make sure that ALL Billing Cycles have been run for the month prior to when you are starting the (fully) automatic billing process.
Then start the Automatic Billing the first day of that month.
Activating "Automatic Billing" will disable the ability to run manual "Auto Bill"
✓Start billing on - By default, the date displayed in the Start billing on Drop-Down Date/Calendar field is the last date on which a Manual Auto Billing process was performed.
▪If the manual billing process has never been run, the date displayed will be the last day of the month prior to the current month.
✓Days in Advance - Set how many days in advance the automatic billing process should start.
▪By default, the billing process is run based on the Billing Day defined in the Billing Cycle record that is assigned to the Recurring Revenue record.
▪If no Manual Auto Billing process has been executed, the default value will be zero ("0") but this may be changed based on your Company's business model.
▪The selected value is set in the "DayPriorToCycleStart" option in Company Settings.
▪Setting the # of days -
oAs an example: If an Account's Billing Date is the first day of the month (for a specific Recurring Revenue record) and you want to bill Accounts 5 days in advance:
oSet the # of days value to "5" (it must be a positive number, or set to Zero).
✓Finish - Click the Finish button then Confirm or Reject the acceptance of the entries you've made in the Auto Billing Setup Form.
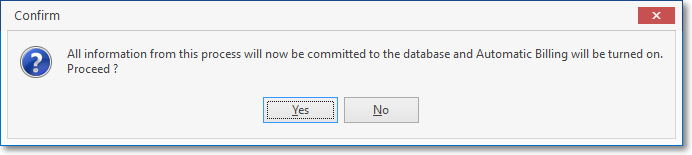
e)Yes - Accept these entries and exit the Auto Billing Setup Wizard to close the Auto Billing Setup Form and set these values.
oThe "AutoBillingOn" option is set to True ("T") in Company Settings.
oThe "DayPriorToCycleStart" option is set to the value of this # of days in Company Settings
b)No - Reject these entries and exit the Auto Billing Setup Form if you are not satisfied with these entries (of were just "practicing").
oThe "AutoBillingOn" option is set to False ("F") in Company Settings.
oThe "DayPriorToCycleStart" option is set to zero # of days in Company Settings