❑Viewing the contents of the Transaction File dialog is like looking under the hood of your favorite race car to see it's magnificent engine.
•The General Ledger System stores its inner workings, the detail of every Financial Transaction that occurred anywhere within MKMS, in the Transaction File table.
✓This list of Financial Transactions is contained within a Grid and so possesses all of the sorting, filtering, rearrangement and content functions normally available in a Grid.
✓See the Grids & Lists - Print Preview - Export Data chapter for complete information on using these functions.
•The Transaction File dialog is designed to provide easy access to all of this complicated, detailed Financial Transaction information - but in a way that makes these General Ledger Transactions understandable.
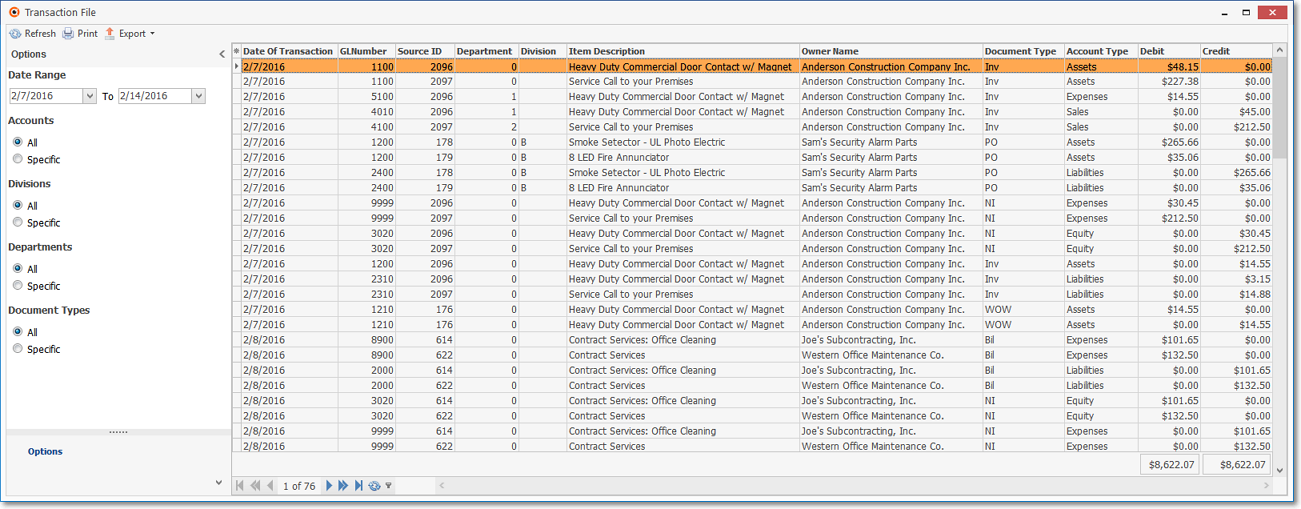
❑This Transaction File dialog provides a List of every Debit and Credit Financial Transaction that was posted to the General Ledger System - within a User Specified Date Range.
•There is a lot of information in this Transaction File, because this information shows exactly how every Financial Transaction was recorded in every Account.
•To access the Transaction File dialog use either of these two methods:
a)From the Backstage Menu System Select File and Choose the General Ledger Menu, then Click the Transaction File option, or
b)From the Quick Access Menu, Select File and Choose the General Ledger Menu, then Click the Transaction File option.
Transaction File Form
❑The Transaction File dialog contains four main sections:
Transaction File Form - top Ribbon Menu
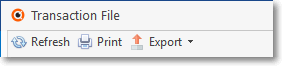
1.Ribbon Menu Icons at the top pf the Transaction File Form - These are used to Refresh the data, Print the displayed data, and Export the displayed data

✓Refresh - Once the Date Range has been chosen:
▪Click the Refresh Icon to update the list of Financial Transactions to match those selected options.

✓Print - To produce a printed copy of what is displayed in Contents of the List (its Financial Transactions):
▪Click the Print Icon to create a printed list of the selected, filtered, and/or reformatted Financial Transactions.
▪See the Grids & Lists - Print Preview - Exporting Data chapter for instructions on how to use this Print Preview dialog.
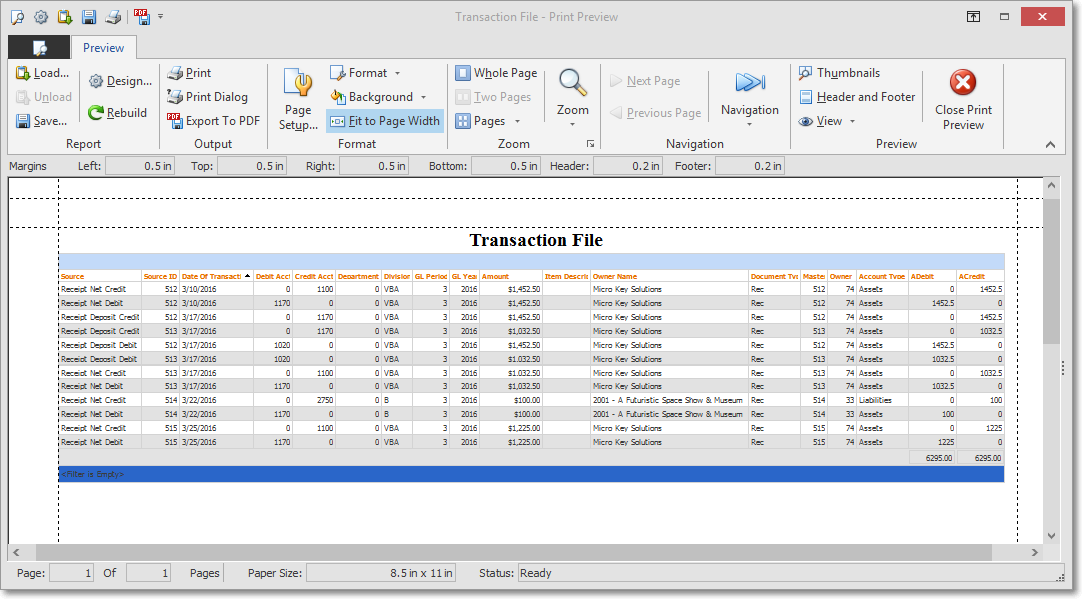
Transaction File dialog - Print Preview
✓Export - Click the Down-Arrow ‚ on the Export Icon to select the file type that is to be used to create an export file type at the Folder location of your choice.
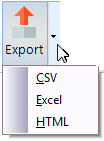
▪Select the file type to be used to create an export file.
▪The standard Windows® Save As dialog will be presented - within which you may Name the file and choose the Folder to which it will be saved.
![]()
Transaction File Form - bottom Ribbon Menu
2.Ribbon Menu Icons at the bottom of the Transaction File Form - These are used for record movement, to Refresh the data, and to create a Filter (see the Grids & Lists - Print Preview - Exporting Data and the Filter Builder Dialog chapters for more information).
3.Options - These Options allow the User to identify what is to be included in the Transaction File listing and any combination of these Options may be used to create the required list:
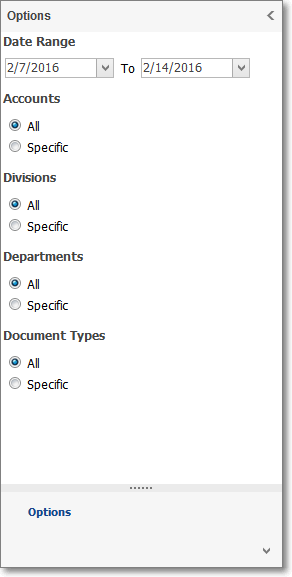
Transaction File Form - Options section
a.Date Range - Using the Drop-Down Date Selection Boxes provided, Select the starting and ending Dates representing the Date Range of the Financial Transactions that are to be listed.
b.Accounts - By default, all General Ledger Accounts with Financial Transactions (created within the specified Date Range) will be included
➢To limit the Financial Transactions in the Transaction File listing to only those Financial Transactions posted to a specific set of one or more General Ledger Accounts:
i.Select a Specific button and then Click the Ellipse on the right of the associated (General Ledger Accounts) field field to open the Select Account dialog.
ii.Enter a Check Mark by Clicking on the Selected box of each General Ledger Account that is be included in the Transaction File listing.
iii.Click the OK to insert those selected Account(s) into the General Ledger Accounts field.
➢Note: As a result of of which Accounts are actually selected, the Totals listed at the bottom of the Transaction File listing may (probably will) be Out of Balance.
c.Divisions - By default, all Financial Transactions with or without a Division Code assigned (created within the specified Date Range) will be included
➢To limit the Financial Transactions in the Transaction File listing to only those Financial Transactions with a specific set of one or more Division Code(s) assigned:
i.Select a Specific button and then Click the Ellipse on the right of the associated (Division) field to open the Select Division dialog.
ii.Enter a Check Mark by Clicking on the Selected box of each Division Code that is be included in the Transaction File listing.
iii.Click the OK to insert those selected Code(s) into the Division Code field.
➢Note: As a result of of which Division Code(s) are actually selected, the Totals listed at the bottom of the Transaction File listing may (probably will) be Out of Balance.
d.Departments - By default, all Financial Transactions with or without a Department Number assigned (created within the specified Date Range) will be included
➢To limit the Financial Transactions in the Transaction File listing to only those Financial Transactions with a specific set of one or more Department Number(s) assigned:
i.Select a Specific button and then Click the Ellipse on the right of the associated (Department) field to open the Select Department dialog.
ii.Enter a Check Mark by Clicking on the Selected box of each Department that is be included in the Transaction File listing.
iii.Click the OK to insert those selected Department Number(s) of the selected Departments into the Department field.
➢Note: As a result of of which Department Number(s) are actually selected, the Totals listed at the bottom of the Transaction File listing may (probably will) be Out of Balance.
e.Document Types - By default, all Financial Transactions - regardless of their Document Type (e.g., Inv, PO, BF, GJ) - will be included in this Transaction File listing.
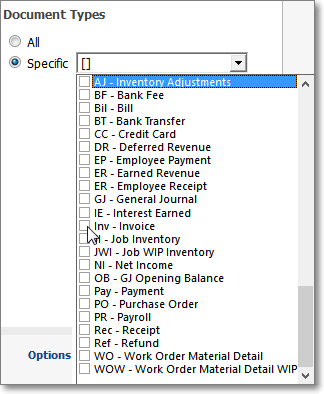
Transaction File Form - Options - Document Types list
➢To limit the Financial Transactions in the Transaction File listing to only those Financial Transactions with a specific set of one or more Document Types:
i.Select a Specific button and then Click the Drop-Down Selection Check List of Document Types.
ii.Check the box of each Document Type that is be included in the Transaction File listing.
iii.Tap the Esc (Escape Key) to insert those selected Document Types into the Document Types field.
➢Note: As a result of of which Document Types are actually selected, the Totals listed at the bottom of the Transaction File listing may (probably will) be Out of Balance.
✓Refresh - Click the Refresh Icon locate on the top Ribbon Menu to update the contents of the Transaction File listing based on the current set of selected Options.
4.Transaction List (the grid containing the selected and filtered Financial Transactions) - It is a very detailed listing (based on the user specified Date Range) of those Financial Transactions.
✓The Column Header Names and the associated data may be relocated using the standard Windows® Drag & Drop method.
▪Once relocated by a User, the new location of the Column Header Names is saved as the default location for this User.
✓The Debit and Credit Amounts are Totaled at the bottom of the Transaction File listing
✓The User may select the Visible Fields Icon (â) to Choose which Fields (columns of data) will be Visible (displayed).
▪Also see the "Defining what is to be Displayed in the Transaction File Listing" discussion immediately below.
❑Defining what is to be Displayed in the Transaction File Listing:
•Visible Fields - Click the Asterisk to the left of the Header Names to display the Select Fields Drop-Down Check Boxes Listing Of Fields
✓Check which Fields that are should be Visible (columns of data that will be displayed).
▪By default, all Field Names will be Checked.
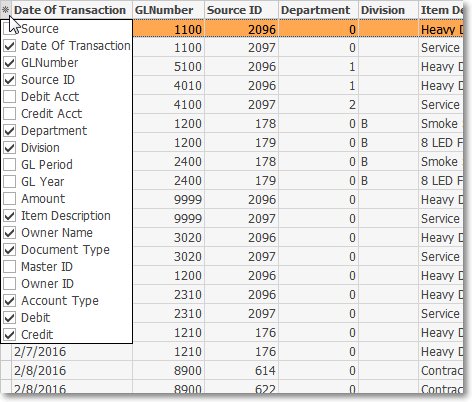
Transaction File Form - Select Fields - Check Box Listing
▪Un-Check any Field Name(s) which are not required.
▪The Header Names will appear/disappear as Checked or Un-Checked.
oThis set of Checked Header Names and the Fields they represent will become the new default set of Fields that will be displayed.
oThis set of Fields may be redefined at any time, as needed.
•Header Names - These are the Header Names and the specific Data Field they represent in the Transaction File Grid.
1.Date of Transaction - This is what it says: the Date entered on the Form from which this transaction was initiated
2.Source - This is an abbreviated phrase which starts the the type of Form (e.g., Bill, Job, PO, Invoice) that originated the transactions, followed by an explanation of this transaction (e.g., Inventory Debit, Local Sales Tax, Deposit Debit)
3.GL Number - The General Ledger Account Number assigned to this Financial Transaction line item
4.Source ID - This is the record number of the Form from which this transaction was initiated
5.Debit Acct - If this is a Debit transaction, the General Ledger Account Number to which the transaction Amount was posted
6.Credit Acct - If this is a Credit transaction, the General Ledger Account Number to which the transaction Amount was posted
7.Department - The Department (number) ID
8.Division - The Division (characters) ID
9.GL Period - The Accounting Period within the Fiscal Year in which this transaction was posted
10.GL Year - The Fiscal Year in which this transaction was posted
11.Amount - The Value of this transaction
12.Item Description - The description entered on the associated Bill or Invoice
13.Owner Name - The Subscriber, Vendor, or other originator associated with this transaction.
14.Document Type - A two or three character abbreviation (e.g., Inv, Rec, NI, GJ) of the Form associated with this transaction
15.Master ID - The Record ID of the Form associated with this transaction
16.Owner ID - The Record ID of the Subscriber, Vendor, or other originator associated with this transaction.
17.Account Type - The Primary Account Division (i.e., Asset, Liability, Equity, Sale, Expense) to which this transaction was posted
18.Debit - The Value of the Debit transaction (if this is a Debit entry)
19.Credit - The Value of the Credit transaction (if this is a Credit entry)
•Accessing the Originating Document - The originating Form (e.g., Invoice, Bill, Receipt, Payment, Purchase Order) for most of the Listed Financial Transactions may be quickly displayed.
a)Select the appropriate Financial Transaction's line item
b)Double-Click anywhere on this line item to open the associated Form from which the Selected Financial Transaction was created.
c)The desired Form will be displayed in a Read Only mode.
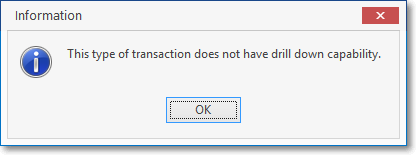
✓Not all Document Types may be displayed in this manner so if you Double-Click on a Financial Transaction's line item which cannot access the originating Form, an information message will be displayed.