❑Paying Bills may not the most enjoyable job that you have to do (virtually every day in some Companies), but by using the Accounts Payable module, at least it is a relatively easy task.
•There are two ways to Pay Bills:
1.Use the Payments Form to enter the Amount you wish to pay to a specific Vendor and then Allocate that Amount to specific Bill(s).
2.Use the Disbursements Form - discussed below - to globally review all outstanding Invoices and simply Check off the Bill(s) you want to pay - which executes both the Payments and the Allocation process in one step.
✓In either case, the final step will be to Print Checks.
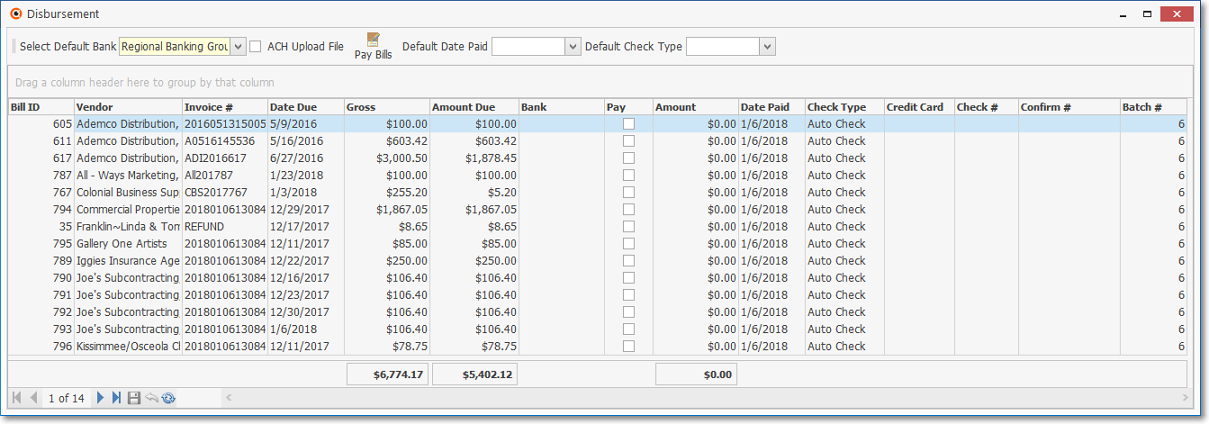
•Use this Disbursements Form to View a List of all outstanding Bills (displayed in a Grid format):
✓In addition to listing all of the outstanding Bills and any Refunds that are to be paid, the Disbursements Form allows the User to easily Choose:
a)The Bank from which the Checks will be drawn;
b)The Check Type;
c)Which Bills will be Paid;
d)The Payment Amount that should be Paid on each;
e)The Date on which the Payment Amount is to be recorded;
f)The Payment Option for how each Bill will be Paid (i.,e., Auto Pay, E-Pay, Credit Card);
g)The Batch Number to be assigned to each Payment.
✓All of these Payment Options may be used during the same Disbursements process.
❑Opening the Disbursements Form:
•To view the Disbursement Form:
a)From the Backstage Menu System Select File and Choose Payable, or
b)From the Quick Access Menu, Select File and Choose Payable
✓Then, Click the Disbursements option.
Disbursement Form
•Select Default Bank - Using the Drop-Down Selection List provided, Choose the Bank from which these Disbursements should be withdrawn (when using the Auto Pay or Hand Check payment option).
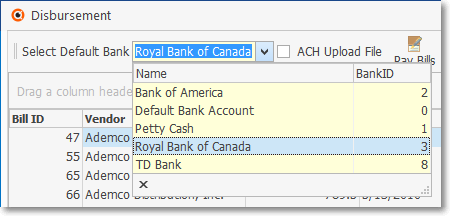
Disbursements Form - Select Default Bank
•ACH Upload File - Check this box, if available (see the Bank Maintenance chapter in the Receivables Maintenance section of these Help Files for additional information about the ACH Upload File option).

Disbursement Form - Header - ACH Upload File option
•Pay Bills Icon - Click the Pay Bills Icon to execute the Bill Payment process (see the "Identifying how and how much is to be Paid on what the Bills" discussion below for those instructions).

Disbursements Form - Pay Bills Icon
•Default Date Paid - By default, this will be Today.
✓Use the provided Drop-Down Calendar/Date Entry field to Choose a different Date, if appropriate.
✓When asked, Confirm that this is the Date which should be used for all of the Payments made during this Disbursements process.
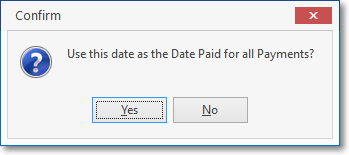
✓Then, follow the "Identifying how and how much is to be Paid on what the Bills" instructions below.
•Default Check Type - The default Check Type (automatically inserted into each Check Type field in that column is Auto Check.
✓Use this Drop-Down Selection List to Choose a different default type of Check (i.e., the payment method: Auto Check, Credit Card, or E-Pay) to be used, or Choose Auto Check.
✓This is a mandatory field and it a Check Type is not selected, an Information message will be displayed.
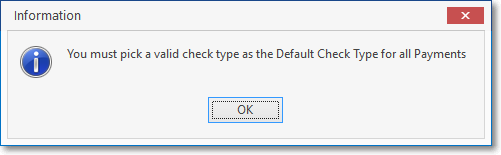
You must pick a valid Default Check Type for all Payments
✓Auto Check - Unless specifically changed, all Disbursements will be identified as an Auto Check and so will be in the queue when the Print Checks procedure is executed.
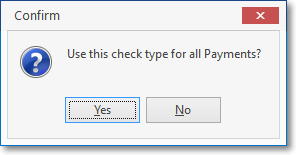
Use this check type for all Payments?
▪Once Auto Pay is selected as the Default Check Type, a confirmation dialog will be presented.
✓Credit Card - If chosen, a Default Credit Card field will be displayed with a Drop-Down Selection List from which to Choose the appropriate default Credit Card.
▪These Credit Card transactions will appear on the associated Credit Card Register.
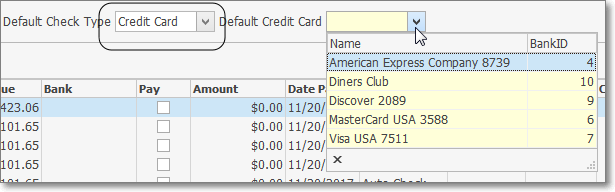
Disbursements Form - Default Check Type: when Credit Card selected, a Default Credit Card is required
▪Once Credit Card is selected as the Default Check Type, and that Credit Card is identified, a confirmation dialog will be presented.
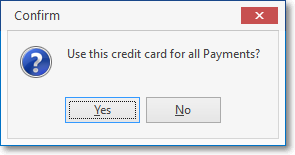
Use this credit card for all Payments?
✓E-Pay - Unless specifically changed, all Disbursements will be identified as an E-Pay Bank Transaction Form and will appear on the Bank Reconciliation Form.
Use this check type for all Payments?
▪Once E-Pay is selected as the Default Check Type, a confirmation dialog will be presented.
•The Outstanding Bills List will display all of your Company's unpaid (or partially paid) Bills.
✓You may re-sort this list by any Header Name such as:
▪Vendor - Click Vendor Column's Header Name to sort the list alphabetically by Vendor Name (the default order which is "a to z").
▪Due Date - Click Due Date Column's Header Name to sort the list based on each Bill's the Due Date, which will be listed from the oldest to the most recent or visa versa, based on how many times you Click the Header Name.
➢Note: You may switch these Header Name orders back and forth as many times as required based upon your viewing needs.
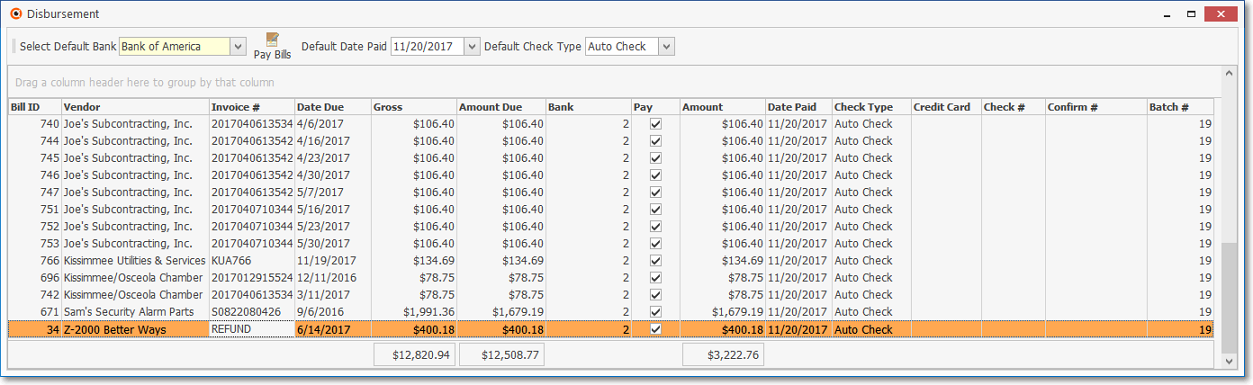
Disbursements Form - List of Bills to Pay - Gross, Amount Due, & Amount (to pay) column totals
•There is a Totals Bar at the bottom of the Outstanding Bills Listing shows the Gross Amount of all listed Bills, the Total Amount Due, and the Amount you have requested to Pay.
❑Identifying how and how much is to be Paid on what the Bills:
•The column Header Names and the associated information which is listed, but cannot be changed:
✓Bill ID - The record number of the Bill
✓Vendor - The Name of the Vendor to whom this Bill is to be Paid.
✓Invoice # - The Vendor's Invoice Number for this Bill.
✓Due Date - The Date on which this Bill should be Paid.
✓Gross - The Total Amount Due of this Bill when it was initially created.
✓Amount Due - The Amount currently Due on this Bill.

Disbursement List with Auto Check, Credit Card and Hand Check Payments requested
•The column Header Names and the associated information which may/will be changed by the User, as needed:
✓Bank - Once the Pay box is Checked (see "Pay" immediately below), the record number of the selected Bank (see the "Select Default Bank" discussion above) is inserted in the Bank column automatically.
▪If the selected Check Type is Credit Card (see the "Check Type" discussion below), this Bank record information will be ignored by the system.
✓Pay - Check the Pay box of all Bills that are to be paid.
✓Amount - By default, the Amount to pay will be the Amount currently Due on this Bill.
▪You may modify an individual Amount (to Pay) to be less than, but not greater than what is listed in the the Amount Due Column, as needed.
▪Shown at the bottom of the Amount column is a continuously updated total Amount to be Paid - which is recalculated as each new item is Checked, and/or when an existing payment Amount is modified.
✓Date Paid - By default, this will be the Default Date Paid entered above
▪However, a specific Payment Date may changed using the provided Drop-Down Calendar/Date Entry field, if appropriate.
✓Check Type - Identify the type of payment method to be used to Pay this Bill.
▪Auto Pay - By default, Auto Pay will be the method used to Pay the selected Bill.
oThis payment will be recorded in the Payments Form for this Vendor.
oThis payment will automatically be Allocated to the selected Bill.
oThis payment will also be reported in the Check Register Report with a Check Type of "A".
oOnce you Print Checks, this payment will also be reported in the Check Register Report with a Check Type of "A".
➢Important Note: When using Auto Pay, it is important to remember that a maximum of 24 items (Bills) may be paid to a Vendor on one Printed Check.
Therefore, when the Auto Pay payment option is selected and you are paying for more than 24 items to that Vendor, remember that two (or more) Checks will be required (and printed) for that Vendor.
Why is this important?
a)Most Companies use pre-printed & pre-numbered Checks,
b)So, it's important to know that you may have one or more Vendors who will be issued more than one Check during the Print Check Process.
c)A simple solution is - in anticipation that more than expected Checks may be printed - to always insert more Checks in the Printer than you think will be printed.
d)You won't have to Void any Checks that accidentally printed on "Plain Paper", and
e)Any excess Checks may simply be returned to stock for later use.
▪Credit Card - To Pay the selected Bill using a Credit Card, Choose the Credit Card option then enter the one that will be used in the Credit Card column using that Drop-Down Selection List provided in that field.
a)This payment will be recorded in the Payments Form for this Vendor.
b)This payment will automatically be Allocated to the selected Bill.
c)This payment will also be listed in the Credit Card Register of the selected Credit Card Vendor.
▪E-Pay - To record an Electronic Funds Transfer Payment which you will pay, or have paid for the selected Bill using an Electronic Funds Transfer, Choose the E-Pay option.
a)This payment will automatically be Allocated to the selected Bill.
b)This payment will be recorded in the Payments Form for this Vendor.
c)This payment will also be reported in the Check Register Report with a Check Type of "E".
▪Hand Check - To Pay (or record that you have paid) the selected Bill using a Hand Written Check, Choose the Hand Check option then enter the Check Number that will be/has been used.
a)This option is only available when you select a specific line item and modify the Check Type field by using the Drop-Down Selection List to select Hand Check.
b)This payment will be recorded in the Payments Form for this Vendor.
c)This payment will automatically be Allocated to the selected Bill.
d)This payment will also be reported in the Check Register Report with a Check Type of "H".
✓Credit Card - If the Credit Card option was selected as the Check Type, use the Drop-Down Selection List provided to Identify that Credit Card.
✓Check # - This field is manually filled in only when the Check Type option of Hand Check is chosen.
▪Otherwise it will be filled in by the system later when the Auto Pay Checks are printed, or remain blank if a Credit Card was used for Payment.
▪When multiple Bills were paid to the same Vendor on the same Check, a memo will be included on the Check Stub indicating exactly which Bills are being paid with that Check.
✓Confirm # - When available, enter this information when appropriate. This will be added to the Payments Form record.
✓Batch # - By default, the Batch Number corresponding to the Default Date Paid (Today) is inserted automatically, even if you subsequently change that Date.
▪Frequently, the Batch Number will be changed because of the following reasons:
a)Your Company's Batch Number assignment methodology is different than the "standard" One Deposit for Each Day which matches that Calendar Day's Number
b)Your Company uses different Batch Numbers each day based on the type of Payment method (i.e., Auto Pay, Hand Check, Credit Card, E-Pay) used.
c)Your Company uses a continuously incremented Batch Number assignment methodology
d)You don't like the number assigned by the system (e.g., "13").
▪Overview - Setting a Batch Number - By default it will be the day number of Today's date. Enter the desired Batch Number.
oIt is best to keep this simple. However:
a.Batch Numbers may be assigned from 1 to 32637 (this limitation is a function of the field type into which you are entering this Batch Number).
b.A new numbering sequence may be started each month (using the current Date's Day number), so the same Batch Number will be used in multiple Months but the Date will be different.
c.In some cases, the same Batch Number may be used for more than one day to group certain of these types of payments together (e.g., Hand Check, Credit Card).
d.Starting from 1 and increment the Batch Number perpetually is another option (if you used 2 Batch Numbers for two separate deposits every day, 5 days a week, it would take over 60 years to use all of the numbers).
e.The down side of incrementing the Batch Number perpetually is that the next number to be used needs to be maintained manually.
f.The recommended method is that each month starts a new sequence so the same Batch Number can be used in multiple Months because, in MKMS, the records for Payments are automatically stored internally by the Date and the Batch Number combined to keep them clearly differentiated.
▪See the Batch Number variations in the illustration below
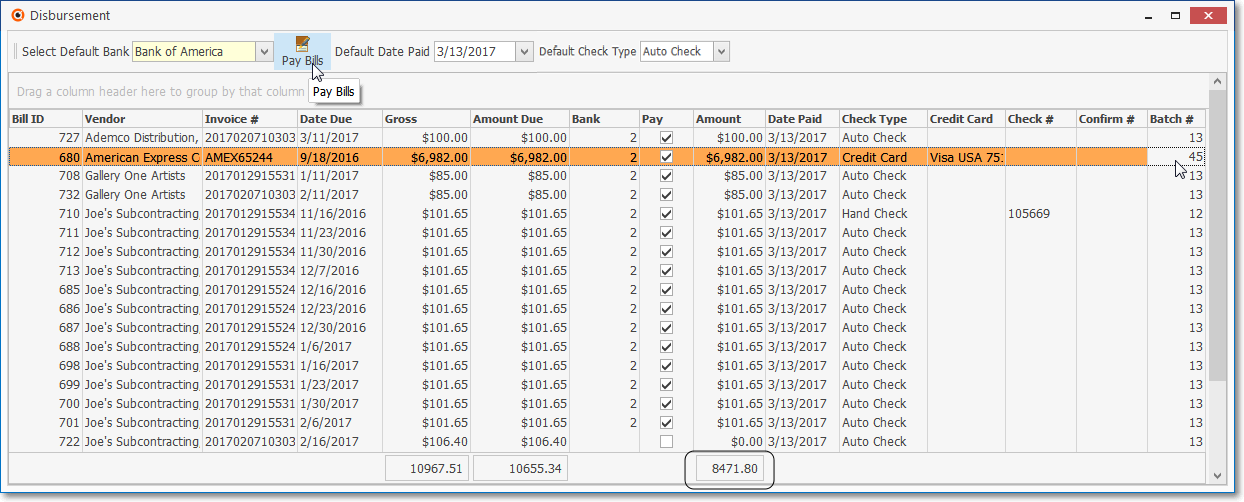
Disbursements Form - Pay Bills Icon - various Check (payment) Types, and the running total of the Amount to be paid
•Click the Pay Bills Icon at the top of the Disbursements Form when you have selected all of Bills that you wish to Pay.

✓A Confirmation message will be displayed.
•What happens next:
✓Those Bills that were Paid (partially, or in full) are automatically Allocated and are inserted into the Unprinted Checks file (report),
✓Those Bills that were paid in full will also be removed from the Outstanding Bills Listing.
•Your final step is to Print the Checks.
✓As a result of this process, if multiple Bills from the same Vendor are designated to be Paid, they will be Paid on the Check, and a memo will be included on the Check Stub indicating exactly what Bills were being Paid with that Check.