❑When your Company is providing Contract Monitoring Services, and your Company is also billing the Alarm Dealer's Monitoring Accounts, an individual Division Code must be created for each Alarm Company for whom your Company is billing those Subscriber's Recurring Revenues.
•But, do not confuse the setup procedure for the Billing of the Dealer's Monitoring Accounts which is not described in this chapter, with the actual monitoring related Dealer setup procedure that is described here (see Dealer Billing) and is required for invoicing those Alarm Dealers who's Accounts are being monitored by your Company's Central Station.
❑When your Company is providing Contract Monitoring Services for any (non-company) Alarm Dealer, specific monitoring related information must be defined for each of those Alarm Dealers .
•The Dealers Form illustrated below serves that purpose, and provides several other features:
1.Identifies each Alarm Dealer for whom your Company is providing their Alarm Signal Processing Monitoring Service.
2.Identifies the Dealer Module Users who should be provided access to specific Dealer's Accounts while using any of the MKS Mobile Applications
3.View, Add, Modify and/or Delete Temporary Notes that will be displayed whenever an Alarm System for one of the selected Dealer's Subscribers is activated
4.Stores all pertinent Documents related to each Dealer
5.Allows the identification, scheduling, and automatic production of Scheduled Reports (your company must be a Communication Module and/or MKS Connect Service user).
6.Provides Dealer Billing setup for Invoicing this Dealer's Accounts for the Contract Monitoring Services your Company provides for the Dealer's Subscribers.
7.Provides special case billing rates for each Dealer (see the Price List, Account Rate Table and Zone Rate Table chapters for that information)
8.Identifies the Recurring Revenue Accounts associated with this Dealer
9.Provides an Invoice History for the Dealer
10.Take All of a Dealer's Accounts Off Line at the same time
•To Access the Dealers Form:
a)From the Backstage Menu System Select Maintenance and Choose the General option, then select the General Maintenance option which displays the secondary Maintenance Menu, or
b)From the Quick Access Menu, Select Maintenance and Choose General Maintenance to display the secondary Maintenance Menu.
✓Once the Maintenance Menu is displayed, Choose the Monitoring sub-menu, then Click on the Dealers option.
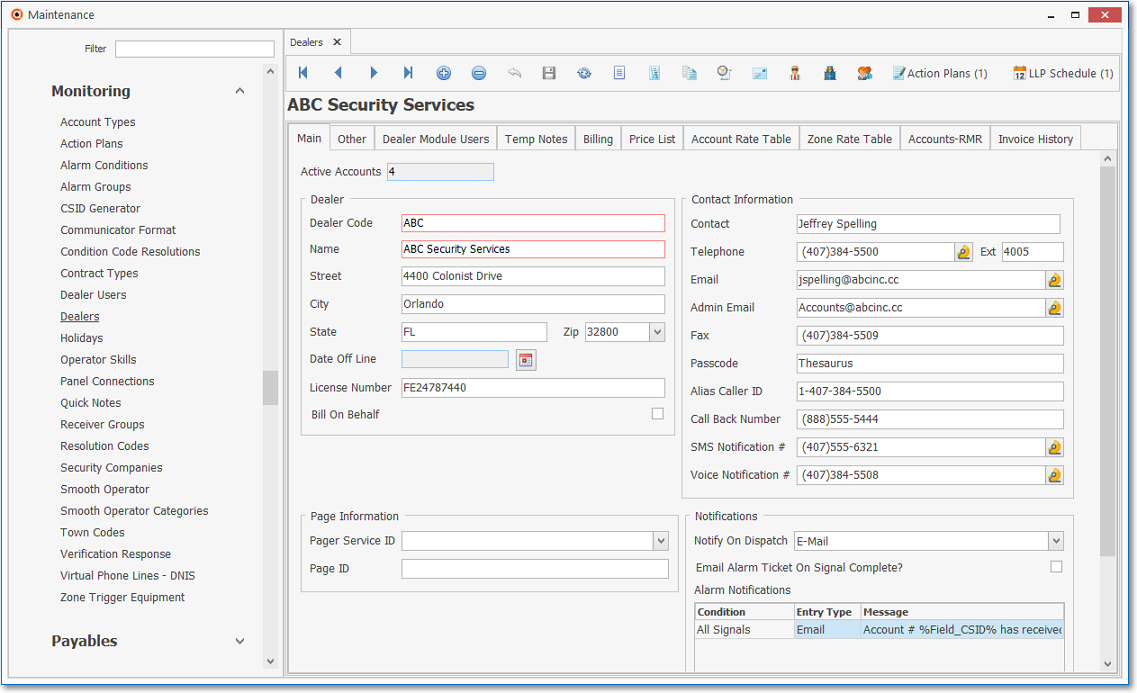
Dealers Form
✓This Dealers Form may be Re-sized by Dragging the Top and/or Bottom up or down, and/or the Right side in or out.
•Navigation Menu - The Navigation Menu is located at the top of the Dealers Form.

✓This Navigation Menu provides the normal Record Movement, New, Delete, Save, Refresh, and List options
▪Plus: special Tech Details, Documents, Scheduled Reports, Email, Sub Dealers, Dealer Billing Review, Subscribers without Dealer Recurring Revenue, and special Action Plans and LLP Schedule Icons.
•Tabs - There are 10 tabs located immediately below the Navigation Menu at the center (Main Body) of the Dealers Form:
![]()
Dealers Form - Tabs
1.Main tab - This is where the basic information for the currently selected Dealer record is maintained.
2.Other tab - This is where a CSID for a Call List, important Comments and a Test Note may be assigned to the Dealer
3.Dealer Module Users tab - Identify the Users for this Dealer - which may or may not have previously been entered in the Dealer User Form.
4.Temp Notes tab - View, Add, Modify and/or Delete Temporary Notes that will be displayed whenever an Alarm System for one of the selected Dealer's Subscribers is activated (sends an Alarm Signal to the Central Station), to help Operators provide the preferred alarm response requested by this Dealer.
5.Billing tab - Used to set-up and/or maintain Dealer Billing procedures for this Dealer
6.Price List tab - Used to create and/or maintain a Price List for Invoicing the Monitoring Services provided by your Company for this Dealer
7.Account Rate Table tab - Used to create and/or maintain a Tiered Account Rate Table for Dealer Billing
8.Zone Rate Table tab - Used to create and/or maintain one or more Zone Rate Tables for Dealer Billing
9.Accounts-RMR tab - Use to create and/or maintain the list of Subscribers and their associated Recurring Revenue records for the selected Dealer
10.Invoice History tab - Displays the chronological history of the Invoice Header information for the Dealer Billing Invoices created for the selected Dealer
11.Actions Plans Icon on the Ribbon Menu - This option displays The Action Plans Grid where any number of Action Plan + Alarm Condition combinations may be assigned to this Dealer
12.LLP Schedule Icon on the Ribbon Menu - This option opens the LLP Schedule Assignment dialog
❖As of MKMS v 5.1.35.8300 and MKMSCS v 5.1.35.7200, Micro Key Solutions ("MKS") now uses the MKS Connect Service for Low Level Processing and the Twilio (www.twilio.com) service that provides cloud based SMS and IVR (Voice) communication and other Enhanced Automated Signal Processing features
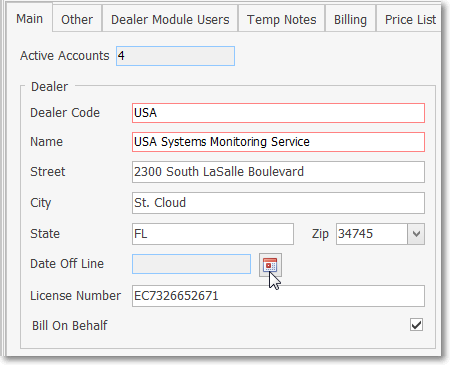
•Record Editing section - The Main tab - located below the Navigation Menu at the center (Main Body) of the Dealers Form - is where the basic information for the currently selected record is displayed.
✓Active Accounts - This is a system maintain field containing the number of Accounts that are actively being monitored for this Dealer.
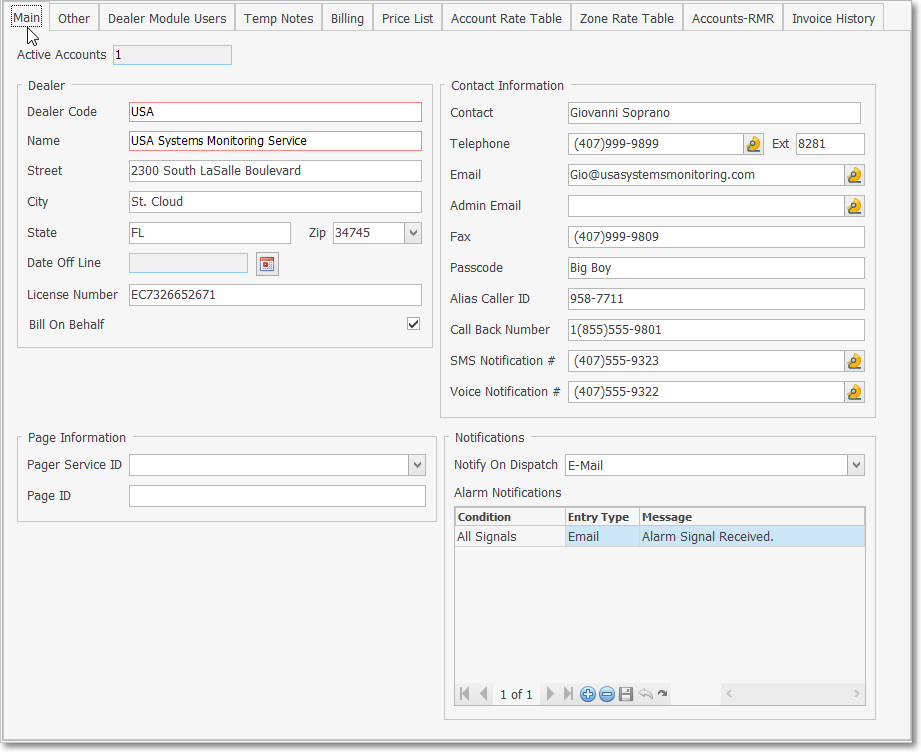
Dealers Form - Recording Editing View - Main tab
Defining Dealers
❑With the Main Tab selected (see illustration above), Click the ![]() Icon on the Ribbon Menu to start a new Dealer entry.
Icon on the Ribbon Menu to start a new Dealer entry.
•Dealer section - Enter the basic name, address, and license information.
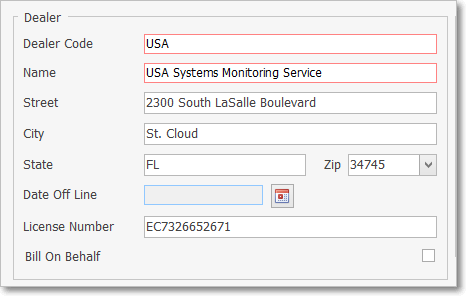
Name & Address Information section on the Dealers Form Main tab
✓Dealer Code - You may enter up to ten (10) characters - Capital letters, spaces, and numbers (punctuation marks are not accepted) - to identify a "CODE" for this Dealer.
✓Name - Enter their Company Name
✓Street - Enter their Street Address.
✓City - Enter the City.
✓State - Enter their 2 character State (or Province) code.
✓Zip - Enter their Zip Code.
✓Date Off Line - See the "Taking All of a Dealer's Accounts Off Line" section below.
✓License Number - Enter the Dealer's primary State License Number
✓Bill on Behalf - Check this box if your Company will be Invoicing this Dealer's Accounts for the Recurring Revenue obligations owed by the Subscribers associated with this Dealer.
•Page Information section - If applicable, and your Company is using the Communication Module and/or MKS Connect Service, enter the Pager Service communication information.
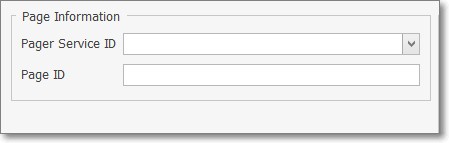
Page Information section
✓Pager Service - Using the Drop-Down Select List provided, Choose the appropriate Pager Service.
✓Page ID - Enter the Alarm Dealer's Pager ID Number when required.
•Contact Information section - Enter all (available) Contact Information:
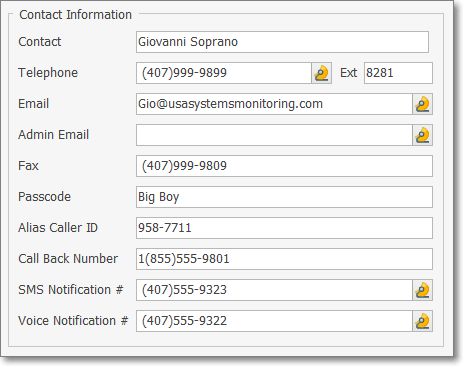
Contact Information section on the Dealers Form Main tab
✓Contact - Enter your primary contact at this Company.
✓Telephone - Enter the primary contact's Telephone Number at this Company.
▪If no Area Code is required, enter the telephone number (it cannot start with a 1 and the dash between the third and fourth number will be inserted automatically).
▪If 10 digit dialing is in effect - no "1"prefix is needed, but you do need to dial an Area Code as part of the telephone number:
oPress the <Space Bar> first.
oThen enter the three digit Area Code.
oFinally, enter the seven digit Telephone Number.
oCorrect formatting will be inserted automatically.
▪Long distance Telephone Numbers (with a "1" prefix) are entered as such with the formatting parentheses and dash applied automatically.
✓Extension - If required, enter their extension.
✓Email - Enter the Email address for Alarm Dispatch Notification.
✓Admin Email - Enter the Email address for the Administrator position
✓Fax - Enter the Fax number for Alarm Dispatch Notification, or general communications for Activity Reports and Alarm Tickets.
▪If no Area Code is required, enter the telephone number (it cannot start with a 1 and the dash between the third and fourth number will be inserted automatically).
▪If 10 digit dialing is in effect - no "1"prefix is needed, but you do need to dial an Area Code as part of the telephone number:
oPress the <Space Bar> first.
oThen enter the three digit Area Code.
oFinally, enter the seven digit Telephone Number.
oCorrect formatting will be inserted automatically.
▪Long distance Telephone Numbers (with a "1" prefix) are entered as such with the formatting parentheses and dash applied automatically.
✓Pass Code - Enter a Pass Code for identification purposes.
✓Alias Caller ID - This entry will be used as the Caller ID when all telephone call is placed (by the system) to one of this Dealer's Accounts
✓Call Back Number - Enter the Telephone Number to use when calling back this Dealer.
▪If no Area Code is required, enter the telephone number (it cannot start with a 1 and the dash between the third and fourth number will be inserted automatically).
▪If 10 digit dialing is in effect - no "1"prefix is needed, but you do need to dial an Area Code as part of the telephone number:
oPress the <Space Bar> first.
oThen enter the three digit Area Code.
oFinally, enter the seven digit Telephone Number.
oCorrect formatting will be inserted automatically.
▪Long distance Telephone Numbers (with a "1" prefix) are entered as such with the formatting parentheses and dash applied automatically.
✓When the MKS Connect Service is enabled, using the Telephone Number entry instructions above, enter the appropriate information:
▪SMS Notification # - Enter the Telephone Number to use when making any type of SMS (Text) Notification
▪Voice Notification # - Enter the Telephone Number to use when making any type of Voice (Voice Response) Notification
•Notifications section - If your Company uses the Communication Module and/or MKS Connect Service, a Dispatch Notification may also be sent to the Dealer as indicated
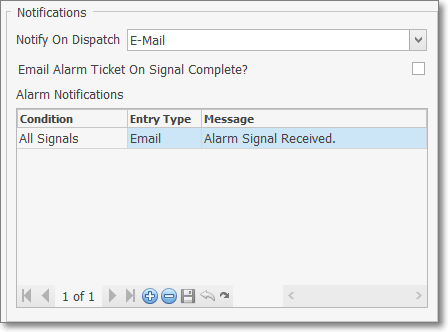
Notification section
✓Notify On Dispatch - Use the Drop-Down Selection List provided to Choose the method of notification to be used to Notify the Dealer
a)None - No notification is requested
b)Pager - Use the Pager Information defined (see the Page Information section immediately above) to Page the Dealer
c)Email - Use the Email address defined (see the Contact Information section above) to Email the Dealer
d)SMS - Use the SMS Notification # defined (see the Contact Information section above) to Text the Dealer
e)Voice - Use the Voice Notification # defined (see the Contact Information section above) to transmit an IVR message the Dealer
✓Email Alarm Ticket on Signal Complete? - Check this box to implement this feature.
✓Alarm Notifications - Define what condition(s) will cause a Dealer who has requested to be Notified when a Dispatch has been performed for one of their Accounts, to get that notification
▪Click the ![]() Icon on the Ribbon Menu at the bottom of this section to start a new Alarm Notification entry
Icon on the Ribbon Menu at the bottom of this section to start a new Alarm Notification entry
▪Condition - By default, a Dispatch for All Signals will trigger a notification (the method of notification to be used is specified above)
oAlternately, use the Drop-Down Selection List provided to Choose a specific Alarm Condition Code to cause this notification
▪Entry Type - Use the Drop-Down Selection List provided to Choose the method to be used for this notification
a)Pager - Use the Pager Information defined (see the Page Information section immediately above) to Page the Dealer
b)Email - Use the Email address defined (see the Contact Information section above) to Email the Dealer
c)SMS - Use the SMS Notification # defined (see the Contact Information section above) to Text the Dealer
d)Voice - Use the Voice Notification # defined (see the Contact Information section above) to transmit an IVR message the Dealer
▪Message - Use the Drop-Down Selection List provided to Choose the Predefined Message to be sent for this notification
▪Click the ![]() Icon to record this Notification instruction
Icon to record this Notification instruction
▪Repeat this process to defined as many combinations of Notification instructions as may be required by the Dealer
✓Once all of the necessary data has been entered, Click the ![]() Icon at the top of the Dealers Form to record this Dealer information.
Icon at the top of the Dealers Form to record this Dealer information.
Other Tabs on the Dealers Form
❑Other tab - This is where the CSID for a Call List is assigned to this Dealer, important Comments related to this Dealer may be added, and the Test Notes for this Dealer may be entered.
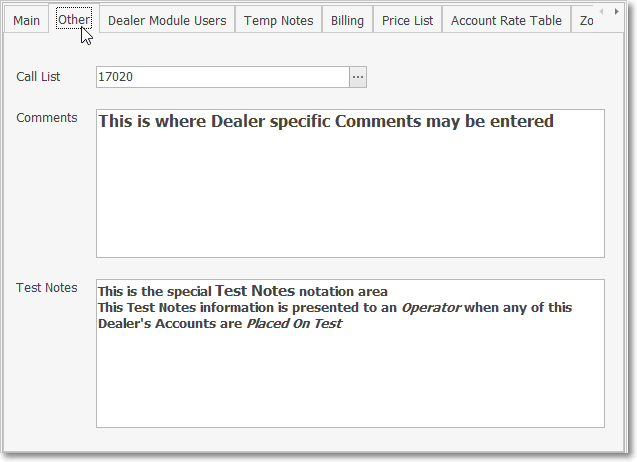
Dealers Form - Recording Editing View - Other tab
•Call List - a Contacts (People To Call) list may be assigned to the Dealer using the Search dialog provided
✓The Search dialog will list all of the Accounts assigned to this Dealer.
✓Select the appropriate Account and Click the OK button
•Comments - Comments may be entered as needed.
•Test Notes - Enter a Note which will be used specifically for those Accounts that are being monitored for an Alarm Dealer,
✓The Dealer's Test Notes created here in the Dealer record is also displayed in the Dealer Note tab within the Test Notes dialog which is displayed for the Operator when an Account that is being Monitored for that Dealer is Placed on Test.
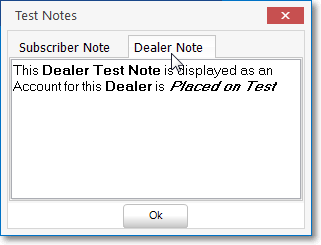
Test Notes - Dealer Note tab
❑Dealer Module Users tab - With the Dealer Module Users Tab selected, you may identify the Mobile Applications' Users for this Dealer which must have been previously entered in the Dealer Users Form.
➢Note: The Dealer Module Users can also be identified in the Dealer Users Form which will then make them automatically appear in the Dealers Form's Dealer Module Users tab.
Also see the Tech Details chapter for related information.
a)Dealer Users do not have to be, but may also be an Employee. (i.e., if an Employee of your Company also provides emergency services for an Alarm Dealer and therefore needs access to the Dealer Module)
b)Dealer Users identified in the Dealer Users Form may be assigned on that Form to one or more of your Alarm Dealers, or at any time in the future, as appropriate (i.e., if the Alarm Dealer has granted that Dealer User access to their data and systems through the Mobile Applications).
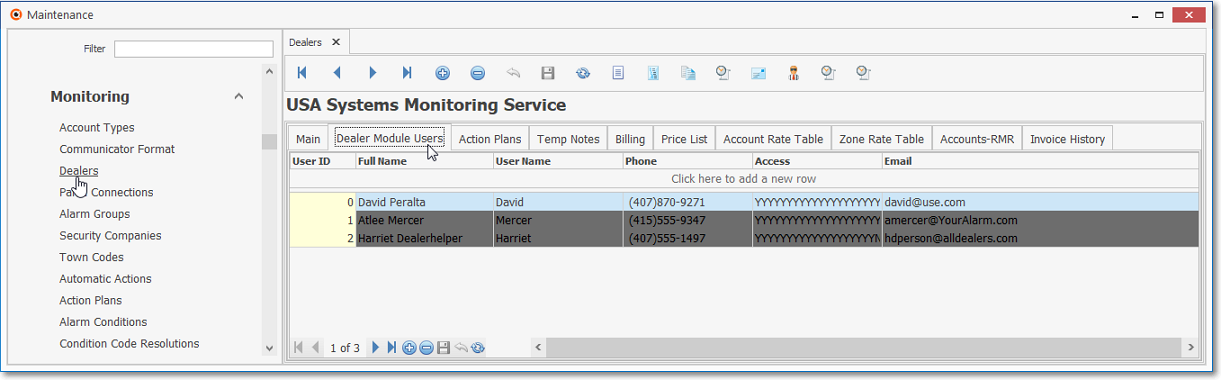
Dealers Form - Dealer Module Users tab
•The previously entered Dealer Users who have already been assigned to this Dealer will appear automatically
•Click the ![]() Icon on the Ribbon Menu at the bottom of this grid to insert an additional Dealer User
Icon on the Ribbon Menu at the bottom of this grid to insert an additional Dealer User
✓User ID - Use the Drop-Down Select List provided to Choose the Record number of a previously entered Dealer User
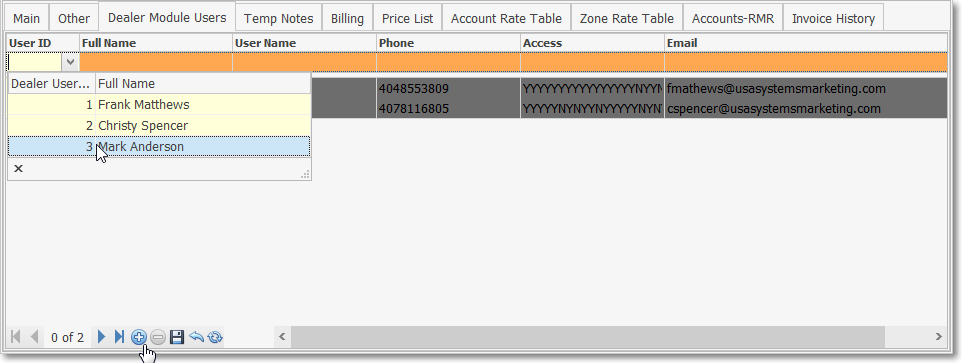
Dealers Form - Dealer Module Users tab - Add Dealer User
✓Full Name , User Name , Phone , etc. - This data will be inserted automatically based on the Selected User ID and the information entered for that User ID.
✓Data that is inserted automatically:
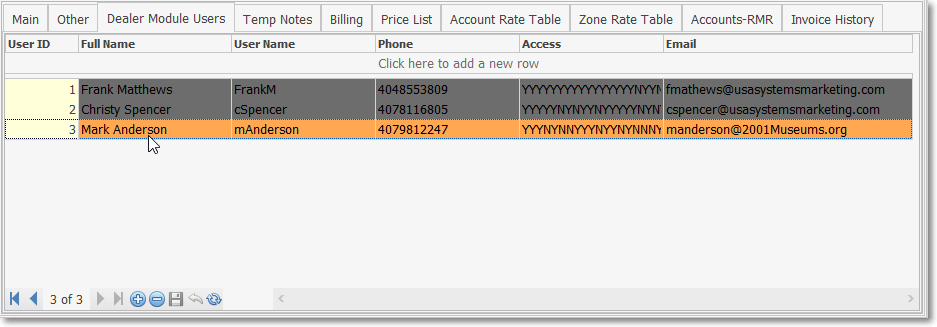
Dealers Form - Dealer Module Users tab - Dealer User Added
▪Full Name - the full name of the Dealer User.
▪User Name - the User Name with which they will log in to the system.
▪Phone - The telephone number that will be used to contact this Dealer User.
▪Access - Y/N entries based on the order in which Access Rights were granted in the Dealer User Form
▪E-Mail - The E-mail address that can be used to contact this Dealer User.
•Click the ![]() Icon on the Ribbon Menu at the bottom of this grid to Save this entry
Icon on the Ribbon Menu at the bottom of this grid to Save this entry
✓The new Dealer User entry is added to the Dealer Module Users Grid
✓In the Dealer User Form, this Dealer name is added to that Dealer User's Dealer list
❑Temp Notes tab - With the Temp Notes tab selected, you may add a Temporary Note and have it displayed when one of this Dealer's Subscribers has an Alarm System activated (i.e., sends an Alarm Signal to the Central Station)
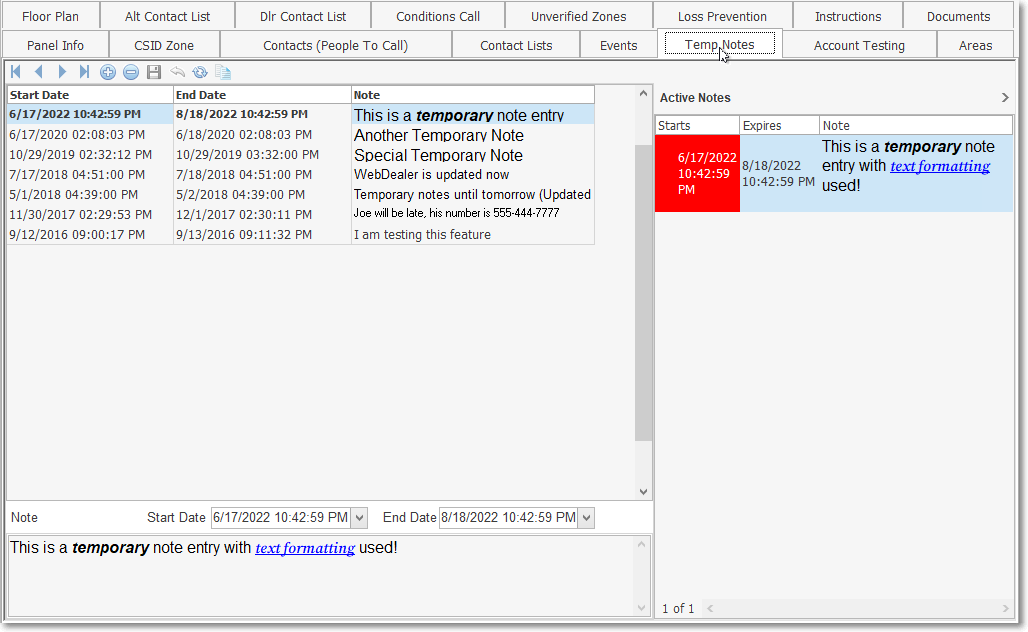
•This ensures that the Operator will see this important Dealer specific information (e.g., the Dealer is on vacation, or unavailable because of some other unusual situation, etc.)
✓It will be shown to the Operator within a designated starting and ending date and time.
✓In the event of another signal is being transmitted from that Subscriber and handled by a different Operator, that next Operator will also be informed of the "issue" with the display of that Temp Notes message.
•Click the ![]() Icon to enter a Temp Note.
Icon to enter a Temp Note.
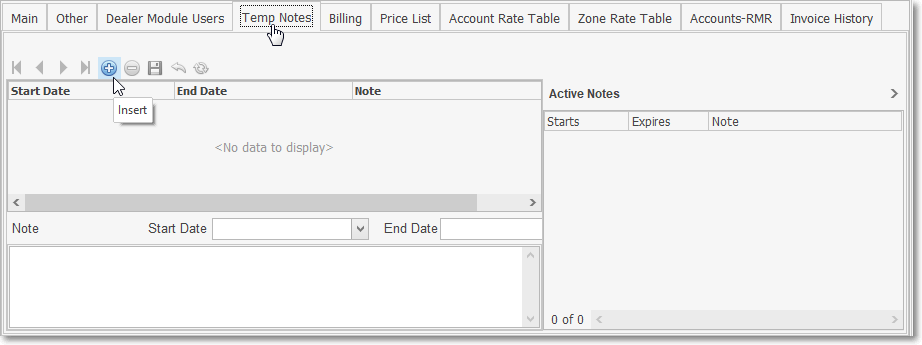
•Start Date - Use the Drop-Down Calendar/Date Entry field to Choose the starting date and time for this Temp Note.
✓By default, it is Today and Now.
•End Date - Use the Drop-Down Calendar/Date Entry field to Choose the ending date and time for this Temp Note.
✓By default, it is Tomorrow at the Same Time.
✓You must reset this ending date and/or time to reflect when you want this Temporary Note to expire.
•Note - Enter the Note to be displayed for the Operator.
✓Type the note or comment that is to be displayed for the User or Operator.
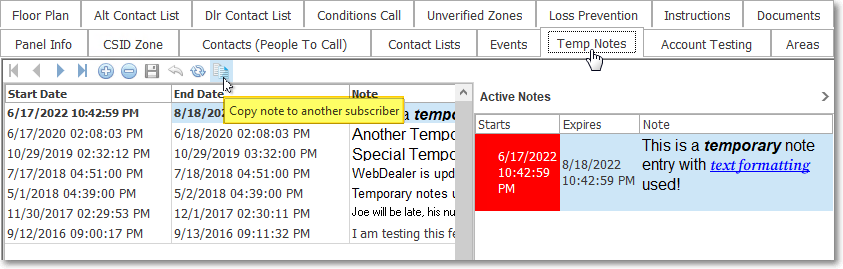
✓There is a Rich Text Edit Form available to format and/or color the text,
✓Double-Click within the Note field to open the Rich Text Editor.
✓When finished, be sure to select Save button on the Rich Text Editor.
•Click the ![]() Icon at the top of the Temp Notes sub-tab to record the Temp Note entry.
Icon at the top of the Temp Notes sub-tab to record the Temp Note entry.
•Using the Copy To option on the Temp Notes Tab:
✓Once entered, there may be a need to copy an existing Temp Note to another Subscriber Panel's CSID which has been set up for this same Dealer.
✓To do so, Open the Subscribers Form and Retrieve (F2 Search) the appropriate Subscriber record.
▪Select the Edit View Icon and Choose the Monitoring Tab and locate the Subscriber Panels section.
▪Select the appropriate Subscriber Panel's CSID.
▪Click the Temp Notes Icon.
✓Click the Copy To... Icon to open the Select Panels dialog.
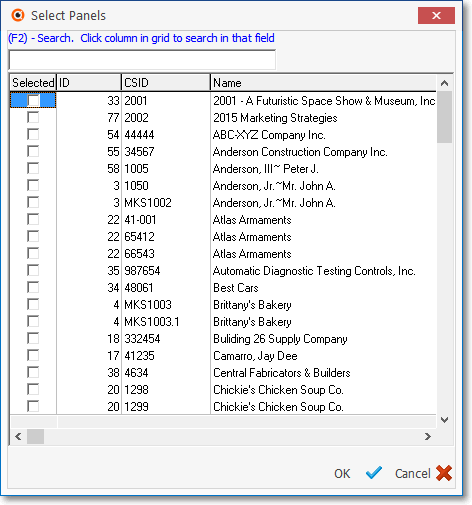
▪Click on any Header Name (ID, CSID, Name, etc.) column's field.
▪Press F2
▪In the (F2) Search field, enter the Subscriber's ID, CSID or Name depending on the field selected, to identify the Subscriber Panel's CSID to which the selected Temp Note is to be copied.
▪This is an incremental search function so, as you type your entry, the highlighted record will continue to be relocated until you have found the required record.
▪Check the desired Account.
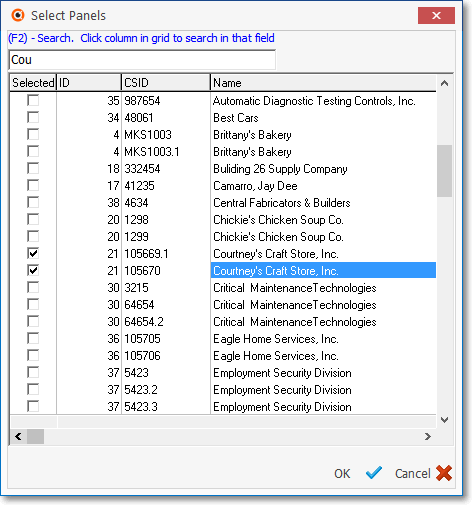
Select Panels dialog for the Temp Notes Form
✓Click the OK button to execute the Copy To function.
▪The Selected Temp Note will be copied to the Temp Notes tab of the Selected Subscriber(s) record(s) and the Select Panel dialog will close.
❑Billing tab - This Billing Form is used to define the rules for how your Company will periodically Invoice this Dealer for the Contract Monitoring Services that are being provided for this Dealer's Subscribers
•Add/Link Billing Account - This option is used to identity what Billing address is to be used to send Invoices to this Dealer
•Dealer Billing Active? - Once a Billing Address has been linked to the appropriate Dealer (Subscriber) record, this box will automatically be Checked by the system
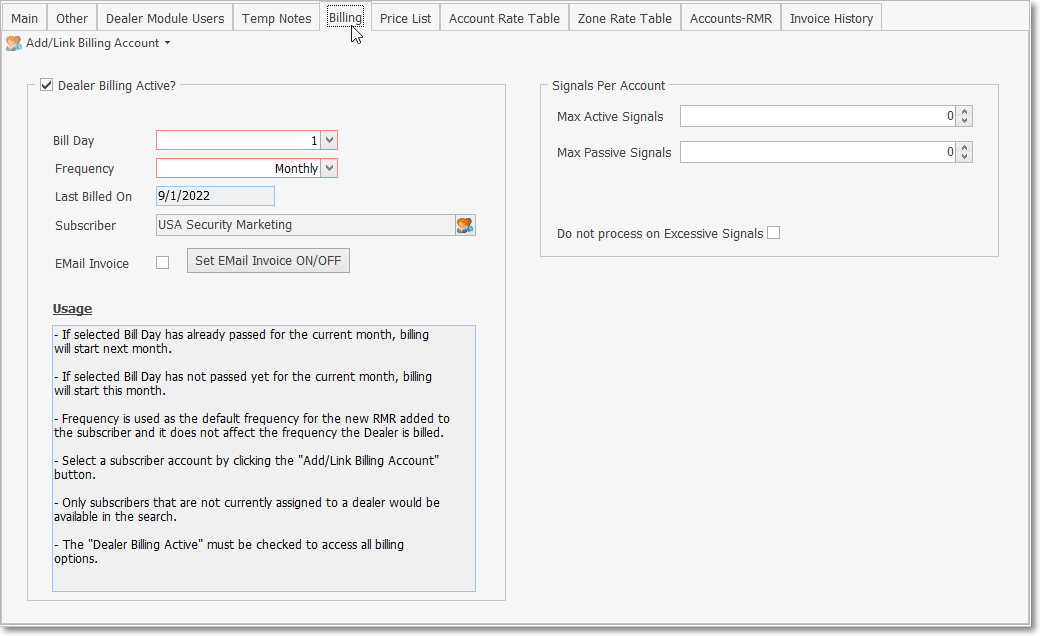
Dealer Form - Billing tab
❖Next, see the Dealer Billing Setup and related chapters (i.e., Price List, Account Rate Table and Zone Rate Table) for complete information on how to automatically Invoice Dealers for the Contract Monitoring Services that your Company is providing for this Dealer's Subscribers
❑Price List tab - Displays a list of the Payment Methods which will be used to calculated the charges that are to be Invoiced to the Dealer for the monitoring services they're being provided
•These Payment Methods are associated with a Sales Category Code
•A Payment Method will have either:
1)a manually entered Price, and/or
2)a Price calculated from the tiered rate data defined in an Account Rate Table or Zone Rate Table which may be created separately, as may be needed
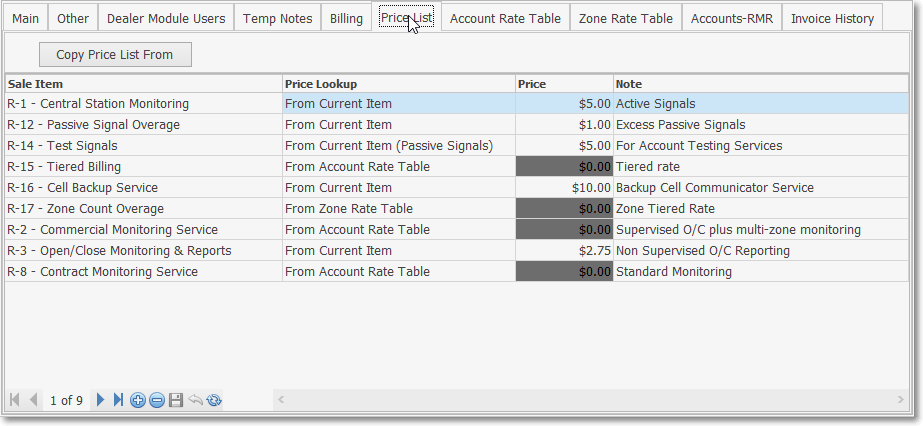
Dealer Form - Price List tab
❖For detailed instructions for how to enter the data into the Price List tab go to the Billing - Price List chapter
❑Account Rate Table tab - Establish the Per Monitored Account Payment Method which is based on the number of Accounts being monitored for this Dealer
•It is used to set the Per Monitored Account Invoicing Rates:
✓Rates are based on the number of Accounts being monitored for this Dealer,
✓Rates may be "tiered" to accommodate various Rates based on the Dealer's Account Volumes (e.g., number of Accounts being monitored for the Dealer)
✓Account Rate Table data sets may be copied from another Dealer's Account Rate Table
✓Existing Account Rates may easily be updated by simply modifying an existing Rate price and/or Range value
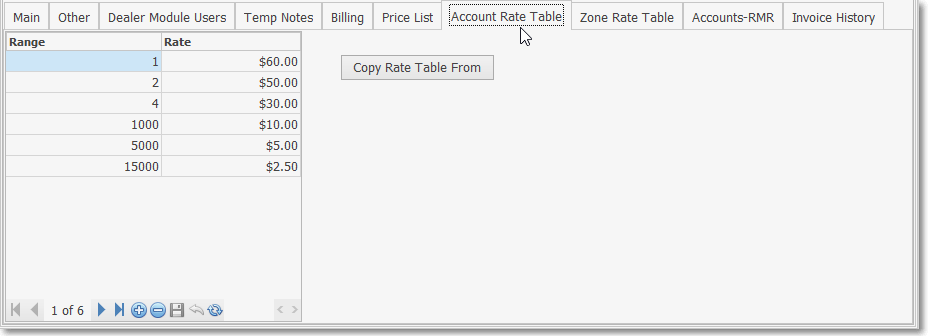
Dealer Form - Account Rate Table tab
❖For detailed instructions on how to use the Account Rate Table tab go to the Billing - Account Rate Table chapter
❑Zone Rate Table tab - Another way to calculate and charge the Fee for monitoring a Dealer's Accounts is to assess the monitoring charge based on the Number of Zones (and type of system) being monitored at each Account's premises.
✓A Zone Rate Table entry consists of a Description attached to its own Range and Rate Grid
✓Billing Rates may then be based on the Number of Zones that are being monitored at an Account.
✓Billing Rates are "tiered" to accommodate Rates which are based on various Zoned Installations (e.g., type and number of Zones per Account being monitored for the Dealer such as Commercial Zones versus Industrial Zones versus Residential Zones)
✓A Zone Rate Table may be copied from another Dealer's Zone Rate Table
✓Existing Zone Rate sets may easily be updated by simply modifying an existing Description and/or Range and/or Rate values
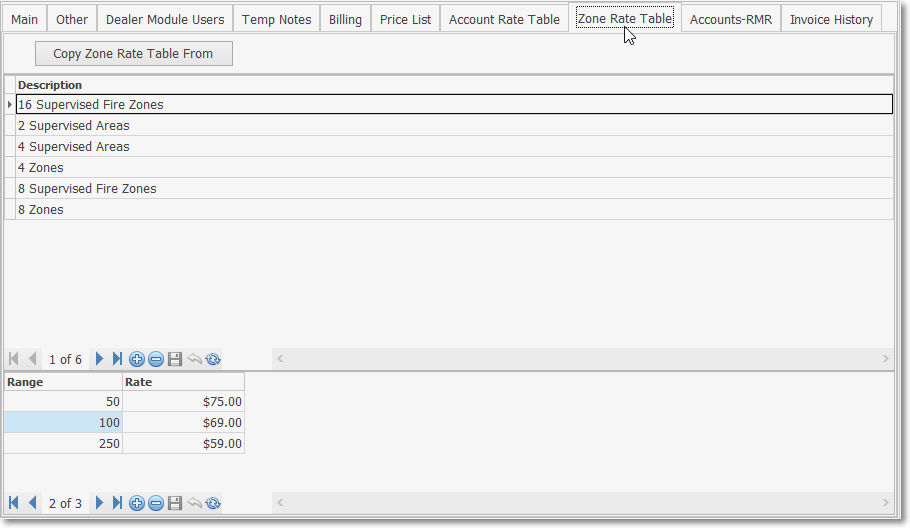
Dealer Form - Zone Rate Table tab
❖For detailed instructions for how to use this Zone Rate Table tab go to the Billing - Zone Rate Table chapter
❑Accounts-RMR tab - Displays a list of the Subscribers who have been associated with this Dealer in the main Grid, and lists the related Recurring Revenue item(s) assigned to each Subscriber in a subordinate Grid
•This is a One to Many display: meaning that each Subscriber record listed in the top Grid may have any number of Recurring Revenue assignments listed in the bottom Grid.
•This allows each Subscriber to be Invoiced for the specific Monitoring Services Rates based on the services they are using
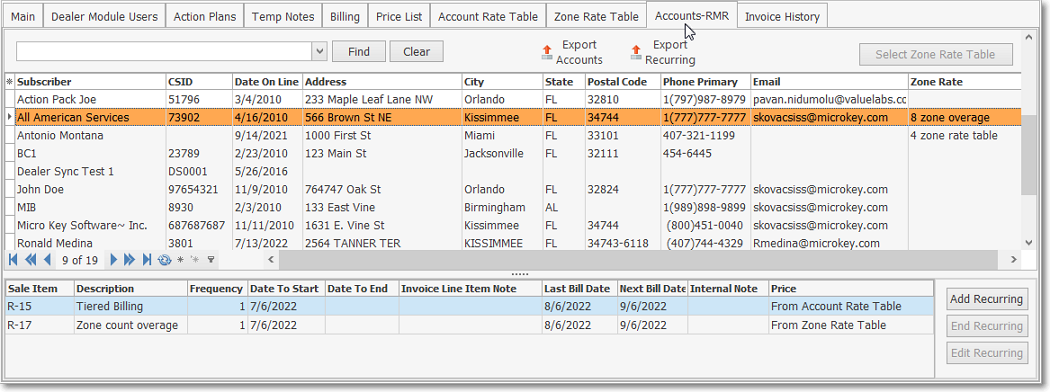
Dealer Form - Accounts-RMR tab with Subscriber List Grid and related Recurring Revenue Grid
❖For detailed instructions for how to use this Zone Rate Table tab go to the Billing - Accounts-RMR Tab chapter
❑Invoice History tab - Displays a list in Grid format containing all of the Invoices previously generated for this Dealer with a Drill-Down capability to view exactly what charges were billed on each Invoice
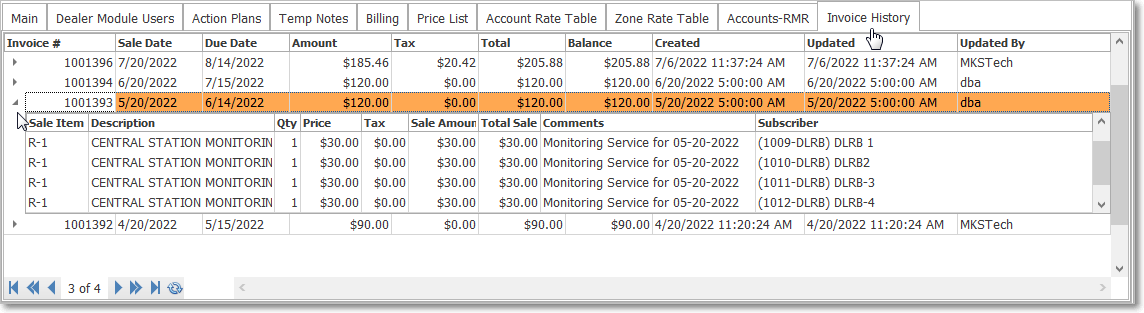
Dealer Form - Invoice History tab
❖For detailed instructions for how to use this Invoice History tab go to the Billing - Invoice History Tab chapter
❑Taking All of an Alarm Dealer's Accounts Off Line at the same time:
•There are times when an Alarm Dealer, for whom your Company is providing Central Station Monitoring Services, will need to have all of those Accounts taken off line, all at one time.
✓Whether for Non-Payment, a Liability Issue, acquisition by a different Central Station, etc., your Company will eventually may be faced with this situation.
✓There are two ways to do so:
1.Manually
a.You would need the Dealer Breakdown Report listing for that Dealer, with all of their Accounts.
b.Then you would have to look-up each of that Dealer's Accounts on the Subscribers Form.
c.Select the Monitoring tab within the Edit View of that Subscribers Form
d.Go to the Central Station Data section
e.The, set the Off Line Date, as appropriate.
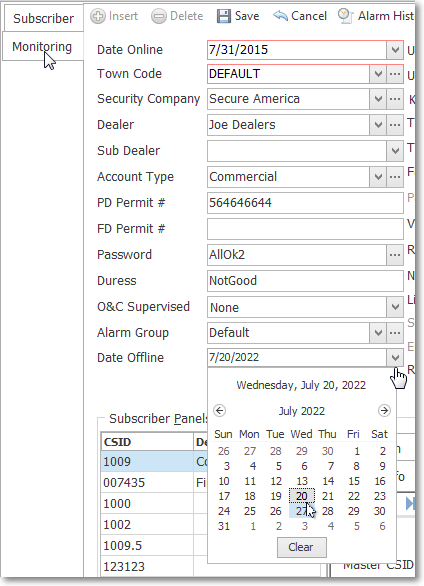
2.Automatically
a.Open the Dealers Form
b.Select the appropriate Dealer record
c.Click the Main tab
d.Click the Calendar Icon next to the Date Off Line field
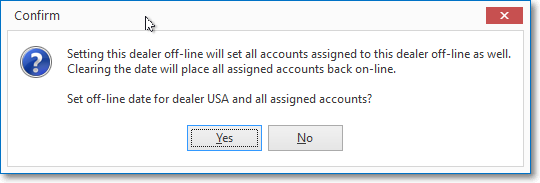
e.Confirm that you do want to set the off-line-date for this Dealer
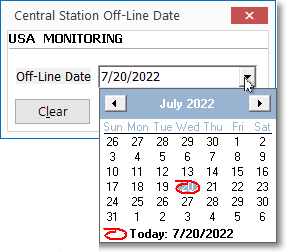
f.Using the Drop-Down Calendar/Date Entry field provided, Select the Central Station Off-Line Date as required.
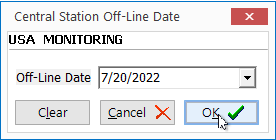
g.Click the OK box to execute this Off Line process.
h.Reverse this process by following the .a through f. steps above, but Choose the Clear option instead of OK
❖The Manual method may take days to complete, the Automatic method will take just a few seconds.
✓In either case, if certain specific Accounts should Not be taken Off Line, those individual Accounts may easily be put back On Line, as needed, by going to the Central Station Data Form to clear the Off Line Date field for those specific Accounts, as may be appropriate.
❑Using the special purpose options on the Dealers Form:

Dealer Form - Special Icons (circled)
•List Icon ![]() - The Navigation Menu also has a List option which provides a tabular view of these Dealer records.
- The Navigation Menu also has a List option which provides a tabular view of these Dealer records.
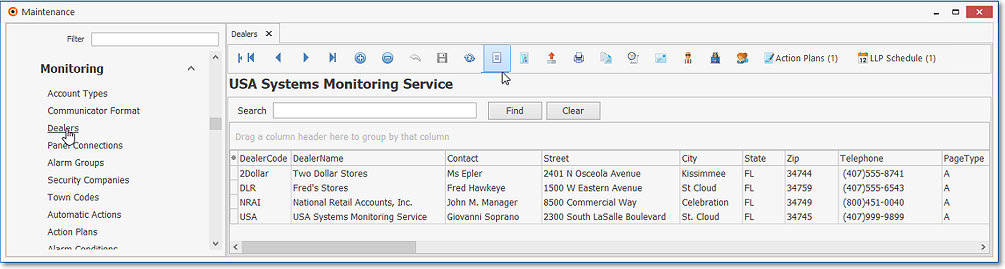
Dealers Form - List View
✓Some columns may contain expanded comments or other information which may make the List View's display somewhat difficult to use.
Ø - Click the Asterisk at the left of the row of Header Names to display a Drop-Down Check List of each column's Headed Name.
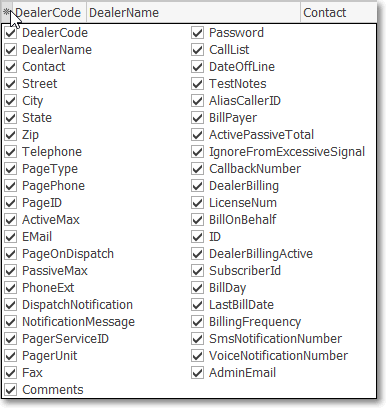
▪Check any Header Name to be included in the List View (by default, All Header Names will be Checked)
▪Remove the Check for any Header Name (see illustration below) that is to be removed from the List View.
✓Click the List Icon to display the associated Grid Data.
✓The columns of Grid Data may be rearranged, filtered, sorted, and exported as a PDF file and/or an Excel formatted file.

✓Find - Enter text to search for a specific record, then Click the Find option.
✓Clear - To remove the text to search for entry, Click the Clear option
✓Click the List Icon again to Close the List View and return to the Record Editing View.
❖See the Grid & Lists - Print Preview - Export Data chapter for complete information on using the List View, including its Export & Print options.
•Tech Details - This option on the Dealers Form (and Dealer User Maintenance Form) opens the Dealer Technician Form which is used for entering the Names and related information of the Dealer Technicians that are employed by this Dealer, and are therefore are allowed to perform service work on this Dealer's Accounts.

✓This button offers the same functionality as the Tech Details button on the Security tab of the Employees Form.
✓The Dealer Technician does not need to be entered as an Employee within MKMS to have them entered on the Dealer Technicians Form through the use of the Tech Detail button.
✓Click the Tech Details button on the top of the Dealer Form to enter the Dealer Technicians that are allowed to perform service work on this Dealers Accounts.
✓Click the ![]() Icon to display the Dealer Technicians Form.
Icon to display the Dealer Technicians Form.
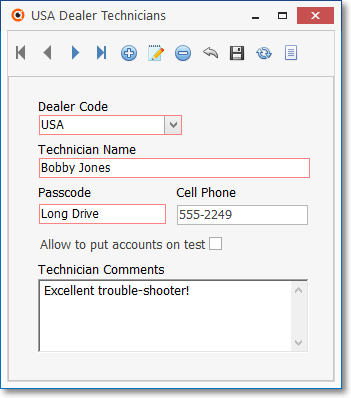
Dealer Technicians Form
•Documents - Used to Link pertinent Documents: usually Contracts, Correspondence, or specific Alarm Tickets, etc. from or for this Dealer.
![]()
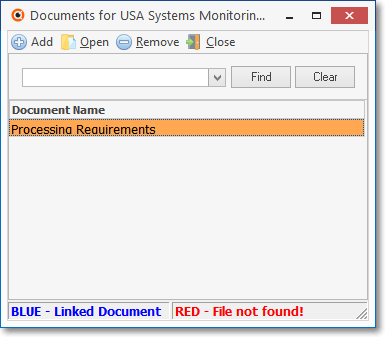
✓To Link a Document into MKMS, Click the Documents icon on the top of the Dealer Form.
✓Please refer to the full discussion of Documents in that chapter.
•Scheduled Reports - The Scheduled Reports Icon will only be displayed when the Communication Module and/or MKS Connect Service is installed.

Scheduled Reports icon on the Ribbon Menu at the top of the Dealer Form
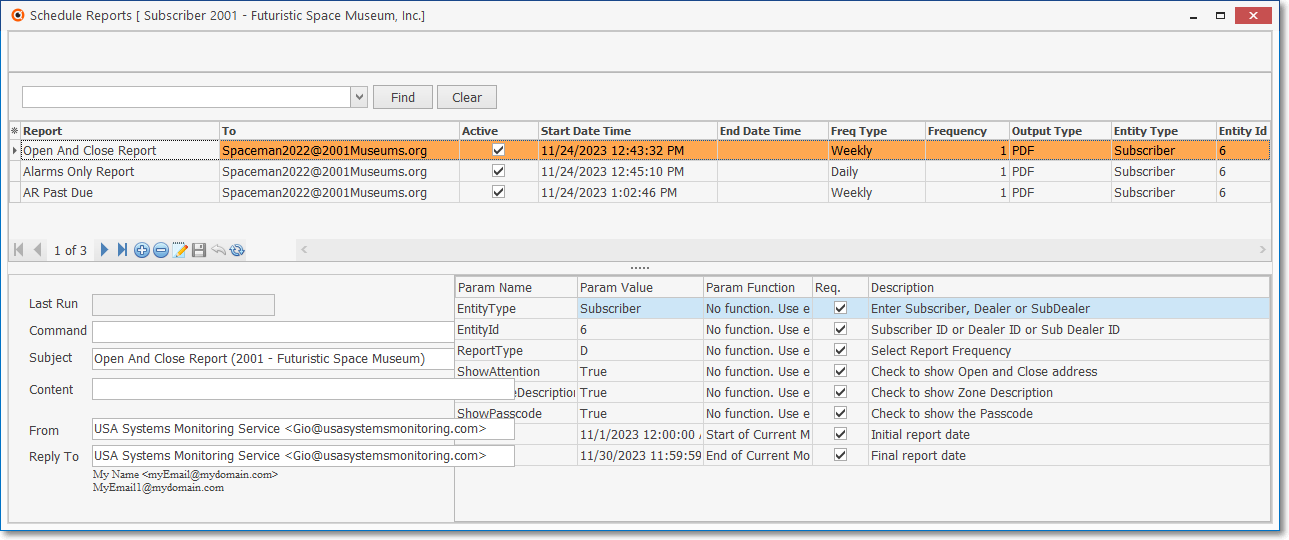
Scheduled Reports dialog available on the Dealers Form
❖If you want to have your Alarm Dealer(s) receive Periodic Reports for selected types of Alarm Activity received from their Accounts, their Scheduled Reports Information must be entered.
❖See the Scheduled Reports chapter for those instructions.
•Email - Click the Email option is used to open an Email dialog (in Outlook® or whatever Email interface you are using) with the current Dealer's email address inserted automatically.

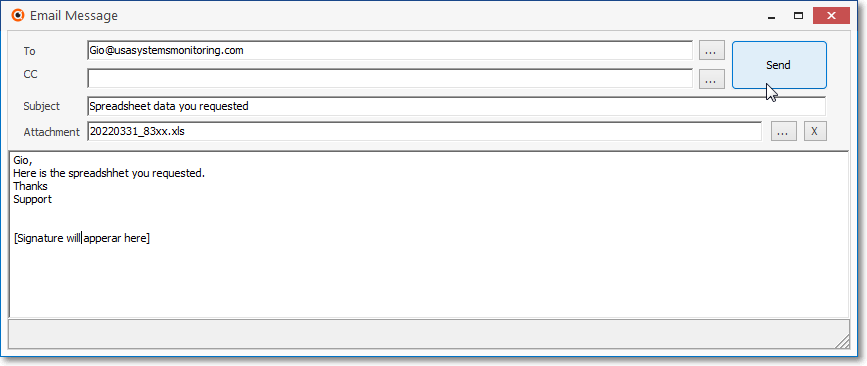
Outlook® Email interface with email address inserted automatically
•Sub Dealers dialog - Each Dealer for whom your Company's Central Station is providing Contract Monitoring Services may establish Sub-Dealers who can have a unique set of Accounts (e.g., Chain Stores, Shopping Centers, gated communities, etc.) and:
a)You want those Sub Dealers to be able to access to their Monitoring data using the MKS Web Dashboard application and/or
b)Those Contract Monitoring Services will be billed by your Company.
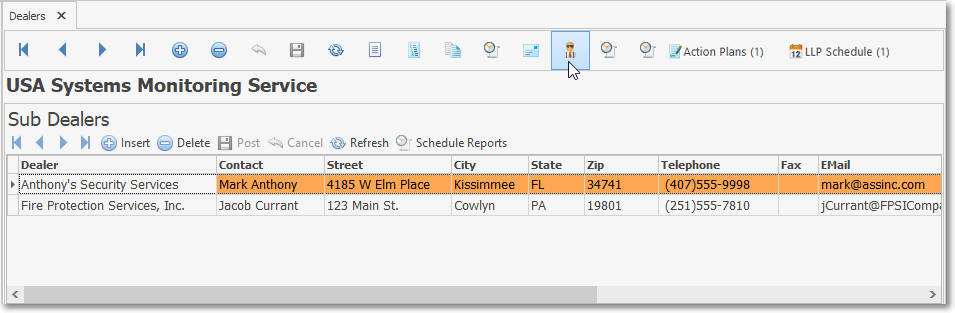
Sub Dealers dialog available on the Dealers Form
✓See the Sub Dealers dialog chapter for instructions on how to enter the Sub Dealer information
•Dealer Billing Review - Dealer Billing Review report available here and in the Reports>Monitoring menu displays as a Grid which may then be reconfigured, sorted, and/or filtered.

✓The Dealer Billing Review will provide a detailed listing of each Invoice created for Contract Monitoring Services using the Dealer Billing feature.
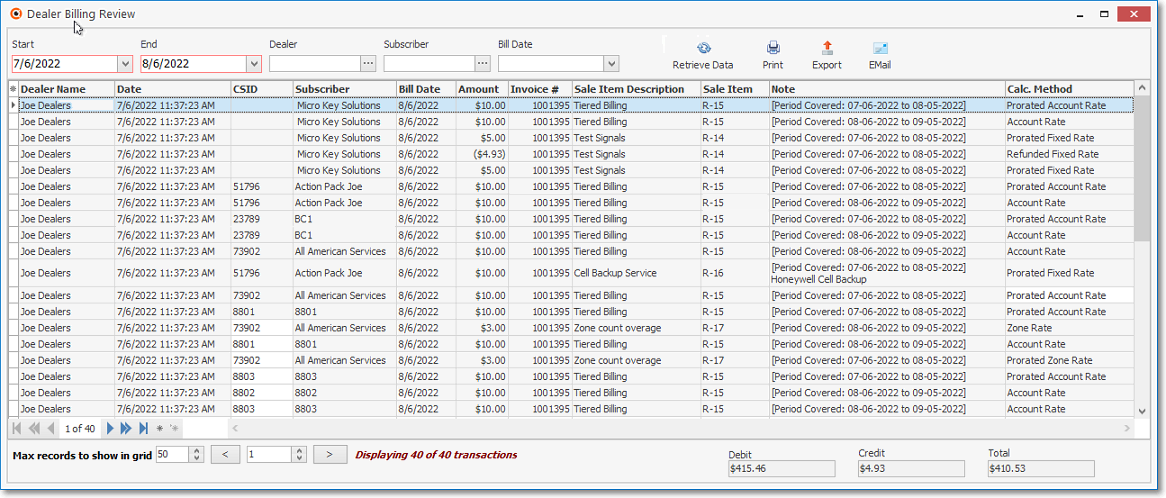
Dealer Billing Review - List of the selected Pending Dealer Billing charges
•Subscribers without Dealer Recurring Revenue - Subscribers Without Dealer Recurring Revenue report is displayed as a Grid that may then be reconfigured, sorted, and/or filtered.

✓The Subscribers Without Dealer Recurring Revenue will provide
a)a detailed listing of each Subscriber who has a Subscriber Panel (CSID) defined
b)and being monitored by your Company's Central Station
c)and is assigned to a Dealer whose Accounts are being monitored by your Company's Central Station
d)but does NOT have a Recurring Revenue record defined
e)therefore it will not be Invoiced automatically using the Dealer Billing function
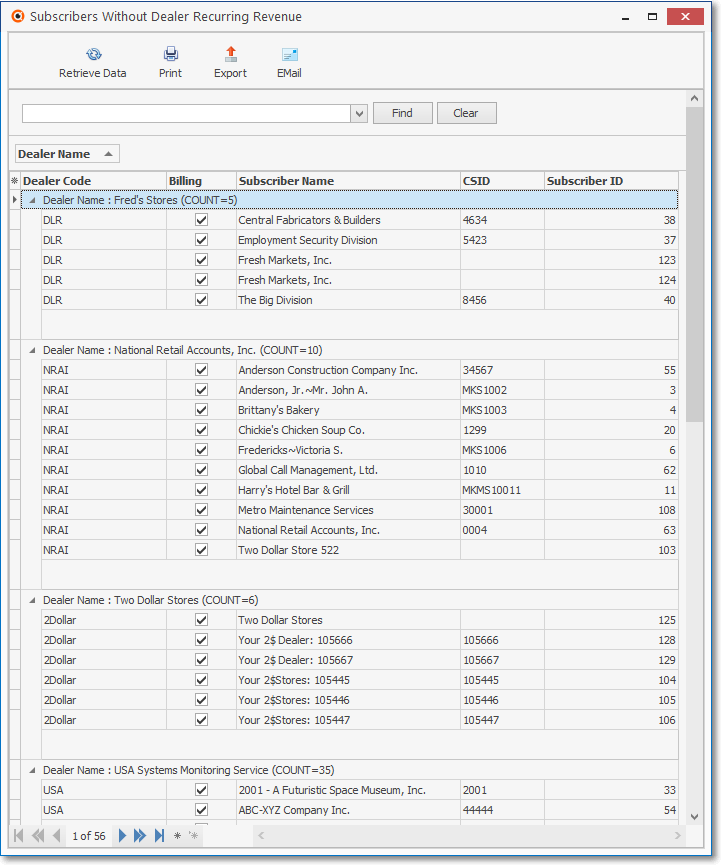
Subscribers Without Dealer Recurring Revenue dialog with data
•Action Plans Icon - Click the Action Plans Icon to

1.Navigate through the list (in a Grid) of the Action Plans previously assigned to this Dealer
2.Insert a specific Action Plan for this Dealer
3.Delete a specific Action Plan
4.Post a newly entered Action Plan
5.Cancel an Action Plan entry not yet saved
6.Refresh the List of Action Plans
✓Thereafter, when an Alarm Signal is received from any of this Dealer's Subscribers that is assigned the Alarm Condition entered below, the selected Action Plan will be executed.
✓When this Alarm Condition is received from one of this Dealer's Accounts, the assigned Action Plan will override the Operator Guided Response that would normally be followed based on the received CSID Zone or Panel Zone information,
➢Note: See the Micro Key Solutions Action Plans, Automated System Actions, and Alarm Condition Codes chapters for more information relating to this feature.

Dealers Form - Action Plans grid
✓To insert an Action Plan into this Dealer's Action Plans list
▪Click the ![]() Icon on the Ribbon Menu at the top of this grid to insert an Action Plan
Icon on the Ribbon Menu at the top of this grid to insert an Action Plan
▪Action Plan - Use the Drop-Down Selection List to Choose the appropriate previously defined Action Plan which will dictate the exact Signal Processing steps to be executed
▪Active - Check this box to Activate this Action Plan entry
▪Alarm Condition - Use the Drop-Down Selection List to Choose All, or the appropriate Alarm Condition Code. which, when received, will implement this Action Plan
▪Description - Enter a brief description of the purpose for this Action Plan assignment
▪Click the ![]() Icon on the Ribbon Menu at the top of this grid to record this Action Plan entry
Icon on the Ribbon Menu at the top of this grid to record this Action Plan entry
✓In Summary:
▪An Alarm Condition Code and an Automated System designated Action Plan combination - entered in this Action Plans grid - will be implemented for any and all CSIDs being monitored for that Dealer when the Alarm Code + Action Plan combination is received at the Central Station.
•LLP Schedule Icon allows the User to View, Assign Existing, Remove Existing, Modify Assigned, and Assign New Schedules options
❖See the Understanding the Schedules Feature discussion below for background information Schedules

Dealers Form - Ribbon Menu - LLP Schedule Icon
✓The LLP Schedule option opens the Dealer Schedules dialog with several options on its Ribbon Menu
❖See the Schedules chapter for detailed information about assigning and using Schedules for Low Level Processing (and other uses, too).
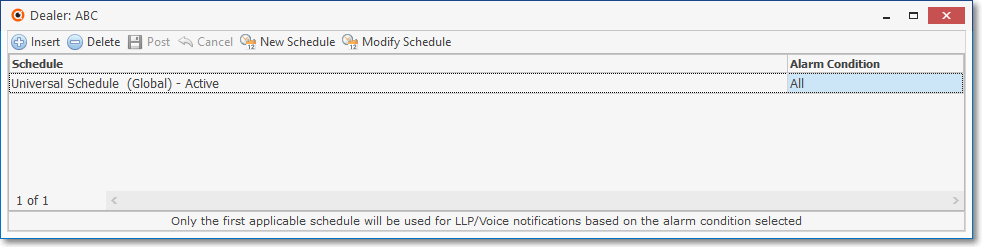
Dealers - Schedules dialog - no entries
a.Insert - Click the ![]() option to assign a Schedule for this Subscriber
option to assign a Schedule for this Subscriber
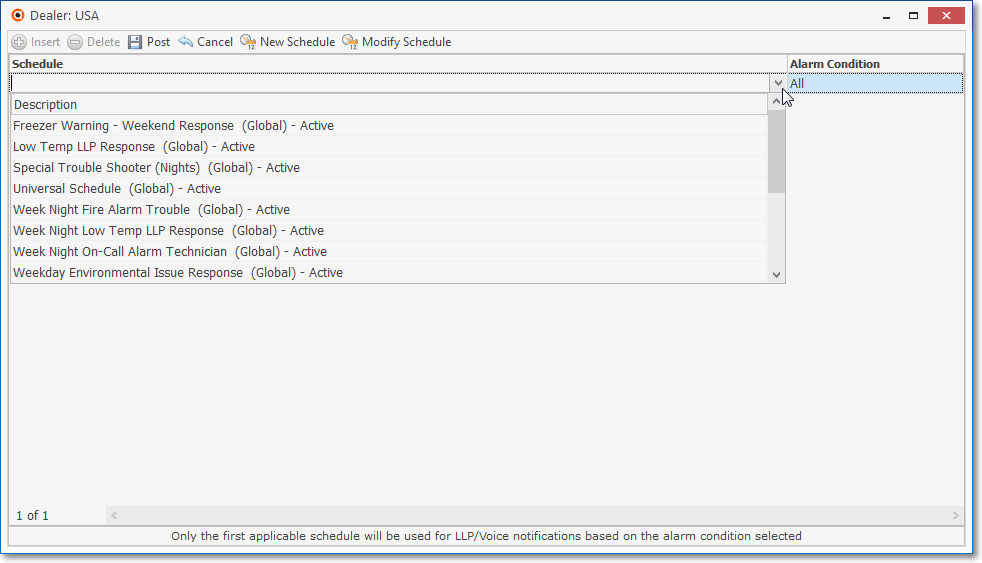
i.Schedule - Using the Drop-Down Selection List provided, Choose the appropriate Schedule from this list
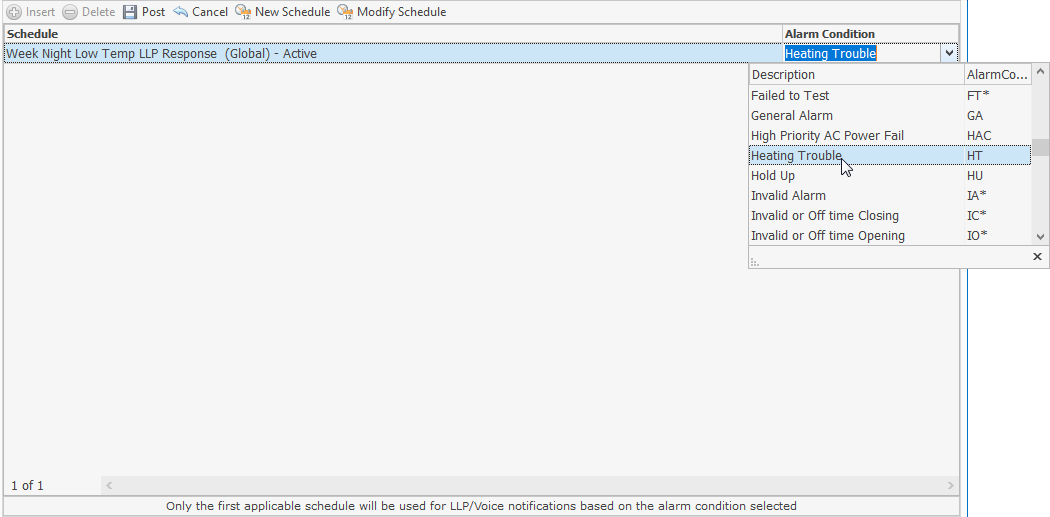
ii.Alarm Condition - The Alarm Condition defaults to All which means that The selected Schedule being added with be applied to All Alarm Conditions
➢Using the Drop-Down Selection List provided, Choose a specific Alarm Condition for this Schedule if it should only be applied when this specific Alarm Condition is received.
➢Important Reminder: Only one instance of an Alarm Condition may be assigned to an LLP Schedule for each Dealer.
iii.Post - Click on this ![]() Icon to save this entry.
Icon to save this entry.
b.Delete - Click the ![]() option to remove the selected Schedule for the list
option to remove the selected Schedule for the list
c.Post - Click on this ![]() Icon to save this entry.
Icon to save this entry.
•Once a Schedule is added, the number of Schedules assigned to this updated next to the LLP Schedule Icon
d.Cancel - Click on this ![]() Icon to abandon the information that was just entered (prior to Posting)
Icon to abandon the information that was just entered (prior to Posting)
e.New Schedule - Click the New Schedule Icon to create a Schedule (custom made for this situation) for this Dealer

i.The Schedules entry dialog will be displayed
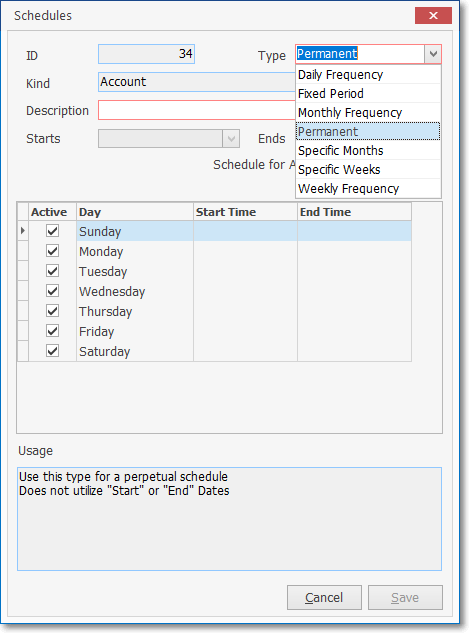
ii.Type - By default, Permanent is selected. Using the Drop-Down Selection List provided, Choose a different Type of the Schedule to be created.
iii.Once the Type is chosen, this Schedules Dialog will changed based on the Type selected
❖ See the Defining the Availability of a Schedule discussion in the Schedules chapter for an explanation of those possible changes
f.Modify Schedule - Click the Modify Schedule Icon to update/change the selected Schedule
❑Understanding the Schedules Form referenced by the LLP Schedule option:
•The Schedules Form displays all of the existing (previously created) Schedules and provides for the creation of new ones
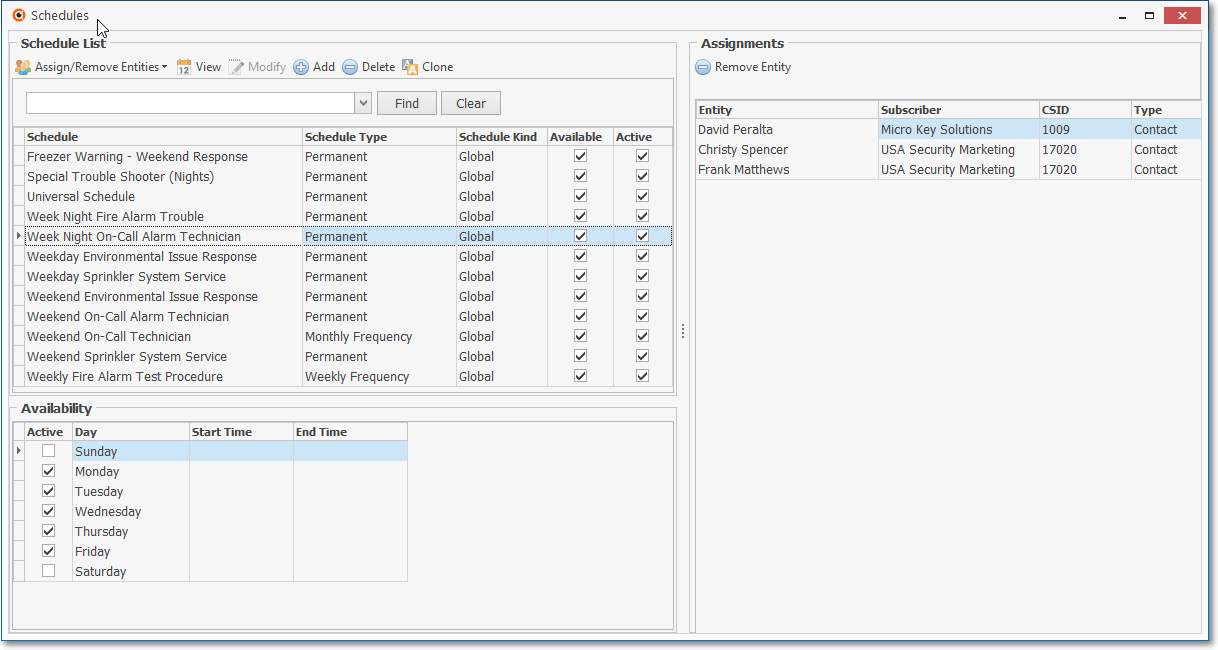
Maintenance - Monitoring Menu - Schedules Form
•The Schedules Form has three sections:
1)Schedule - Grid with all of the previous defined Schedules, and Schedule Type column, plus Available and Active columns
2)Availability - Grid with all of the Days of the Week and a Start and End time column used to set when the selected the Schedule should be used
3)Assignments - Grid containing all of the Entities - which may individuals, sets of individuals, and/or specific telephone numbers previously entered in one or more Subscriber's Contacts Lists - that are assigned to the selected Schedule
•When a Schedule is Created, it may become one of three Kinds based on the following conditions:
1)Global - A Schedule created from the actual Schedules Form is considered to be Global and may therefore be used by anyone.
2)Account (Subscriber) - An LLP Schedule Assigned to a Subscriber in the Monitoring tab's Central Station Data section within the Edit View of the Subscribers Form using this LLP Schedule option is reserved for use by this Account
3)Panel - A Schedule created, the Assigned from within the Contact Lists tab for a specific Subscriber Panel is reserved only for use by this CSID
•When Subscriber is associated with a specific Schedule by having it assigned to it using this LLP Schedule option, that selected Schedule will limit when an LLP Service response may be executed for this Subscriber.
✓Only one Schedule may be assigned to a Subscriber
•The Available Contacts section on the Contact Lists Form displays a list of all Contacts who have not yet been assigned to the selected Contact List
✓ An Available Contact may be assigned to any number of Schedules
✓Even though a Contact was assigned to a specific Schedule, that Contact may still be assigned to a different Schedule listed on the Schedules Form
✓To assign an Available Contact to an existing or new Schedule listed on the Schedules Form, Right-Click on that Contact, or Click any View Schedules Icon ![]() on the Contact Lists Form
on the Contact Lists Form
•A Contact List is used to define who should respond to a certain Alarm Condition and/or CSID Zone and/or Physical Zone Code within the Day, Date and/or Time parameters of the Schedule to which the Contact List has been assigned
✓ A Contact List may be may be assigned to any number of Schedules
✓Click the View Schedules Icon ![]() to open the Schedules For (this Contact List) dialog
to open the Schedules For (this Contact List) dialog