❑Why are you paying rent, heat, air conditioning, insurance and maintenance for the space where all of your filing cabinets are sitting?
•Those costly facilities and services do not even consider the purchase price for the filing cabinets, or the fact that their existence is a fire hazard.
•There is a way to phase out these costs and space requirements, while making it easier to find this information when you actually need it!
❑Going Paperless should be your goal and it's simple in Accounts Payable:
•Scan the Vendor's Invoices as soon as they arrive.
•Scan packing slips as they arrive.
•View reports rather than printing them whenever possible (remember, almost all reports can be reprinted any number of times, as needed).
•Any report that you feel you must print and save - do so - but after that month is closed which the report addresses, try printing it again. If they match (the original report and its reprint), never save another copy again because you've proved to yourself that you can get another copy whenever you need it.
•Shred immediately (save Employee records, Income and Sales Tax returns, and not much else)!
❑The Documents Icon appears on the Actions Menu on the Vendors Form.
•Vendors often have Documents that relate to the information normally collected as part of your normal business operation (such as letters, invoices, packing slips from inventory received,and copies of Sales Tax exemption certificates, etc.) that you may want to keep on file but be readily accessible with their record.
•If the Document to be saved is a Printed Document:
✓Scan the document if it is not available to you electronically.
✓If you are operating on a Network, Save the scanned image to a Hard Drive on your File Server to which anyone needing it will have access.
✓If you operate on a single computer, Save the scanned image to your local Hard Drive.
•To import this Document Click Documents on the Actions Menu
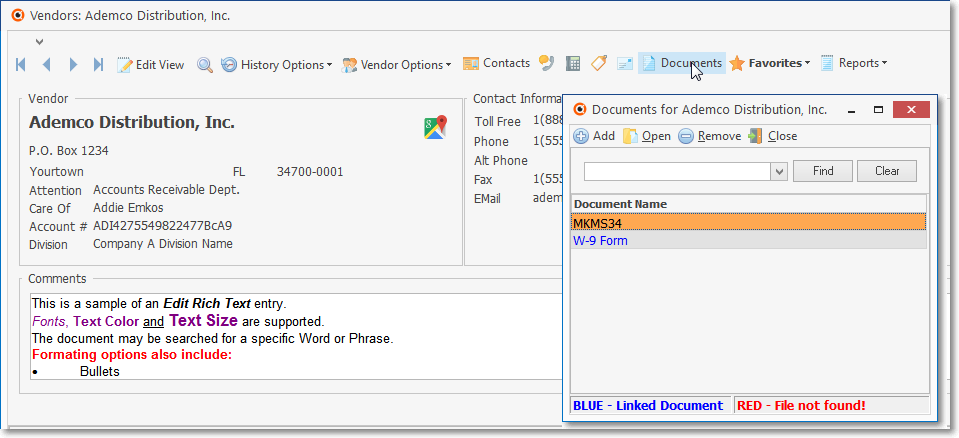
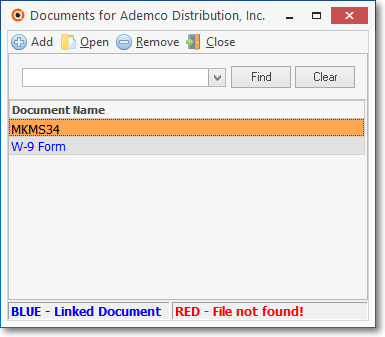
•The Documents Form offers three option buttons:
1.Add - allows you to add a new Document and attach it to the currently displayed record.
2.Open - opens an existing Document in the Documents list
3.Remove - deletes an existing Document in the Documents list
➢Note: In previous versions:
a)Documents could be Identified with a Link (the drive, folder, and file name where the Document actually exists), or
b)Documents could actually be Embedded into the database.
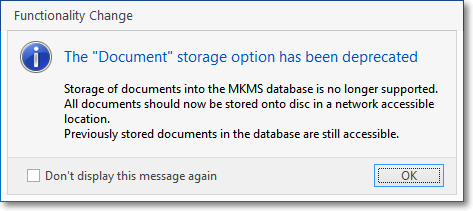
Functionality Change - Documents Storage
✓The Embedding feature has been discontinued because it was inefficient and used excessive space (Embedded Documents required more storage space then Linked Documents).
✓Unless you Check the "Don't display message again" box, this Functionality Change reminder message will be displayed every time you open the Documents Form!
•To Add a new Document:
✓Click Add
✓Select a Document to add to the Form using the standard Windows © Explore dialogue.
✓Documents may be:
▪Graphics (please save scanned image as a .jpeg),
▪PDF files,
▪Native formats like Web Site URL Links and Windows compatible Help Files, plus
▪Text Files such as the text files (.txt) format saved by Windows © Word Pad.
✓Keeping this in mind, locate and Double-Click on the desired Document
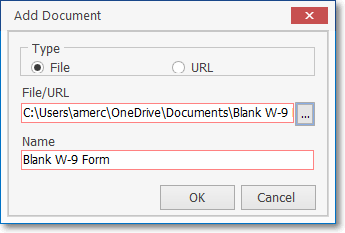
✓The Add Document dialog will be displayed (see above).
▪Type - Click on either File or URL button to identify the type of the Document to be added.
▪File/URL - Click the Ellipse to Select the full path and file name to be inserted into this File/URL field in the Add Document dialog
▪Name - The individual Name of the File or Description you entered for the URL will be inserted in the Name box.
oPreserving the Link - MKMS now knows exactly where this Document will be located when it is needed.
i.It must remain there.
ii.If you have multiple users who may need to access this file, be sure it is stored on your File Server where other users will also have access to it.
iii.Because only the Link is stored in the database, it does not make the database larger.
oPreserving the URL Link - MKMS can only find the URL if it has not been relocated.
✓Click OK to save the file and close the Add Document Form.
✓Click Cloce or the Close ![]() box on the top right of the Documents Form
box on the top right of the Documents Form