❑You may Modify an Existing Invoice, as long as it has not yet been paid and/or the month in which it was billed has been closed.
•The User must have the proper Security Access Rights to Modify an existing Invoice.
•A general overview of how this process is presented to the User follows:
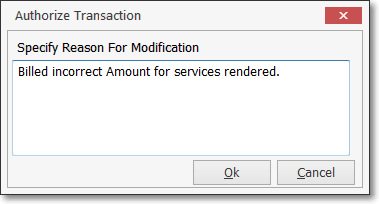
✓When a change is made to an Invoice that has already been saved and that Invoice Form was Closed, the User must complete the Authorize Transaction Form where she/he will be asked to provide a reason for making the change.
✓If the User does not have the Authority to make this change, an Invalid Credentials Warning Message will be displayed.
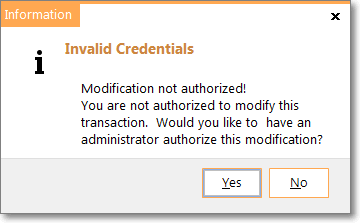
➢Note: Authority to make Changes is automatically granted to a User when the Accounting Administrator? box is Checked within the Security tab of that User's Employee Form.
✓To complete the change, answer Yes and have an Accounting Administrator with that Authority approve the entry.
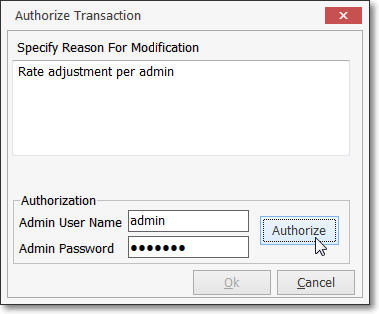
▪When a User does not have the Authority to make this change, an authorized person (i.e., Accounting Administrator or System Administrator) must enter their User Name and Password
✓Click Authorize.
✓Click Ok to save this change.
✓If required, all of the the Invoice's Totals will be adjusted automatically.
❑Making Invoice Changes:
❖Warning: It is important to know about restrictions that exist on any Invoice that included Inventory Usage and was created from within a Work Order!
✓Once an Invoice is created from within the Work Order, you cannot modify the Quantity, add additional Inventory Items, or change the Sale Category's Item ID of any Inventory Item recorded on that Invoice.
▪This is because, the Work Order has been Completed with those Inventory Usage Quantities and Charges recorded.
▪If an error was made in the Invoicing of that Inventory:
oThe Invoice must be Deleted
oThe Check mark removed from the Completed box on the Work Order Form
oThen, the corrected Inventory Usage must recorded and Invoiced.
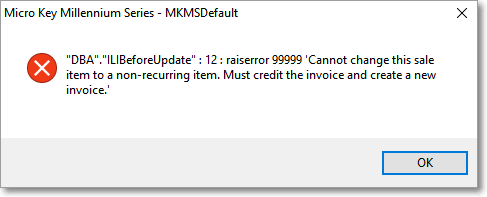
❖Warning: It is important to know about restrictions that exist on any Invoice that included Recurring Revenue and your Company is tracking Earned & Deferred Revenue.
✓For those Companies who are tracking Earned & Deferred Revenue, once a Recurring Revenue Invoice is created, you cannot modify the Quantity or change the Price on any Detail Line Item in that Invoice.
✓If you attempt to do so, this error message will be displayed:

▪✓ - Click Continue and the Invoice will be redisplayed.
▪![]() - Click the Cancel Icon
- Click the Cancel Icon
▪Issue a Credit Memo, then recreate the Invoice as needed.
•To change the Sale Date of the Invoice, use the Drop-Down Calendar/Date Entry field provided and select the desired Date.
a)Click on the Date field and type the desired Date using a MM/DD/YYYY format; or
b)Use the Drop-Down Calendar/Date Entry field provided to Choose the desired Date
✓Complete the Authorize Transaction Form as required.
✓The Date entered may not be in a Month that has already been Closed.
✓For General Ledger System Users:
▪If the Sale Date is changed:
oAll of the General Ledger Transactions that were posted for the Invoice and its the Detail List Items will be reversed.
oA new - matching - set of General Ledger Transactions will be created using the new Date as the Sale Date.
•To change an individual Price, Click on and modify that Price, as needed.
✓Complete the Authorize Transaction Form as required.
▪Click the Save button
▪This will automatically adjust all of the Invoice Totals.
•To change an individual Quantity, Click on and modify that Quantity, as needed.
✓Complete the Authorize Transaction Form as required.
▪Click the Save button
▪This will automatically adjust all of the Invoice Totals.
•To change an individual Sale-Purchase Item, Click on and modify that Item using the Drop-Down Selection List provided, if needed.
✓Complete the Authorize Transaction Form as required.
▪Click the Save button
▪This will also adjust the Description field.
✓If the original Sale-Purchase Item was a Recurring Revenue entry, it cannot be changed
▪If you attempt to do so, an error message will be displayed.
•To add an additional Detail Line Item:
✓Complete the Authorize Transaction Form as required.
▪Click on the last Detail Line Item of the existing Invoice
▪Press the Down Arrow ("â")
▪Enter the new sale information on the new Detail Line Item.
▪Click the Save button
▪This will automatically adjust all of the Invoice Totals.
•Discounts - Discounting the Gross Amount of this Invoice from its total original price (whether for a Sales Promotion or some other customer compensation situation):
✓The Discount function - which may require the appropriate Authorization - allows you to apply either a specific "percentage off" Value, or a specific "dollar off" Amount, both of which will be calculated by the Invoice Form and inserted as a separate Detail Line item.

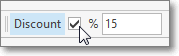
Invoice Form - Discount Section - Check Box
✓To provide a Discount based on a specific Dollar Value, after the Invoice has already been completed and saved:
▪Enter that Dollar Value in the Discount field
▪Do Not Check the % box.
▪Press the Tab F key
![]()
Dollar Value Discount entry
▪Click the Discount option.
▪Click the ![]() Icon to record this Discount entry.
Icon to record this Discount entry.

Invoice Form - Detail Line Item showing Dollar Value Discount
▪This action will automatically adjust all of the Invoice Net, Tax, and Gross Totals.
✓To provide a Discount based on a specific Dollar Value, after the Invoice has already been completed and saved:
▪Check the Discount Box:
▪Enter the desired Discount Percentage of Discount.
▪Press the Tab F key
▪Click the Discount option.
▪Click the ![]() Icon to record this Discount entry.
Icon to record this Discount entry.
▪This action will automatically adjust all of the Invoice Net, Tax, and Gross Totals.
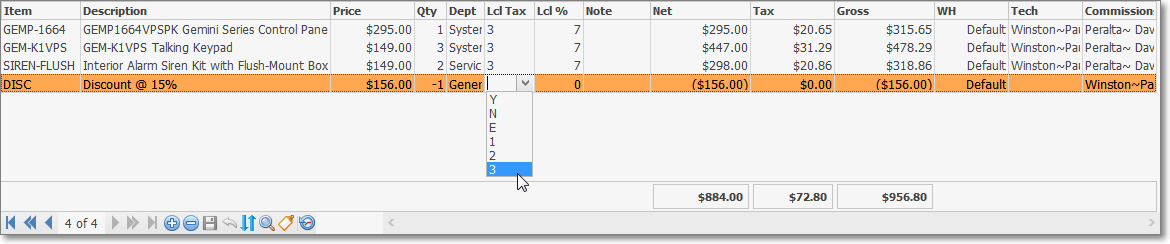
❖About Sales Tax and Department entries - Updates to the Discount Detail Line Item may be required:
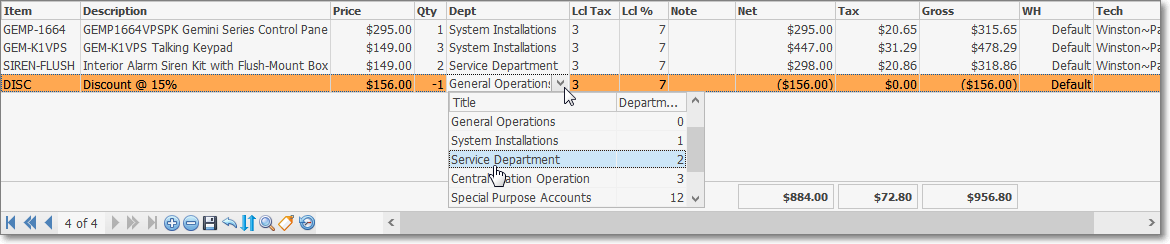
Invoice Form - Discount Detail Line Item - Department and Sales Tax fields
▪Sales Tax - In some States and/or Countries, Sales Tax may not be credited as part of the Discount, but in others it is allowed.
a)If the Sales Tax cannot be credited as part of the Discount, and Sales Tax has been charged on other items, Click the Local Tax - Code column and, using the Drop-Down Selection List provided, Select "N" (No).
b)If the Sales Tax may be credited as part of the Discount, and Sales Tax has been charged on other items, Click the Local Tax - Code column and, using the Drop-Down Selection List provided, Select the appropriate Sales Tax code and rate.
▪Department - If a Department was assigned to the original Detail Line Items (prior to providing a Discount), be sure to assign the appropriate Department to the Discounted Detail Line Item.
•If you have made any changes and are attempting to Close this Invoice Form without choosing thew Save Icon at the top opf the Form. a Save current invoice" reminder wioht be presented.
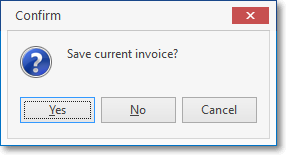
Save current invoice?
✓Answer accordingly.