❑The entrance to the Prospect Tracking System is through this Prospect Form.
•This Micro Key Millennium Series™ Application Desktop - the MKMS Desktop - has a several module Tabs with each Tab having its own Ribbon Menu.
•The Prospect Form has its own Ribbon Menu which offers access to the Edit View Icon
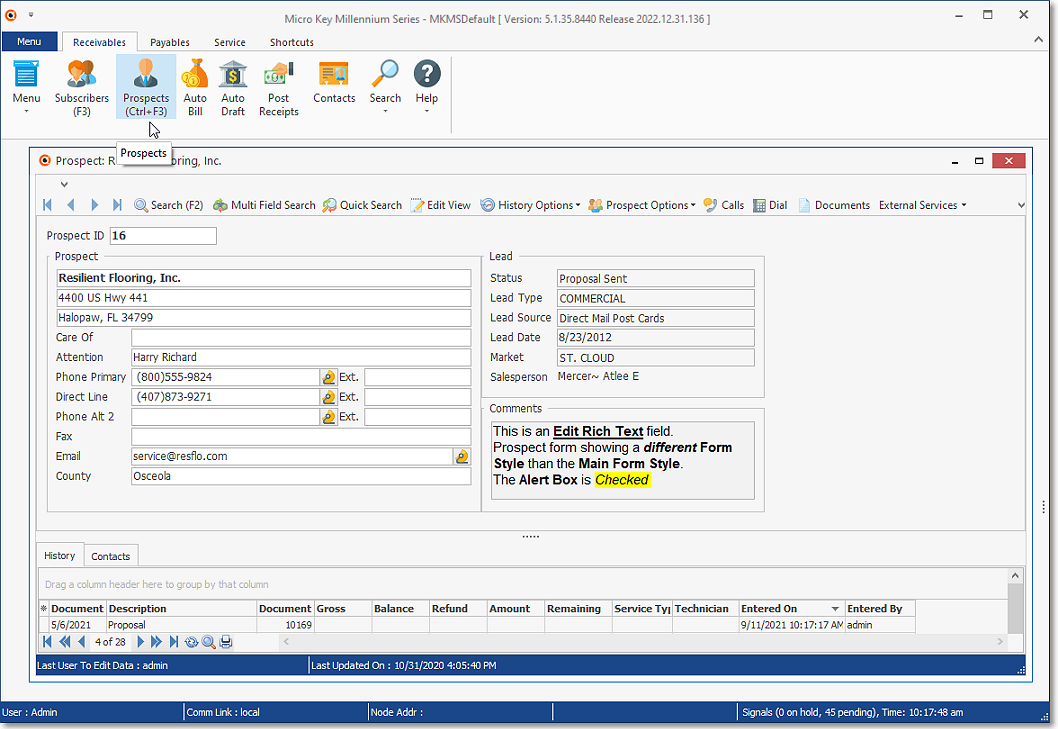
MKMS Desktop Ribbon Menu - Receivables Tab - Prospect Form with its Ribbon Menu
❑Understanding the components on the Prospects Form:
1.The Prospects Form contains the Prospect related information and has its own Ribbon Menu.
2.Add or Remove Buttons option (Down-Arrow ˆat the top of this Form) which allows each User to Customize the Quick Access Tool Bar.
3.That Ribbon Menu has many Icons which provide access to specific functions used by and/or for the Prospect Tracking System.
![]()
Prospect Form - Ribbon Menu
a.Navigation - Record movement and special purpose Icons: Edit View, Search, History Options and Prospect Options (see the brief overview below of the Prospect Options Menu chapter)
b.Actions Icons - Search (F2), Multi Field Search, Quick Search, Calls, Dial, Documents, External Services, Favorites, Filter, Reports, and Email.
❖The External Services option does not appear on the Ribbon Menu of the Prospects Form unless an External Service has been defined for Prospects.
4.The Edit View option is used to add, update and delete all Prospect related information for the currently selected Prospect record.
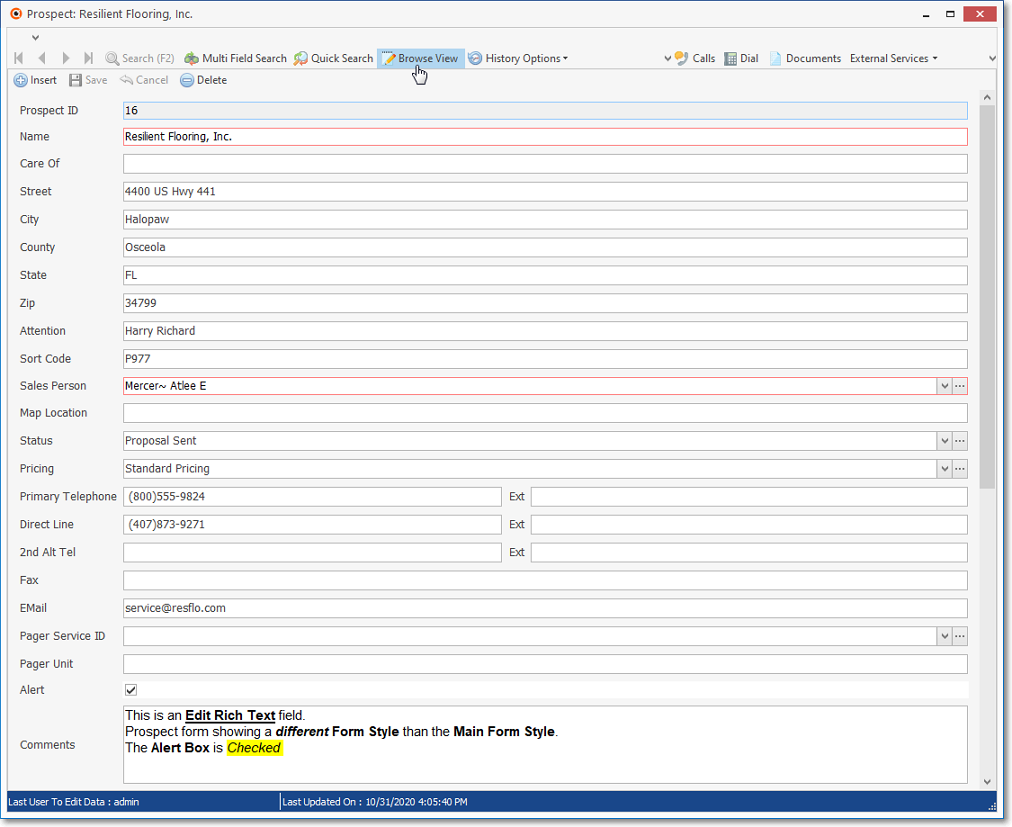
Prospect Form with Edit View displayed - Browse View option available
•Navigation Options:
✓Record movement - Offers the standard First, Previous, Next, and Last Icons
![]()
✓The Search Icon opens the Prospect Search dialog which is used to locate and select a specific Prospect record.
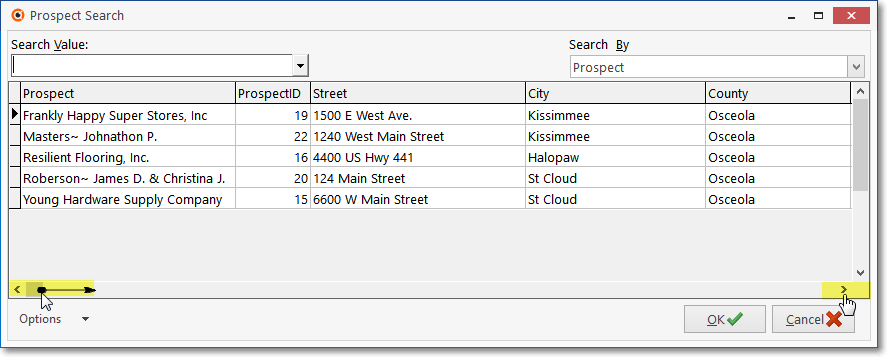
Prospect Search Form
✓The History Options Drop-Down Menu allows the User to:
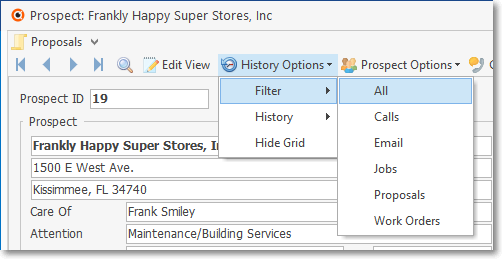
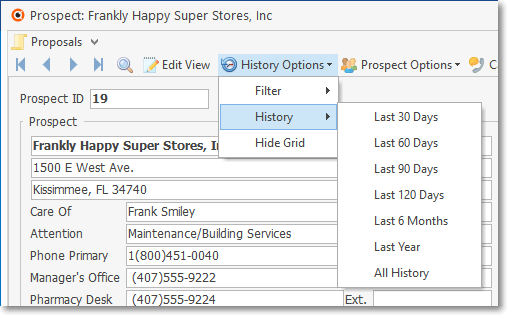
1.Filter - Set (Filter) what Prospect related information will be shown in the Prospect History Grid.
2.History - Identify the Date Range to further filter the Prospect History Grid by when Prospect related information selected above was created.
3.Hide Grid - Hide the History Grid.
✓Prospect Options Menu provides access to many Prospect specific functions:
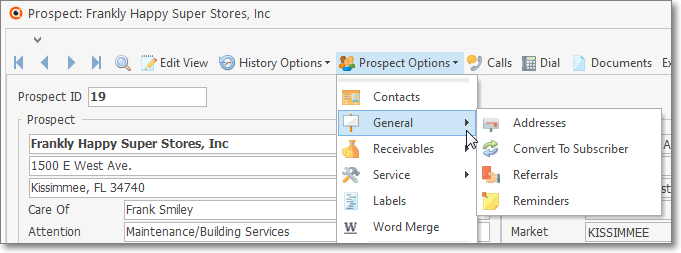
•Prospect Options - Menus & Sub-Menu options:
1.Contacts - Opens this Prospect's Contacts Form
2.General sub-menu - This List (shown above) provides access to various other Forms and Processes that are used throughout MKMS by several different modules including, in some cases, the Prospect Tracking module:
a.Addresses - Define an Alternate Mailing Address for this Prospect.
b.Convert to Subscriber - Convert the currently selected Prospect record to a Subscriber (and once it is converted to Subscriber, and optionally convert any related Proposals to Invoices.
c.Referrals - This Form is used to record who Referred this Prospect to your Company.
d.Reminders - Look-up, Add, Edit, and/or Complete a Reminder Item, or Reschedule a selected Reminder Item.
3.Receivables sub-menu - There is only one option:
a.Proposals - This Form is used to create a Proposal for this Prospect.
3.Service sub-menu- There is only one option:
a.Work Orders - This Form is used to create a Work Order for this Prospect.
4.Labels - This Form is used to create mailing Labels for this Prospect.
5.Word Merge - This form is used to define instructions for a Word Merge process.
•Actions Options:
![]()
1.Calls - Click Calls to document a Telephone Contact with this Prospect.
2.Dial - Click Dial to dial the Primary telephone number via your modem (located below in the Prospects Tab).
3.Documents - Click the Documents Icon to have access to the Document stored for this Prospect.
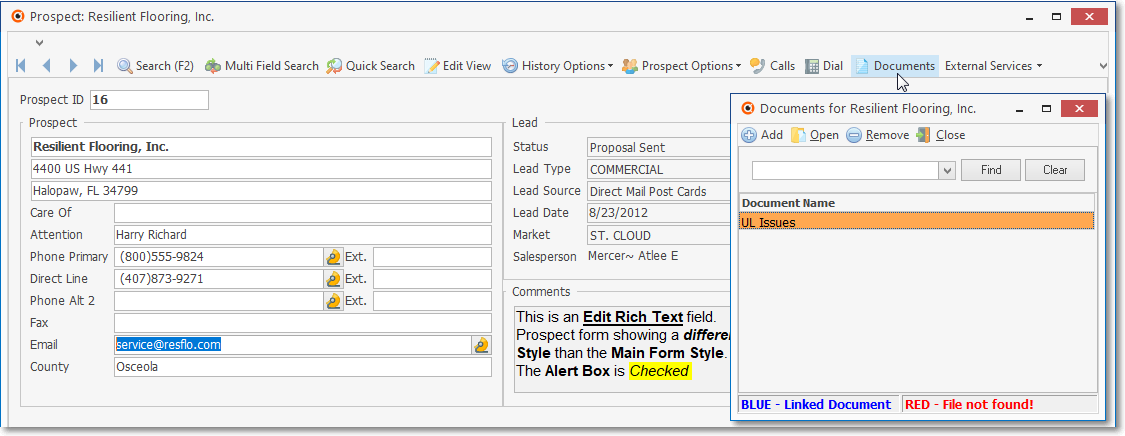
Prospect Form - Ribbon Menu - Actions - Document Icon - Documents Form
✓Click the Documents Icon to open the Documents Form (see instructions in the Documents chapter for complete information on using this feature)
4.External Services - Click the small down arrow 6 on the External Service Icon to display the Drop-Down Selections list of previously defined External Services.
5.Favorites - Click the Favorites option to identify a Favorite Prospect which may then then be selected using the Favorite Icon's Down Arrow to open a Drop-Down Selections List to instantly display a previously identified Favorite Prospect record.
6.Filter - Provides the ability to apply or un-apply a Prospect Filter to the Prospects Form
7.Reports - Click the small down arrow 6 on the Reports Icon to display the Drop-Down Selections list from which the Prospect Information Report dialog may be opened.
8.EMail - Click the Email Icon to open the Email Dialog (e.g., using Outlook©, or whatever Email protocol is being used) to send an Email to this Prospect.
▪The Email option will activate your Email utility (e.g., Outlook®, etc.) and insert the Email Address(es) identified for this Prospect.
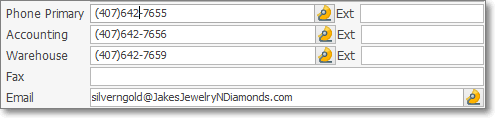
•Contact Icons on the Prospects Form
Contact Icons on the Subscribers Form
![]() - Click any Contact Icon to open the Contact dialog
- Click any Contact Icon to open the Contact dialog
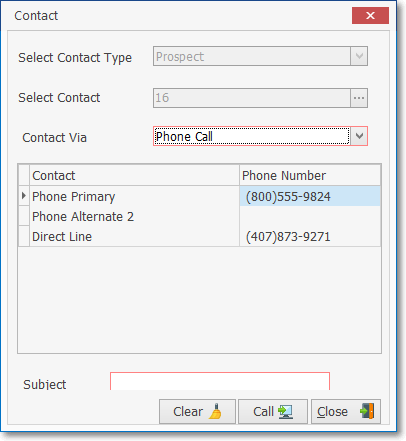
Contact dialog - Contact Via - Phone Call
❖See the Contacts discussion in the Subscriber Information chapter for instructions.
Entering a New Prospect
❑This Prospects Form's Edit View Icon opens the Edit View dialog where a new Prospect record may be entered, or an existing one, edited.
•Entering a New Prospect record
✓Open the Prospects Form by Pressing Ctrl+F3 (or by Clicking the Prospects Icon on the Receivables Tab's Ribbon Menu)
✓Then, Click the Edit View Icon.
![]()
➢Note: To return to the regular Prospects Form (the Browse View), Click that Browse Icon (which replaces the Edit View Icon).
•Edit View on the Prospects Form is where the Prospect's information is entered and/or modified.
Prospects Form - Edit View
•To return to the regular Prospects Tab (the Browse View), Click the Browse View Icon.
❖See the Edit View on the Prospects Form chapter for complete information on how to enter a new Prospect record.