❑The Documents Icon appears as a Ribbon Menu Option (sometimes with a different appearance) on many Data Entry Forms.
•Subscribers, Vendors, Job Costing, Prospects, Employees, Sale-Purchase Items, and Installed Equipment Codes among others, often have additional Documents that relate to the information normally collected on those Forms (such as contracts, product descriptions, letters of commendation, Proposal acceptances, W-9's and copies of Sales Tax exemption certificates, Control Panel Instructions, etc.) which should be kept on file, but be readily accessible for viewing.
•If the Document to be saved is currently a Printed Document:
✓If you only have a printed copy (if you do not already have an electronic copy such as a Word® document),
▪Scan the printed Document into either the ".jpg" or ".pdf" file format.
▪Save it to your local Hard Drive (or, if running on a Network to the File Server - see below).
✓If you are operating on a Network, Save the scanned image to a Hard Drive on your File Server to which - anyone needing it - will have access to it.
✓If you operate on a single computer, Save the scanned image to your local Hard Drive.
❑To identify a Document which needs to be accessible within MKMS, Click the Documents Icon on the Form that needs that access.
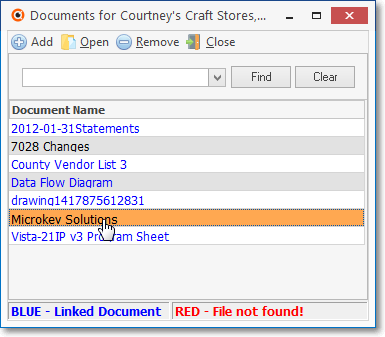
•The Documents Icon will open the Documents Form (see the Documents Icon and Documents Form in the illustration below), on which you have a four (4) options:
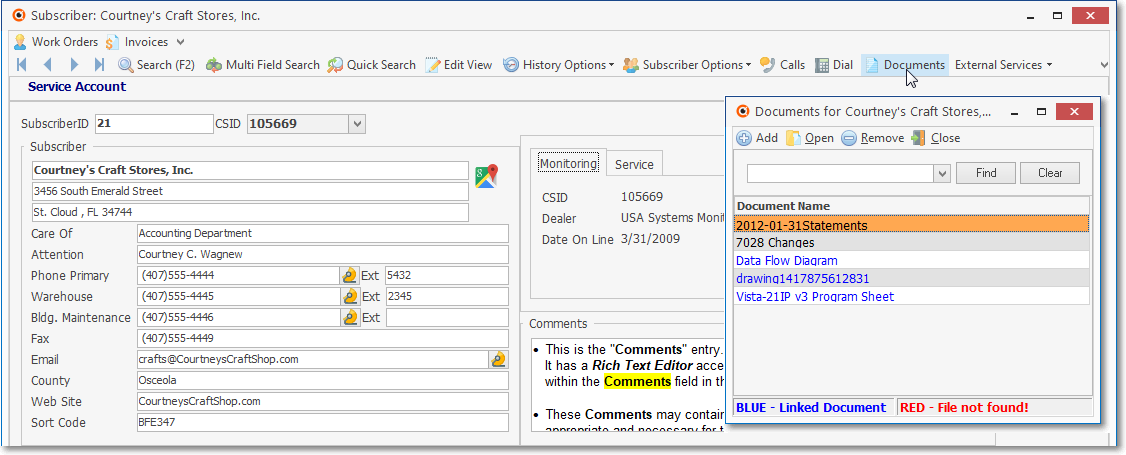
Subscribers Form - Ribbon Menu - Actions - Document Icon
1.Add - Click this option to add a new Document to the the Documents List (see the "To Add a new Document" discussion below).
➢Important Note: In previous versions on MKMS:
a)Documents could be Identified with a Link (the drive, folder, and file name where the Document actually exists), or
b)Documents could actually be Embedded into the database.
❖The Embedding feature has been discontinued because it was inefficient and used excessive space (Embedded Documents required more storage space then Linked Documents).
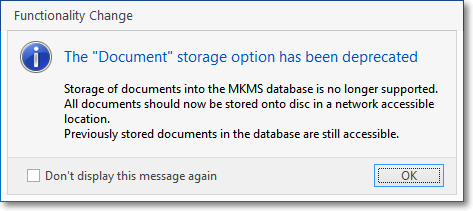
Functionality Change - Documents Storage
❖Unless you Check the "Don't display message again" box, this Functionality Change reminder message will be displayed every time you open the Documents Form!
2.Open - Select a Document Name in the Documents List and Choose Open to view that specific Document immediately.
3.Remove - Select a Document Name in the Documents List and Choose Remove to delete that specific Document from the Documents List
4.Close - Click this option to close the Documents Form and return to the main screen from which is was opened.
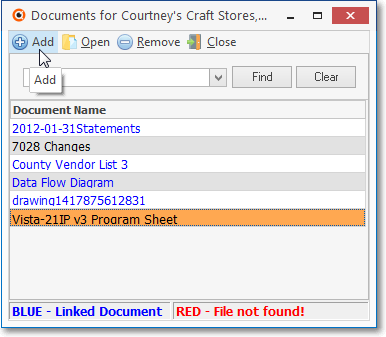
Documents Form - Add Icon
•Add - Click the Add Icon to open the Add Document dialog
✓File - Click File button to locate a specific File
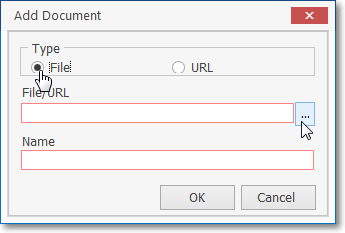
✓Click the Ellipse on the right of the File field to open the Windows® Open dialog
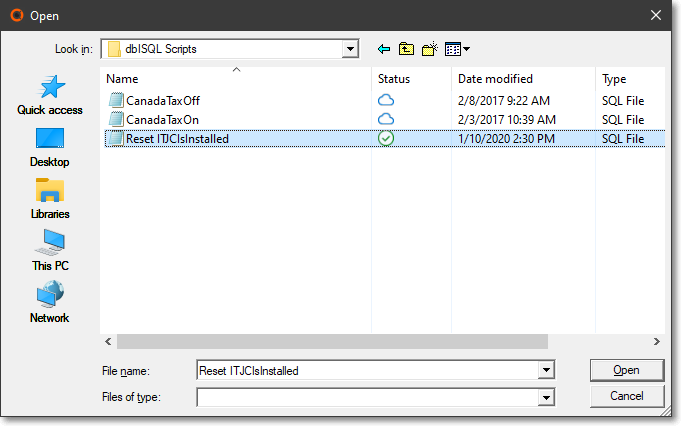
▪Navigate to then select the desired Document
▪Click Open
▪File/URL - The Selected Document's Path will be inserted in the File/URL field
▪Name - The Name of the selected File will be inserted in the Name field
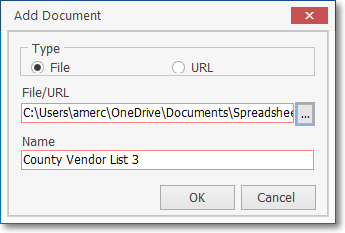
Add Documents dialog
▪OK - Click the OK button to save this entry
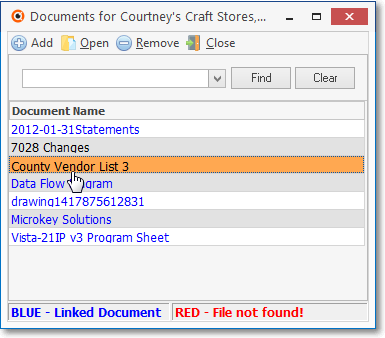
▪The File entry will be inserted in the Documents list
✓URL - Click URL button to identify a specific URL

▪File/URL - Enter the appropriate URL
▪Name - Enter Name of that Web Site in the Name field
▪OK - Click the OK button to save this entry
▪The URL entry will be inserted in the Documents list
•Close - Click this option to close the Documents Form