❑MKMS does not provide a Payroll module
•Many use either QuickPay®, QuickBooks®, or an outside Payroll Service (such as ADP®) to process their payroll.
•To save time, the transactions required to post your Payroll expenditures in the General Ledger System, may be imported as a batch(set) of Financial Transactions contained in a specially formatted text file.
•QuickBooks® can provide this specially formatted Account Register Format described below:
➢Note: As this is a somewhat "standard" methodology, other Payroll Services should be able to create a file that matches this QuickBooks® format.
❑Import Payroll File Format: This is a tab delimited file with each line containing a transaction, followed by a carriage return and a line feed, and containing the following information:
•Transaction Number - This information will be inserted into the General Ledger's Account Register as the transaction's Description.
•Transaction Type - This information will be inserted into the General Ledger's Account Register as the transaction's Type.
•Date - This information will be inserted into the General Ledger's Account Register for the Date of the transaction .
•Number - This is the General Ledger Account Number.
•Account - This is the General Ledger Account Number's Title.
•Debit - If this is the Debit side of the entry, this is the Debit amount to be posted.
•Credit - If this is the Credit side of the entry, this is the Credit amount to be posted.
➢Note#1: Each line in the Account Register will have either a Debit or a Credit entry, not both.
➢Note#2: When these Import Payroll transactions appear on the Bank Reconciliation Form, the word "DEBIT" will appear in lieu of a Check Number.
❑Creating this Account Register format within QuickBooks®:
•Open QuickBooks®.
•Select Reports/Payroll/Payroll Account Register and a Report will be displayed
•You will Select the Customize (in some versions it may say Modify) option from the Report Toolbar.
✓A list of field names will be presented - many of them will have a Check next to them.
✓Those with a Check are automatically included, those without, are not.
✓You may Double-Click any field name to turn on (or off) the Check.
•Add and/or Remove field names until the 7 items listed below are the Only Items that are Checked.
1.TransNo
2.TransType
3.Date
4.Num
5.Account *
6.Debit
7.Credit
* Optionally, the Account entry may be preceded by a hyphen, then an Account Title, then the Amount
•Once you have made these selections, Click OK, which will return you to the Report screen.
✓Examine the Report.
✓Ensure that the General Ledger Account Numbers (Num) are listed before the actual Account Name (Account).
✓If not, set your QuickBooks® options to turn on (display) Account Numbers.
✓On the Report Toolbar, turn off Report Headers - it is just a button you Click to turn Report Headers off or on.
✓On the Report Toolbar, Click Memorize to have QuickBooks® memorize this report format
✓Name the memorized report: PayrollExport
❑Making an actual Account Register for MKMS:
•Open QuickBooks (it is assumed that you have processed Payroll for the week to be imported).
•Select Reports/Memorized Reports.and Choose the PayrollExport report.
•Select the data for the payroll period you wish to export from QuickBooks® into the MKMS General Ledger.
•Click the Print button and within the Print dialog, Choose Print to File.
•Use the Drop-Down Selection List provided to Format the report as Tab Delimited giving it a unique name like: PAY09-25-2010.
❑Importing the Payroll Account Register:
•To access the Payroll Import Form use either of these two methods:
a)From the Backstage Menu System Select File and Choose the General Ledger Menu, then Click the Import Payroll option, or
b)From the Quick Access Menu, Select File and Choose the General Ledger Menu, then Click the Import Payroll option.
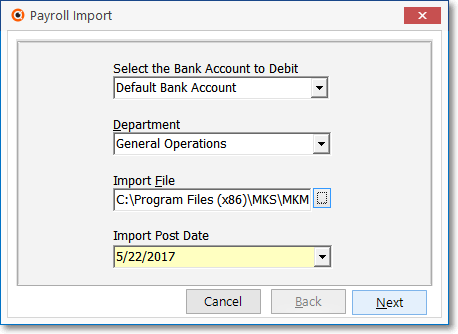
Payroll Import dialog
❖It is important to know that, until you Click Finish (see the Final Instructions Steps below), no Payroll Transactions will actually be posted to the General Ledger System.
•Select the Bank Account to Debit - Using the Drop-Down Selection List provided, Choose the Bank from which these Payroll funds will be withdrawn.
✓This is actually going to be a Credit transaction because we will be subtracting these Payroll funds from the selected Debit (Asset) Bank account.
•Department - If multi-departmental accounting procedures have been implemented, using the Drop-Down Selection List provided, Choose the Department that will be charged with this Payroll.
•Import File - Click the Ellipse button to browse for the appropriate Payroll Account Register name.
•Import Post Date - Using the Drop-Down Calendar/Date Entry field provided, Choose the Posting Date to indicate when the selected Bank's General Ledger Account will be affected.
•Click Next to continue to Import Payroll.
✓The file will be opened
✓If the Account Register you've identified contains any General Ledger Accounts that do not exist within MKMS General Ledger, a dialog will be displayed with that information.
✓If all accounts are correct, the Import Payroll process will start.
✓A running total of Debits, Credits and funds withdrawn from your Bank will be displayed.
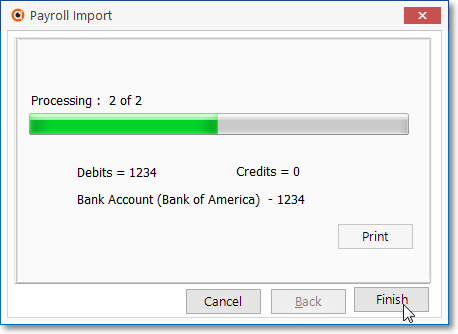
Payroll Import calculations
✓You will be notified when the Payroll data has successfully been imported.
•Print - Click the Print button to Preview or Print (to a File or a Printer) this report.
•Examine the Payroll Import Data report for accuracy.
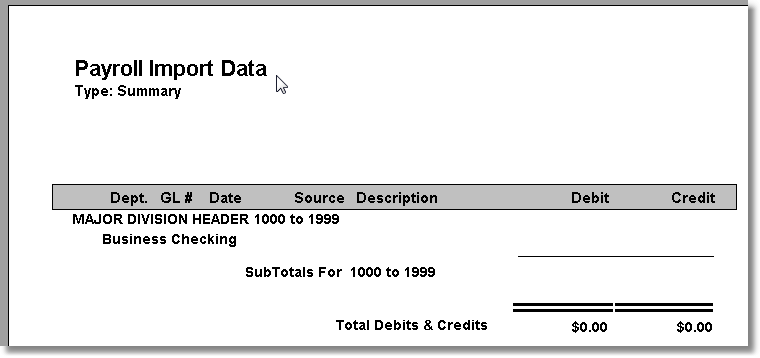
Payroll Import Data report sample
❑The Final Steps:
•Finish - Once you have determined the Payroll Import Data report is OK, Click Finish to actually Post these transactions to the General Ledger.
•Back - If you need to select a different file or make any other entry adjustments, Click Back.
•Cancel - To abort the entire Import Payroll process, Click Cancel.