❑This General Ledger Checkpoints dialog provides a List (Grid) which may be printed and/or exported that allows a User to review the General Ledger Checkpoints that were recorded when an Accounting Period is Closed in the General Ledger System, and any User generated General Ledger Checkpoints which were created manually.
•After any General Ledger Checkpoint is created (manually or automatically), a General Ledger Notification dialog is automatically displayed the next time an authorized Employee Logs Into MKMS.
✓At least one Employee must be authorized to view a General Ledger Notification
✓The authority to view General Ledger Notification is granted to a User by Checking the Notify General Ledger Changes? box in the Security tab of the Employee Form
✓Also, in the Security tab of the Employee Form, that User may:
▪Be identified as an Accounting Administrator by Checking the Accounting Administrator? box .
▪Be permitted to Post into a Closed Period by Checking the Can Post Into Closed Period? box.
▪May be classified as a Super User by Checking the Super User Authority? box.
•To access the General Ledger Checkpoints Form use either of these two methods:
a)From the Backstage Menu System Select File and Choose the General Ledger Menu, then Click the Create Checkpoint option, or
b)From the Quick Access Menu, Select File and Choose the General Ledger Menu, then Click the Create Checkpoint option.

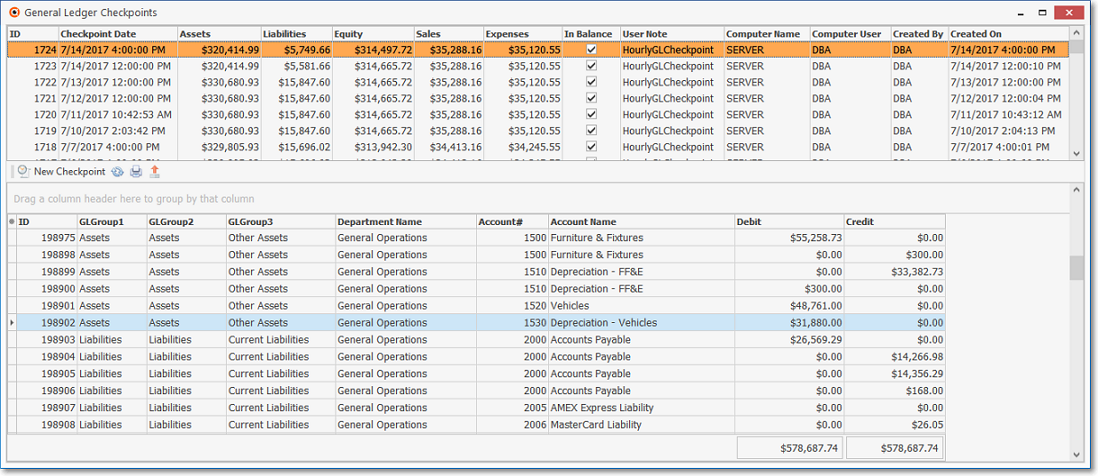
General Ledger Checkpoints dialog - Header Grid Column Names

General Ledger Checkpoints dialog - Header Grid Columns - Out of Balance Checkpoint displayed in Red
❑Understanding the General Ledger Checkpoints dialog:
•The Ribbon Menu options in the center of the General Ledger Checkpoints Form:
1.Ribbon Menu - This Menu has several options:
![]()
a.New Checkpoint - Click this Icon to Create a new Checkpoint by opening the Create New Checkpoint dialog.
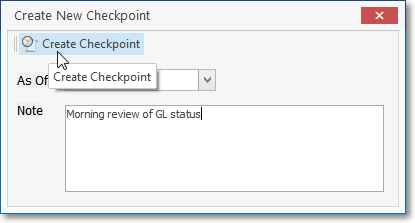
Create New Checkpoint dialog
oAs Of - Enter the Date this Checkpoint is being created using the Drop-Down Calendar/Date Entry field provided.
oNote - Enter a comment.
oCreate Checkpoint - Click this Icon to create the desired Checkpoint.
b.Refresh - Click this Icon to update the data (e.g., General Ledger Checkpoints List and the Checkpoint Detail with the most current information (this option is typically used immediately after creating a new Checkpoint).
c.Print - Opens a General Ledger Checkpoints Form's Print Preview dialog displaying the currently selected Checkpoint's General Ledger Detail Grid's contents as adjusted using the Detail View/Hide Detail option (see the "View/Hide Columns of Grid Detail" discussion in 3., a. below).
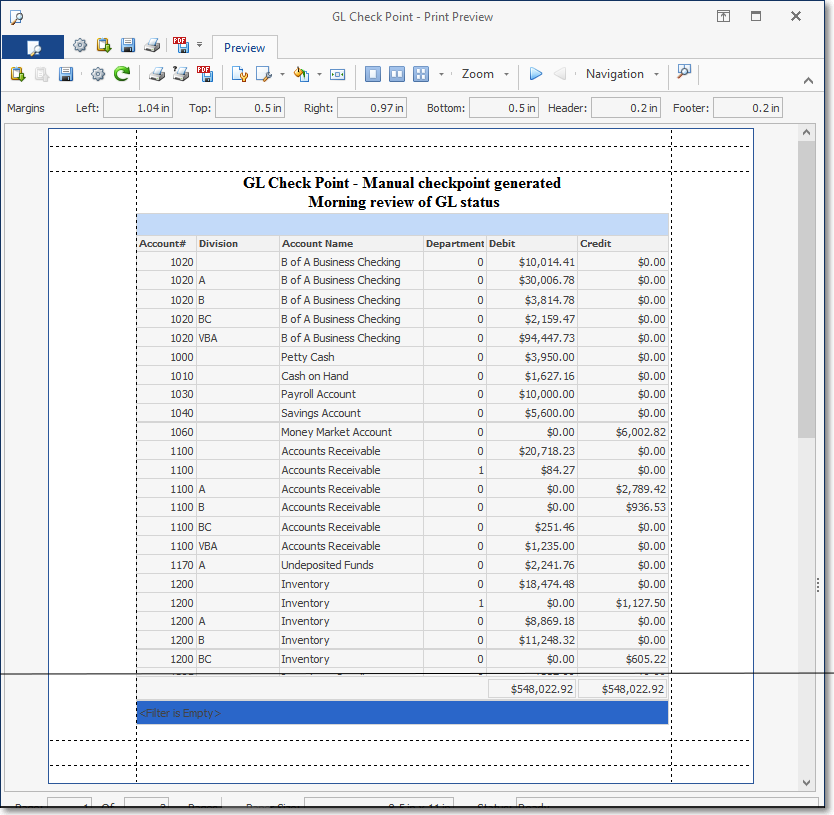
oThe format information that is displayed (e.g., column widths, sorted order, filtered data) is determined by the structure and formatting of the Detail Gird at the time the Print option was selected.
oThe Grids & Lists - Print Preview - Exporting Data chapter has much more information about this Print Preview option.
❖Understanding Checkpoints created from the Trial Balance Report:
i.When a Trial Balance Report is created for All Divisions and All Departments, that report's data set is inserted as a Checkpoint.
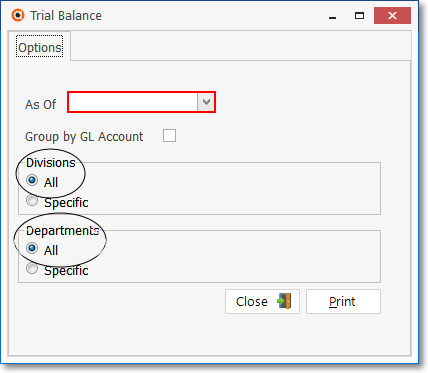
Trial Balance Report - Options tab - All Divisions & All Departments
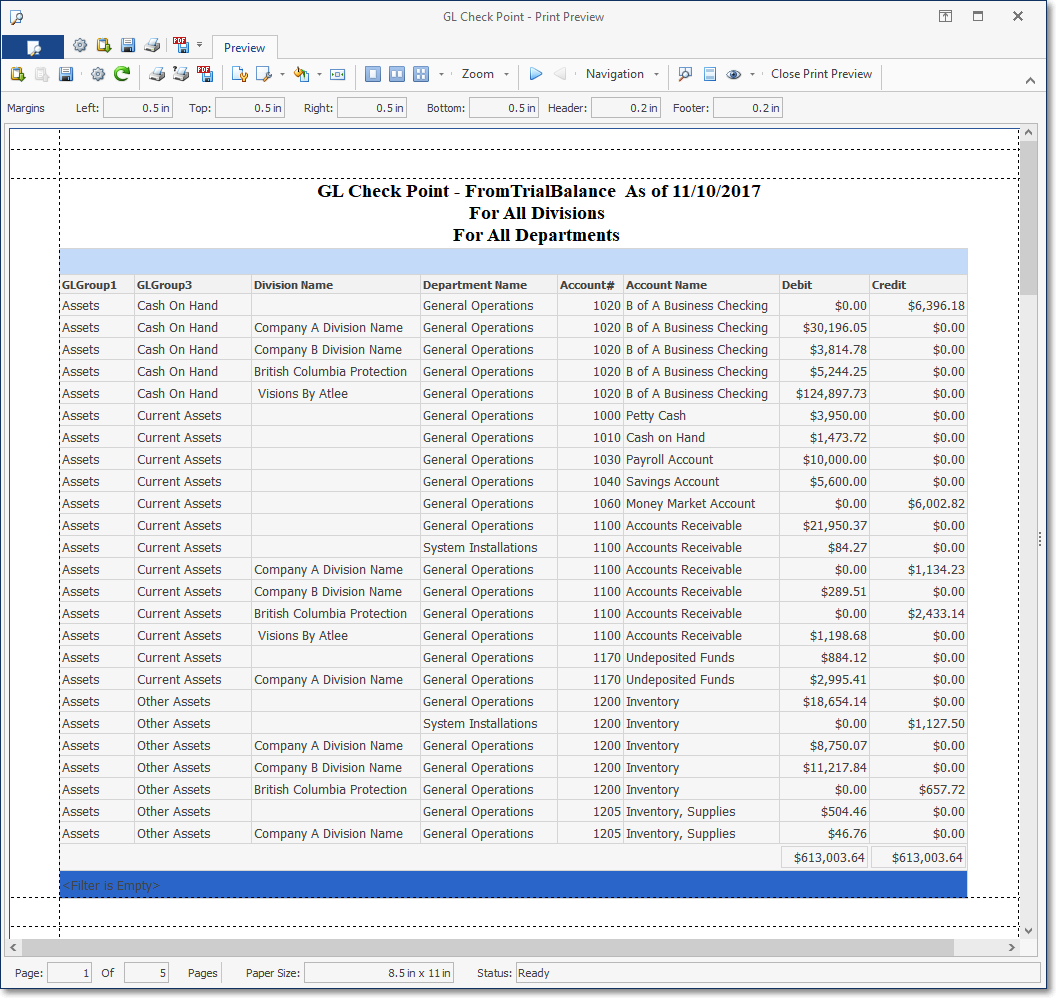
Print Preview for GL Checkpoint from Trial Balance Report - All Divisions & All Departments
ii.When a Trial Balance Report is created for a set of one or more selected Divisions and/or a set of one or more selected Departments, that report's data set is not inserted as a Checkpoint.
d.Export - Click this Icon to export the Detail (see # b. View/Hide Detail above) of the currently selected Checkpoint in an XLS, TXT, or Comma Delimited TXT format.
oBrowse Folders - Click the Down-Arrow to open the Browse Folders dialog and select the Folder in which this exported data should be located.
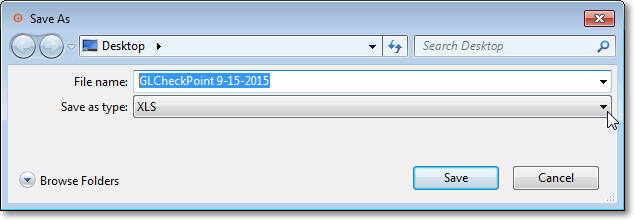
oFile name: Enter a file name into which this data will be exported.
oSave as type: Use the Drop-Down Selection List provided to Choose the desired File Type (i.e., XLS, TXT, or Comma Delimited TXT)
oSave - Click the Save button to create the file.
2.Checkpoints List (Grid) - This presents the List of the previously created Checkpoints.
General Ledger Checkpoints dialog - Header Grid Column Names
3.Checkpoint Detail (Grid) for selected Checkpoint in the Header - Double-Click a Checkpoint record line item to view of the Financial Detail associated with the Checkpoint selected in the Header.
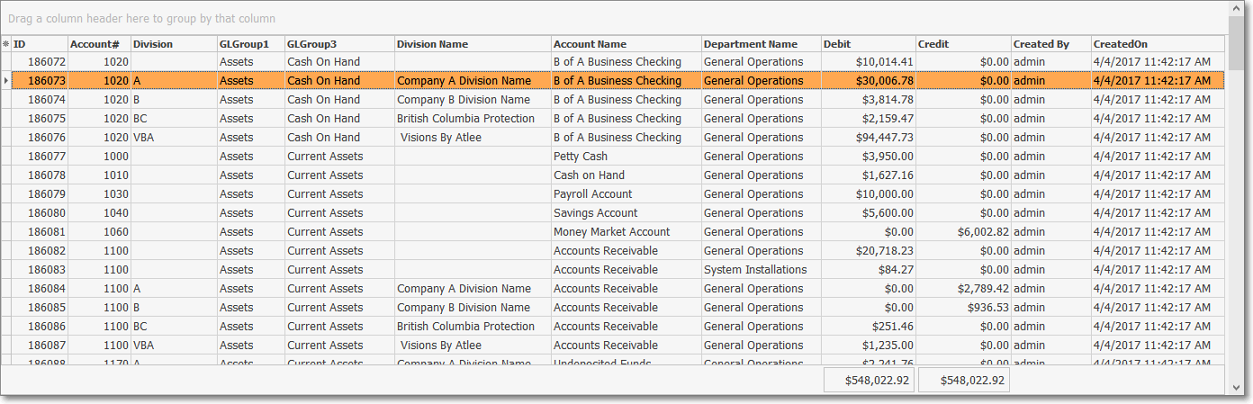
General Ledger Checkpoints dialog - Detail Grid Column Names
a.View/Hide Columns of Grid Detail - Because this is a Grid, the User may:
i.Choose which Columns of data are to be included in the Checkpoint Detail Grid
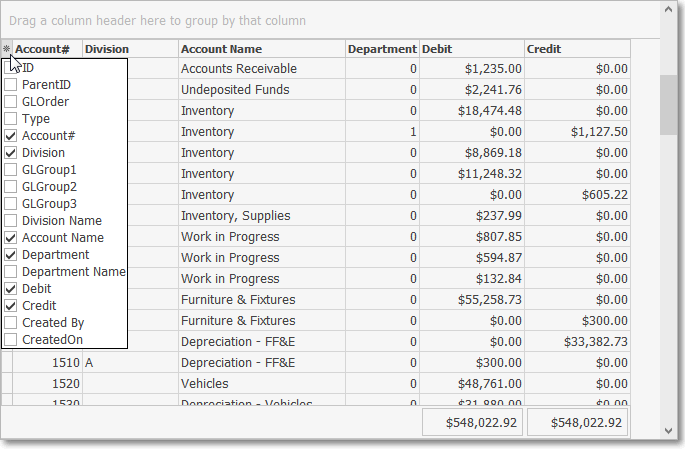
▪Click the Asterisk on the left of the Grid Detail Header
▪Check those Column Names of data which are to be included (initially, by default, all will be Checked).
▪Those that are Checked will become the new default columns included in the Grid Detail list.
ii.Group the data in the Grid based on any Column of Data (represented by that Header Name)
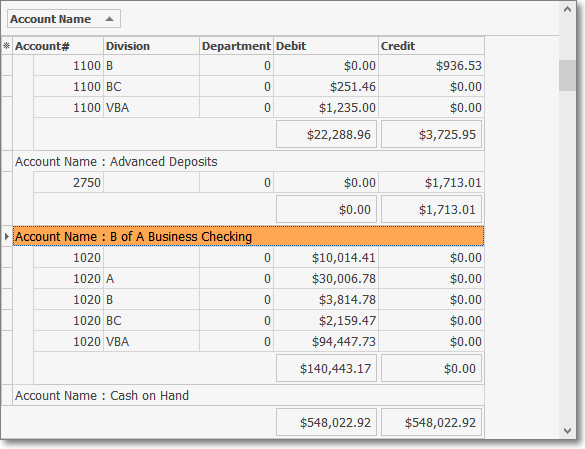
▪Drag & Drop a Header Name into the Drag a column header here to group by that column band.
▪All General Ledger Accounts of that type will be included.
iii.The User may also Filter the data in the Grid (see those instructions in the "Creating a Custom Filter for the List, a Group, and/or Grid Data Detail" section of the Grids & Lists - Print Preview - Exporting Data chapter), if required
▪This is generally done to locate a specific set of data, or to configure data for a Print Preview (see 1., c. above).
iv.Print, or Export the selected, configured, and filtered Grid data.