❑When one or more Inventory Items that are potentially needed for a Job and are currently On Hand and Available On Hand should be Reserved for this Job (to ensure that those Inventory Items are available when needed):
•By doing so, you are notifying the system that those Inventory Items should not be Sold or Reserved by another User, because they are now committed to this Job.
•To Reserve those Inventory item(s) for this Job,
✓Use the Reserve Inventory option on the Item List sub-tab on this Job Costing Form.
✓Those Reserved Inventory item(s) will automatically be inserted into this Inventory Reserved sub-tab.
•To Release Inventory item(s) use the Reassign/Transfer Inventory option.
❑Understanding the Inventory Reserved sub-tab
•Select the Inventory Tab on the Job Costing Form, then Click the Inventory Reserved sub-tab.
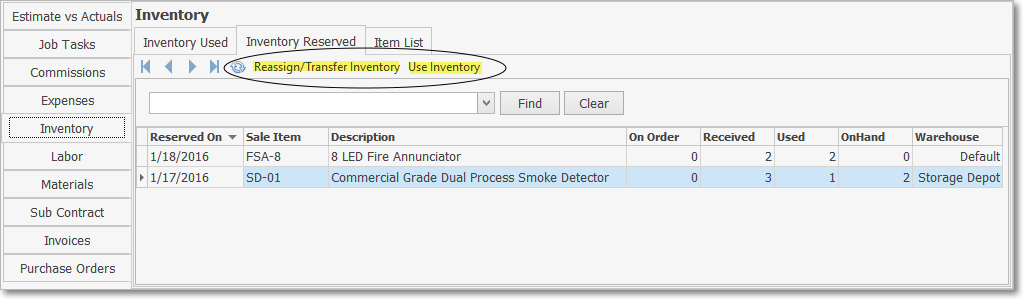
Job Costing Form - Inventory Tab - Inventory Reserved sub-tab - options
✓The Inventory Reserved sub-tab may be used for either of the following (these two Options are only displayed if the selected record has a Quantity recorded in the Received column that is greater than the Quantity in the Used column:
1.Reassign/Transfer Inventory - This option is used to reassign/transfer previously Reserved Inventory Items to the same, or a different Warehouse.
▪Once transferred, they are considered released and so will no longer be identified as Reserved for this Job
2.Use Inventory - This option is used to identify those Reserved Inventory Items which have now been used for this Job
▪Inventory Items identified as used will be moved to the Inventory Used sub-tab.
❑Reassign/Transfer Inventory,
•Inventory Item(s) which had previously been Reserved for a Job, may be sent back to the Warehouse as uncommitted In-Stock (as Available On Hand) as follows:
•Go to the Job Costing Form and locate the appropriate Job. Then:
1)Release the Inventory Item(s) back to stock (which is usually because it had been over Reserved or over-ordered on a Purchase Order), or
2)Transfer Inventory Item(s) to a different Warehouse location.
•In either case:
a)From the Backstage Menu System Select Maintenance, then in the General sub-menu Choose Job Costing, or
b)From the Quick Access Menu, Select Maintenance and Choose Job Costing.
✓A Job Costing Form will be displayed.
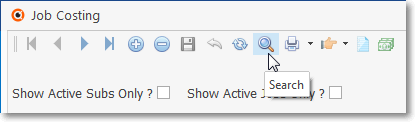
✓Locate the Job that needs Inventory Items reassigned/released by Clicking the Search Icon at the top of the Job Costing Form which will open the Search Jobs dialog.
•Select the Inventory Tab.
✓Click the Inventory Reserved sub-tab.
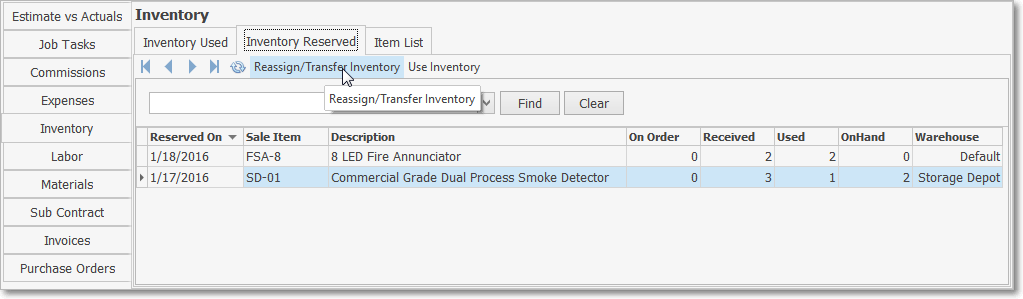
Job Costing Form - Inventory Tab - Inventory Reserved sub-tab - Reassign Inventory option
✓Click the Reassign/Transfer Inventory button (see illustration above):
a)Reassign the selected Inventory Item(s) - by returning them to an In-Stock status - thereby moving the unneeded Quantity from the Committed On Hand count back to the Available On Hand count of the selected Warehouse, or
b)Transfer the selected Inventory Item(s) to a different Warehouse location (perhaps moving them closer to the Technician's usual location) but have them remain Reserved for the selected Job.
❑Using the Reassign/Transfer Inventory option
•The Reassign/Transfer Inventory Form is opened by Clicking the Reassign/Transfer Inventory option and provides Job Inventory Reassignment and Inventory Transfer functionality.
✓Initial setup: Regardless of whether you will be reassigning or transferring Inventory Item(s), except for the option that is ultimately selected (i.e. Reassign or Transfer), the setup is the same.
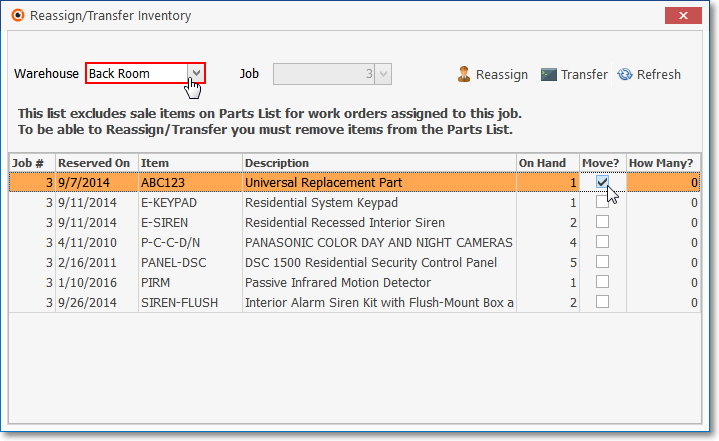
Job Costing Form - Inventory Tab - Reassign Inventory option
▪Warehouse - Use the Drop-Down Selection List to Choose the Warehouse to which the Inventory Item(s) are to be reassigned or transferred.
▪Job - No Job Number needs to be entered because the system knows that this is for the currently selected Job.
▪Reserved Inventory List Header: -
➢Note: This list includes sale items from the Parts List for the Work Orders assigned to this Job.
To be able to Reassign/Transfer you must remove items from the Parts List.
oJob # - The Job Number is known by the system and may not be changed by the User.
oReserved On - The Reserved On Date will be inserted by the system and may not be changed by the User.
oItem - The Inventory Item code(s) for those items whose Received Quantity exceeds the Used Quantity on the Inventory Reserved sub-tab will be inserted by the system and may not be changed by the User.
oDescription - The Description of the Inventory Items will be inserted by the system and may not be changed by the User.
oOn Hand - The Quantity of this Inventory Item that is On hand (i.e., previously reserved, but not yet used for this Job) will be inserted by the system and may not be changed by the User.
oMove? - Check each of the Inventory Item(s) to be reassigned or transferred..
oHow Many? - Enter the Quantity of the Checked Inventory Item(s) to be reassigned or transferred
A.Job Inventory Reassignment -To put unneeded Inventory Item(s) back into the Warehouse to make them available for other Jobs and Sales, use the Reassign option.
✓Click the Reassign option at the top of the Reassign/Transfer Inventory Form to initiate the Reassignment the selected Inventory Item(s) to the Available On Hand count of the selected Warehouse.
▪This option will reduce the Received Quantity on the Inventory Reserved sub-tab by the How Many? number entered on the Reassign/Transfer Inventory Form
▪Therefore, it will increase the Available On Hand count and reduce the Committed On Hand count in the selected Warehouse by that same number.
▪The associated Sale-Purchase Item record will also be updated, with the Available On Hand count increased, and WIP (Work in Progress) and Committed On Hand counts reduced by that How Many? number.
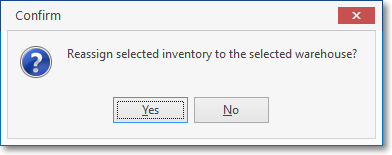
Confirm Inventory Reassignment request
▪Click the Close ![]() box to Close the Reassign/Transfer Inventory Form
box to Close the Reassign/Transfer Inventory Form
B.Job Inventory Transfer - Alternately, you may Click the Transfer option at the top of the Reassign/Transfer Inventory Form to move the selected Inventory Item(s) to the Committed On Hand count of the selected Warehouse.
▪This option is normally used to "reposition" the selected Inventory Item(s) to the service vehicle of the Technician who will install them, or to the Warehouse closest to the Job
▪This process will not change the Received Quantity on the Inventory Reserved sub-tab.
a)It will increase the Committed On Hand and the Total On Hand counts in the selected Warehouse by the How Many number.
b)The Committed On Hand and the Total On Hand counts in the originating Warehouse will be reduced by the same How Many number.
▪There will be no changes to the associated Sale-Purchase Item record.
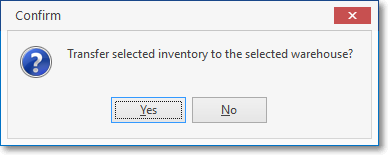
Confirm Inventory Transfer request
▪Click the Close ![]() box to Close the Reassign/Transfer Inventory Form
box to Close the Reassign/Transfer Inventory Form
❑Using the Use Inventory option - Once at least one Inventory Item has been reserved, the Use Inventory option allows you to indicate that the Reserved Item has actually been Used.
•There are three ways to "Use" the Inventory Item(s) included in the Item List sub-tab of the Inventory Tab of the Job Costing Form:
1.Select the Use Inventory option on the Item List sub-tab
▪See the "3. Use Inventory" section in the Item List sub tab chapter for more information.
2.Select the New Work Order option on the Job Tasks Tab and to create a Work Order for the selected Job Task
a.Click the Down-Arrow on the Mat.\Inv. field located in the Completion section of the Work Order Form to display the Inventory/Materials Drop-Down Info Box
b.Identify the various Inventory Items and Materials (itemized expenses) used while completing the Job Task requested on the Work Order.
3.Select the Use Inventory option on this Inventory Reserved sub-tab and follow the directions immediately below:
•This Use Inventory option allows the User to record the usage of a specified quantity of a selected Inventory Item and inserts that information to the Inventory Used sub-tab following the directions outlined below:
✓Select the Use Inventory option.
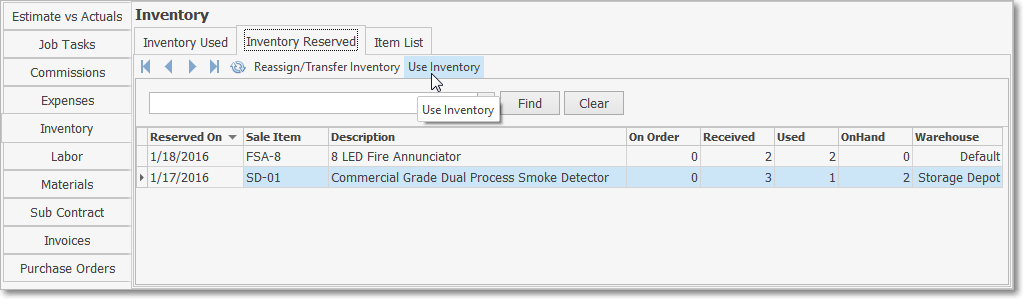
Job Costing Form - Inventory Tab - Inventory Reserved sub-tab - Use Inventory option
✓Job Invoice Multi Usage dialog - When the Use Inventory option is selected, the Job Invoice Multi Usage dialog will be displayed
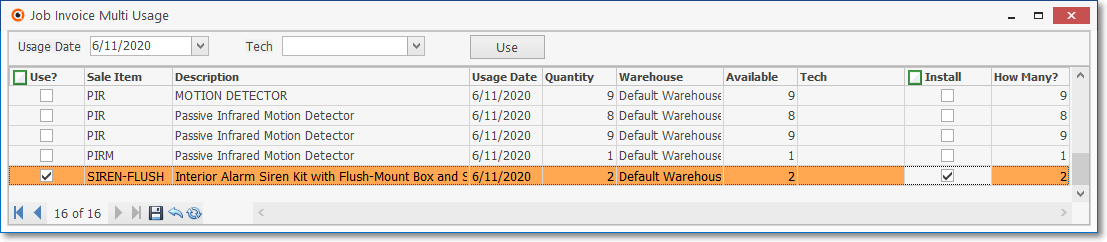
Job Costing Form - Inventory tab - Item List sub-tab - Use Inventory option selected - Job Invoice Multi Usage dialog
▪It contains a data gird with a list of only those Inventory Items which are both In-Stock (On Hand) and have been Reserved ( 2. Reserve Inventory in the Item List sub tab chapter for more information) specifically for this Job.
✓Using the Job Invoice Multi Usage dialog
a)Usage Date - By default, Today will be inserted, but you may use the Drop-Down Calendar/Date Entry field to change that date, if needed.
Use this date as the Usage Date for all Items?
▪Yes - The selected Date will be inserted into the Usage Date column for all of the records
▪No - The Date in the Usage Date column will remain Today.
b)Tech - Using the Drop-Down Selection List provided, Choose the Technician who used the Inventory.

Use this Technician as the Tech for all Items?
▪Yes - The selected Technician will be inserted into the Tech column for all of the records
▪No - The Technician must be manually entered in any Inventory record that will be identified as Used.
c)Identify the Inventory Item(s) that are to be recorded as having been used (these listed will be Available and have been Reserved for this Job) :
i.Use? - Check the box in the Use column for each Inventory Item that was used (if all listed Inventory Items were used, Check the Green Use? box).
ii.Sale Item - The Sale-Purchase Item code for each Inventory Item is inserted
iii.Description - The default description of each Inventory Item is inserted
iv.Usage Date - By default Today will be inserted
oUse the Drop-Down Calendar/Date Entry field to Change that Date, if required.
oOr use the Usage Date field at the top of the Job Invoice Multi Usage dialog to insert that date in all Usage Date fields
v.Quantity - Enter the Quantity of the selected Inventory Item that was used (it cannot be greater than the number that is Available).
vi.Warehouse - Use the Drop-Down Selection List to Choose the Warehouse location from which the Inventory Item(s) will be taken.
vii.Available - The quantity Available On Hand of the selected Inventory Item that is currently in the selected Warehouse location is inserted
viii.Technician - Use the Drop-Down Selection List to Choose the Technician that will use/ has used the Inventory Item(s).
oOr use the Tech field at the top of the Job Invoice Multi Usage dialog to insert that Technician Name in all Tech fields
ix.Install - Check the box in the Install column for each Inventory Item that is to be recorded in this Subscriber's Installed Equipment Form (if all listed Inventory Items were installed, Check the Green Install box).
d)Use - Click the Use button at the top of the Job Invoice Multi Usage dialog to execute (Post) this Inventory usage.
Inventory Successfully Utilized
oWhen the "Inventory Successfully Utilized" message is displayed, Click OK.