❑As each Subscriber's Installed Equipment information is identified (see the Installed Equipment illustration below and its related chapter), for consistency and clarity, MKMS uses predefine Installed Equipment Codes to identify those components that are (will be) part of each system installation.
•By doing so, everyone will identify a like part or installed component with the same name (Code and Description).
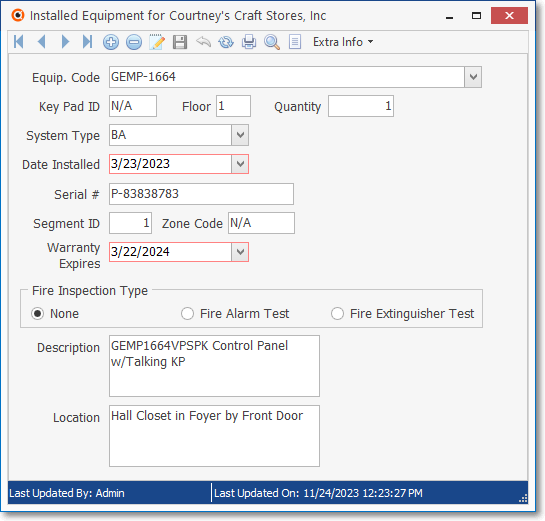
The Subscriber's Installed Equipment Form uses Installed Equipment Codes
•Not using predefined Installed Equipment Codes would result in ambiguous and confusing information about those systems (whether on reports, Work Orders, in personnel conversations, or when displayed on the screen), as well as when commented on and/or written by the Technicians when describing an installation or a service repair, or when initially diagnosing a problem.
❑Create Installed Equipment Codes
•Access the Installed Equipment Codes Form:
a)From the Backstage Menu System Select Maintenance and Choose General Maintenance then Select the Miscellaneous sub-menu, or
b)From the Quick Access Menu, Select Maintenance and Choose General Maintenance then Select the Miscellaneous sub-menu
✓From within the Miscellaneous sub-menu, Choose the Installed Equipment Codes option to display the Form shown below.
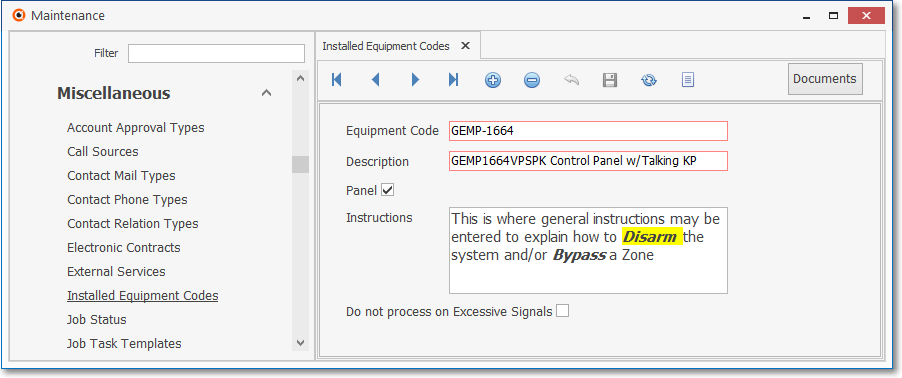
Installed Equipment Codes Form
✓This Installed Equipment Codes Form may be Re-sized by Dragging the Top and/or Bottom up or down, and/or the Right side in or out.
•Navigation Menu - The Navigation Menu is located at the top of the Installed Equipment Codes Form.

Navigation Menu shown with the List Icon and Options for Export & Print + a Document option
✓This expanded Navigation Menu provides Icons for normal Record Movements, New, Delete, Cancel, Save, and Grid (with Export and Print when selected) options, as well as the Documents command.
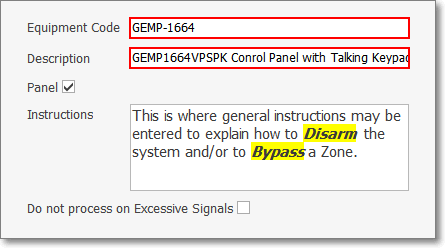
•Record Editing section - The details of the currently selected record are displayed below the Navigation Menu at the center (Main Body) of the Installed Equipment Codes Form.
•To define an Installed Equipment Code:
✓Click the ![]() Icon to start the Installed Equipment Code entry in the Record Editing section.
Icon to start the Installed Equipment Code entry in the Record Editing section.
✓Equipment Code - Enter an Equipment Code (a very brief abbreviation) for the Equipment type to be described.
▪The code may be 1 to 40 characters in length.
▪Letters are automatically capitalized,
▪Numbers are OK.
▪Normal punctuation (including the Space) is OK.
✓Description - Enter a description of this Installed Equipment Code.
▪The Description may be up to 70 characters in length.
▪Use numbers, letters (upper or lower case), spaces, and/or normal punctuation marks.
✓Panel? - Check this box to identify this Installed Equipment Code record as a Control Panel.
▪Installed Equipment Codes designated as Panels are used to identify the (Control Panel) Part of each CSID defined in the Subscriber Panel(s) section of the Central Station Data Form, and in the Equipment Form used to identify what specific Parts have actually been installed in a Subscriber's Alarm System.
▪Also see the "Do not process on Excessive Signals" discussion below if this is a Installed Equipment is a Control Panel.
✓Instructions - Enter any information that would help a Technician install, or an Operator to later troubleshoot, this device.
▪This is where the instructions for how to Disarm a Control Panel, Bypass a Zone, and other helpful information - particularly for complex devices - should be provided.
▪In the Subscriber Panels section of the Central Station Data Form, the Subscriber's CSID(s) are defined and a Part code (Installed Equipment Code) representing the Control Panel is entered.
▪These Instructions when associated with their Control Panel (see "Panel?" above) are available to the Operator within MKMSCS by Clicking the Panel Icon on the Sub Info (F2) Form.
▪Double-Click this field to open an Edit Rich Text dialog.
✓Do not process on Excessive Signals - Check this box if Signals being transmitted from this Installed Equipment Panel are not to be counted or billed when calculating and Invoicing Excessive Signals.
▪There are certain types of Control Panels which incur little ongoing cost to the Central Station (e.g., set up to transmit only passive Account Testing or Opening & Closing Signals).
▪For those Dealers and/or Subscribers being monitored for these types of Control Panels, a Flat Rate Recurring Fee is usually charged monthly (either to the specific Subscribers, or to the Alarm Dealer for whom the Monitoring Services are being provided).
▪This option exempts those Subscribers, or the Alarm Dealers from being assessed an Excessive Signals charge when using these types of Control Panels.
✓Click the ![]() Icon to record this entry.
Icon to record this entry.
✓Any number of additional Installed Equipment Code records may be defined.
❑Using the Special Functions on the Navigation Menu at the top of the Installed Equipment Codes Form:
![]() List Icon - The Navigation Menu also has a List option which provides a tabular view of these Service Contract records.
List Icon - The Navigation Menu also has a List option which provides a tabular view of these Service Contract records.
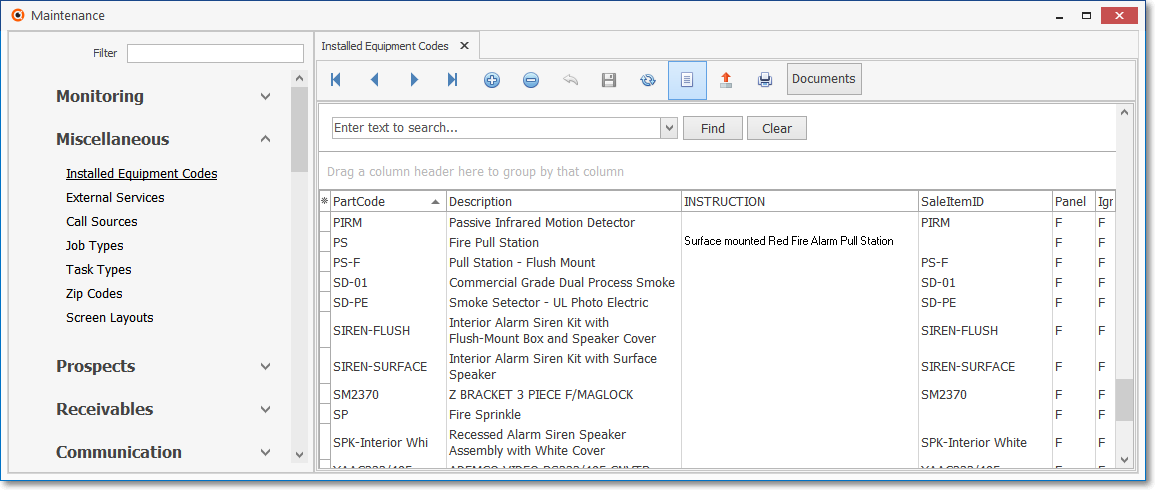
Installed Equipment Codes Form - List View
✓Click the List Icon to display the associated Grid Data.
✓The columns of Grid Data may be rearranged, filtered, sorted, and exported as a PDF file and/or an Excel formatted file.

✓Find - Enter text to search for a specific record, then Click the Find option.
✓Clear - To remove the text to search for entry, Click the Clear option

Navigation Menu shown with the List Options for Export & Print
✓Click the List Icon again to Close the List View and return to the Record Editing View.
❖See the Grids - Print Preview - Export Data chapter for complete information on using the List View, including its Export & Print options.

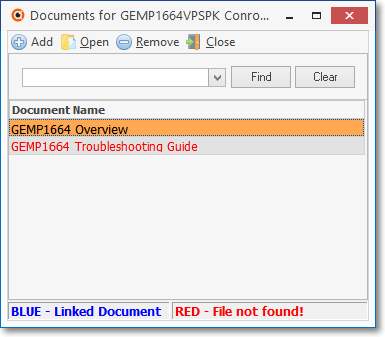
•Documents - A Documents Icon on the Commands Menu is provided to link a file to a selected Installed Equipment Code record.
✓Graphics (please save scanned images as JPG files)
✓PDF files
✓Native formats like Web Site Links and Windows compatible Help Files
✓Text Files such as the text files (.txt) format saved by Windows © Word Pad
❖See the Documents chapter for more information about using this Documents Form.