❑Action Plan - To complete the processing when an Action Plan is controlling the processing procedure, these are the typical Completion steps that will be required from the Operator.
•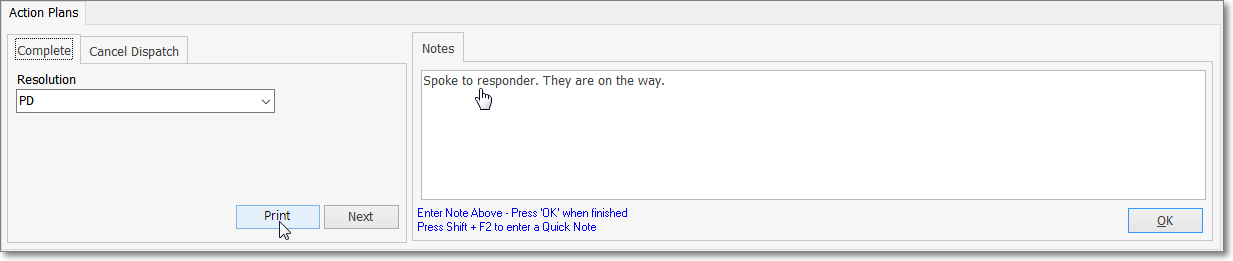
Action Plans tab - Resolution Code selected - Print button chosen (to print Alarm Ticket) - Note entered - then the Next completes processing
1.Resolution - The appropriate Resolution Code must be selected.
2.Print - If an Alarm Ticket is required, Click the Print button.
3.Note - If a Note is needed, enter that information and Click the OK button.
4.Next - Click the Next button to complete the processing of this Signal.
❖In some cases, the Hold option may be available when processing Signals for a UL© Account which requires that additional Investigator information be recorded at a later time (see the UL® Settings, Signal Processing & Reporting Procedures chapter for additional information).
❑Must Contact List Tab - For those situations where, regardless of who was contacted prior to, or during the Notifications process, a specific person (or persons) must also be contacted (notified) prior to selecting a Resolution Code in the Signal Options tab on the Signal Processing screen.
•When the Account has a "Must Contact" List Type assigned to a Contact List entry, the List Member(s) assigned a Must Contact List Type in this Contact List must be notified as described below:
a)The List Member(s) must be contacted prior to Completion of the Signal Processing procedure
b)To ensure this action is taken, the List Member(s) will be shown in a Must Call List sub-tab as part of an Action Plans instruction, or
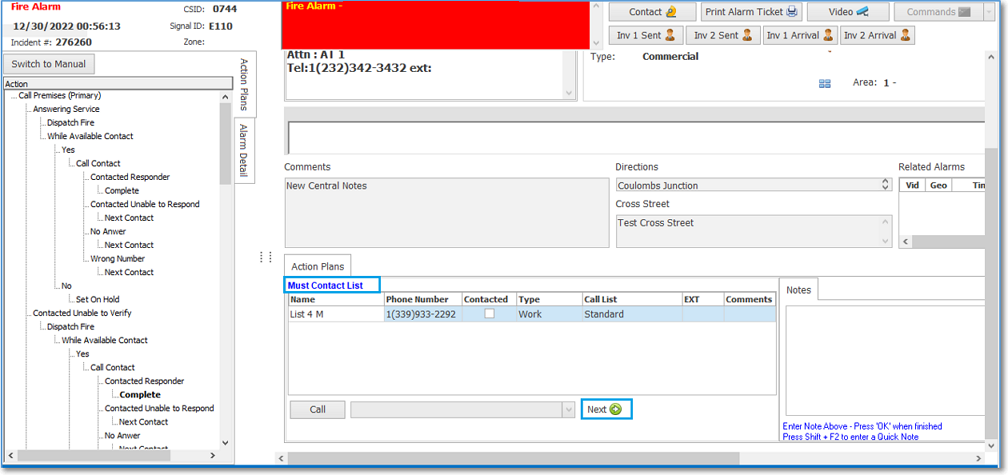
Must Contact List sub-tab as an Action Plan step
c)To ensure this action is taken, the List Member(s) will be shown in a Must Contact List sub-tab within the Signal Options tab

Must Contact List sub-tab on the Signal Options tab
d)Those Contact(s) must be reached before a Resolution Code is selected
❑Cancel Dispatch - Dispatch Cancellation Procedures:
•Sometimes, immediately after performing a Dispatch, new information becomes available indicating that this Dispatch was not needed.
•See the Cancel Dispatch chapter for detailed instructions on the ways a Dispatch Cancellation may be executed.
❑To complete the processing of an Operator Guided Response directed Signal:
1.The appropriate Resolution Code is assigned
2.The Operator indicates that the processing required for this Alarm Signal has been Completed, or
3.The Signal needs to be placed on Hold awaiting additional information or further processing.
➢Note: If an Operator attempts - before processing has been completed - to Close a Signal Processing Form by Clicking the Close box ![]() on the right at the top of this Signal Processing Form,
on the right at the top of this Signal Processing Form,
▪A Warning message will be displayed.
▪This feature complies with Section 11.1.4 of the Third Edition UL® 1981 Standard - "When only one operator or supervisor is logged on, who then attempts to log out, a message shall inform the operator/supervisor that she/he is the last one logged on"
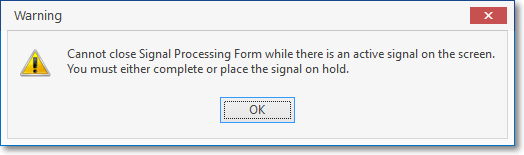
Cannot close Signal Processing Form while there is an active signal on screen
You must either complete or place the signal on hold.
▪The Operator must Click the OK button and must continue processing.
•The Signals Options tab will be activated when the Operator has Verified, Dispatched (if necessary) and a Notification (if necessary) has been accomplished:
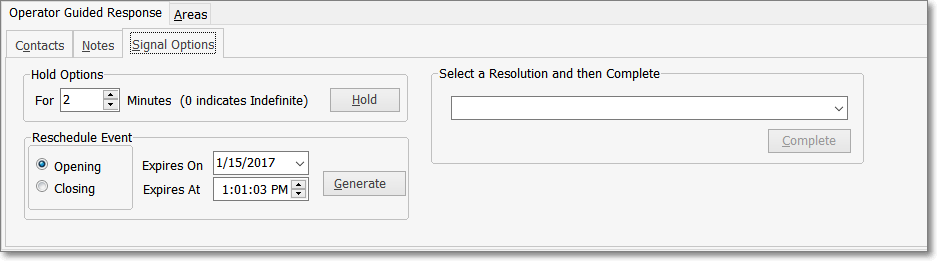
Operator Guided Response view with all available options on the Signal Options tab activated
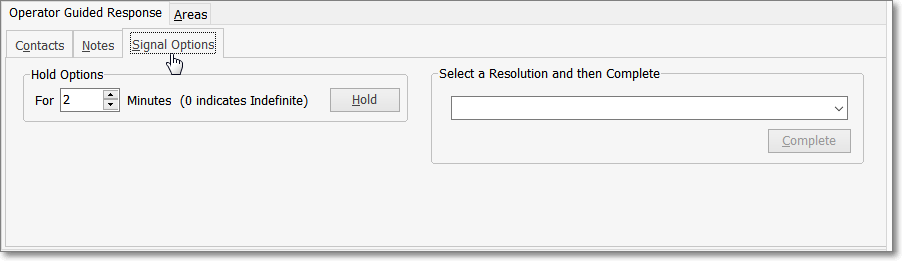
Signal Options tab with only the Hold Options shown
a)Has finished all of the Operator Guided Response steps required - based on the actual results of those processing steps.
b)Has switched to the Manual Mode from an Action Plan step.
•One or more of these (up to) three available options are chosen to finish the current processing of the Alarm Signal:
A.Hold - The Operator places the Alarm Signal on Hold (see "1. Understanding the Hold function" below):
i.To await additional communication from the Responding Authority who was Dispatched and/or
ii.To await additional communication from the Responsible Party that was Notified, and/or
iii.To await additional communication from the Investigator who was Dispatched (see the UL Signal Processing Procedures & Reports chapter for additional information), and/or
iv.To await another Signal (e.g., Open, Close, Test, Restore) at a later - often preset - time to complete final Processing.
B.Reschedule Event - If the Alarm Signal being processed is reporting a Supervised Event related issue, the Signal Options tab offers the Reschedule Event option (see "2. Reschedule an Event" below).
C.Complete - The Operator indicates that this Alarm Signal has been Completed (see "3. Completion" below).
❑Understanding the Hold function - Putting an Alarm Signal on Hold:
•The Hold Options dialog on the Signal Options tab allows an Operator to clear the current Alarm Signal from their Signal Processing screen and return it to the Alarm Stack with an On Hold status ("H").
✓Later, the Alarm Signal may be retrieved by the current Operator, or another Operator, or a Central Station Supervisor, to continue and/or complete the needed follow-up processing step(s).
•Hold Options - Set the amount time this Signal should stay On Hold (by default, this will be 2 minutes):
Signal Options tab with Hold Options shown
✓For nnn Minutes (0 indicates Indefinite) - Enter the number of minutes that the Alarm Signal is to be placed On Hold.
▪Entering a number indicates that the Alarm Signal should be placed On Hold for that number of minutes.
▪Entering a 0 (zero) places it on Hold Indefinitely.
✓Hold - Click the Hold button after entering the number of minutes the Alarm Signal is to be placed On Hold.
▪Once the On Hold time expires, the Alarm Signal's status is changed to Pending ("P")
▪The Signal will be sent to the next available Operator based on the normal prioritization of signals, or,
▪In the meantime, it may be manually retrieved from the Alarm Stack for further processing.
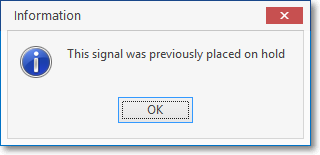
▪When manually retrieved from the Alarm Stack, an information message will be displayed alerting the Operator that the Alarm Signal had been previously placed On Hold.
➢Important Note: Normally, while an Operator is Processing an Alarm, and the processing of that Signal is being guided by an Action Plan, and she/he must put that Signal On Hold,
oBy default, when that Signal is retrieved from the Alarm Stack for further processing, it will revert to the Operator Guided Response processing methodology.
oHowever, if (when) the RestartActionPlanFromOnHold option in the Company Setting tab on the Users Options Form is set to True ("T"), the processing guidance will revert to the beginning step defined in that Action Plan.
✓Signals placed On Hold indefinitely must be manually retrieved from the Alarm Stack for further processing.
▪When retrieved from the Alarm Stack (or when re-displayed because the On Hold Time has Expired), an information message will be displayed alerting the Operator that the Signal had been previously placed On Hold.
▪If the Signal that was just completed had been manually selected from the Alarm Stack, once the Operator has completed it, if there are no other Operators on duty who are still Processing Alarms, this Operator will be warned and must Confirm that they do want to exit Processing.
oThis feature complies with Section 11.1.4 of the Third Edition UL® 1981 Standard - "When only one operator or supervisor is logged on, who then attempts to log out, a message shall inform the operator/supervisor that she/he is the last one logged on"

❑Reschedule an Event - When the Alarm Signal being processed is reporting an Event related issue, the Signal Options tab automatically includes the Reschedule Event dialog box on the Signal Options tab.
•Often, while verifying an FC* - Failed to Close, or an FO* - Failed To Open - Event, the Operator is asked to set a new Opening or Closing time for the premises.
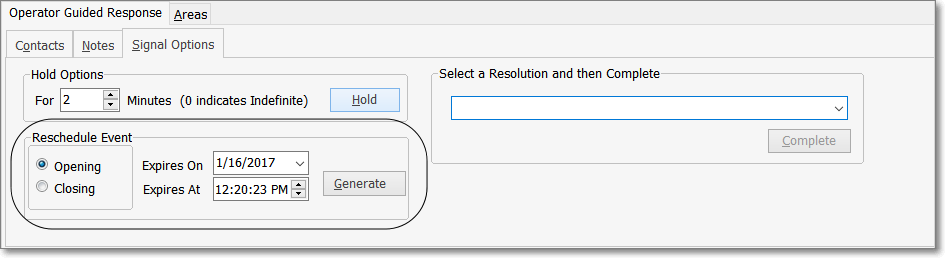
Signal Options tab with Reschedule Event options
•The Reschedule Event dialog box:
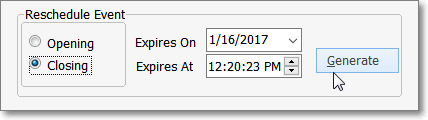
Reschedule Event dialog box
✓Open or Close - Click either the Opening or Closing button that represents the type of Event which needs to be rescheduled.
✓Expires On - By default, it will be Today.
▪Use the Drop-Down Calendar/Date Entry field the Choose the Date when this Event should occur.
▪Keep in mind that if setting the time beyond midnight, you must Choose the Date of the following day.
✓Expires At - By default it will be one hour later than the current time.
▪Reset the Time when this Event should occur using the up & down arrow buttons.
▪As needed, Click the Hours, Minutes, Seconds or AM/PM column, then Click the appropriate arrow to change the contents.
✓Generate - Click the Generate button to create the new Event in this Subscriber's current list of Scheduled Events.
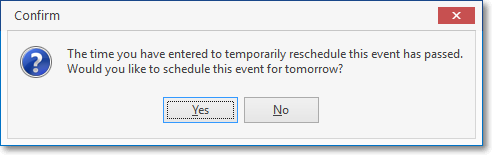
▪If you have entered a time that would require that it be inserted into the "next day" Scheduled Events list, you must Confirm this action.
▪The system will indicate (whether or not the next day's date was required), that this Temporary Event has posted correctly.
✓Complete - Complete the processing as explained in Completion information below.
❑Completion - This is the final procedure required to Process an Alarm Signal.
•Signal Options Tab - When all of the predefined steps required by the Operator Guided Response have been finished, or the Action Plan dictates Completion with a Hold option as the Next Action Step, the Signal Options tab will be displayed automatically.
✓Operator Guided Response - Normal Signal Options tab with Hold Options dialog (see "1. Understanding the Hold function" above), Resolution Code field, and the Complete button.
Signal Options tab - Hold Options - Resolution Code not selected - Complete button inactive
✓Operator Guided Response - Completed with a Rescheduled Event dialog box (see "2. Reschedule an Event" above).
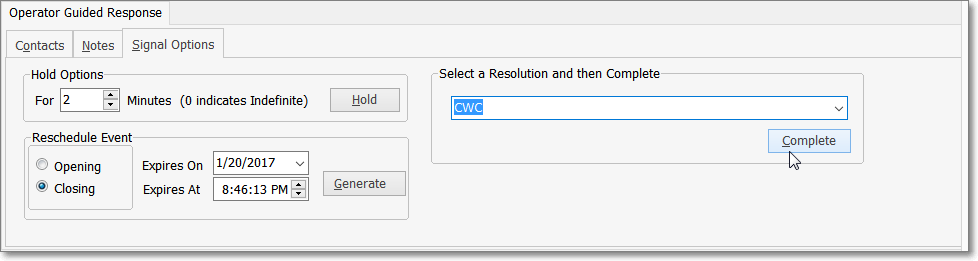
Signal Options tab - Hold Options with Reschedule Event fields - Resolution Code entry - Complete button activated
•Regardless of what other steps (e.g, On Hold, Reschedule Event, Note entry) are required on the Signal Options tab, the Operator must assign the appropriate Resolution Code using the Drop-Down Selection List provided.
✓If an Alarm Ticket should be printed:
a.If available (see the illustration immediately above), Click the Print button, and after printing the Alarm Ticket, Select the Next button; or
b.An Alarm Ticket Report for the currently displayed alarm event may be printed at any time while that alarm event is still being Processed by selecting the Print Alarm Ticket option accessed using its Action Option button

✓In either case, the Alarm Tickets dialog may be displayed with the Preview tab active.
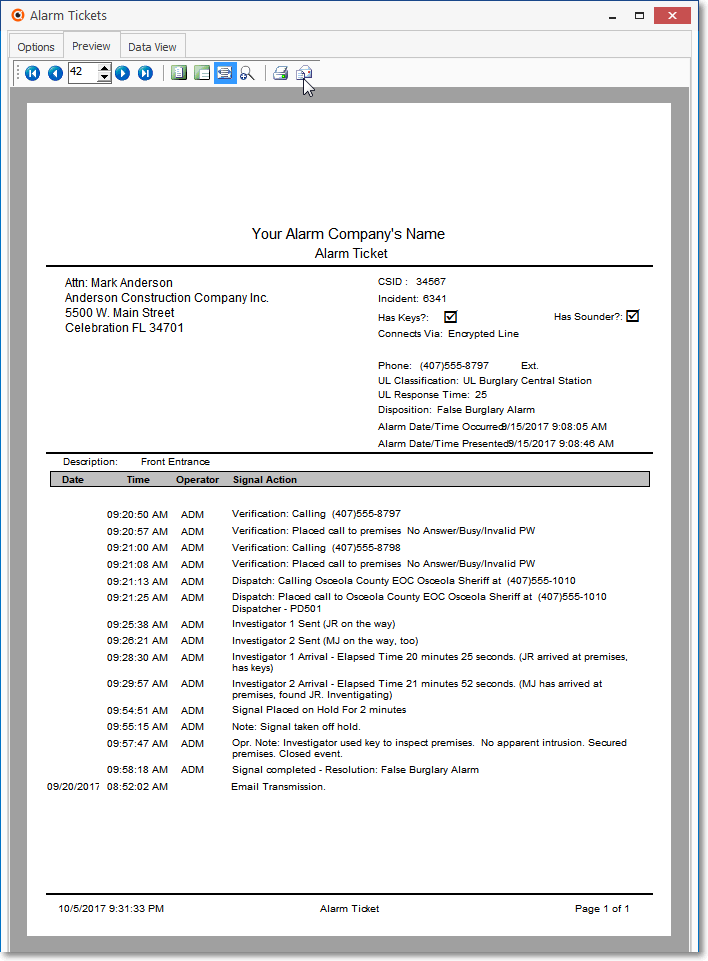
Alarm Ticket dialog with Preview tab displayed and Email option selected
▪Select the Print Icon to create a printed copy of the Alarm Ticket, or
▪Select the Email Icon to send the Alarm Ticket via Outlook® (see the mouse pointer in the illustration above).
•Complete - Once the Operator determines that all required steps to properly process the Alarm Signal have been performed, and has printed an Alarm Ticket if one is required, the processing of the Alarm Signal is Completed.
✓Resolution Code - If not already done, use the Drop-Down Selection List to Choose the appropriate (predefined) Resolution Code.
▪Once the Resolution Code is selected, the Complete button is activated.
•Required Third Edition UL® 1981 Standard responses will be presented, when needed:
✓Investigator's arrival verified by - For a UL Certificated Alarm System, when completing an Alarm Signal with a Priority Level (1 - 7) requiring the identification of the Verification Method used by a "runner", answer accordingly when this dialog is displayed.
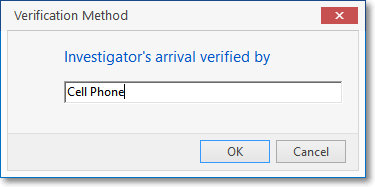
Verification Method - Investigator's arrival verified by
✓Were keys used? - For a UL® Certificated Alarm System, when completing an Alarm Signal with a Priority Level (1 - 7) requiring it, answer accordingly when this dialog is displayed.
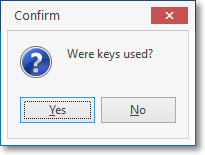
Confirm - Were keys used?
▪Remember to Print an Alarm Ticket at this time (see those instructions above), if required.
✓Complete - Once the Resolution Code is selected, and optionally an Alarm Ticket is printed, Click the Complete button to close this event.
11.1.4 - When only one operator or supervisor is logged on, who then attempts to log out, a message shall inform the operator/supervisor that she/he is the last one logged on
▪If the Alarm Signal that was just completed had been selected from the Alarm Stack, once the Operator has completed it, if there are no other Operators on duty who are still Processing Alarms, this Operator will be warned and must Confirm that they actually do want to exit.
▪That Operator must get an Authorization from a Central Station Supervisor prior to exiting the Processing (F9) function.
•Complete Signal dialog - If there are one or more Pending and/or Holding Signals for the Subscriber whose Signal was just Completed, the Complete Signal dialog will be displayed.
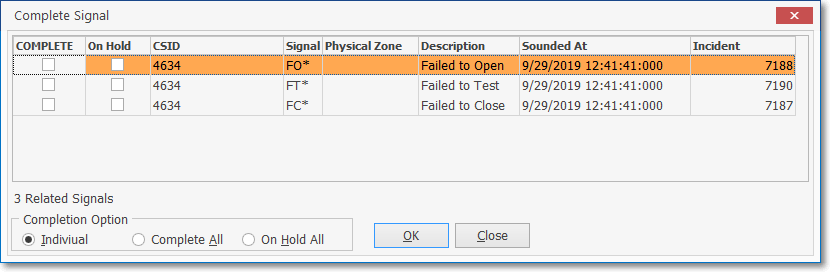
Complete Signal dialog
✓Completion Option - There are three choices, Click the appropriate button to specific how these Related Signals should be managed:
1.Individual - Check the appropriate box to COMPLETE or place On Hold a specific Related Signal, then Click the Individual button.
2.Complete All - Click this button (or Press Alt+A) to Complete All of the Related Signals listed in the Complete Signal dialog.
3.On-Hold All - Click this button (or Press Alt+H) to place all of the Related Signals On Hold that are listed in the Complete Signal dialog.
✓Click the OK button (or Press Alt+O) to execute the selected Completion Option.
❖The Related Alarms that were completed with the Primary Alarm Signal that is currently being completed will be identified:
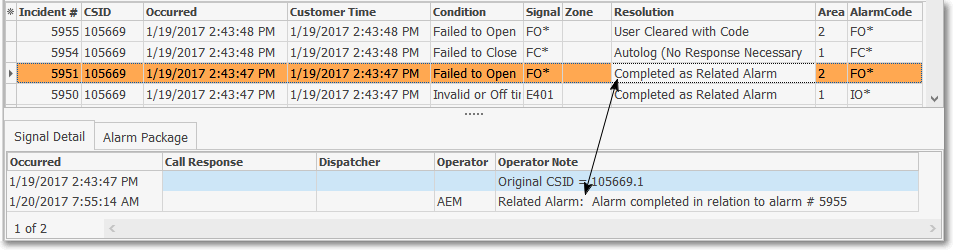
▪In the Alarm History Signal Details section with the Incident Number of the Primary Alarm Signal just completed (see the arrow pointer in the illustration above).
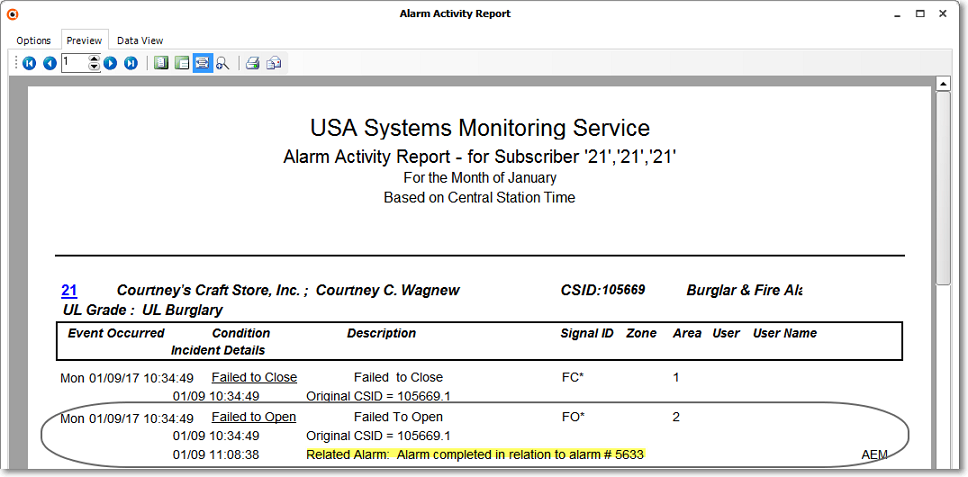
▪In a similar manner within the Alarm Activity Report.
▪In a similar manner within an Alarm Ticket.