❑If the Accounts Receivable or the Service Tracking module(s) are already being used including any Service Locations which are being billed to a different address, no additional Subscriber records need to be entered in the General section of the Edit Tab of the Subscribers Form to activate a Subscriber Account for the Monitoring module.
•By default, the Subscribers Tab view is displayed when the Subscribers (F3) Icon is selected on the MKMS Desktop Ribbon Menu.
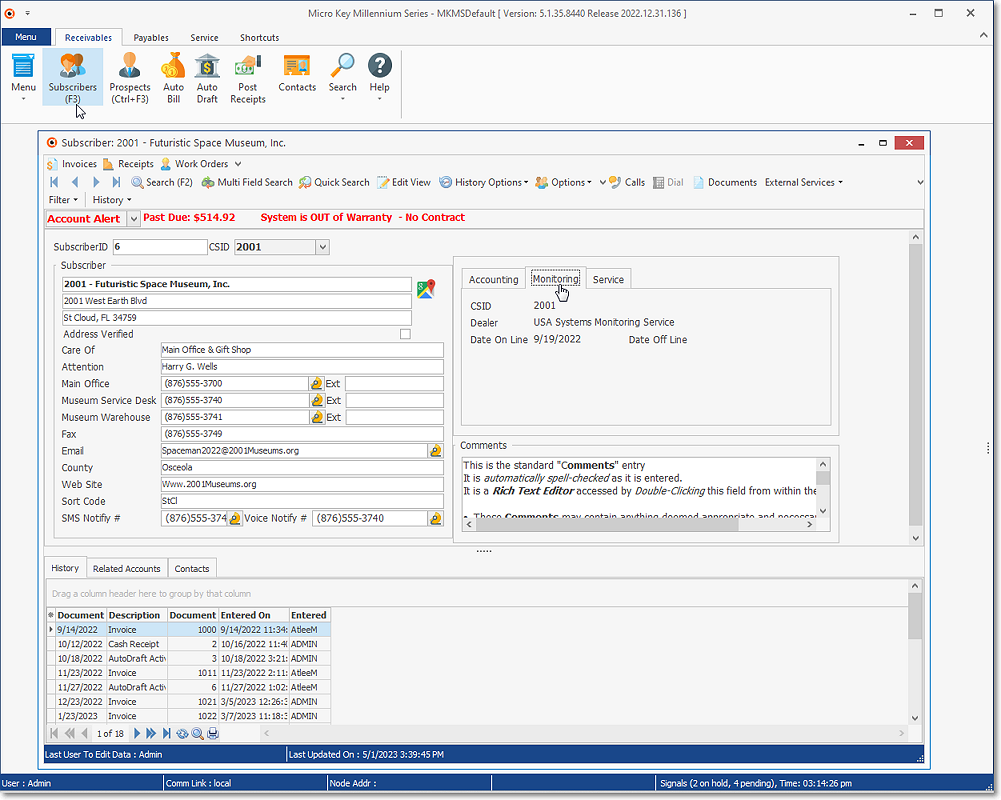
MKMS Desktop - Receivables tab - Subscribers Icon - Subscribers Form - Browse View - Monitoring sub-tab
•If the Accounts Receivable or the Service Tracking module(s) are not being used, each Subscriber's physical location (and other basic) information must be entered for every Subscriber who is being monitored.
•In addition, whether or not the Subscribers were entered, Special Subscriber Entries must be made for each Alarm Dealer for whom Monitoring Services are being provided, and for the SPA - Signal Processing Application.
✓These Special Subscriber Entries are used by MKMSCS and SPA to properly track Signal Processing Errors and monitor Alarm Signals received from Dealer's Accounts.
❑The Ribbon Menu on the Subscribers Form has two sections:
1.A Navigation section providing a Search dialog, Grid Options Drop-Down Menus and Subscriber Options Drop-Down Menu
▪An Actions section with special Actions Icons - Search (F2), Multi Field Search, Quick Search, Edit View, History Option, Options, Calls, Dial, Documents, External Services, Favorites, Filter (Select this option to cancel any Filter established using the History option), Reports, Email.and Clone Icons
![]()
Actions Icons on the Subscribers Form
❑Understanding the Subscribers Form's Navigation section Icons:
![]()
•Search - This Icon activates the Subscriber Search Function (which is also accessible by Pressing F2)
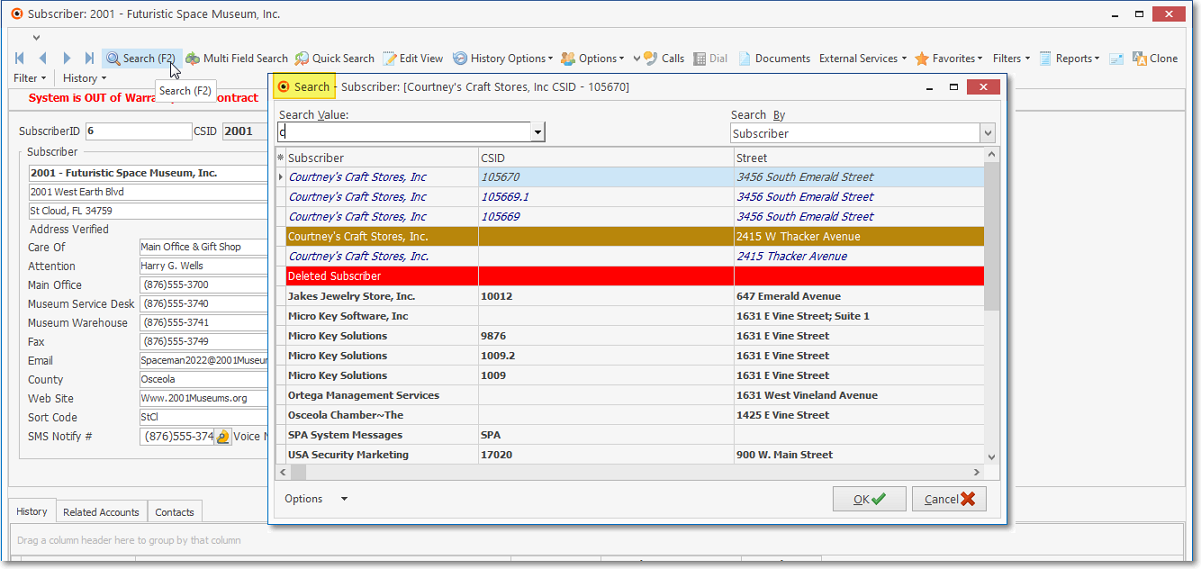
•History Options - The three History Options are:
1. Filter - Choose this History Option to display a Drop-Down Selection List of the available Grid Data Filtering options
✓This will identify the type of transactional and data entry History which is to be included in the Grid.
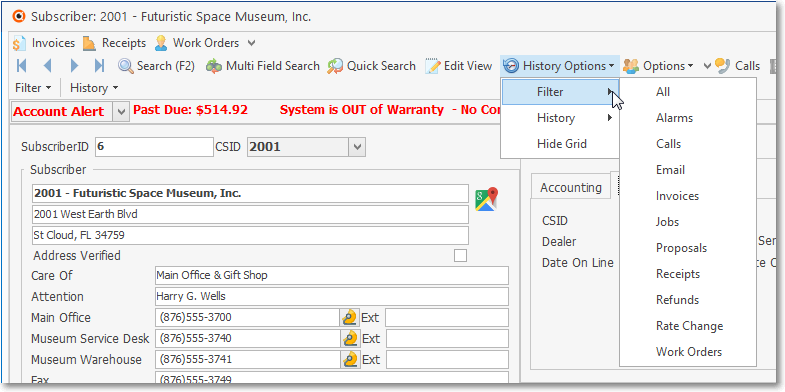
a.By default, All of the Data Types that are listed will be included in the Grid.
b.However, the User may Select the specific Type of Data that is be included in the Grid.
2. History - Once the Grid Data Filtering option has been chosen, the Time Frame in which the chosen Grid Data was entered may be specified.
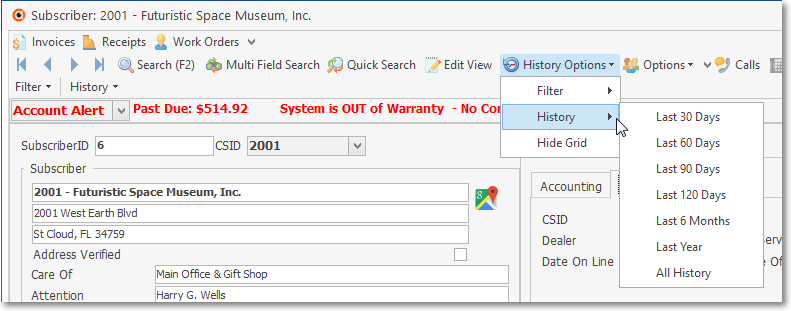
a.There is no default Time Frame.
b.Use the Drop-Down Selection List that displays the available Time Frames from which to Choose.
c.Consider the practical limitations of the number of records which can be effectively viewed and/or analyzed.

Subscribers Form - History Grid
❖See the Grid Options on the Subscriber Form chapter for complete information about using the Grid Options.
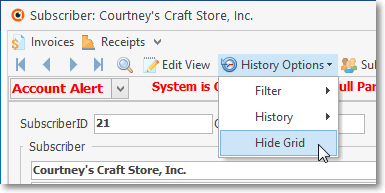
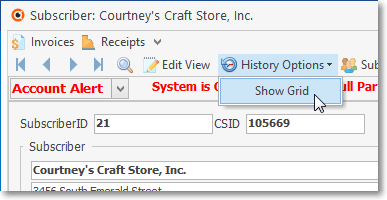
3. Hide Grid - Turning the History Grid feature On and Off.
▪Hide Grid - Select the Hide Grid option to remove the History Grid from the Subscribers Form.
▪Show Grid - Select the Show Grid option to display the History Grid on the Subscribers Form.
•Subscriber Options - This Icon opens a Subscriber Options Menu which provides access to various Subscriber associated Data Entry Forms, Processing Forms and Reports

❖See the Subscriber Options on the Subscriber Form chapter for complete information about using these Subscriber Options.
❑Understanding the Subscribers Form's Actions section Icons:
![]()
Action Icon on the Subscribers Form
•Dial - Click Dial to dial the Primary telephone number via your modem (located below the Form View Section).
![]()
✓The Dial Icon is available on the Subscribers, Prospects, and Vendors Forms and within the Monitoring module.
▪You must have a modem attached to your computer and a telephone line connected to the modem.
▪Your modem must be defined in your Personal User Options.
✓Be sure to Click Hang Up to release the modem from the telephone line connected to the modem.
•Documents - The Documents Icon provides access to the Documents dialog within which many types of Documents (File or URL) may be linked to, the currently selected Subscriber record.
![]()
▪Click on any Document Title on the list to Open that Document.
✓Click the Add button to identify a new Document.
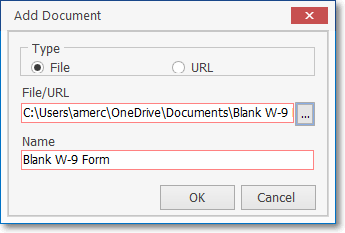
Add Document dialog
❖See the Documents chapter for more information.
•External Services - This Services Icon allows a User to open a Browser (e.g., Explorer®, Chrome®) and display a previously defined Web Site from within the Subscribers Form.
✓Click the small down arrow 6 on the Services Icon to display the Drop-Down Selections list of previously defined External Services.
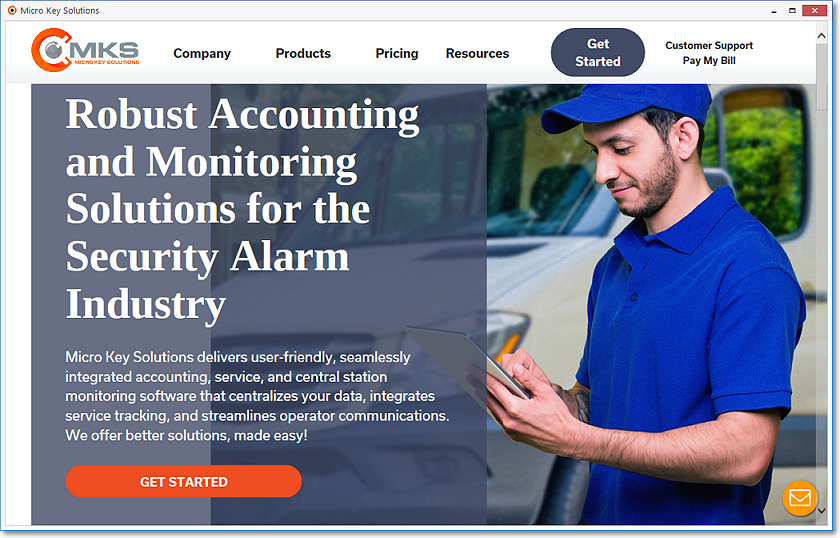
Web Site Example when an External Service is selected using the Services option on the Main Menu of the Subscribers Form
✓Choose the desired External Service.
✓Click the Close ![]() box on the top right of the Form when finished.
box on the top right of the Form when finished.
•Favorites - This Icon is used to identify a Favorite Subscriber which can then be selected using the Down-Arrow on the same Favorites Icon
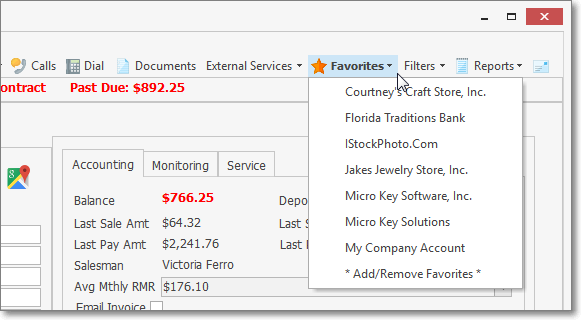
✓Click the Favorites Icon to assign favorites status (and insert this Subscriber into the Favorites Menu's options).
✓Once set, to access a favorite Subscriber record, Click the Down-Arrow ‚ on the Favorites Icon and Select the desired Subscriber.
✓That Subscribers information will be displayed.
❖This feature is also available on the Prospects and Vendors Forms.
•Filters - The Filters Icon opens a Drop-Down Selection List of previously defined Subscriber Filters.
✓A Filter is applied to the Subscribers table so when selected, only those Subscribers matching the Filter will be available in the Subscriber Search dialog.
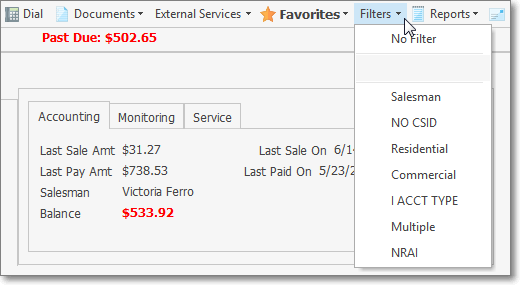
Filters Icon
✓Select the Filter Name to be implemented (i.e., Salesman).
✓The Filter is applied to the Subscribers table immediately.
✓Select No Filter to cancel all Filters on the Subscribers table.
•The Reports Icon on the Subscribers Form's Action Menu provides easy access to a variety of Subscriber specific printed information specifically populated for the current Subscriber.
![]()
Reports Icon - Central Station - Sub-Menu options
❖See the Reports Icon and associated chapters for information about the available Monitoring related Reports
•Email - Click the Email Icon to open the Email Dialog (e.g., using Outlook©, or whatever other Email protocol is being used) to send an Email to this Subscriber.
![]()
Subscribers Form - Ribbon Menu - Actions - EMail Icon
•Clone - The Clone Icon on the Ribbon Menu of the Subscribers Form
![]()
Clone Icon within the Actions section of the Ribbon Menu on the Subscribers Form
✓The Clone Icon opens the Clone Account dialog where a User may create one or more "New Account" record(s) with a basic set of mandatory field entries matching the currently selected Subscriber
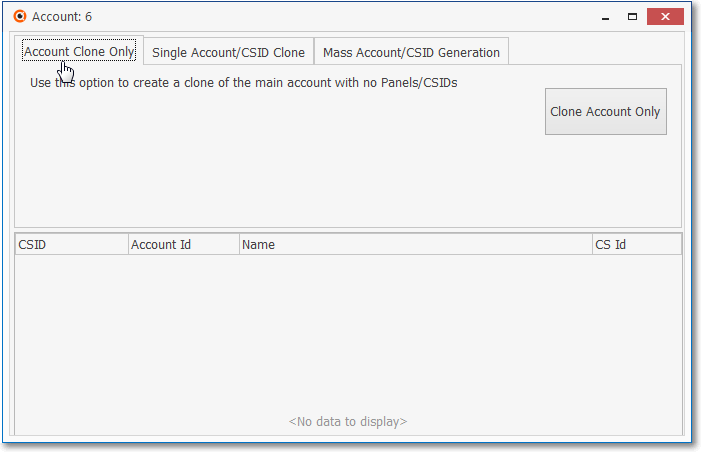
Clone option on the Subscribers Form - Clone Account dialog
❑Defining a Subscriber record:
![]()
•Open the Subscribers Form by Clicking the Receivables Tab on the MKMS Desktop and Pressing F3 (or Clicking the Subscribers Icon on the Receivables Tab's Ribbon Menu), then Select the Edit View Icon.
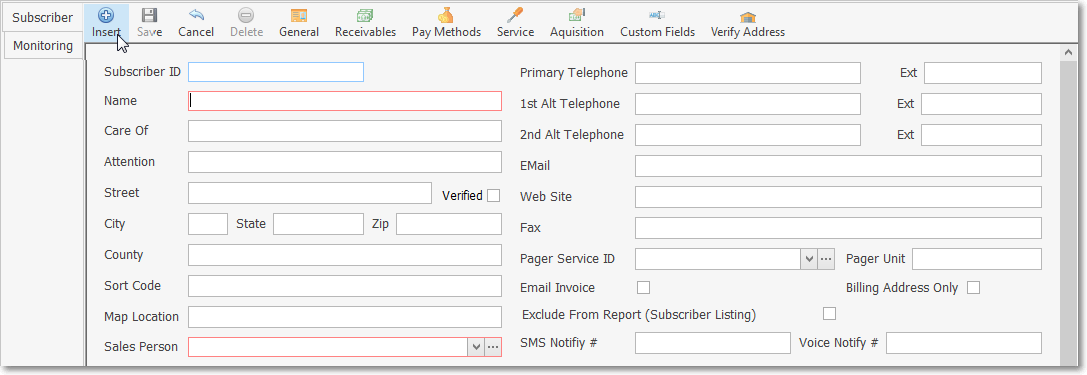
•The Edit View's Subscriber Section (part of which is shown above) on the Subscribers Form is where information is initially entered.
✓Categories & Sections - The Edit View is divided into two tabs (Subscriber and Monitoring), and each tab has several Sub-Sections which further segregate information based on its function and/or purpose.
▪Select the Edit View Icon and the Subscriber Tab will be displayed by default
▪The first explanation below describes how the Basic Subscriber Information is to be entered.
❑Creating a new Subscriber record:
•Entering Basic Subscriber Information:
✓If you are not modifying an existing Subscriber record, Click the Insert Icon in the Edit View Menu to start a new Subscriber record.
![]()
Edit View - Subscriber tab Add Icon
•Name & Location of the protected Premises:
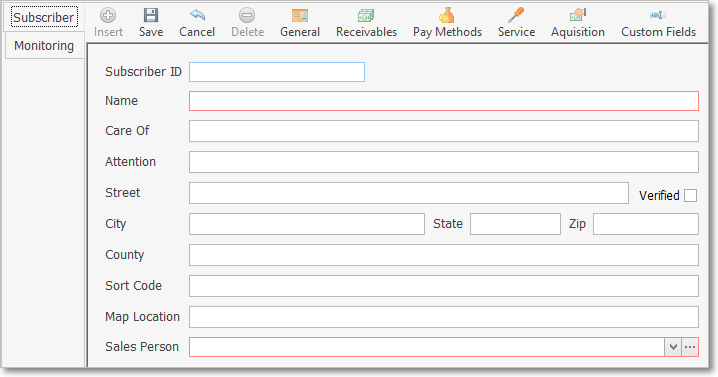
✓Subscriber ID - This field is populated with the record number of this new Subscriber when the entry is initially saved.
✓Name - Enter the Subscriber's name (up to 70 characters in length - but keep in mind the limited display area of a standard #10 Window Envelope).
▪Entering a Business Name
oEnter the Name as it would be listed in the Telephone Directory
oIf a prefix is part of the name but that name is not normally alphabetized by that prefix (such as the word "the"), enter the name followed by a tilde ("~") and the prefix.
oExample: "ABC Company~The"
▪Entering an individual Person's Name
oLast Name is entered first
oType a tilde ("~")
o(The tilde tells the system that everything after it is the Employee's first name and middle initial.)
oEnter the First Name and Middle Initial
oFor Prefixes (Mr., Mrs., Ms., etc.), enter them after the Tilde and before the first name
oFor Suffixes (MD., Jr., III, etc.), enter them after the last name and before the tilde.
oExample: "Smith, MD~Dr. James T."
✓Care Of - The Care Of field also provides a place to expand the Subscriber's address information, and will appear below the Attention line (up to 30 characters in length), if entered.
✓Attention - The Attention line will be printed below the Subscriber's Name on their Invoice's Mailing Address (up to 30 characters in length).
▪This may be used for a building name, a person, suite number, additional address information or skipped entirely - depending on what you need.
✓Street - Enter the Street address and name (up to 30 characters in length).
✓City, State, Zip - Enter the City (up to 25 characters in length), which will not be included in any printed forms (Invoices, Statements, Proposals) but will be shown in the Sub Info (F2) Form in MKMSCS, State code (or Province) and Zip (or Postal) code.
✓County - Enter the name of the County in which this Subscriber's premises is located (up to 20 characters in length)
✓Sort Code - This may be entered to help you classify this Subscriber.
▪Up to 20 characters including upper and lower case letters, numbers, spaces and normal punctuation marks may be entered.
▪The Subscriber Listing report allows you to Filter based on - among many other fields - the Sort Code.
▪The Subscriber Filters function also allows you to filter by this Sort Code.
▪In the example above "BFP" represents a combination Burglary, Fire, and Panic Alarm System.
▪Some Reports may be limited (filtered) by these Sort Codes.
✓Map Location - This field is used to record the page number and map coordinates for this location, GPS coordinates, or any other consistent methodology your Company adopts to easily locate a Subscriber's premises.
✓Sales Person - Using the Drop-Down Selection List, Choose the Sales Person of record for this Subscriber.
▪The Company's Sales Staff must be predefined as Employees.
▪When assigning a Sales Person to a Subscriber, only those Employees whose Employee Type is identified as either Sales or All will be available (in the Drop-Down Selection List) for populating the Sales Person field.
▪Double-Click on the appropriate Employee
▪Click the Ellipse Icon to open the Employee Maintenance Form where a new or revised entry may be made (if the appropriate User Access Rights have been granted for the Employee Form)
•Contact Information:
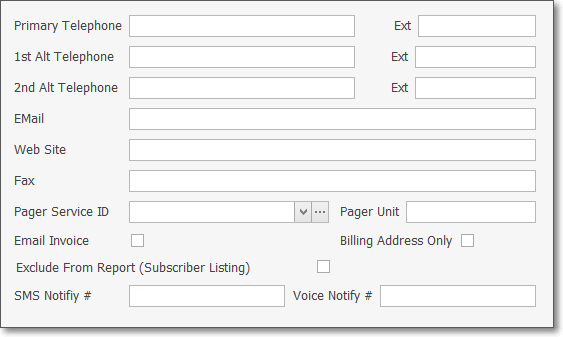
✓Primary Telephone - Enter the Primary Telephone Number following the rules below:
▪The name of this field may be changed for this specific Subscriber record, as appropriate (see the "Renaming the Telephone Number field names" discussion below)
▪If no Area Code is required, enter the seven (7) digit telephone number (it cannot start with a 1)
▪If 10 digit dialing is in effect - no "1"prefix is needed, but you do need to dial an Area Code as part of the telephone number:
oPress the <Space Bar> first.
oThen enter the three digit Area Code.
oFinally, enter the seven digit Telephone Number.
oCorrect formatting will be applied automatically.
▪Long distance Telephone Numbers (with a "1" prefix) are entered as such, and the appropriate formatting parentheses and dash is applied automatically.
✓Ext - Enter any Extension number that is required.
✓1st Alt Tel - Continue with the Alternate Numbers as needed following the Telephone Number entry rules outlined above.
✓Ext - Enter any Extension number that is required.
✓2nd Alt Tel - Continue with the Alternate Numbers as needed following the Telephone Number entry rules above.
✓Ext - Enter any Extension number that is required.
❖Renaming the Telephone Number field names:
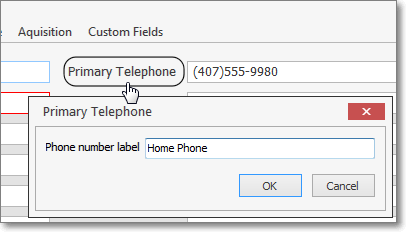
Primary Telephone - Phone number label entry
▪Right-Click on the Telephone Number field name you want to rename (Primary Telephone, 1st Alt Tel and 2nd Alt Tel field names may be renamed, as needed for each individual Subscriber).
▪Enter the desired Telephone Number field name.
▪Click the OK button.

All of the Phone Number field names are renamed
▪To cancel any renamed Telephone Number field name,
oRight-Click on the Telephone Number field name you want to revert to the original field name.
oLeave the Phone number label field blank.
oClick the OK button.
oThat Telephone Number field name will revert to the original "default" field name.
✓E-mail - Enter one or more E-mail addresses. This field will accept multiple Email Addresses (up to a total of 100 characters).
▪If you Check E-Mail Invoice? (see below), this is the E-mail address(es) that will be used.
▪Each additional E-mail address must be separated from the previous one by a semi-colon.
✓Web Site - If available, enter the Subscriber's Web Site address.
✓Fax - Enter their Fax number.
✓If the MKS Connect Service is installed, the Notification feature associated with Monitoring these fields will be activated, otherwise they will be unavailable:
▪Pager Service ID - Double-Click on the appropriate Page Service ID using the Drop-Down Selection List, if applicable for this Subscriber.
oClick the Ellipse Icon to open the Page Service Maintenance Form where a new or revised entry may be made (if the appropriate User Access Rights have been granted for the Page Service Form)
▪Pager Unit - Enter the Pager Unit name.
✓E-Mail Invoice? - If this Subscriber has requested that their Recurring Revenue Invoices be e-mailed to them, rather that printed and mailed, Check the E-Mail Invoice? box.
✓Billing Address Only? - If this record is being entered as a billing address (no service will be provided at this address) for one or more other Subscriber locations, Check the Billing Address Only box.
▪This Billing Address Only record will be identified on Information Bar with a "Billing Address Only" message.
▪Because they are not needed, once entered, a Billing Address Only record will have fewer options available on the Subscriber Options Menu (e.g., Recurring Service, Work Orders, Recurring Revenue)
➢Note: Also, please refer to the Bill Payer chapter for additional information.
✓Exclude From Report (Subscriber Listing) - If this Subscriber is to be excluded from the Subscriber Listing report, Check this box.
✓When the MKS Connect Service is enabled, SMS and IVR Notifications may be utilized
▪SMS Notify # - Enter the telephone number that should be used to send a Text Message (SMS) Notification to this Account
▪Voice Number # - Enter the telephone number that should be used to send a Voice Message (IVR) Notification to this Account
▪Enter these Telephone Numbers following the rules below:
oIf no Area Code is required, enter the seven (7) digit telephone number (it cannot start with a 1) and the proper formatting will be applied automatically
oWhen the10 digit dialing format is in effect - no "1"prefix is needed, but you do need to dial an Area Code as part of the telephone number:
oPress the <Space Bar> first.
oThen, enter the three digit Area Code.
oFinally, enter the seven digit Telephone Number.
oCorrect formatting will be applied automatically.
oLong distance Telephone Numbers (with a "1" prefix) are entered as such, and the appropriate formatting parentheses and dash is applied automatically.
•Other fields that may require information:
✓Alert - Check the Alert box if you want an "Account Alert" message displayed on the Information Bar on the Subscribers Form whenever this record is viewed.
▪This Alert message is particularly useful if the Account needs follow up, is receiving special care, or a special resolution process is underway, or in other ways - needs to be recognized as needing the Comments information viewed by you (or whomever might also view this record) before communicating with the Subscriber.
✓Comments - Enter any additional comments about this Account, as needed.
❖See the Comments Section chapter for more information about using this field.
▪This is an optional Rich Text Editor field.
▪Double-Click this field if you want to enter information in that enhanced format, or just type into the field normally to enter regular (standard) text.
➢Note: For those Accounts who are using a Security Company for their Alarm Response,
a)The Comments entered here should clearly reflect this Security Company response requirement.
b)The CSID Zone records defining these events should be Checked Response Needed? and have <Other> selected for the Dispatch type.
c)The Security Company's emergency contact number must also be entered in the Subscriber's People To Call list.
d)Select that Security Company when defining who is to be contacted for the <Other> Response that's identified on the CSID Zone Form.
e)The CSID Zone's Description field should also clearly reflect this Security Company response requirement.
![]()
•Click the ![]() Icon to record on the Edit View Menu to record this information.
Icon to record on the Edit View Menu to record this information.
✓Duplicate Account Warning - If the Telephone Number of this new Subscriber Information record you are saving already exists in another Subscriber record, a Duplicate Account dialog will be displayed.
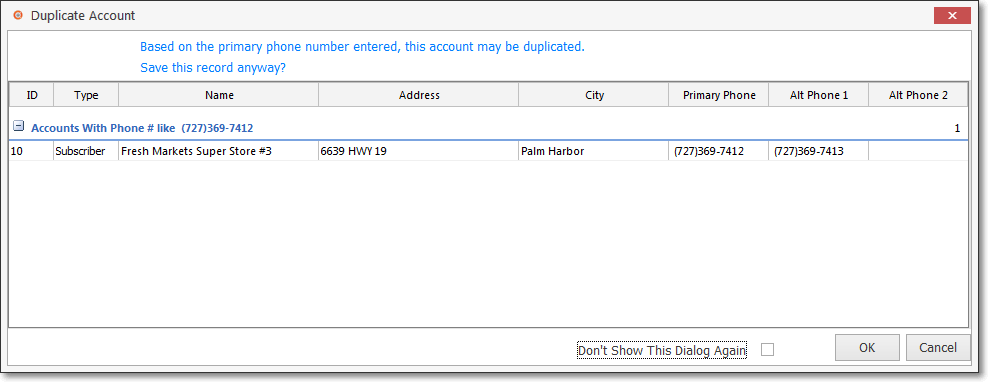
Duplicate Account Warning dialog for Subscribers Form
▪If you know that this Telephone Number is being used by an Account that already exists, and that is acceptable (perhaps it is a sub-location of a main Account or for some other reason, more than one Account will have the same main number), Click the OK button to save the record as requested.
▪If this is not the case, and one or more Subscriber records are listed, determine whether duplicates are acceptable, whether you need to correct this, or another record's primary telephone number.
oClick the Cancel button and change the current record.
oClick the OK button to accept the current record.
oGo to the other record(s) and make the primary telephone number changes there, if appropriate.
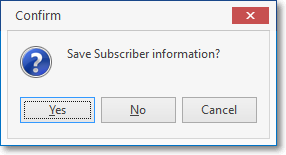
Save Subscriber information?
✓If the User attempts to Close this Form by Clicking the Close Icon (T), or Clicking the Subscribers Tab before saving the current entry (or modification), a Confirm message will be displayed.
▪Yes - Click the Yes button to record the entry (or modification) and Close the Form.
▪No - Click the No button to abandon the entry (or modification) and Close the Form.
•System maintained fields
✓The first field is maintained by the system and represents the Subscriber's internal Account Number which is automatically assigned by the system when the Add ("+") button is Clicked. You cannot change this number.
✓System maintained fields may not be changed on this Edit View Tab.
❑The Subscribers Tab - Browse View:
![]()
•As illustrated above, from the Edit View, Click the Browse View Icon to return to the Subscribers Tab view.
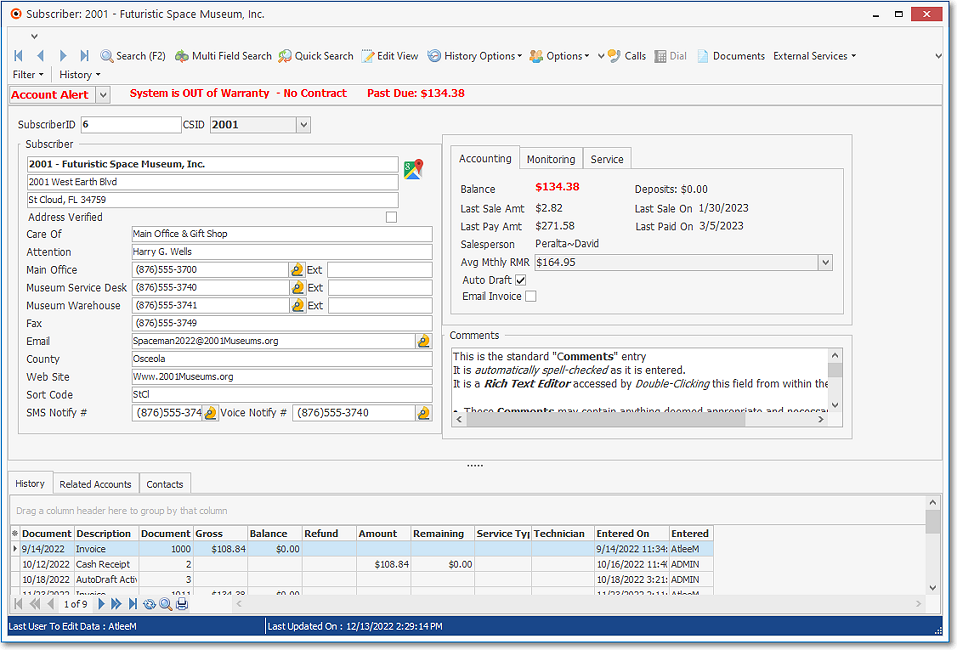
Subscribers Form - Subscribers Tab - with Basic Subscriber Information entered
✓Proceed to the steps listed below.
❑What's Next?
1.Enter the Monitoring Information for each Subscriber.
2.Complete the Special Subscriber, Subscriber Panels, Panel Zones & CSID Zone Entries.
3.Read and complete the data entry described in the General Menu Entries chapter.