❑Based on the selection criteria chosen on the Work Order Invoicing/Review Form, those Work Orders will be displayed in the Work Order List (see the "Establishing the Viewing Parameters for Work Orders that have not been Invoiced" discussion in the Work Order Invoicing/Review chapter for those selection criteria instructions).

Work Order Invoicing/Review Form
❑Reviewing, Invoicing and Completing a selected Work Order:
•The basic steps to finalizing a Work Order record are:
a)Select the Work Order record to be completed
b)Enter the appropriate Labor Hours and Rate, Inventory/Materials expenses, Installed Equipment, and Technician Activity information
c)Review and add/update the remaining Completion information:
i.Edit the Work Order Invoicing/Review record in the Grid section discussion immediately below, as appropriate;
ii.Update that Work Order record itself by Selecting the Go To > Go to Work Order option (see the Work Order illustration shown later, below).
➢Note: Any Work Orders identified as Nob-Billable (i.e., any costs associated with this Work Order should not be billed to the Subscriber) and are finished, will also be listed - as long as they were not marked as Completed within the Work Order Form.
a)The User will then have the ability to add (or confirm) the Inventory/Material (Shift+F9) items that were used.
b)Once that has been done, those Inventory items will appear in the Installed Equipment (Shift+F10) tab
c)Checking the corresponding Install box in the Installed Equipment (Shift+F10) will notify the system that those should be inserted into the associated Subscriber's Installed Equipment Form.
d)Complete the Work Order as normal, and once any of the other Work Orders have been billed, this Work Order will be removed form this list and the Inventory item will be added to the Subscriber's Installed Form automatically.
I.Editing within the Work Order Grid section
•Within the Work Order List, Click on (i.e., Select) a Work Order and then edit the appropriate Columns of that Work Order record.
✓Any service related information that was previously entered in the Completion section of the chosen Work Order will be shown within the Grid.
✓Add, Modify, or Delete any information, as needed, to identify who, when, and what was done to finish the Work Order.
![]()
•Data Column's Header Names:
✓The order in which the Header Names appear may be changed by the User.
✓Once changed, that revised Header arrangement will become this User's default.
✓The Header Names listed below represent only an example of how they could be chosen (e.g., which Header Names will be listed, and how they will be arranged).
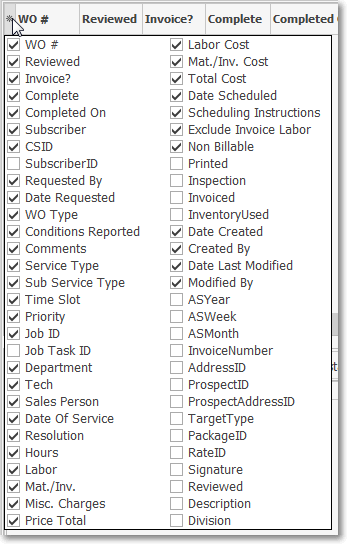
•Columns - Select which columns of data are to be displayed:
✓Click the asterisk (¬) at the left of the data grid's Header row to display a list of all of the column names - and associated data - which may be displayed.
✓By default, all Column Names will be Checked.
✓Remove the Check mark (Click on the Check to remove it) to hide that column of data from the data grid.
•Understanding the Data in the most frequently needed Columns:
✓WO# - This is the system assigned Work Order Number.
✓Subscriber - The name of the Subscriber for whom the service was performed.
✓Reviewed - Check this box to indicate the an Administrator has reviewed this Work Order.
✓Invoice? - Check this box to have the Generate Invoices function create an Invoice for this Work Order.
✓Complete - Check this box to indicate this Work Order has been completed.
✓Completed On - This is the Date when the request for service was successfully completed.
▪Use the Drop-Down Calendar/Date Entry field to Choose the Date this Work Order was completed.
✓CSID - The Central Station's Account Number of the Subscriber for whom the service was performed.
✓Subscriber ID - This is the system assigned Subscriber record Number.
✓Department - The Department to which the Expenses - assigned to this Work Order - will be posted.
✓Date Requested - This is the Date when the request for service was recorded.
✓Service Type - If not entered, use the Drop-Down Selection List provided to Choose the Service Type that best characterizes this Work Order.
✓WO Type - This the the previously selected form Type for the selected Work Order.
✓Conditions Reported - This is the problem reported and entered when the request for service was recorded.
✓Comments - These are the notes and comments entered when the request for service was recorded.
✓Service Type - If not entered, use the Drop-Down Selection List to Choose the Service Type that best characterizes this Work Order.
✓Sub Service Type - Use the Drop-Down Selection List provided to Choose the subordinate Service Category associated with the selected Service Type which best characterizes this Work Order.
✓Time Slot - This is the (default or manually changed) Time Slot that was identified when the request for service was recorded.
✓Priority - This is the (Service Type's default, or manually changed) Priority that was entered when the request for service was recorded.
✓Job ID - If the Work Order was created for a Job Task, the Job Number will be inserted here.
✓Job Task ID - If the Work Order was created for a Job Task, the internal Job Task ID Number will be inserted here.
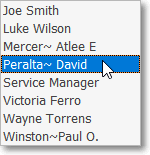
✓Tech - If not entered, use the Drop-Down Selection List provided to Choose the Lead Technician for this Work Order.
▪You may also attribute the Labor hours and charges for this Work Order to more than one Technician, as needed (see the "1. Labor tab" discussion in the Understanding the Work Order Invoicing/Review Tabs section below).
▪However, this Technician selection represents the "Technician of Record" (a.k.a. "Lead Technician") for this Work Order.
✓Date of Service - If not entered, use the Drop-Down Calendar/Date Entry field to enter the initial date when service commenced.
✓Resolution - If not entered, use the Drop-Down Selection List provided to Choose the appropriate Work Order Resolution for this Work Order.
✓Services Performed - Enter a description of the work that was actually performed using this field's Drop-Down Note box.
✓Hours - The header name is shown as a blank in the Select Columns Drop-Down. This system maintained Value represents the sum of all man-hours charged for Labor (see the "1. Labor tab" discussion in the Understanding the Work Order Invoicing/Review Tabs section below) from all the Technicians that performed work for this Work Order.
✓Labor - This system maintained Value represents the total Amount (retail charges) to be Invoiced for Labor (Bill Rate * Hours for each Technicians' time used) charged for Labor (see the "1. Labor tab" discussion below) from all the Technicians that performed work for this Work Order.
✓Inv\Materials - This system maintained value represents the total Retail Price charges for Inventory\Material items (see the "2. Inventory/Materials tab" discussion in the Understanding the Work Order Invoicing/Review Tabs section below) used for this Work Order.
✓Misc Cost - Enter the value to be charged for any Miscellaneous Costs - beyond those entered for Labor and Inventory\Material.
✓Total Cost - This Value represents the sum of the "Retail" Labor, Inventory\Material and Miscellaneous Charges, including applicable Sales Tax.
✓Exclude Invoice Labor - Check this box to exclude the Labor charge associated with any Sale-Purchase Item entered in the Mat.\Inv. Drop-Down Info Box field if their was also a Labor Installation entry in the Job Cost Categories section of the Inventory Item.
▪When an Inventory Item is defined, part of this Sale-Purchase Item entry offers a Job Cost Categories section

▪In this Job Cost Categories section the User may identify the associated Labor Costs for the installation of that Inventory Item.
▪These Labor Costs include the Labor Hours, Employee Pay Rate and the Retail Pay Rate.
▪This Exclude Invoice Labor? option allows the User to tell MKMS to ignore these Labor Costs when creating an Invoice that includes Inventory Items.
✓Non Billable - Check this box when any costs associated with this Work Order should not be billed to the Subscriber. By doing so:
▪The Invoice button will be disabled on the Work Order Form.
▪This Work Order will not appear in the Work Orders Not Invoiced report.
✓Division - The Division assigned to the Subscriber whose Work Order is currently being viewed.
✓Other Columns - There are many more - less frequently needed - Column Names which may be selected, whenever required.

•Post Edit - Click the Save ![]() Icon at the bottom Grid to record the updates.
Icon at the bottom Grid to record the updates.
•Cancel - ![]() Click the Cancel Icon at the bottom Grid to abort this edit.
Click the Cancel Icon at the bottom Grid to abort this edit.
II.Update that Work Order record itself:
•Select the Go To > Go to Work Order option after you Choose the Work Order that needs to be updated.

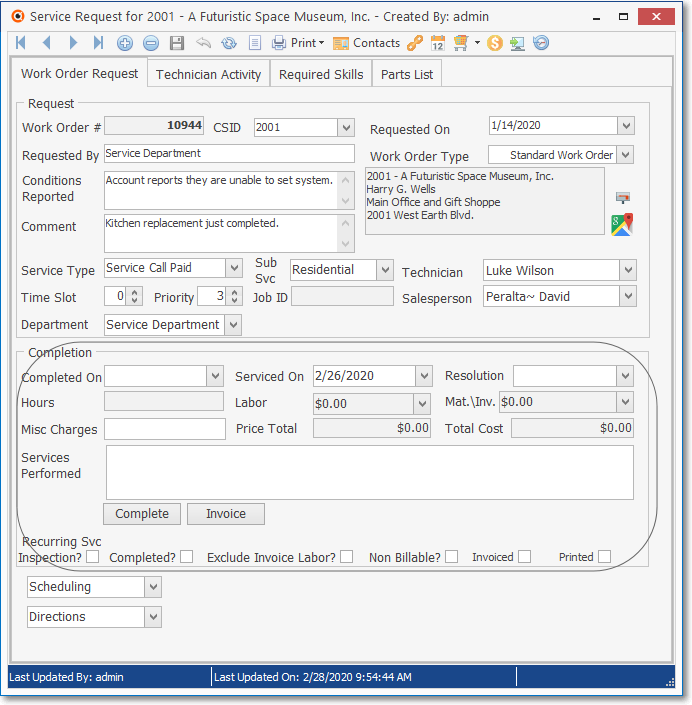
Work Order Invoicing/Review Form - Go To Work Order option - Work Order's Completion section
•Work Order tabs - The Labor and Inventory/Materials Drop-Down Info Boxes, Technician Activity and Parts List tabs are available for updates.
•The Completion section on the selected Work Order Form is displayed - as shown immediately above - may be used for executing the required Review, Invoicing, and Completion process.
✓Enter whatever data is required (see the Completing a Work Order chapter for that information) to identify who and what was required to complete this Work Order.
a)If you want to actually mark this Work Order as Complete and Invoice it from within the Work Order Form:
▪Enter a Completed On Date.
▪Follow the "Automatic Invoice Generation" instructions in the Completing a Work Order chapter.
b)Otherwise, enter all of the necessary information (except the Completed On Date) and simply Click the Close ![]() box to Close the Work Order Form.
box to Close the Work Order Form.
▪The information entered in the Work Order Form will be added to the Work Order Invoicing/Review record (once you Click the Refresh Icon)
▪By doing this, all of the Work Orders that have undergone the Work Order Invoicing/Review process may be Invoiced in one batch.
•You may use the Labor and/or Inventory/Materials Drop-Down Info Boxes on the Work Order Form; and/or within the Work Order Invoicing/Review dialog by using the Labor (Shift+F7) and/or Inventory/Materials (Shift+F8), plus Installed Equipment (Shift+F9) the Technician Activity (Shift+F10) and the Parts List (Shift+F12) tabs (which are located immediately below the Work Order Listing) to review and update that information, as well see the "Understanding & Using the Work Order Invoicing/Review Tabs" discussion immediately below for more information).
✓The information within each of these tabs is associated with the currently selected Work Order record.
Work Order Invoicing/Review - Labor, Inventory / Materials, Installed Equipment (selected), Technician Activity, Appointments & Parts List tabs
❑Understanding & Using the Work Order Invoicing/Review Tabs - There are six (6) tabs below the Work Order Listing - Grid section
•Specific Details of a Selected Work Order will be available, and may be added or modified in the Labor, Inventory/Materials, Installed Equipment, Technician Activity, Appointments and Parts List tabs
![]()
Work Order Invoicing/Review Form
Labor, Inventory / Materials, Installed Equipment, Technician Activity, Appointments & Parts List tabs
1.Labor (Shift+F7) tab - Select the Labor tab to add and/or update the information relating to the Technician(s) that worked on this Service Request, and the Labor Hours that are to be charged to the selected Work Order.
✓This Labor tab has its own Ribbon Menu located at the bottom of the Labor tab, which in addition to the normal record movement options, offers Insert, Delete, Save, Cancel, and Refresh Icons, has the special ![]() Advanced Item Search Icon used to display the Advanced Sale Item Look-up dialog.
Advanced Item Search Icon used to display the Advanced Sale Item Look-up dialog.
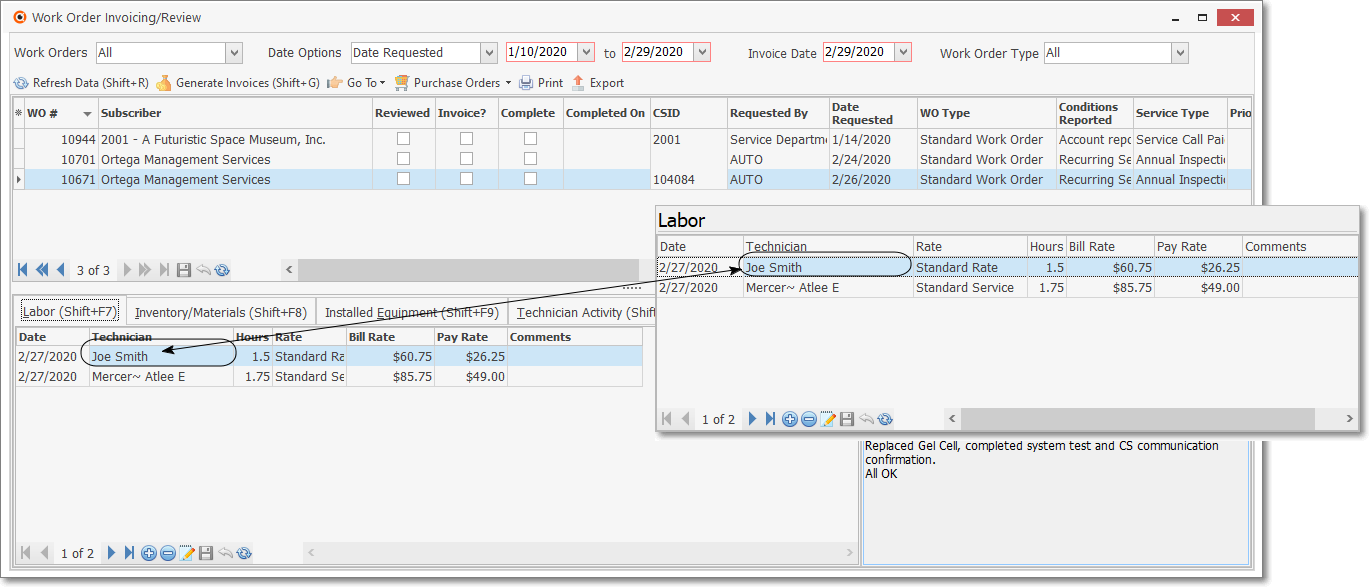
Work Order Invoicing/Review Form -Labor Tab - contains any data previously entered in the Work Order Form - Labor Drop-Down Info Box
✓Click the ![]() Icon to enter new and/or additional Labor charges.
Icon to enter new and/or additional Labor charges.
✓Date - Today will be the default.
▪Use the Drop-Down Calendar/Date Entry field to enter the Date that this Labor was provided.
✓Technician - The Technician originally assigned to this Service Request will be the default.
▪If necessary, use the Drop-Down Selection List to Choose a different Technician who actually performed this Labor.
✓Hours - Enter the number of Hours of Labor that will be charged to this Work Order.
✓Rate - Use the Drop-Down Selection List to Choose the Description of the Rate that will be used to calculate the Internal Cost that will be assessed to the Work Order, and the Amount that will be billed to the Subscriber for this Labor.
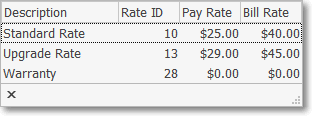
▪Consider defining a "Warranty" Pay Rate for the Technician which would have the appropriate Internal Pay Rate but a Bill Rate of $0.00
▪In this manner, when Completing a Service Request, the "Cost" and "Hours" of Labor that was required may be properly tracked and a No Charge Invoice could be sent to the Subscriber indicating what was done, and that there would be no charges to them.
✓Bill Rate - Calculated by the system based on the Hours worked and the Rate entered above, the Bill Rate (Amount that will be billed to the Subscriber) is entered by the system.
✓Pay Rate - Calculated by the system based on the Hours worked and the Rate entered above, the Pay Rate (Internal Cost that will be assessed to the Work Order) is entered by the system.
✓Comments - Click on this field to enter a brief description (for internal use only) of this Labor charge.

✓Save - Click the ![]() Icon at the bottom of the Labor tab to record this information.
Icon at the bottom of the Labor tab to record this information.
➢Note: If you want to create a No Charge Invoice instead of using the Non Billable Check box (see the "Non Billable" field discussion in the Editing within the Work Order Grid section discussion above) which will suppress the creation of any Invoice:
oBe sure to re-set the Price to $0.00 in all cost related fields.
Use a "Warranty" Pay Rate for the Technician which would have the appropriate Internal Pay Rate but a Bill Rate of $0.00 (see the Rates tab on the Employee Form for more information about this entry).
oThen, a No Charge Invoice can be sent to the Subscriber noting what was done, that they were not being charged, and why they were not charged (e.g., Warranty Repair, Extended Service Agreement coverage, a Friend).
In this manner Labor costs and Inventory Usage (see the "2. Inventory/Materials (Shift+F8) tab" discussion immediately below) may be accounted for, and the Work Order processing procedure can be properly "finished" .
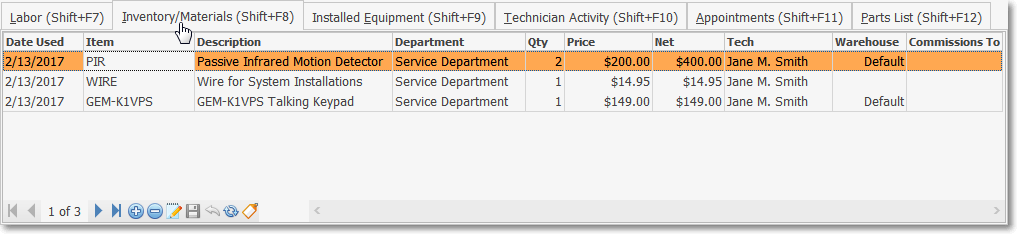
2.Inventory/Materials (Shift+F8) tab - Select the Inventory/Materials tab to record the Inventory and other Materials and Expenses that will be charged to this Work Order.
➢Important: For Inventory Tracking & Job Costing System Users - If this Work Order's Inventory/Materials entries identify Inventory Item(s) that were used to complete a Job Task:
1)The Work Order Listing will have a "Job ID" number assigned; and
2)The Inventory Items identified in the Inventory\Material Drop-Down Info Box must have been Reserved for this Job in the Inventory tab of that Job Costing record.
▪For more information review the:
a)Pick From Job discussion in the Parts List tab chapter
b)Reserve Inventory discussion in the Item List sub-tab chapter
3)The used Inventory Items information entered on the Inventory/Materials tab will be inserted automatically in the Inventory Used sub-tab of the Inventory tab on the Job Costing Form.
✓This Inventory/Materials tab has its own Ribbon Menu located at the bottom of the Inventory/Materials tab, which in addition to the normal record movement, Insert, Delete, Save, Cancel, and Refresh Icons,
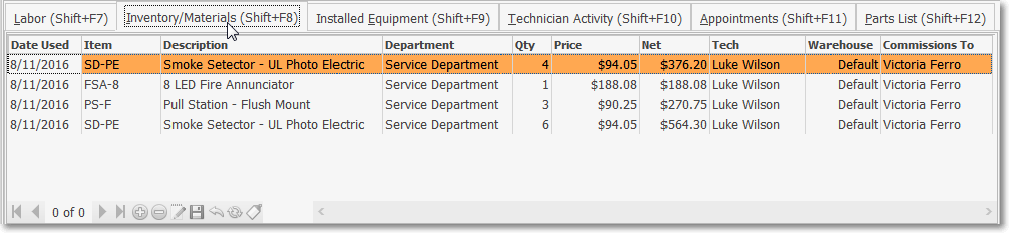
Work Order Invoicing/Review Form - Inventory\Materials tab
▪Click the ![]() Icon to record a new, or modify an existing Inventory and/or Materials charge.
Icon to record a new, or modify an existing Inventory and/or Materials charge.
✓Date Used - Today will be the default.
▪Use the Drop-Down Calendar/Date Entry field to enter the Date when this Inventory and/or Material was used.
✓Item - Use the Drop-Down Selection List to Choose the Sale Purchase Item that was used on this Work Order.
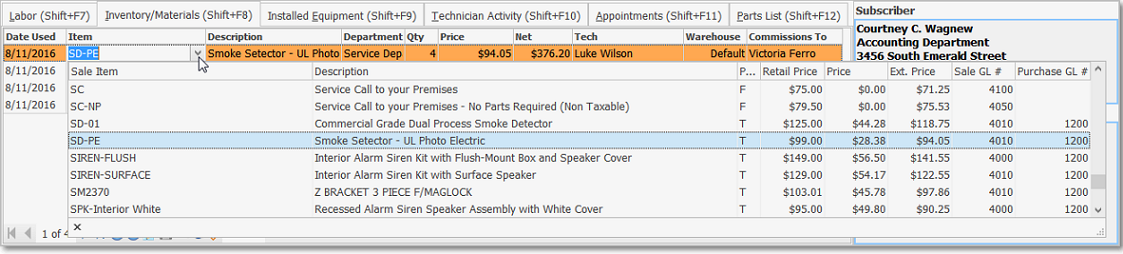
Work Order Invoicing/Review Form - Inventory\Materials tab - Sale-Purchase Items Drop-Down Selection List
![]() While entering an individual Item, if the list of Sale-Purchase Items is too long to easily locate the required Item:
While entering an individual Item, if the list of Sale-Purchase Items is too long to easily locate the required Item:
Click the Advanced Item Search Icon to display the Advanced Sale Item Look-up dialog.
✓Description - By default, this will be the description defined for the selected Sale Purchase Item. This may be modified, if required.
✓Department - The Department to which this Expense will be posted to the General Ledger.
✓Qty - By default, this will be 1. Enter the quantity of this item that was actually used.
✓Price - By default, this will be the Retail Price defined for the selected Sale Purchase Item. This may be modified, if required.
✓Net - The result of the Retail Price times the Quantity used.
✓Tech - Use the Drop-Down Selection List to Choose the Technician that used this Inventory or incurred the Materials charges.
✓Warehouse - If any Sale-Purchase Item entered here was defined as an Inventory Item, the Default Warehouse will be inserted.
▪If the Subscriber whose Work Order is being reviewed has been assigned to a Division which has its own default Warehouse assigned, that Warehouse will be inserted automatically.
▪Use the Drop-Down Selection List to Choose the Warehouse from which this Inventory Item was actually taken, if it was not the Default.
✓Commission To - If using the Commissions Tracking System, and this Sale-Purchase Item is Commission Eligible, use the Drop-Down Selection List provided to Choose the appropriate Employee to whom the Commission should be paid.
✓Save - Click the ![]() Icon at the bottom of the Inventory/Materials tab to record this information.
Icon at the bottom of the Inventory/Materials tab to record this information.
3.Installed Equipment (Shift+F9) tab - The Inventory Items identified within the Inventory\Materials tab (see 2. Materials/Inventory tab immediately above) may be recorded in the Installed Equipment Form for the Subscriber whose Work Order is being reviewed.
✓This Installed Equipment tab has its own Ribbon Menu located at the bottom of the Installed Equipment tab, which in addition to the normal record movement, has the Save, and Cancel Icons
✓After all of the required Inventory\Materials entries have been identified:
▪Select the Install Equipment tab located at the bottom of the Work Order List
✓Each entry that was made in the Inventory/Materials tab will be listed here
▪These are listed in this Installed Equipment tab for several purposes:
a)To identify those entries that should be recorded as Installed Equipment (see that Installed Equipment chapter for more information)
b)To set the Warranty Expiration Date for any Inventory Item, if appropriate.
c)To enter the Serial Number of an Installed Equipment item, if appropriate.
➢Note: If a Parts List has recently been imported into the Inventory/Materials tab, and those items do not appear in this Installed Equipment tab,
Click the Refresh Data Icon at the top of the Work Order Invoicing/Review Form to insert that Parts List here in the Installed Equipment tab.

Work Order Invoicing/Review Form - Installed Equipment tab
✓Install - In the Install column's Header:
▪Check the ![]() box to Choose All listed Installed Equipment items (you may Check the
box to Choose All listed Installed Equipment items (you may Check the ![]() box again to remove the Check from all of the Installed Equipment items).
box again to remove the Check from all of the Installed Equipment items).
▪Otherwise - as shown in the Work Order Invoicing/Review Form - Installed Equipment tab illustration above - you may Check the individual Install Check box of each Inventory Item that is to be added to this Subscriber's Installed Equipment Form.
✓How Many? - If shown, the Quantity in this Installed Equipment (Shift+F9) tab will match the number in the Quantity field in the Inventory/Materials (Shift F8) tab, but this Quantity may be modified (reduced but not increased), as may be appropriate.
▪Based on the Insert_Multiple_Equipment_Items option's True/False entry in Company Settings - there are two possibilities:
1.The Insert_Multiple_Equipment_Items option is False ("F") - The How Many? field is not displayed and One Installed Equipment entry will be created with the Installed Equipment (Shift+F9) tab's How Many? Quantity inserted into the Quantity field on that Subscriber's Installed Equipment record.
2.The Insert_Multiple_Equipment_Items option is True ("T") - The How Many? field is displayed and multiple Installed Equipment entries may be created in the Installed Equipment Form - based on the Installed Equipment (Shift+F9) tab's How Many? Quantity - with each Quantity entry set to "1".
✓Item - This is the Sale-Purchase Item Code entered in the Inventory\Materials tab.
✓Description - The default Description of the selected Sale-Purchase Item.
✓Date Installed - By default, the Date Installed will be Today or the Date Used as recorded in the Inventory\Materials tab.
▪Use the Drop-Down Calendar/Date Entry field to change this component's Installation Date.
✓Warranty Expires - By default, the Warranty Expires will be one Year after the default Date Installed (see above).
▪Use the Drop-Down Calendar/Date Entry field to change this component's Warranty Expiration Date.
✓Serial # - When its available, enter the Serial Number of an Installed Equipment item.
✓Qty - This value is the Quantity entered in the Inventory/Materials tab (column named Qty).
✓Save - Click the ![]() Icon at the bottom of the Installed Equipment tab to record this information.
Icon at the bottom of the Installed Equipment tab to record this information.
4.Technician Activity (Shift+F10) tab - Any Technician Activity recorded in the selected Work Order (and/or the Tech Status Form) is automatically inserted into the Technician Activity tab at the bottom of the Work Order Invoicing/Review Form
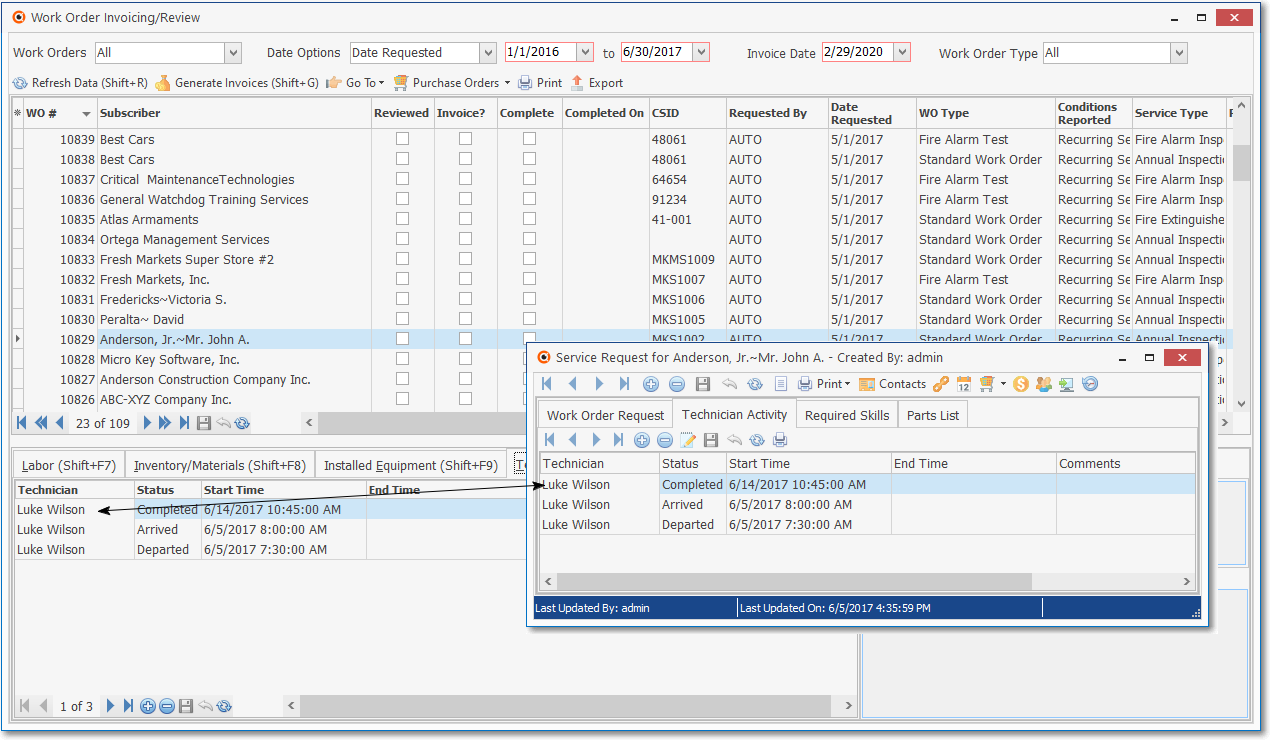
Work Order Invoicing/Review Form - Technician Activity tab & Work Order Form - Technician Activity tab
✓This Technician Activity tab has its own Ribbon Menu located at the bottom of the Technician Activity tab, with the normal record movement, has the Insert, Delete, Save, Cancel, and Refresh Icons
▪Tech Status (Technician Time Recording dialog) updates should be posted using the Tech Status Form so they will automatically be posted to this Technician Activity tab, and the Work Order Form's Technician Activity tab.
✓If the Technician Status Form is not being used to track and record the Work Time for each Technician (and why not?):
▪Enter a Technician Status record:
oThis process will also - as illustrated above - insert these entries into the associated Work Order Form's Technician Activity tab):
▪Click Add ![]() Icon on the Technician Activity tab
Icon on the Technician Activity tab
▪Technician - Use the Drop-Down Selection List to Choose the Technician for whom you want to set the current Status.
▪Status - Use the Drop-Down Selection List to Choose the appropriate Status Code.
▪Start Time - Use the Drop-Down Calendar/Date & Time Selection Box to enter the Correct Date and Time.
oModify, Set the actual starting Date and Time.
oOK - Click the OK button to record this Date and Time selection.
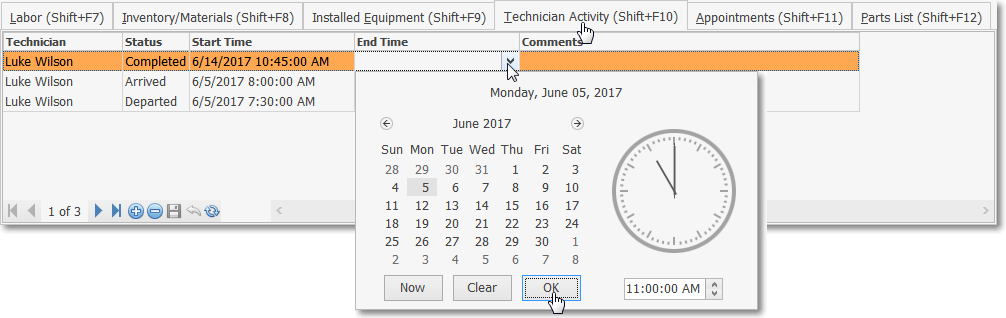
▪End Time - Use the Drop-Down Calendar/Date Entry field to enter the Current Date and (appropriate) Time.
oModify, as necessary, to set the actual ending Date and Time.
oOK - Click the OK button to record this Date and Time selection.
▪The Technician Activity tab will display the Start Time field and End Time as set by Windows®, but when you edit the field, it will display the time in your user defined time format.
✓Comments - Double-Click the Comments field to record a clarifying comment.
✓Click the Save ![]() Icon at the bottom of the Technician Activity tab to record this information.
Icon at the bottom of the Technician Activity tab to record this information.
▪The associated Work Order Form's Technician Activity tab will be updated with this information
▪The Tech Status Form with not be updated
5.Appointments (Shift+F11) tab - Any Appointments that were set for this Work Order will be listed.
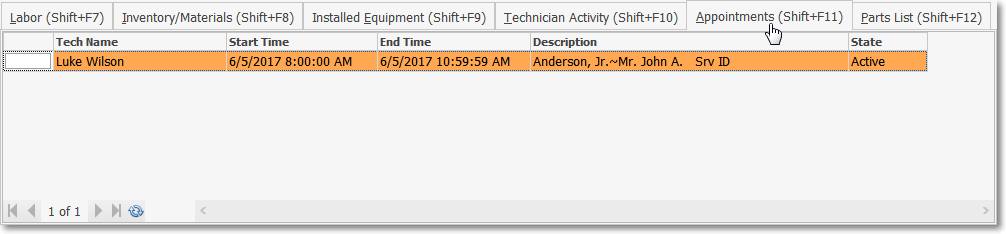
Work Order Invoicing/Review Form - Appointments tab
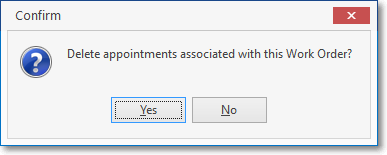
✓Once this Work Order has been Checked as Complete and a Completed On Date has been entered,
▪The User will be asked if they want to delete the existing Appointment that was made for this Work Order.
▪Answer as appropriate.
6.Parts List (Shift+12) tab - Except for the ability to Insert (add) additional items into the Parts List, this tab functions in a similar manner to the Parts List Tab on the Work Order Form.
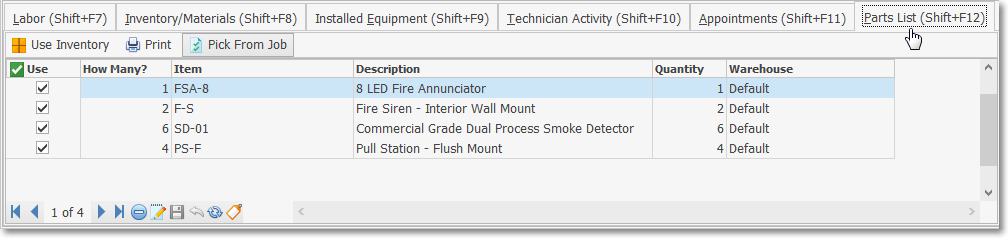
Work Order Invoicing/Review Form - Parts List tab
✓Use Inventory - This option will insert the Inventory Item(s) that have a Check in the Use column on this Parts List tab into the Inventory\Material tab (see #2. Inventory/Materials tab above).
▪Use - Check the Use box for each item that was actually used on the Work Order.
▪How Many? - If you Checked the Use box, enter How Many of this Item has been used. The default will be the entry in the Quantity column. Revise the number as needed.
![]() Select the Use Inventory option on the Parts List tab to insert the number entered in the How Many? field of those Checked Inventory Items into the (see #2. above) Inventory\Material tab and also into the Inventory/Materials Drop-Down Info Box of the associated Work Order
Select the Use Inventory option on the Parts List tab to insert the number entered in the How Many? field of those Checked Inventory Items into the (see #2. above) Inventory\Material tab and also into the Inventory/Materials Drop-Down Info Box of the associated Work Order
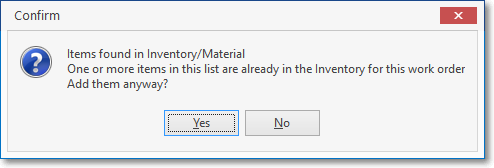
Items found in Inventory/Material message
▪If one or more Inventory Items from this Parts List tab has previously been marked as Used, a Confirmation Query dialog will be displayed.
▪Be sure the Inventory Items chosen as Used are the correct one(s), and if so, Click Yes, otherwise Click No.
✓Pick From Job - When the original Work Order was created from a Job (the Job ID and Job Task ID fields will be populated), and as part of that Job Costing information, an Item List was created, this Pick From Job option becomes active.
![]() Click the Pick From Job Icon on the Parts List tab
Click the Pick From Job Icon on the Parts List tab
oIf the Inventory List from the Job Costing Form was previously imported (or was never defined), an information message will be displayed.
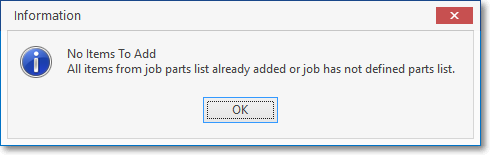
oIf there are no items defined in the Item List sub-tab on the Job Costing Form, or those Inventory Items have already been inserted into the Work Order's Parts List tab, a No Items Found message box will be displayed.
▪Otherwise, this Pick From Job option will import all Received Items in that Item List (which have not yet been identified as used) into the Pick From Job of the Work Order Form as follows:

Work Order Form - Parts List sub-tab - Pick From Job option - Job Pick List dialog
oThe Job Pick List dialog will be displayed with four columns of data:
i.Add? - Check the Green Check Box to the left of the Add? Header Name to Select all items on the Job Pick List, or individually Check the line item(s) of those specific items which are to be Added to the Parts List tab.
ii.Item - The Sale-Purchase Item code for each Inventory Item is displayed as a read-only field
iii.Description - The description of each Inventory Item is displayed as a read-only field
iv.Quantity - The Quantity entered in the Inventory List tab on the Job Costing Form and this Quantity field's Value may be modified, if appropriate.
▪Click the Add Icon at the top of the Job Pick List dialog.
▪Click the Close ![]() box to Close the Job Pick List dialog and populate the Parts List tab.
box to Close the Job Pick List dialog and populate the Parts List tab.
✓Print (Parts List) - To print the contents of this Parts List tab, Click the Print Icon.
▪The Preview of the Parts List Report for the selected Work Order will be displayed on screen.
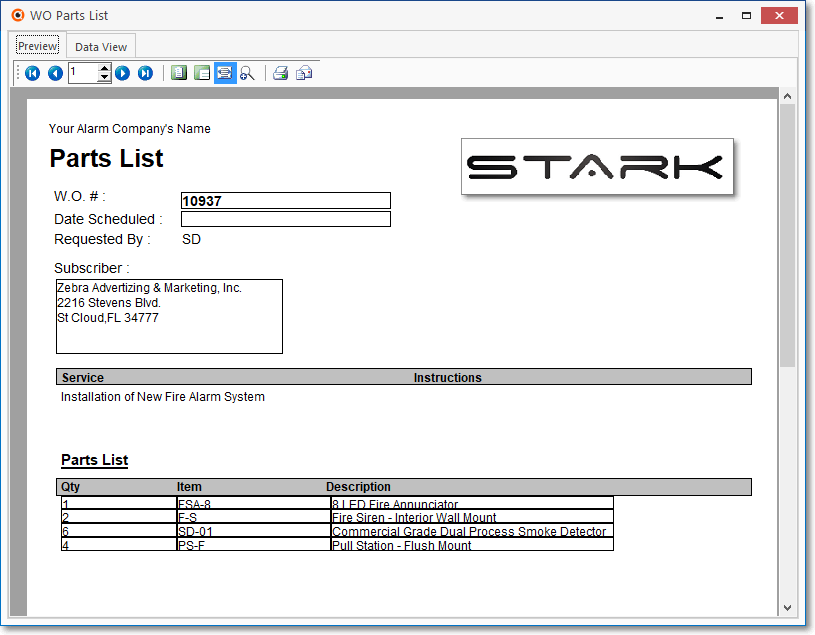
Work Order Form - Parts List sub-tab - Parts List report