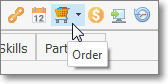
❑Creating a Purchase Order - Regardless of how you opened the Purchase Order Form (see Purchase Orders - An Overview), once the required Vendor is Selected and the Purchase Order Form is displayed, use the Purchase Orders option on the Vendor Options Menu to display the Purchase Order Form:
•Click the Insert ![]() Icon on the Ribbon Menu at the top of the Purchase Order Form to create a new Purchase Order.
Icon on the Ribbon Menu at the top of the Purchase Order Form to create a new Purchase Order.

Purchase Order Form - New Entry
✓The Purchase Order Header fields will be populated (see the "Entering the Purchase Order Header Information" discussion immediately below):
✓Predefined defaults will be inserted based on the system defaults
▪The mandatory information (boxed in Red) which must be entered to complete the Purchase Order Header is automatically filled in, but some may be modified, as needed.
❑Entering the Purchase Order Header Information

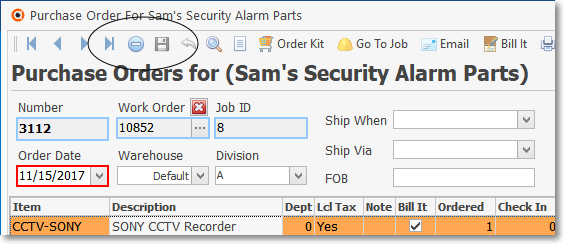
Purchase Order Form - New Entry - Header Information
•Number - The next available Purchase Order Number will be inserted automatically.
•Work Order - May represent any of the following (See "Understanding and Using the Work Order Number field" discussion below):
1.The Work Order Number of the Work Order for which this Purchase Order is being created.
▪When an Inventory Item in the Parts List tab on a Work Order needs to be ordered, a Purchase Order may be created for that purpose which will automatically be assigned that Work Order Number
2.The Work Order Number may be manually assigned to this Purchase Order after (or as) it is created.
▪To assign a Work Order Number to this Purchase Order:
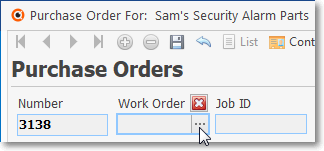
oClick on the Work Order field to activate the Ellipse
oClick that Ellipse to display the Select Subscriber dialog from which the Subscriber - for whom these Sale-Purchase Items are being Ordered - may be identified.
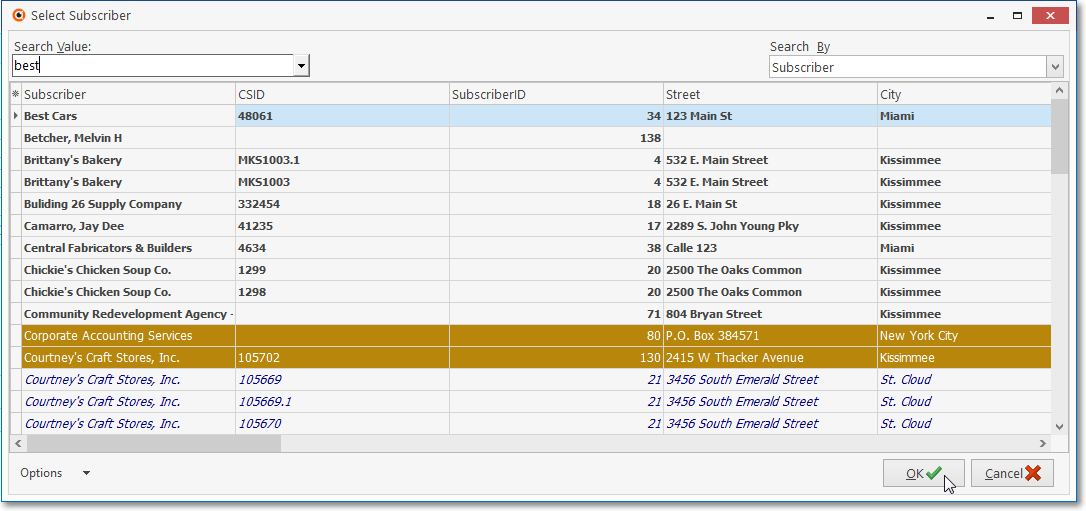
oClick OK to Select that Subscriber and the Select Work Order dialog will be displayed immediately.
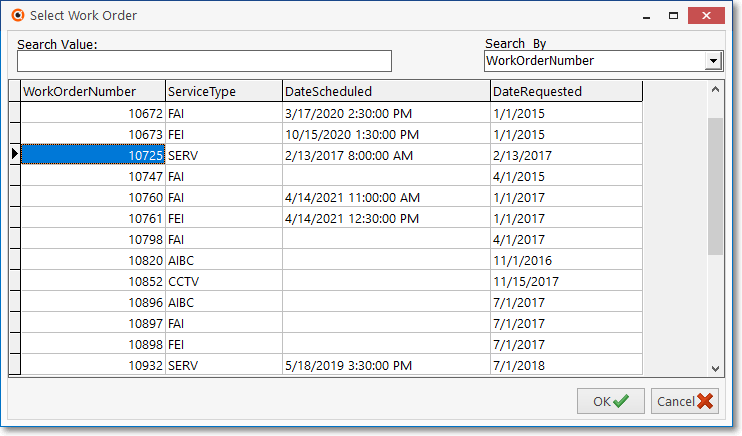
oChoose the Work Order Number that is to be assigned to this Purchase Order.
oClick OK to Select that Work Order Number which will then insert it into the Work Order field on the Purchase Order Form.
3.The default Work Order Number will be assigned to any Detail Line Item which had not previously been assigned a Work Order Number.
4.An assigned Work Order Number may be removed by Clicking the Work Order field's ![]() box
box ![]()
•Job ID - If this Purchase Order is being created from within the Inventory Tracking & Job Costing System to Reserve Inventory item(s):
✓The Job ID Number which was assigned to that Job within the Job Costing Form is automatically inserted into this Job ID field.
✓This Number may not be changed.
•Order Date - By default, Today's date is inserted.
✓You may use the Drop-Down Calendar/Date Entry field to Choose a different date, if appropriate.
•Division - If the Selected Vendor has a Division Code assigned, that Division Code will be inserted into this Division field.
✓Use the Drop-Down Selection List to Choose a different (or new) Division Code, if appropriate.
•Warehouse - By default, it will be the Default Warehouse.
➢Note: The Divisions Form allows a Company to identify a Default Warehouse for that Division
Thereafter, when Purchase Orders and/or Bills are created for a Vendor who was assigned to a Division (a Division assignment to a Vendor is optional), by default, any Inventory related Transaction posted to one of those Purchase Order and/or Bill documents will automatically be assigned to that Warehouse but that Default Warehouse assignment may be changed as needed.
✓Use the Drop-Down Selection List to Choose a different Warehouse.
•Ship When - This field is not populated automatically.
✓Use the Drop-Down Calendar/Date Entry field to Choose the probable Shipping Date, if available.
•Ship Via - Identify the desired Shipping Method using the Drop-Down Selection List provided, if known.
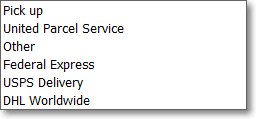
Ship Via options
•FOB - Enter the location from where the order will be shipped.
✓This location information often determines how much you will have to pay for shipping.
✓If the Vendor changes the shipping point, and then charges more for shipping than anticipated, you may want to contest the additional cost based on what FOB was originally agreed upon.
•Ship Due - This field is not populated automatically.
✓Use the Drop-Down Calendar/Date Entry field to Choose the Date when this shipment to be delivered.
•Direct Sale - Purchase Orders, when created, may be preset for delivery to one of the following locations:
i.Your Company's default Address entered in the Company Tab of the User Options Form (No Ship To address will appear on the Purchase Order)
ii.A predefined "Ship To" address (explained in the Edit View on the Vendor Form chapter) will be entered automatically in the Ship To field (described below)
iii.The address of an end-user may be identified by Checking this "Direct Sale" box and entering that Address in the Ship To field (described below)
✓Regardless of where they are delivered, All purchases will still be billed to your Company Address when they are converted to a Bill
•Ship To - When empty, the ordered items are sent to your Company's default Address - previously entered in the Company Tab of the User Options Form - which will appear at the top of the Purchase Order
✓Otherwise:
i.The predefined "Ship To" address (explained in the Edit View on the Vendor Form chapter) is automatically inserted in this Ship To field
ii.The address of an end-user (Subscriber or Prospect) may be identified by Checking this "Direct Sale" box by [overwriting the predefined Ship To address, if present and then] entering the appropriate Address in this Ship To field
•System Maintained fields
✓Amount Billed - The Amount that has been Billed to date for the Detail Line Items entered on this Purchase Order
✓Amount Left to Bill - The Amount that has not been Billed for the Detail Line Items entered on this Purchase Order
✓Line Items Left to Bill/Receive - The number of Detail Line Items on this Purchase Order which have not been Billed and/or Received
![]() Click the Save Icon to record the Header Information for this Purchase Order.
Click the Save Icon to record the Header Information for this Purchase Order.

•Closed - See the Checking In Inventory, the Bill It Button, and the Closing a Purchase Order chapters for information about this Check box.
❑Entering the Purchase Order's Detail Line Item(s): Items may be ordered individually, or as User-Defined Inventory Kits.
•Using the Order Kit option -You may order a User Defined Kit:

✓Design your own Kits - An Overview:
▪A Kit may contain many different Inventory Items, with different quantities required for each of the Inventory Items that make up the Kit.
▪Once that Kit is defined, the Sale-Purchase Item Code assigned to that Kit may be selected to place an order for all of the Inventory Items required to make the Quantity of Kits that are to be Ordered.
▪This will insert, on the Purchase Order, as many individual Detail Line Items and Quantities required to make up the contents (Inventory Items and individual Quantities) of the selected predefined Kit.
✓To issue a Purchase Order for a specific quantity of a User Defined Kit, Click the Order Kit Icon in the Actions Menu at the top of the Purchase Order Form.
▪The Order/Purchase Kit dialog will be displayed.
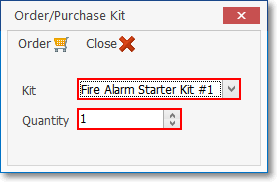
Order/Purchase Kit dialog
a.Kit - Use the Drop-Down Selection List to Choose the desired User Defined Kit.
b.Quantity - Enter the number of Kits that are required.
c.Order - Click the Order button to execute this request.
d.Repeat a. - c. to order additional User Defined Kits, as needed.
e.Close - Click the Close ![]() box to return to the Purchase Order Form.
box to return to the Purchase Order Form.
f.The Inventory Items and Quantities required to make up the number of Kits ordered will automatically be inserted into the Purchase Order.
•Enter the required Detail Line Items individually:
✓Click the Insert ![]() Icon on the Ribbon Menu located on the bottom of the Detail Line Item's Data Grid and add the required Detail Line Item
Icon on the Ribbon Menu located on the bottom of the Detail Line Item's Data Grid and add the required Detail Line Item
✓Item - Using the Drop-Down Selection List provided, Choose the Purchase Category code for the item to be ordered

▪If you have a large number of Purchase Items defined, to help you locate the desired Item, Click the Advanced Item Look-up ![]() Icon on the bottom Ribbon Menu to simplify this search/selection process.
Icon on the bottom Ribbon Menu to simplify this search/selection process.
▪See the Advanced Sale Item Look-up chapter for more information about this feature.
✓Description - By default, it will be the default Description assigned to the selected Purchase Category.
▪You may Modify this Description, if needed.
✓Dept - Departments are used in the General Ledger to identify the Work Group or Profit-Center within your Company that is responsible for ordering and/or using this Detail Line Item.
▪If appropriate, enter the Department that is responsible for, and will use, the items requested on this Detail Line Item.
✓Lcl Tax - If this Detail Line Item is taxable locally, the system will insert the default Sales Tax Rule (i.e., Yes, No, Exempt) based on what is defined in the Vendor Tax Information section. for this Vendor.
▪This entry may be changed, as needed.
✓Ntl Tax - If this Detail Line Item is taxable nationally, the system will insert the default Sales Tax Rule (i.e., Yes, No, Exempt) based on what is defined in the Vendor Tax Information section. for this Vendor.
▪This entry may be changed, as needed.
✓Note - Click within the Note field and Press the <Space Bar> to display the Drop-Down Note Pad in which you may enter any additional information related to the Detail Line Item.
✓Bill It - By default, this box will be Checked.
▪Later, once Ordered items are received and Checked In, if you want to Bill some Detail Line Items but not others - because additional Ordered items are expected to be delivered later - remove the Check from this box for any Detail Line Items which have not yet been received, or for any other reason you do not what them Billed at that time.
✓Ordered - By default, it will be 1.
▪You may Modify the quantity to be ordered, as needed.
✓Check In - Nothing is entered now. Later, when the Vendor has shipped some., or all of the order, you will enter the number ot items that were actually shipped to your Company.
▪See the Checking In Inventory chapter for more information about making entries in this field.
✓Received - This number will be maintained by the system and represents what you have previously Checked In.
✓Lcl Due - Depending on what is entered in the Lcl Tax field, and how many of the ordered items have actually been Checked In, the appropriate Sales Tax Amount (or $0.00) will be inserted automatically by the system.
✓Ntl Due - Depending on what is entered in the Ntl Tax field, and how many of the ordered items have actually been Checked In, the appropriate Sales Tax Amount (or $0.00) will be inserted automatically by the system.
✓Price - By default, it will be the Price (the current Value in the Price or COGS Value field - as appropriate - on the Sale-Purchase Items Form) assigned to the selected Purchase Category.
▪You may Modify this Price, if a different price is to be specified on the Purchase Order.
✓Net - The charge for this Detail Line Item calculated by multiplying the number Ordered by the Price for each.
✓Tax - The Net multiplied by the Tax Rate.
✓Gross - The sum of the Net plus the Tax.
✓WH - By default, it will be the Default Warehouse unless it was changed when you Identified the Warehouse in the Header.
▪Use the Drop-Down Selection List to Choose a different Warehouse, if needed.
✓More Info - Click the More Info field's Drop-Down Arrow (see More Info ... below) to open the Drop-Down Data Entry Box
![]() Click the Save Icon at the bottom of the Detail Line Items to record this Detail Line Item.
Click the Save Icon at the bottom of the Detail Line Items to record this Detail Line Item.
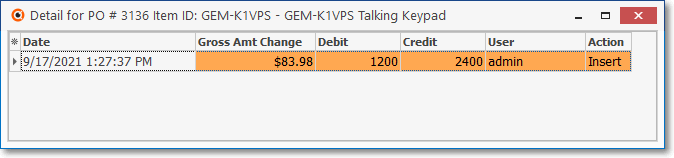
![]() Click the View Item History Icon at the bottom of the Detail Line Items to display the General Ledger Financial Transactions for this Detail Line Item.
Click the View Item History Icon at the bottom of the Detail Line Items to display the General Ledger Financial Transactions for this Detail Line Item.
•System Calculated Fields:
✓Net - Calculated by the system and equals the Price multiplied by the Quantity of this Detail Line Item.
✓Tax - Calculated by the system and equals the sum of all Sales Tax that was charged on this Detail Line Item.
✓Gross - The total for the Detail Line Item - calculated by the system.
•More Info ... Click the More Info field and Press the <Space Bar> to display the Drop-Down Data Entry Box, if required:
✓Work Order field in More Info Drop-Down Info Box - Displays the Work Order Number - if one was assigned to the Purchase Order (using the Order Inventory button on the Service Request Form) or has been specifically assigned to this Detail Line Item, that appropriate Work Order Number may be assigned individually (see below).
▪To assign a Work Order Number to this Purchase Order:
oClick on the Work Order field to activate the Ellipse
oClick that Ellipse to display the Select Subscriber dialog from which the Subscriber - for whom these Sale-Purchase Items are being Ordered - may be identified.
oClick OK to Select that Subscriber and the Select Work Order dialog will be displayed immediately.
Select Work Order dialog
oChoose the Work Order Number that is to be assigned to this Purchase Order.
oClick OK to Select that Work Order Number which will then insert it into the Work Order field on the Purchase Order Form.
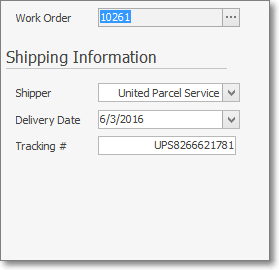
✓Shipping Information
▪Shipper - Use the Drop-Down Selection List to Choose a Shipping Method for the current Detail Line Item, if and when appropriate.
▪Delivery Date - Use the Drop-Down Calendar/Date Entry field to Choose a Delivery Date for the current Detail Line Item, if and when available.
oThe Inventory Delivery Report uses this information to determine when ordered Inventory Items are expected to be delivered.
▪Tracking # - Enter a Tracking Number for the current Detail Line Item, if and when available.
![]() Click the Save Icon to record this Purchase Order.
Click the Save Icon to record this Purchase Order.
✓Note: When a Purchase Order Form is opened from a Work Order that was created for a Job Task,
That Purchase Order Form's Ribbon Menu will not include an Insert ![]() Icon
Icon
No additional Purchase Order for that Work Order may be created unless it is saved and close
By doing so, it prevents an accidental creation of another Purchase Order which is not associated with the Job Task
❑Entering the Purchase Order Footer Information

•Comments - Enter any additional Comments that will help the Vendor better understand the items being ordered on this Purchase Order.
✓You may also Double Click the Comments field to open a Rich Edit Text box.
•Internal Notes - Enter any information that would be useful for the User to see when viewing this Purchase Order.
✓These Internal Notes are not Printed on the Purchase Order.
![]() Click the Save Icon to record the Footer Information for this Purchase Order.
Click the Save Icon to record the Footer Information for this Purchase Order.
❑Understanding and Using the Work Order Number field on the Purchase Order Form:

Purchase Orders Form - Work Order field
•Work Order - This is a multi-purpose field which may identify one of the following:
1. Indicates the Work Order Number of the Work Order for which this Purchase Order is being (or was previously) created from and for that Work Order:
▪To created a Purchase Order for a specific Work Order, Select the Order Inventory Icon on the Work Order Form
Service Request Form
Order Inventory option
▪This will open a Search Vendors dialog
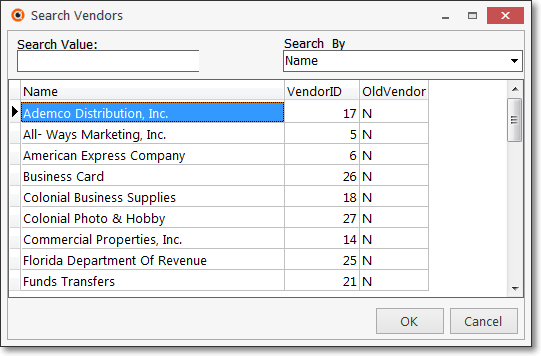
Search Vendors dialog
▪This Search Vendors dialog is used to Choose the Vendor to whom the Purchase Order will be submitted.
▪Click on the desired Vendor and Click the OK button.
▪The Purchase Order Form opens and the required Inventory Items may then be ordered for that Work Order, following the directions at the beginning of this chapter.
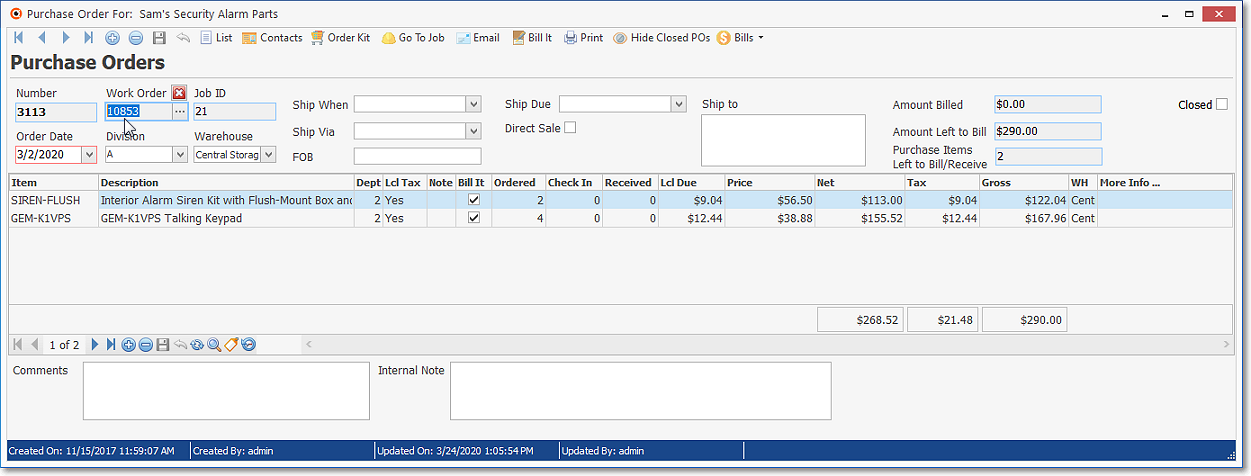
Purchase Order Form - Work Order field
▪The Work Order Number assigned to that Work Order will automatically be inserted in the Work Order field (as shown above).
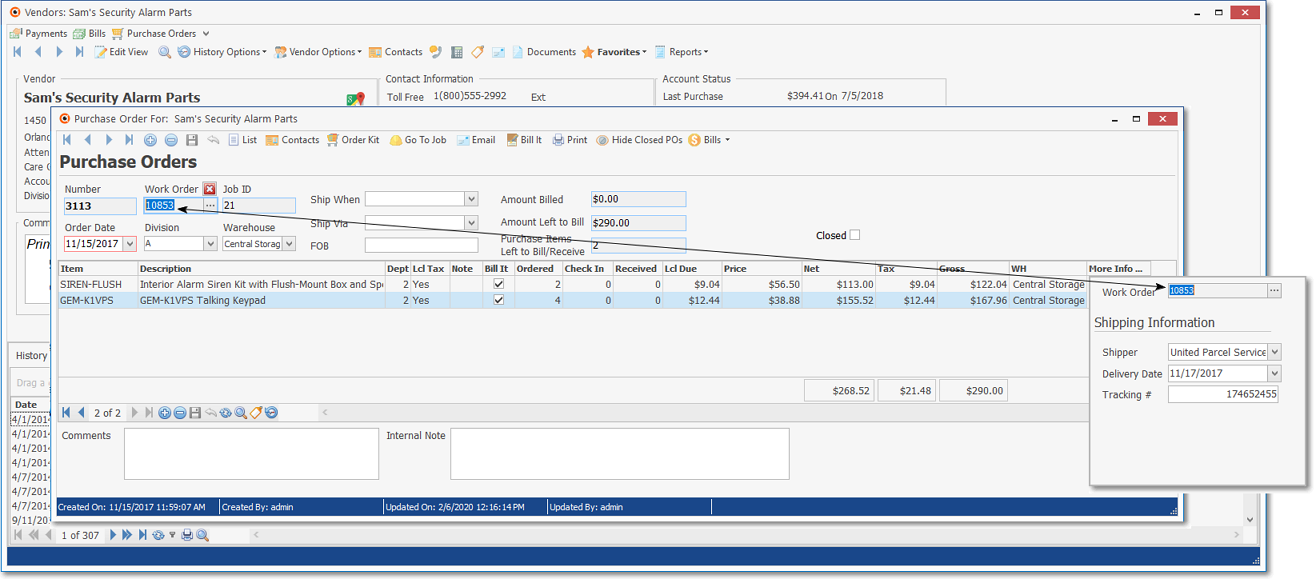
Work Order field on Purchase Order Form and within the More Info box
▪Each Detail Line Item (as shown above) on the Purchase Order Form will also have that Work Order Number assigned.
▪Close the Purchase Order Form.
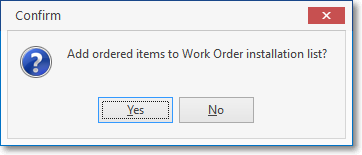
Add ordered items to Work Order installation list?
oIndicate whether or not these ordered Inventory Items should be added into the Work Order's Parts List Tab.
oIf Yes is Chosen, the Inventory Items on the Purchase Order will be inserted into the (existing) Parts List for that Work Order.
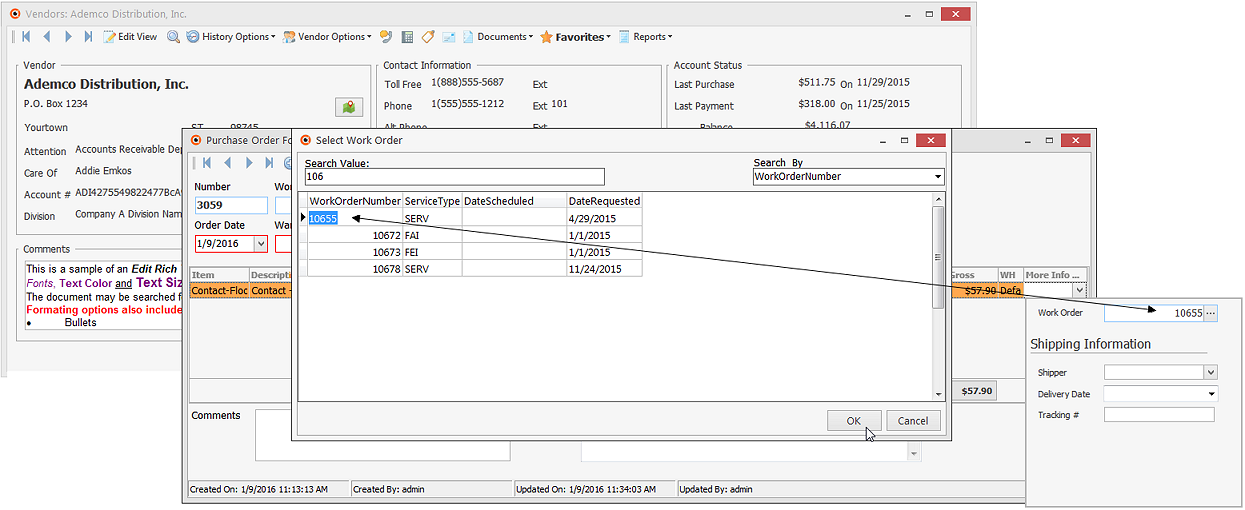
2. Allows a specific Work Order Number to be manually selected and then assigned to a Purchase Order (which is being created to order Inventory Items for a specific Subscriber's Work Order:
▪When the Purchase Order is first started, as the Header Information is being added, Click the Ellipse on the Work Order field on the Purchase Order Form to open the Select Subscriber dialog (see the F2 Subscriber Search chapter for more information).
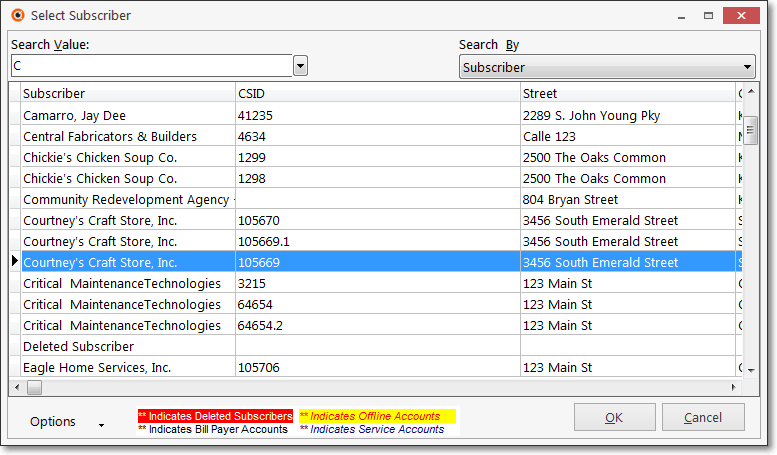
Select Subscriber dialog
▪The User must Choose the Subscriber who has an Open Work Order which needs to have Inventory Items ordered for it.
▪Once the Subscriber is Selected, a Select Work Order dialog is provided next.

Select Work Order dialog
▪The User will Choose the Work Order Number of the Work Order which needs these Inventory Items.
▪The Work Order Number assigned to that Work Order will automatically be inserted in this Work Order field.
Purchase Orders Form - Work Order field
▪Each Detail Line Item subsequently added to this Purchase Order Form will also have that Work Order Number assigned automatically.
3. To identify the default Work Order Number to be assigned to any additional Detail Line Item(s) which are (or may be) added to an existing Purchase Order:
▪Follow the directions in item 2. immediately above.
❑Completing a Purchase Order when a portion, or all of the order is Received:
•The requested items on your Purchase Order have arrived, What do you do?
1.Retrieve the appropriate Vendor.
2.Open the Purchase Order Form.
3.Locate the Purchase Order
4.Check in those Items that were delivered (See the Checking In Inventory chapter).
5.Create a Vendor Bill for these items (See the Bill It Button chapter).
▪The Purchase Order must be opened from within the Vendors Form for the Bill It button to be available.
6.Close the Purchase Order (See the Closing a Purchase Order chapter).
•You may also print a List of all Purchase Orders.