❑Understanding the Purpose for Divisions:
•Divisions allow you to define and separate the Company - either for territorial reasons or for product line differentiation - into any number of Divisions.
•Divisions also allow your Company to Billing an Alarm Dealer's Accounts for those companies for whom you are providing Contract Monitoring Services by having each Dealer's name and return address automatically printed on the Recurring Revenue Invoices sent to their Subscribers.
•Divisions may be used to identify specific business related entities, regions (territorial or functional) or any other sub-divisions within the Company, and to allow the creation of custom Invoice and Work Order headers to accommodate multiple offices within the same Company, and/or to accommodate Billing an Alarm Dealer's Accounts.
❑Each Division may belong to one or more Division Groups
•Each Division Group may have any number of Divisions as members within that Group.
•Several Accounts Receivable System Reports allow for filtering or record selection based on what Division Code is assigned to the Subscriber and/or the Division Group to which that Division Code belongs. These reports are:
a)Accounts Receivable (As Of) Report
c)Average Recurring Revenue Report
h)Sales taxes Collected Report
m)Wholesale Collections Report
❑Defining the Company's Division Groups:
a)From the Backstage Menu System Select Maintenance and Choose General and Click the General Maintenance option which displays the Maintenance Menu, or
b)From the Quick Access Menu, Select Maintenance and Choose General Maintenance to display the Maintenance Menu.
•Once the Maintenance Menu is displayed, Select the Receivables section and Choose Division Groups
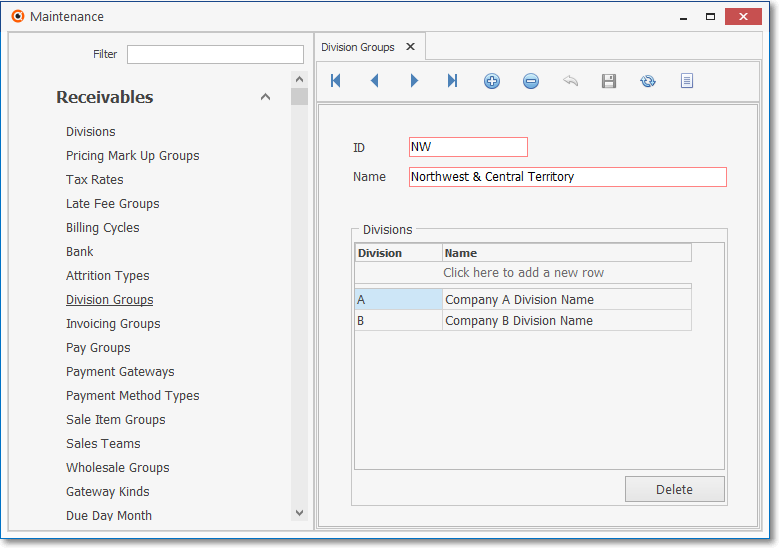
Division Group Form
✓This Division Group Form may be Re-sized by Dragging the Top and/or Bottom up or down, and/or the Right side in or out.
•Navigation Menu - The Navigation Menu is located at the top of the Division Group Form.

✓This Navigation Menu provides the normal Record Movement, plus Add, Delete, Cancel, Save, Refresh, and List options.
•Record Editing View - The details of the currently selected record are displayed below the Navigation Menu at the center (Main Body) of the Division Group Form.
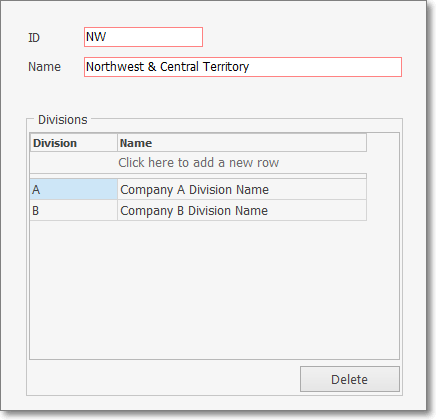
Division Groups Form - Record Editing View
•To define a Division Group:
✓Click the ![]() Icon to start a Division Group entry in the Record Editing View.
Icon to start a Division Group entry in the Record Editing View.
▪ID - Enter a unique Division Group Code composed of 1 - 4 alpha-numeric characters.
oLetters will NOT be capitalized automatically, so if you want a capital letter, enter it as such.
oNormal punctuation - such as a dash, underline and/or asterisk - is permitted.
▪Name - Enter the Name for this Division Group composed of up to 30 alpha-numeric characters.
oLetters will NOT be capitalized automatically, so if you want a capital letter, enter it as such.
oNormal punctuation - such as a dash, underline and/or asterisk - is permitted.
✓Click the ![]() Icon to record this Division Group.
Icon to record this Division Group.
•Any number of additional Division Groups may be identified, as required.
❑Identifying the Divisions which are to be assigned to this Division Group:
•To identify one or more Divisions as members of this Division Group:
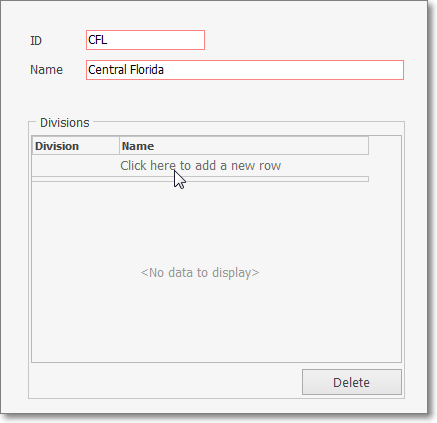
✓Click the Click here to add a new row bar to begin (see illustration above).
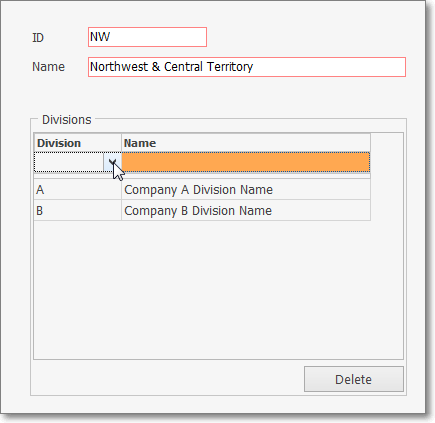
Division Groups Form - Division section - Add Record row
✓Division - Using the Drop-Down Selection List provided, Choose the appropriate Division.
✓Name - Press the Tab F key and the associated Name of that Division will be inserted.
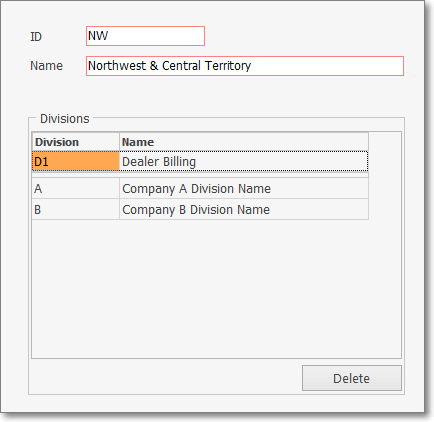
Division Groups Form - Division section - Record is Added
✓Click the Save ![]() Icon to save this Division assignment.
Icon to save this Division assignment.
✓Repeat as needed to identify all of the Divisions who are members of the Division Group.
![]() List Icon - The Navigation Menu also has a List option which provides a tabular view of these Division Group records.
List Icon - The Navigation Menu also has a List option which provides a tabular view of these Division Group records.
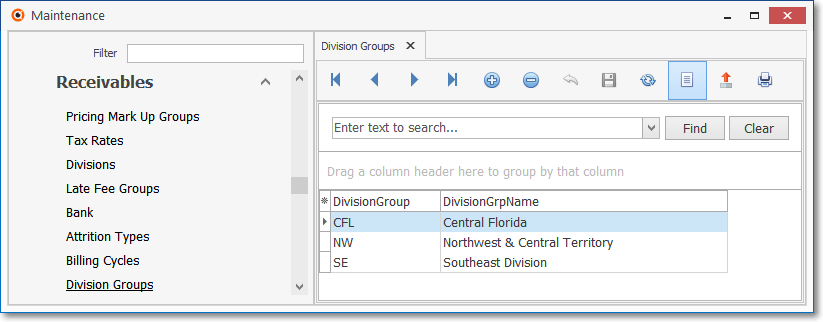
Division Groups Form - List View
✓The columns of listed Grid Data may be rearranged, filtered, sorted, and exported as a PDF file and/or an Excel formatted file.

✓Find - Enter text to search for a specific record, then Click the Find option.
✓Clear - To remove the text to search for entry, Click the Clear option

Navigation Menu shown with the Icons for List, Export and Print
![]() List Icon - Click the List Icon again to Close the List View and return to the Record Editing View.
List Icon - Click the List Icon again to Close the List View and return to the Record Editing View.
![]() Export Icon - Click the Export Icon to create (one of there types of) a spreadsheet compatible file containing the Grid Data as it is currently organized and filtered.
Export Icon - Click the Export Icon to create (one of there types of) a spreadsheet compatible file containing the Grid Data as it is currently organized and filtered.
![]() Print - Click the Print Icon to display the Print Preview Form from which a custom report may be designed and "printed" as an Adobe® PDF File.
Print - Click the Print Icon to display the Print Preview Form from which a custom report may be designed and "printed" as an Adobe® PDF File.
❖See the Grids - Print Preview - Export Data chapter for complete information on using the List View, including its Export & Print options.