❑any Companies create, operate and track their Sales, Purchases, and Inventory by distinct business Divisions:
•Divisions allow a Company to define and separate certain business related entities within their Company - either for management, territorial, and/or for product line differentiation - by specific Company Divisions.
•The Divisions Form also allows a Company to identify a Default Warehouse for that Division
✓Thereafter, when Invoices, Purchase Orders, Bills and/or Work Order documents are created for a Subscriber who was assigned to a Division (a Division assignment to a Subscriber is optional), by default, any Inventory related Transaction posted to one of those Invoice, Purchase Order, Bill and/or Work Order documents will automatically be assigned to that Warehouse but that Default Warehouse assignment may be changed as needed.
•Divisions allow a Company to Bill an Alarm Dealer's Accounts of Alarm Companies for whom your Company is providing Contract Monitoring Services.
✓This is accomplished by having each Alarm Dealer's Company Name (and your Company's PO Box) automatically printed on the Recurring Revenue Invoices being mailed (or Emailed) to that Dealer's Subscribers.
✓When payments are received for that Alarm Dealer's Invoices, your Company can subtract the Contract Monitoring Service Fees and send the Balance of those Receipts to that Alarm Dealer.
•Several Accounts Receivable System Reports (and if using the General Ledger System: six Financial Reports) allow for filtering, or record filtering based on what Division Code is assigned to the Subscriber and/or the Division Group to which that Division Code belongs.
✓These reports are:
a.Accounts Receivable Collections Report
b.Accounts Receivable (As Of) Report
d.Average Recurring Revenue Report
g.Cash Receipts Summary by Month
k.Invoices
s.Sales taxes Collected Report
x.Wholesale Collections Report
y.Accounts Payable System Reports
z.General Ledger System Reports:
vii.Trial Balance
•A Division Code may also be assigned to a Vendor and an Accounts Payable by Division report is also available.
❑Departments versus Divisions:
•Divisions are generally implemented to identify specific business related entities, regions (territorial or functional), or any other sub-divisions within your Company, and/or to allow the creation of custom Invoice and Work Order headers to accommodate multiple offices within the same Company, and/or to accommodate Billing an Alarm Dealer's Accounts.
✓Each Division may belong to one or more Division Groups
▪Each Division Group may have any number of Divisions as Members of that Group.
▪An individual Subscriber may only be assigned to one Division.
✓Optionally, using the Drop-Down Selection List provided in the Warehouse field (see below), a Level 1 Warehouse may be identified.
▪This will then become the default Warehouse when Invoices are created for a Subscriber who was assigned to a Division or for Work Orders when Inventory/Materials which were used are identified; also when Purchase Orders and Bills are created for a Vendor who was assigned to a Division.
•Departments, unlike Divisions, are only used for Financial Transaction Tracking - and are generally created to identify a Work Group or Profit-Center within your Company.
1.Departments within a Security Alarm Company are generally associated with installing, servicing, or monitoring functions, and so they will identify the Receipts from, and Sales made to Subscribers, and the Purchases from, and Payments made to Vendors as Financial Transactions associated with those Departments,
2.Departments are almost always used as part of an internal Financial Transaction Tracking process within the General Ledger System.
3.Departments are designed for use as an itemization and reporting tool within Financial Statements & Reports.
❑If your Company is providing Contract Monitoring Services, and the services being provided to those Dealers include Billing the Dealers Monitoring Service Fees, create a Division Code for each Alarm Dealer for whom your Company will bill their Subscriber's Recurring Revenues.
•To accommodate this, any number of Division Codes may be created.
✓Once created, these Division Codes will be assigned to Subscribers for future sorting, billing and reporting purposes.
✓In addition, these Company Divisions may each have their individual Company Return Address Information printed on their Subscriber's Invoices and Statements.
•The ability to Print individualized Division return addresses eliminates the need to have multiple sets of Invoice Forms - one for each different Division's (or Dealer's) return address.
•This capability allows you to bill the Recurring Revenue for those Dealers who have contracted for monitoring services with your Company, because each Dealer will have their own individualized Invoices.
➢Note 1: Division Codes normally used to Billing an Alarm Dealer's Accounts may - if you do not need to do the Billing for them - have other uses instead such as providing for the grouping of your Subscribers for many reasons (ex. Service Areas, System Types, Language spoken, etc.).
➢Note 2: However, regardless of whether you are performing the Alarm Dealer's Recurring Revenue Billing Service, if your Company is providing Contract Monitoring Services for other Alarm Dealers, the actual Alarm Dealer information must also be defined.
❖See the Dealers Chapter for more information.
❑To define a Division, access the Divisions Form:
a)From the Backstage Menu System Select Maintenance and Choose General and Click the General Maintenance option which displays the Maintenance Menu or,
b)From the Quick Access Menu, Select Maintenance and Choose General Maintenance to display the Maintenance Menu.
•Once the Maintenance Menu is displayed, Select Receivables and Choose Divisions.
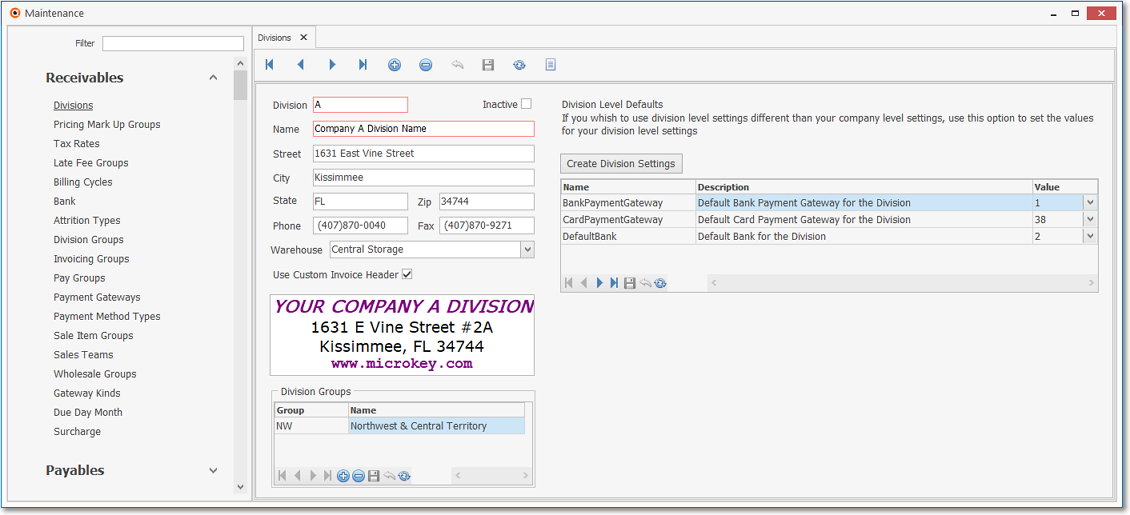
Divisions Form
✓This Divisions Form may be Re-sized by Dragging the Top and/or Bottom up or down, and/or the Right side in or out.
•Navigation Menu - The Navigation Menu is located at the top of the Divisions Form.

✓This Navigation Menu provides the normal Record Movement, plus Add, Delete, Cancel, Save, Refresh, and List options.
•Record Editing View - The details of the currently selected record are displayed below the Navigation Menu at the center (Main Body) of the Divisions Form.
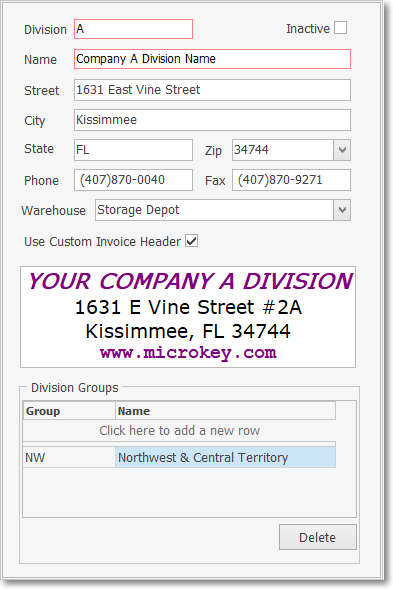
Divisions Form - Record Editing View
•The Division Groups section contains the list of the Division Group(s) to which this Division has been assigned..
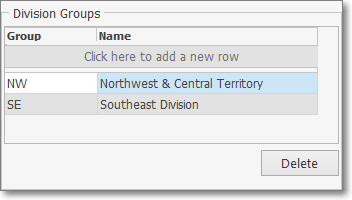
Divisions Form - Division Groups section
•To define a Division to be used for identifying a section of the Company, or an Alarm Dealer:
✓Click the Add ![]() Icon to start a Division entry in the Record Editing View.
Icon to start a Division entry in the Record Editing View.
▪Division - Enter a unique Division Code composed of 1 - 4 alpha-numeric characters.
oLetters will NOT be capitalized automatically so if you want a capital letter, enter it as such.
oNormal punctuation such as a dash, underline or asterisk are permitted.
▪Inactive - Check this box if this Division is no longer being used.
oA Filter (see "Using the Special Functions" below) may be applied whereby All Divisions, only Active Divisions, or only Inactive Divisions may be viewed.
▪Name - Enter the Name for this Division
▪Street - Enter the Street Address
▪City - Enter the City
▪State -Enter the State code (or appropriate governmental entity name).
▪Zip - Enter the Zip (or Postal) code.
▪Phone - Enter their main telephone number
oIf no Area Code is required, enter the telephone number (it cannot start with a 1 and the dash between the third and fourth number will be inserted automatically).
oIf 10 digit dialing is in effect - no "1"prefix is needed, but you do need to dial an Area Code as part of the telephone number:
i.Press the <Space Bar> first.
ii.Then enter the three digit Area Code.
iii.Finally, enter the seven digit Telephone Number.
iv.Correct formatting will be inserted automatically.
oLong distance Telephone Numbers (with a "1" prefix) are entered as such with the formatting parentheses and dash applied automatically.
▪Fax - Enter their dedicated Fax line number following the rules outlined above.
▪Warehouse - using the Drop-Down Selection List provided in the Warehouse field (see below).
oOnly a Level 1 Warehouse may be identified.
oThis entry will then become the default Warehouse when Invoices are created for a Subscriber who was assigned to a Division or for Work Orders when Inventory/Materials which were used are identified; also when Purchase Orders and Bills are created for a Vendor who was assigned to a Division.
➢Note A Vendor may be assigned to a specific Division within your Company.
This Divisions field allows your Company to associate this Vendor with that Warehouse
Thereafter, when Purchase Orders, and/or Bills are created for a Vendor who was assigned to a Division (a Division assignment to a Vendor is optional)
By default, any Inventory related Transaction posted to either of those documents will automatically be assigned to and associated with that Warehouse
However, that Warehouse designation may be changed when needed.
An Accounts Payable Report By Division is also available.
▪Use Custom Invoice Header - Check this box to activate a Custom Header.
oSee the "Creating a Custom Header for this Division" section below.
✓Click the Save ![]() Icon to record this Division.
Icon to record this Division.
✓Any number of additional Divisions may be identified, as required.
❑Assigning Division Level Payment Gateway Defaults:
•For those Companies who use multiple fully automated Payment Gateways (i.e., InnoEPay, Authorize.net, and/or Forte.net) and multiple Banks into which Receipts are deposited during the Fully Automated Recurring Revenue Billing process, this Division Level Payment Gateway Default capability allows your Company to Designate for all Subscribers assigned to that specified Division:
a)The Bank ("Default Bank") into which
b)The specified Payment Gateway that will process and deposit ACH ("Bank Payment Gateway") payments
c)The specified Payment Gateway that will process and deposit Credit Card ("Card Payment Gateway") payments
•Identifying the Payment Gateway(s) and Bank:
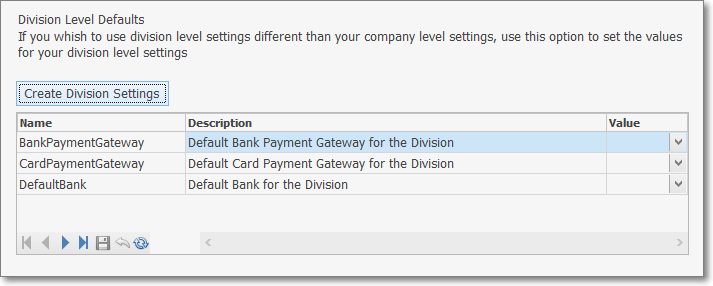
✓Create Division Settings - Click this button to insert the three Default Settings for this Division.
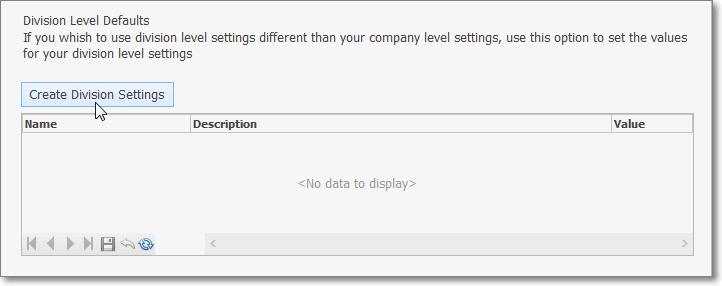
Division Form - Create Division Settings option
✓Grid - This grid will then display the predefined defaults for entity Division
▪Name - There are 3 defaults for each Division: 1) BankPaymentGateway, 2) CardPaymentGateway and 3) DefaultBank
▪Description - The description of each Name.
▪Value - The record number of the Payment Gateway or Bank being identified (see "Selecting the Value" below)
Division Form - Create Division Settings entries
•Selecting the Value:
✓Each Payment Gateway is assigned an ID number value by the system when it was created.
✓These ID number values may be seen by using the List Icon on the Payment Gateway Form
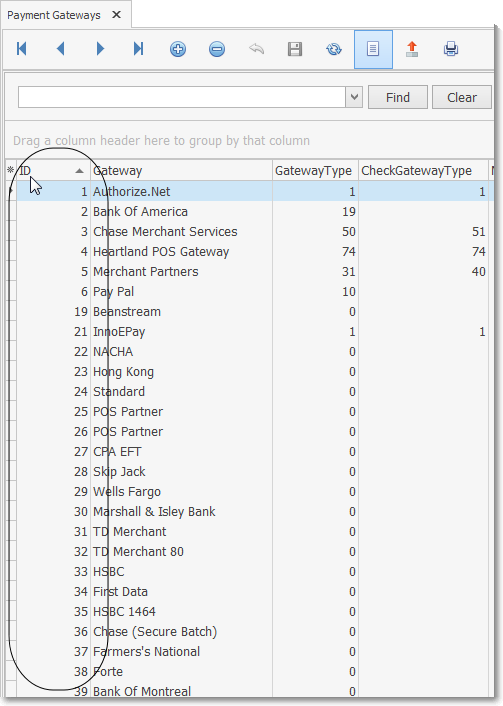
Payment Gateways - List view - ID number values
✓Value - Using the Drop-Down Select List provided, Choose the appropriate ID number:
▪BankPaymentGateway - Click the Down-Arrow in the Value field to display a list of valid options.
oSelect the appropriate Payment Gateway "key"
oOK - Click the OK button
oThe "key" Value will be inserted to the Value field in the Grid
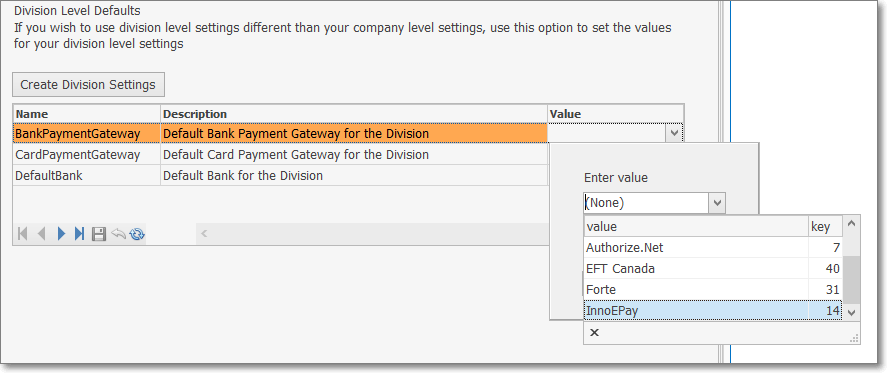
Division Form - Division Settings - Selected "BankPaymentGateway" Value
▪CardPaymentGateway - Click the Down-Arrow in the Value field to display a list of valid options.
oSelect the appropriate Payment Gateway "key"
oOK - Click the OK button
oThe "key" Value will be inserted to the Value field in the Grid
▪DefaultBank - Click the Down-Arrow in the Value field to display a list of valid options.
oSelect the appropriate Payment Gateway "key"
oOK - Click the OK button
oThe "key" Value will be inserted to the Value field in the Grid
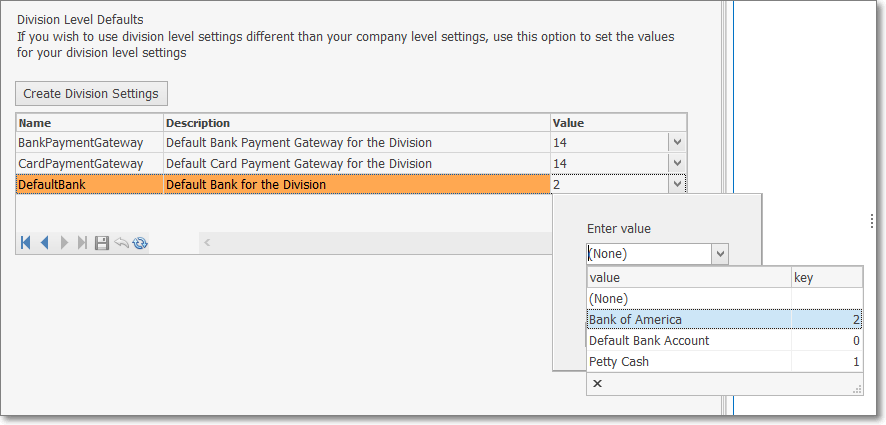
Division Form - Division Settings - Selected "DefaultBank" Value
•Thereafter:
✓When a new Receipt is created, the Bank associated with that Subscriber's assigned Division will be used first, and if that Bank is not found (because no Divisional Bank was identified) then the Company's default Bank identified in the Company Options - General tab in the User Options Form will be used.
✓When an Invoice is paid during the Fully Automated Recurring Revenue Billing process or by using the E-Payment Form, the default Payment Gateway would be the Subscriber's Division default for Credit Card or Bank payments.
✓If a Division default Payment Gateway does not exist, the process will use the Company's default Payment Gateway as identified on that Payment Gateway Form.
➢ Note: The Payment Batch file created by an Auto Billing process or the Post Auto Draft Form will not use the Subscriber's Division defaults described above.
Instead it will use the Payment Gateway assigned to the Billing Cycles associated with each Recurring Revenue record that were created for each Subscriber.
❑Assigning a Division to one or more Division Groups:
•To assign this Division to a Division Group:
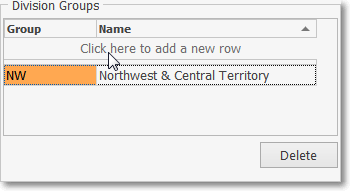
Divisions Form - Division Groups section - Add Record row
✓Select the Click here to add a new row bar
✓Group - Using the Drop-Down Selection List provided, Choose the appropriate Division Group .
✓Name - Press the Tab F key and the associated Name of that Division Group will be inserted.
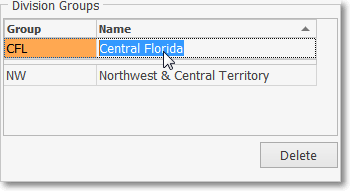
Divisions Form - Division Groups section - Record being Added
✓Click the Save ![]() Icon to save this Division Group assignment.
Icon to save this Division Group assignment.
✓Repeat as needed to identify all of the Division Groups to which this Division is to be assigned.
❑Creating a Custom Header for this Division:
•If you want to create a customized header for their Sales Invoices so that each Division's Invoices and Statements are printed with their own Invoice/Statement Header information
✓Check the Use Custom Invoice Header? box.
✓Click the Save ![]() Icon to save Use Custom Invoice Header? Check mark.
Icon to save Use Custom Invoice Header? Check mark.
•Custom Invoice Header (field) - Double-Click within the Custom Invoice Header field to display the Rich Text Editor dialog.
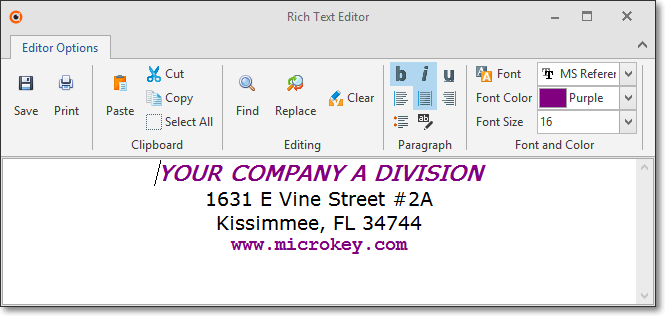
✓Create the desired Custom Invoice Header using the Rich Text Editor screen (shown immediately above) which allows word-processor style selectivity of text fonts, sizes, centering and coloration.
✓Click the Save Icon
•If the Division Codes feature is being used to provide individualized Invoice Headers, update the Company Options information to recognize this Invoice format change:
✓To access the Company Options tab on the User Options Form:
1.Open the Backstage Menu and Select Maintenance, Select General then Choose User Options;
2.Open the Quick Access Menu and Select Maintenance then Choose User Options.
✓Select the Company Options tab and Select the Company Options - General sub-tab.
▪Remove the Check in the Use Pre-Printed Invoices? box to allow MKMS to insert the Division Custom Invoice Header information in lieu of what would be on a pre-printed Invoice Form.
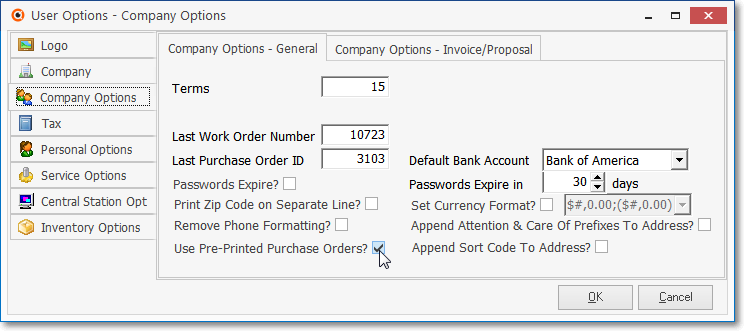
▪Click OK to save the change.
•Therefore, you may use Custom Invoice Header information instead of Pre-Printed Invoices for every Invoice/Statement/Service Request you print.
✓As seen above, individualized Invoice Headers may be created for any number of your Company's Divisions.
✓In addition, you may also create a generic Invoice Header for any Subscriber who has not been assigned to a Division - thus eliminating the need for using any pre-printed Invoice Forms.
✓To do so, in the Company Options - Invoice/Proposal tab on the Company Options Form (see the instructions for accessing the User Options Form immediately above).
▪Check the Use Custom Invoice Header? box.
▪Click View/Edit to create the Custom Invoice Header information (see the instructions above)
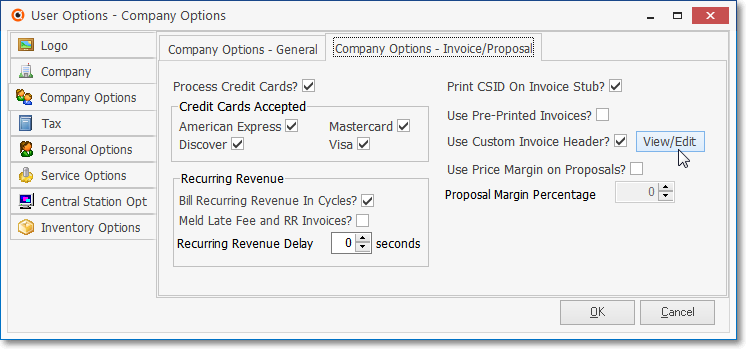
▪Use the Rich Text Editor dialog to create the generic Invoice Header.
▪Click OK to save the Invoice Header.
❖Pre-Printed Invoice Forms versus using Custom Invoice Headers:
✓In summary, because the Company Options - Invoice/Proposal option for Use Pre-Printed Invoices? doesn't affect a Division's Custom Invoice Header:
A.You may use Pre-Printed Invoices for those Subscribers that have NOT been assigned a Division code, and still have Custom Invoice Headers printed for those Subscribers that DO have a Division code assigned.
B.Or you may define a generic Custom Invoice Header for use by all Subscribers except those that have been assigned a Division's Custom Invoice Header thereby eliminating the need for any Pre-Printed Invoice Forms.
![]() List Icon - The Navigation Menu also has a List option which provides a tabular view of these Division records.
List Icon - The Navigation Menu also has a List option which provides a tabular view of these Division records.
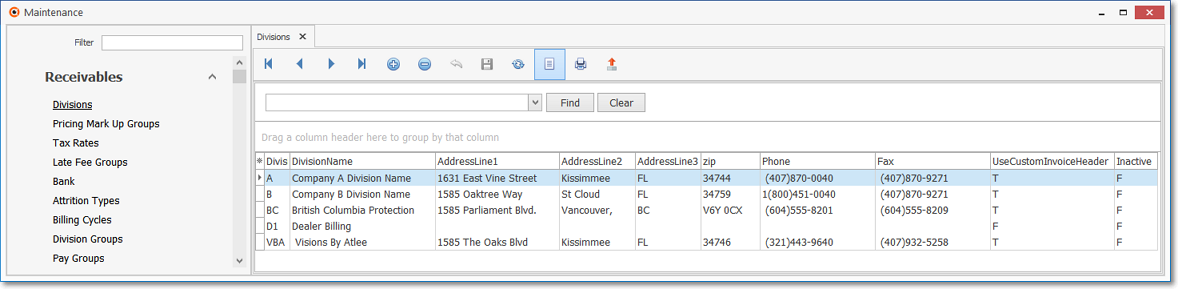
Divisions Form - List View
✓The columns of listed Grid Data may be rearranged, filtered, sorted, and exported as a PDF file and/or an Excel formatted file.

✓Find - Enter text to search for a specific record, then Click the Find option.
✓Clear - To remove the text to search for entry, Click the Clear option

Navigation Menu shown with the Icons for List, Export and Print
![]() List Icon - Click the List Icon again to Close the List View and return to the Record Editing View.
List Icon - Click the List Icon again to Close the List View and return to the Record Editing View.
![]() Export Icon - Click the Export Icon to create (one of there types of) a spreadsheet compatible file containing the Grid Data as it is currently organized and filtered.
Export Icon - Click the Export Icon to create (one of there types of) a spreadsheet compatible file containing the Grid Data as it is currently organized and filtered.
![]() Print - Click the Print Icon to display the Print Preview Form from which a custom report may be designed and "printed" as an Adobe® PDF File.
Print - Click the Print Icon to display the Print Preview Form from which a custom report may be designed and "printed" as an Adobe® PDF File.
❖See the Grids - Print Preview - Export Data chapter for complete information on using the List View, including its Export & Print options.