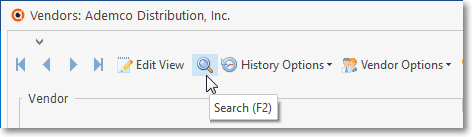
❑Anytime a Vendors Form is open, you may use the Vendor Search function by pressing the F2 function key or Clicking the Search Icon on the Navigation section of its Ribbon Menu.to locate a specific Vendor record.
•The Vendor Search dialog might also be displayed from other Forms when there's a need to locate a specific Vendor record.
✓A sample of the Vendor Search dialog is shown below:
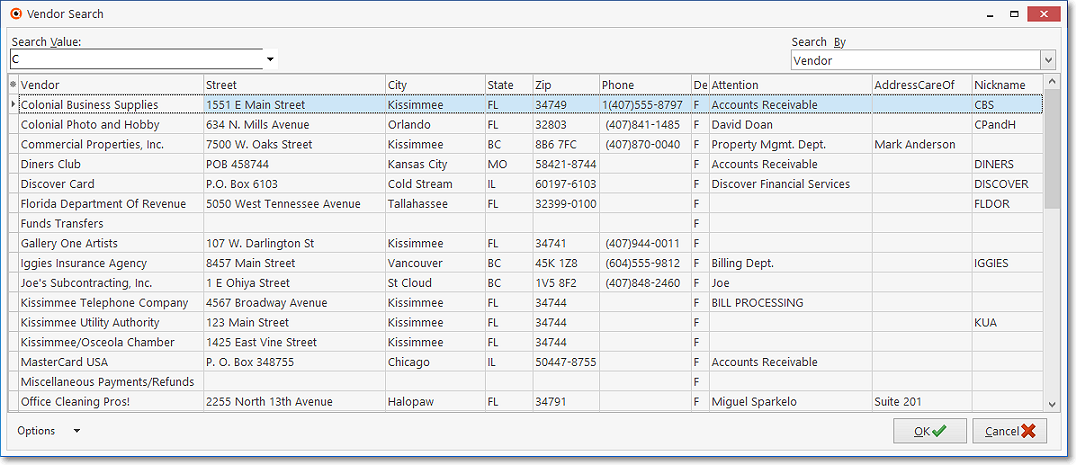
Vendor Search dialog is displayed by pressing F2 while viewing a Vendor Form
•Search By - The default criteria is Vendor which is their Name
✓Using the Drop-Down Selection List provided, Select the best Search By criteria for locating the desired Vendor.
•Search Value - There are two Search Value entry methods available:
✓Enter some or most of the Vendor's Name (or whatever the appropriate entry should be based on the selected Search By method).
▪Your entry is not case sensitive.
oTherefore, "SMITH", "Smith", and "smith" are all searched for in the same manner, because during the search, the system internally converts the Search Value entry to all upper case.
▪If the Auto Search option is not Checked, Click the Search button (see below).
•Search (button) - If the Auto Search box is not Checked (see Auto Search below) there will be a Search button to the right of the Search Value field.
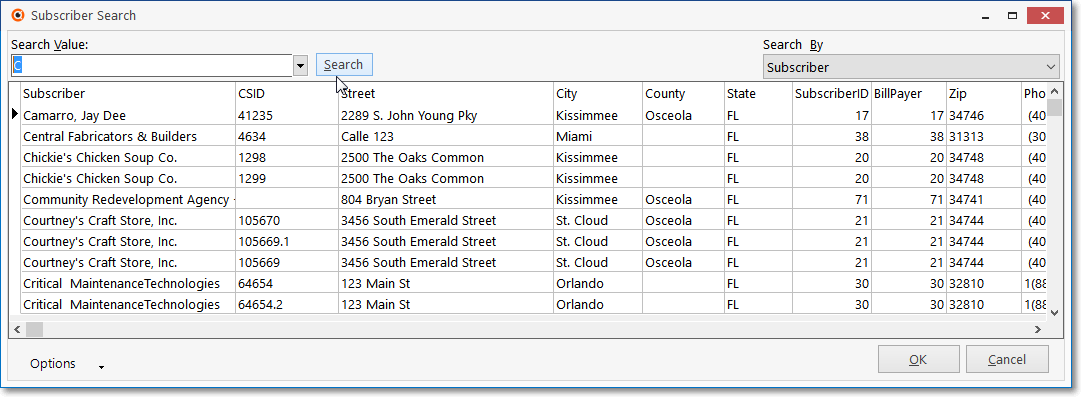
✓Click the Search button after entering the Search Value (see Search Value below) to locate the desired record.
•To Select the desired record, Click on that record line.
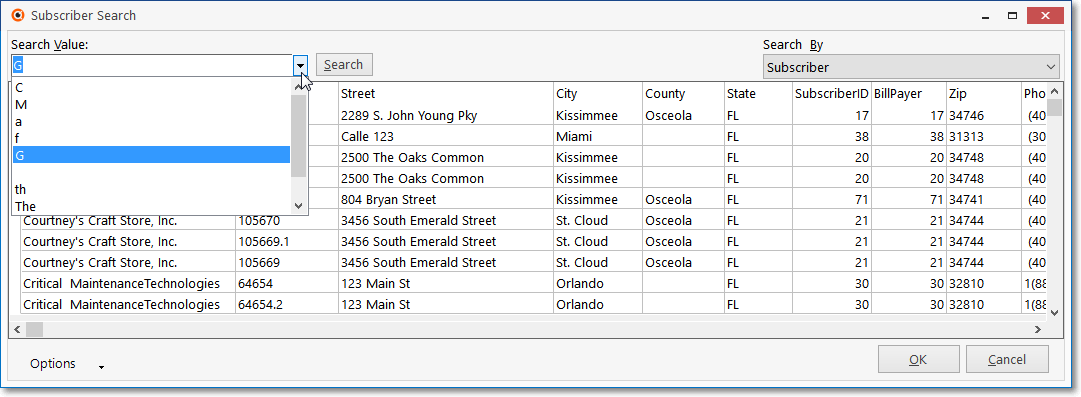
✓Using the Drop-Down Selection List provided, you may Choose from one of the 10 most recently entered Search Values.
▪If Auto Search is in effect (see "Auto Search" below), the record that most closely matches the entered Search Value (or selected from the Drop-Down Selection List ) will be identified with a Right-Arrow4record pointer on the far left side of that record's row.
▪If the Auto Search option is not Checked, Click the Search button (which will be displayed to the right of the Search Value field) to execute the search.
oThe appropriate record will be identified with a Right-Arrow4record pointer on the far left side of that record's row.
▪To Select the desired record, Click on that record line.
✓Click the OK button to Choose the selected Vendor record.
•The Search Vendors Form will Close and the Selected Vendor record will be displayed on the Vendors Form.
❑Other Available Options on the Vendor Search dialog:
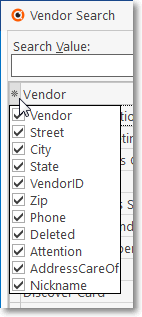
•Columns - Select which specific columns are to be listed in the Vendor Search dialog:
Vendor Search dialog
Field selection options
✓Click the asterisk (¬) at the left of the list's Header row (see the mouse pointer in the illustration above) to display a list of all of the column names - and associated data - which may be displayed.
✓By default, all Column Names will be Checked.
✓Remove the Check mark (Click on the Check to remove it) to hide that column of data from the list.
•Columns - Rearrange the left to right sequence in which the Columns are to be displayed:
✓To move a Column left or right of its original location, Drag and Drop that Column to the desired location.
✓This relocation may be executed on the Vendor Search dialog itself, or within the Column List described above.
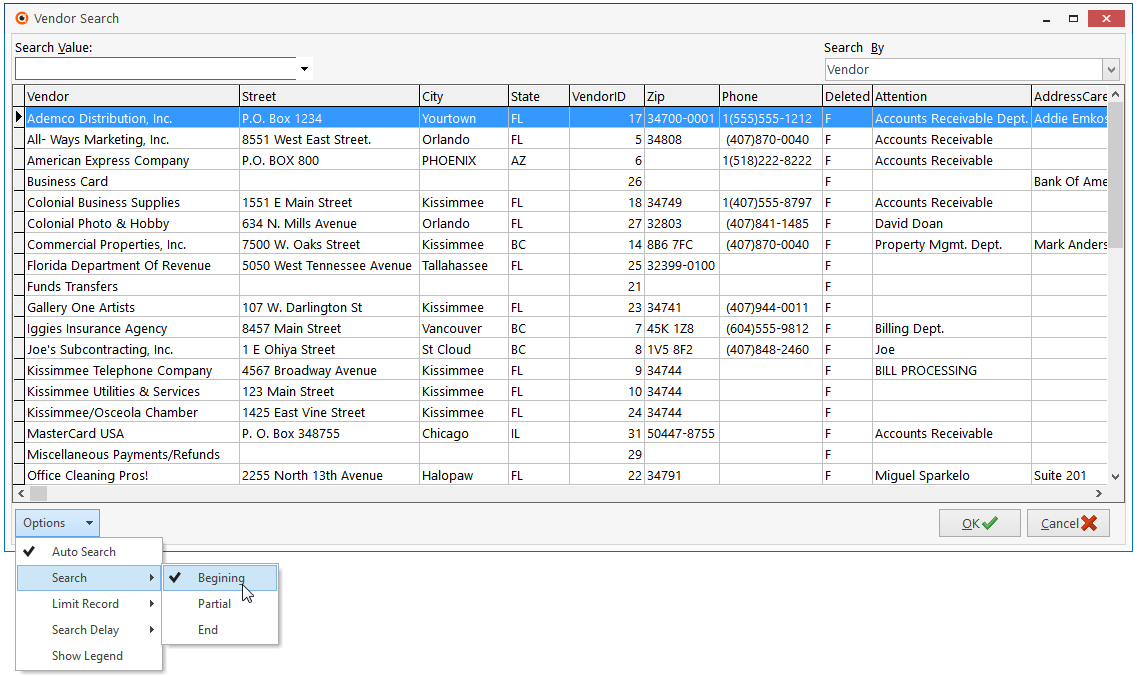
•Vendor Search - Options Menu
•Auto Search - Check this box to activate the Auto Search function.
✓Auto Search performs an incremental search as you type in your Search Value entry (see above).
•Search - By default, when Checked, the Search function will be set for Begin,
✓However, using the Drop-Down Selection List, you may Choose any one of these three available methods to locate the needed record.
1.Begin - The Search Value you type will be compared to the beginning of the Search By criteria you selected.
2.Partial - The Search Value you type will be compared to the whole line of data to find any matching set of characters in the Search By criteria you selected.
▪As an example, entering "MIT" would locate "SMITH".
3.End - The Search Value you type will be compared to the end of data to find a match based on the Search By criteria you selected.
▪What you enter will be compared from the end back to the beginning of the field selected in Search By.
•Limit Record - For those Companies with Hundreds of Vendors, it is more practical to limit the number of records displayed to some finite number.
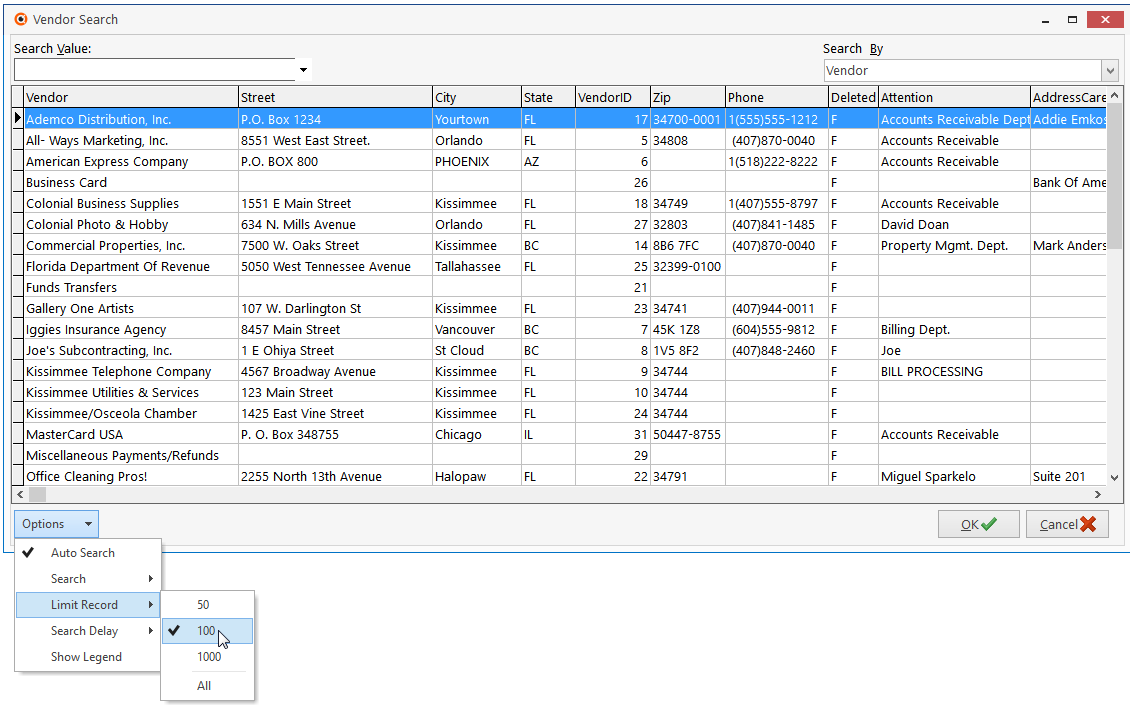
✓By default, 100 is the selected value but this may be changed, as appropriate.
•Search Delay - For those Companies with Hundreds of Vendors, it is sometimes necessary to "slow down" the search process to avoid using too much Database Server Resources.
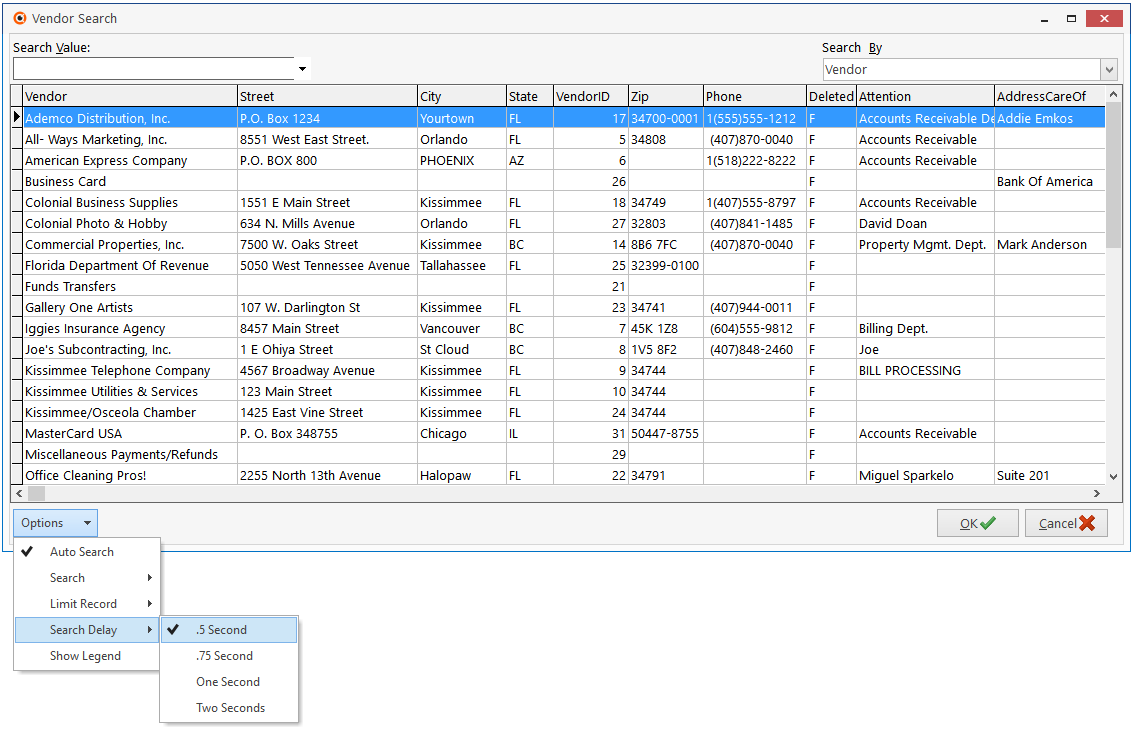
✓If Vendor Searches cause a temporary slowing effect on the system, consider increasing the built in delay somewhat.
✓Technical Support can provide guidance on this option.
•Show Legend - The records displayed are presented in one of four formats:
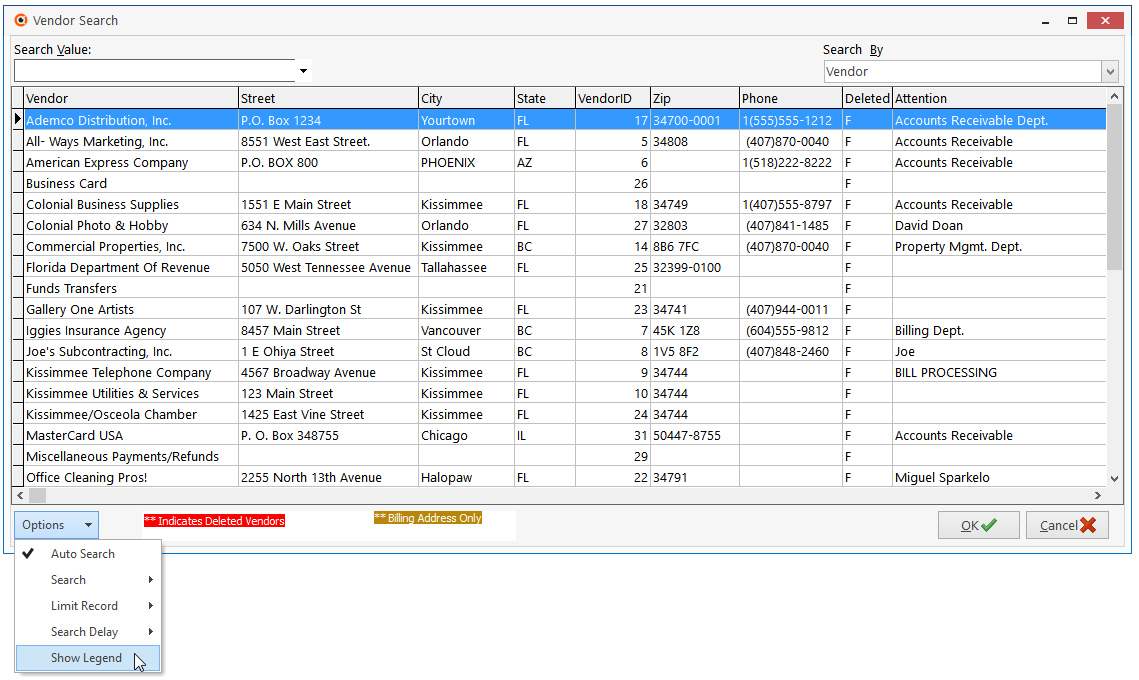
1.Black type on a White background - representing a regular Vendor record.
2.White type on a Red background - representing a previously Deleted Vendor record.
3.White Type on a Brown background - representing a Billing Address record.
✓To display a "reminder" Legend at the bottom of the Vendor Search dialog, Select this option.