❑The Sale Item Group Form allows you to define any number of Group Names that may later be assigned to Sale-Purchase Items.
•These Sale Item Groups should be designed as a logical grouping for Sale-Purchase Items based on their use (e.g., Inventory Items, Labor Rates, Installation Packages, Recurring Revenues).
•Create, then assign Sale Item Groups to Sale-Purchase Items where there are many of the same type (group).
•By doing so, because of the Advanced Sale Item Lookup function, locating a specific Sale-Purchase Item when creating a new Sale - or recording a Purchase - will be much easier and faster.
❑Once Sale-Purchase Items have been assigned to a Sale Item Group, they are able to be located when creating a new Sale either of two ways:
1.Individually within a Drop-Down Selection List, or
2.If you have a very long list of Sale-Purchase Items - by using the Advanced Sale Item Look Up function.
•These Sale Item Groups are required when using the second method.
❑To open the Sale Item Group Form:
a)From the Backstage Menu System Select Maintenance and Choose General and Click the General Maintenance option which displays the Maintenance Menu, or
b)From the Quick Access Menu, Select Maintenance and Choose General Maintenance to display the Maintenance Menu.
•Once the Maintenance Menu is displayed, Select Receivables and Choose Sale Item Groups.

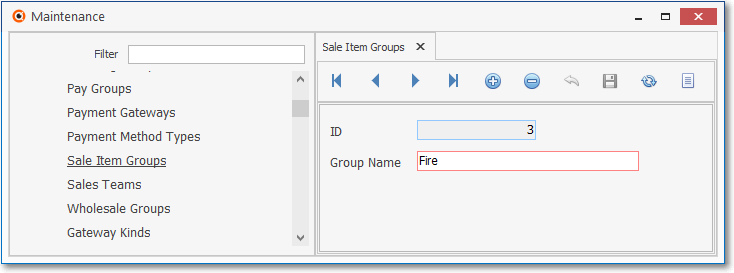
Sale Item Group Form
✓This Sale Item Groups Form may be Re-sized by Dragging the Top and/or Bottom up or down, and/or the Right side in or out.
•Navigation Menu - The Navigation Menu is located at the top of the Sale Item Group Form.

✓This Navigation Menu provides the normal Record Movement, plus Add, Delete, Cancel, Save, Refresh, and List options.
•Record Editing View - The details of the currently selected record are displayed below the Navigation Menu at the center (Main Body) of the Sale Item Groups Form.

Sale Item Group Form - Record Editing View
❑Entering a new Sale Item Group record:
•To define a Sale Item Group to be used by the Advanced Sale Item Lookup function:
✓Click the Add ![]() Icon to start a Sale Item Group entry in the Record Editing View.
Icon to start a Sale Item Group entry in the Record Editing View.
▪ID - This record number will be assigned after the entry is initially saved.
▪Group Name - Enter a Description of this of the Sale Item Group.
oThe Description may up to 40 characters in length and include upper and/or lower case letters, numbers, spaces and normally used punctuation marks.
✓Click the Save ![]() Icon to record this Sale Item Group.
Icon to record this Sale Item Group.
•Any number of additional Sale Item Groups may be created.
➢Note: Sale-Purchase Items may be easily assigned to a Sale Item Group by using the Sale Item Group Assignment Form.
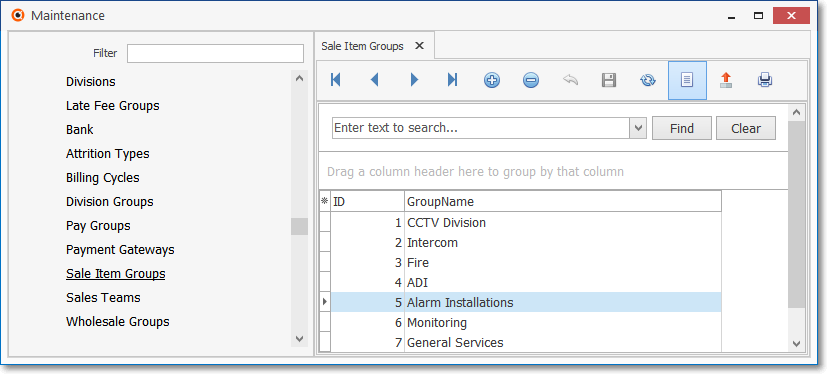
![]() List Icon - The Navigation Menu also has a List option which provides a tabular view of these Sale Item Group records.
List Icon - The Navigation Menu also has a List option which provides a tabular view of these Sale Item Group records.

Sale Item Groups Form - List View
✓The columns of listed Grid Data may be rearranged, filtered, sorted, and exported as a PDF file and/or an Excel formatted file.

✓Find - Enter text to search for a specific record, then Click the Find option.
✓Clear - To remove the text to search for entry, Click the Clear option
![]()
Navigation Menu shown with the Icons for List, Export and Print
![]() List Icon - Click the List Icon again to Close the List View and return to the Record Editing View.
List Icon - Click the List Icon again to Close the List View and return to the Record Editing View.
![]() Export Icon - Click the Export Icon to create (one of there types of) a spreadsheet compatible file containing the Grid Data as it is currently organized and filtered.
Export Icon - Click the Export Icon to create (one of there types of) a spreadsheet compatible file containing the Grid Data as it is currently organized and filtered.
![]() Print - Click the Print Icon to display the Print Preview Form from which a custom report may be designed and "printed" as an Adobe® PDF File.
Print - Click the Print Icon to display the Print Preview Form from which a custom report may be designed and "printed" as an Adobe® PDF File.
❖See the Grids - Print Preview - Export Data chapter for complete information on using the List View, including its Export & Print options.