❑Technician Groups - What are they? How are they Used?
•In most Companies, there are specific groups of Technicians who:
✓Have expertise and/or specialized training,
✓Are skilled at working on special system types (UL® versus non-UL),
✓Only work on Accounts for certain Dealers,
✓Have a general set (area) of service locations they always cover,
✓Work for a defined Company Division, etc. - and
✓Within each of these groups, the same Technicians are generally used to complete those group's Service Requests.
•To more clearly (and consistently) identify these groups of Employees, Technicians may be identified as Members of one or more of these Technician Groups (sometimes also referred to as Service Groups).
✓A Technician's assignment to a Technician Group may be based on:
▪His or her Skills,
▪The general service Location in which they usually are assigned,
▪By the Languages they speak,
▪The Company Division for which they work -
▪Or any combination of these, or any other (Company identified) factors, as appropriate.
•Once these Technician Groups are defined, and it's Members identified, a Technician Group may (should) also be assign to each Subscriber using the Tech Group field within the Service Info section of the Edit Tab of the Subscribers Form.
•After a Technician Group is assigned to each Subscriber, these Technician Groups may be used on various Service Tracking Reports to limit and/or filter:
✓Which of the Subscriber's Open Work Orders will be displayed in the Technician Scheduling Form
✓Which Subscribers are included in the Open Service Requests report
✓Which Subscribers are included on the Recurring Service Preview report
✓Which Subscribers are included when printing a batch of Service Request Forms
✓Which Subscribers are included when printing the Services Performed report
❑Assigning a Group of Subscribers to a Technician Group:
•As noted above, a Technician Group may be assign - one at a time - to each Subscriber (the field is titled as Tech Group) in the Service Info Section within the Edit Tab of the Subscribers Form
•However, a Technician Group may be assigned to any number of (a selected set of) Subscribers - all at once - using the Service Group Maintenance Form.
✓Any number of Technician Groups may be created.
✓The same Technician may be identified as a Member (see "Assigning the Members of a Technician Group" below) in more than one of these Technician Groups.
➢Note: Throughout MKMS, a Technician Group may be referred to as a Service Group, Tech Group, as well as a Technician Group - so consider these terms to be interchangeable
❑Defining the Technician Groups:
•To access the Technician Groups Form:
a)From the Backstage Menu System Select Maintenance and Choose General Maintenance then Select the Service sub-menu, or
b)From the Quick Access Menu, Select Maintenance and Choose General Maintenance then Select the Service sub-menu
✓From within the Service sub-menu, Choose the Technician Groups option to view the From shown below.
Technician Groups Form
✓This Technician Groups Form may be Re-sized by Dragging the Top and/or Bottom up or down, and/or the Right side in or out.
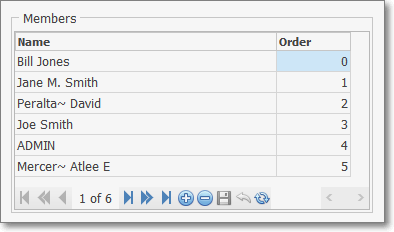
•Navigation Menu - The Navigation Menu is located at the top of the Service Types Form.

Navigation Menu shown with the Grid Icon & Grid Options for Export and Print
✓This Navigation Menu provides the normal Record Movement, New, Delete, Cancel, Save, and List Icons (with the List option providing an Export and Print option, if selected).
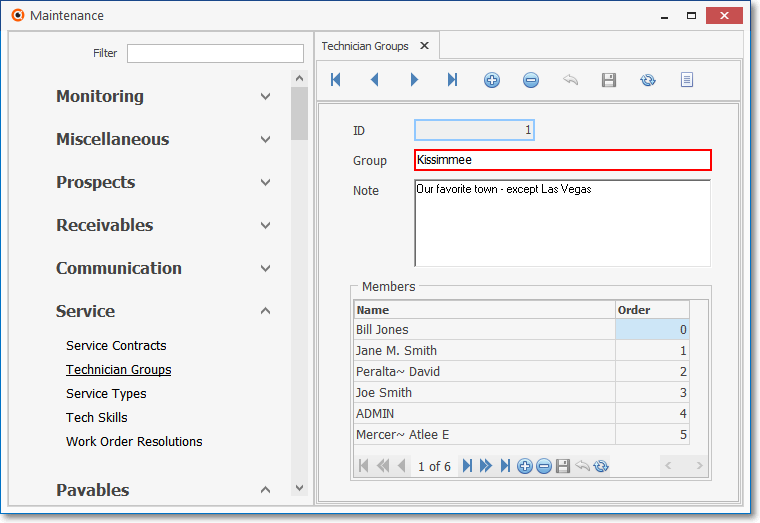
•Record Editing section - The details of the currently selected record are displayed below the Navigation Menu at the center (Main Body) of the Technician Groups Form.
Technician Groups Form - Record Editing section
•To define Technician Groups,
✓Click the Add ![]() Icon to start the Technician Group entry in the Record Editing View.
Icon to start the Technician Group entry in the Record Editing View.
✓ID - This field is sequentially numbered by the system when the record is initially saved.
✓Group - Enter up to 40 alphanumeric characters (0-9, a-z or A-Z and normal punctuation) as the name for this Group.
✓Notes - Enter a brief Description (up to 200 characters including upper & lower case letters, numbers and standard punctuation) of this Technician Group.
✓Click the Save ![]() Icon to record this Technician Group entry.
Icon to record this Technician Group entry.
✓Repeat as needed.
❑Assigning the Members of a Technician Group:
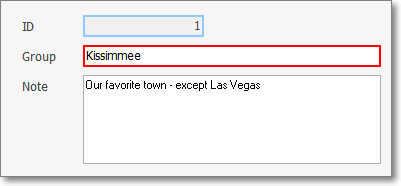
•Members - Based on the Selected Technician Group, the Members list includes only those Technicians who currently are a Member of this Technician Group
Technician Groups Form - Members section
✓To assign new Members to a specific Technician Group:
▪Use the Search Icon on the Navigation Menu to locate and Select the Technician Group record for which a new Member is to be defined.
▪Locate the Members Section below the Record Editing section of the Technician Group Form.
✓Click the Add ![]() Icon to enter a Name within the Members section of the Service Type Form.
Icon to enter a Name within the Members section of the Service Type Form.
✓Name - Enter a Name of the Member that is to be added to this Technician Group.
✓Order - This is the record number assigned by the system, once the record is saved.
✓Click the Save ![]() Icon to record this entry.
Icon to record this entry.
✓Click the Name Header Name to resort the Members list to include the newest Member.
✓Repeat as needed.
![]() List Icon - The Navigation Menu also has a List option which provides a tabular view of these Technician Group records.
List Icon - The Navigation Menu also has a List option which provides a tabular view of these Technician Group records.
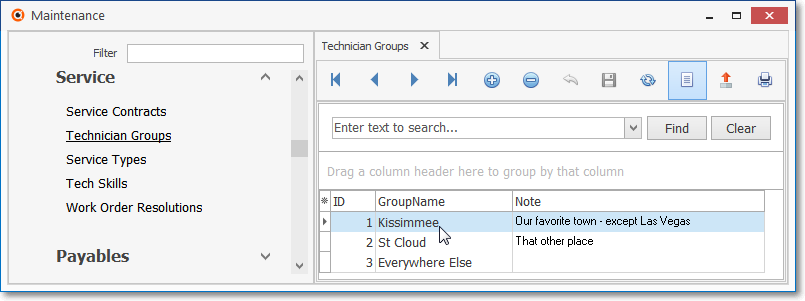
Technician Groups Form - List View
✓Click the List Icon to display the associated Grid Data.
✓The columns of Grid Data may be rearranged, filtered, sorted, and exported as a PDF file and/or an Excel formatted file.

✓Find - Enter text to search for a specific record, then Click the Find option.
✓Clear - To remove the text to search for entry, Click the Clear option
Navigation Menu shown with the List Options for Export & Print
✓Click the List Icon again to Close the List View and return to the Record Editing View.
❖See the Grids - Print Preview - Export Data chapter for complete information on using the List View, including its Export & Print options.