❑This Job Tasks Tab is used to define the specific set or requirements that must be completed to properly finish a Job,
•Once these requirements are entered as specific Tasks (e.g., pre-wire, install equipment, final button up, full inspection & testing to the Central Station, etc.), Work Orders may be created to request that those Job Tasks be executed, and finally Invoices may be created to send to the Subscriber for that work (the completed Job Tasks) identified here (and/or in those Work Orders).

Job Costing Form - Job Task tab
•Available Columns - Select the columns to be included in the Job Tasks tab
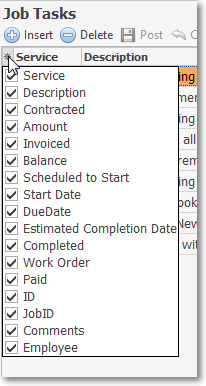
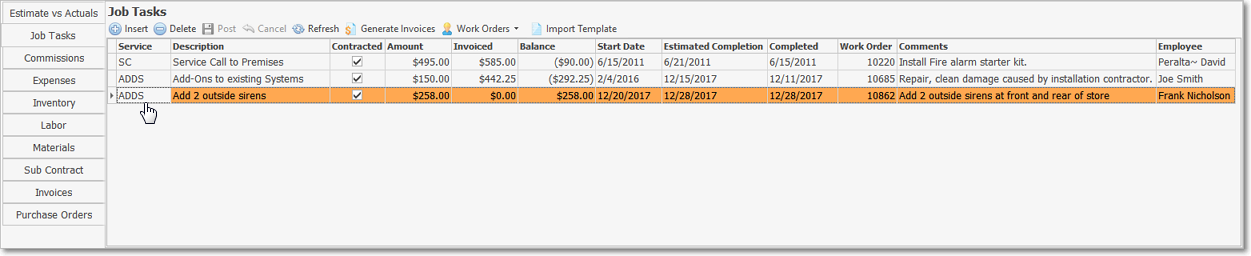
Available Columns
✓Click the asterisk (¬) at the left of the Job Task tab's data grid's Header row (see the mouse pointer in the illustration above) to display a list of all of the column names - and associated data - which may be displayed.
✓By default, all Column Names will be Checked.
✓Remove the Check mark (Click on the Check to remove it) to hide that column of data from the data grid.
•Sorting the List - Setting the Order in which the Job Tasks tab's data grid is Listed within the Job Tasks Grid:
✓The default sorted order of the Job Tasks tab's is based on the Job Costing record's ID (Job ID Number) - which is ordered from lowest to highest (1 - 9).
✓Thereafter, the column that determines the sorted order of the List may be easily changed, whenever needed.
•Filtering the List - This Job Tasks tab's data grid may also be filtered, as needed to define/identify the data that is actually needed.
✓See the Grids & Lists and the Filter Builder Dialog chapters for more information about formatting and printing (and exporting) the Job Tasks tab's data grid
❑The basic steps for using the Job Tasks tab are listed below in the order they would normally be executed:
1.Locate the Job and then Select the Job Task Tab.
2.Add the Job Task. (manually, or by using the Import Template option to pre-populate certain fields - See Using the Import Template option below).
3.Create a Work Order for that Job Task, as needed.
4.Generate an Invoice for that Work Order when the Job Task has been Completed:
▪This may be accomplished by using the Work Order Form's Complete and Invoice options, or on this Job Costing Form's Job Tasks Tab using the Generate Invoices option button.
5.As necessary, an Invoice may be created for a "Zero" and/or even a Negative Amount for a Task
▪When the "Task Invoicing" dialog is opened, the default "Amount To Invoice" is the Task's Balance.
▪An Invoice may not be created for more than the Task's Balance
6.Identify the Job Task as Completed by entering that completion date in the Completed field (this is entered automatically when the associated Work Order is Completed).
➢Note: The Job Tasks Aging As Of Report may then be used to track how the Service/Installation Department(s) are keeping up with their work (Job Task) requirements.
❑Locate the Job:
•To view the Job Task Tab, open the Job Costing Form
a)From the Backstage Menu System Select Maintenance, then in the General sub-menu Choose Job Costing, or
b)From the Quick Access Menu, Select Maintenance and Choose Job Costing.
✓A Job Costing Form will be displayed.
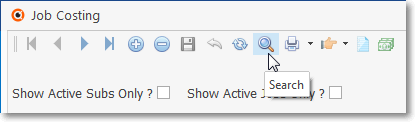
•Locate the Job that needs a Job Task added by Clicking the Search icon at the top of the Job Costing Form which will open the Search Jobs dialog.
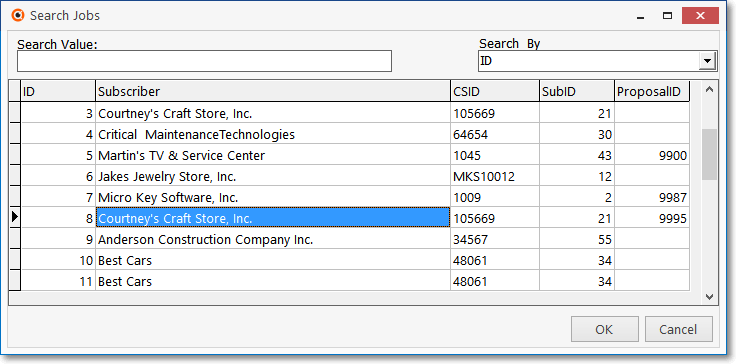
Search Jobs dialog on the Job Costing Form
✓Search By - Use the Drop-Down Selection List to Choose the field name on which your search will be performed.
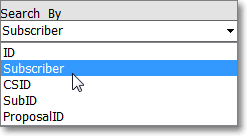
Select Search by field
✓Search Value - Enter the characters that will best locate the desired Job. As you enter information, the record pointer4will be continually relocated based on your entry.
✓OK - Click OK when the correct Job is located.
•Select the Job Tasks Tab
❑Understanding the capabilities of the Job Task Tab
Job Task tab on the Job Costing Form
•Managing Job Tasks - The functions provided by the Job Task Tab are:
✓Add a new Job Task; and/or
✓Review existing Job Tasks; and/or
✓Create Work Orders to get all of the needed Job Tasks identified; and/or
✓Generate Invoices for those Job Tasks that need to be billed (and don't require a Work Order).
✓Enter the Completed Date for the Job Task (when a Work Order was not required).
•Using the Import Template option - Certain sets of one or more of Job Tasks are needed on most Jobs and those somewhat standard sets of Job Tasks may be pre-defined

Job Costing Form - Job Task tab - Import Job Template option
✓To speed up data entry and make these type of Job Task entries consistent, any number of Job Task Templates may be defined, as needed.
▪These Job Task Template definitions include a Name, and a set of one or more Template Items - each of which includes a Service Type, the Task Item's Description, the addition or absence of a Check in a Contracted Check box, and the addition or absence of an Amount.
✓Click the Import Template Icon to open the Select Job Template dialog.
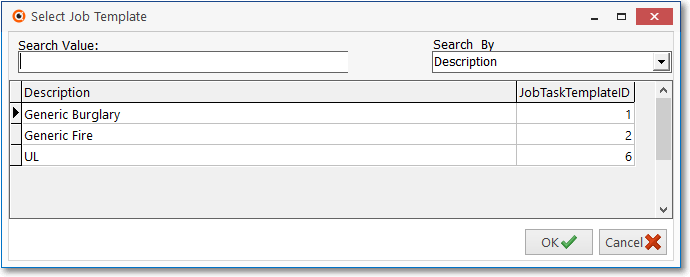
▪Select the appropriate Job Task Template.
▪Click the OK button.
✓The associated set of one or more pre-defined Template Items will be inserted into the Job Task Grid.
▪See the Job Task Template chapter for detailed information on how to created a Job Task Template.
❑To Add a New Job Task - Enter the information in the fields listed below:
➢Note: The keyboard's Insert (to start a new entry), Delete (to remove an existing entry), and the Left-Right-Up-Down-Arrow Keys for Navigating within the Grid; plus the Ctrl+S combination (for Save) are implemented on this tab
1.Click the Insert ![]() Icon to start a New Job Task entry, or
Icon to start a New Job Task entry, or
2.Click on the Import Template option on the Job Task tab's Ribbon Menu.
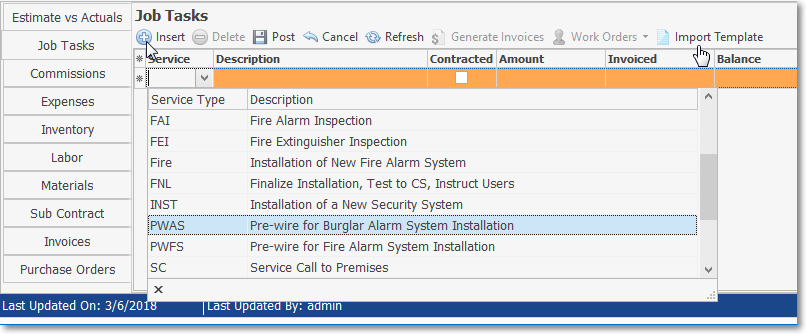
•Service - If a Job Task Template was not inserted, use the Drop-Down Selection List to Choose a Service Type that best describes this Job Task.
✓When you use the Import Template option, the Service field is populated automatically.
✓If the Service Type you need does not exist, but would be generally useful in the future:
![]() Click the Cancel Icon on the Job Task Tab to abandon the Job Task entry
Click the Cancel Icon on the Job Task Tab to abandon the Job Task entry
✓Open the Service Types Form:
a)From the Backstage Menu System Select Maintenance and Choose General Maintenance then Select the Service sub-menu, or
b)From the Quick Access Menu, Select Maintenance and Choose General Maintenance then Select the Service sub-menu
▪From within the Service sub-menu, Choose the Service Types option
▪Define the desired Service Type that's needed by following the instructions in the Service Type chapter.
✓Re-open the Job Costing Form, Locate the required Job and Select the Job Task Tab
▪Click Insert ![]() to re-start the entry.
to re-start the entry.
▪That Service Type will now be available in the Drop-Down Selection List.
•Description - The default Description originally entered for the selected Service Type will be inserted.
✓When you use the Import Template option, the Description field is populated automatically.
✓Edit the default Description if needed.
✓Up to 70 characters may be entered.
✓But, a Description of 70 character in length may be truncated on some Job Costing Reports.
•Contracted - Check this box, when your Company and the Subscriber have actually been Contractually obligated to perform this Job Task.
✓It is assumed that a Contract has been executed (by default, the box is Checked).
✓If this is not the case, be sure the Check is removed from this box
✓When you use the Import Template option, the Contracted field may or may not be Checked based on how the selected Job Task Template was designed.
•Amount - Enter the Amount, representing this phase of the installation, which should be Invoiced to the Subscriber for this Job Task.
✓If you used the Import Template option, the Amount field is Checked or not Checked based on how the selected Job Task Template was designed.
✓When you use the Import Template option, the Amount field may or may not be automatically populated based on how the selected Job Task Template was designed.
•Invoiced - This Amount is maintained by the system and shows which portion of the Amount entered (see above) has been Invoiced to the Subscriber.
✓The actual Invoiced Amount field is updated, anytime this Job Task is Invoiced through the Work Orders Form, and/or by using the Generate Invoices button on this Job Task tab.
•Balance - This Amount is maintained by the system and shows that portion of the Amount (see above) that has not yet been Billed to the Subscriber
✓When/if the Amount shown is in parentheses, it what was Over Billed to the Subscriber in comparison to the agreed upon (i.e., contracted) Amount.
✓The Balance field is updated, whether the Job Task is Invoiced through the Work Orders Form, or by using the Generate Invoices button on this Form.
•Start Date - Use the Drop-Down Calendar/Date Entry field to enter the Date this Job Task should be (was) Started.
•Due Date - This field will be populated with the Estimated Completion Date identified in the Job Costing record when it is initially entered. It may be changed as appropriate.
✓Use the Drop-Down Calendar/Date Entry field to revise the Date when this Job Task should be finished.
•Estimated Completion Date - This field will be populated with the Estimated Completion Date identified in the Job Costing record when it is initially entered.
✓Use the Drop-Down Calendar/Date Entry field to change the Date when this Job Task is expected to be finished.
✓This date is used in the Job Tasks Aging As Of Report to track how the Service/Installation Department(s) are keeping up with their work (Job Task) requirements.
•Completed - Do not enter a date here, yet (see the "Completing a Job" section in the Generate Invoices chapter).
•Work Order - Do not enter a Work Order Number now (see the Work Orders for Job Tasks chapter).
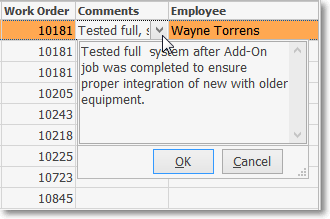
•Comments - A Drop-Down Notes Box is provided for recording comments about the Job Task.
•Employee - A Drop-Down Selection List containing all of the Employees assigned an Employee Type of either Technician or Administration is provided to identify the Technician who was assigned to preform this Task.
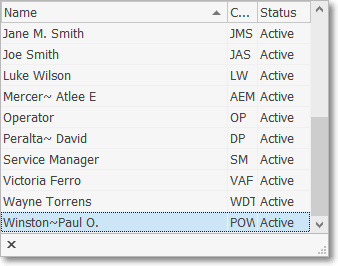
✓The list shows the Name, Employee Code and Status (i.e., Active/Inactive) of each of those Types of Employees
•Click the ![]() Icon to record this Job Task.
Icon to record this Job Task.
❑Create a Work Order for that Job Task - See Work Orders for Job Tasks
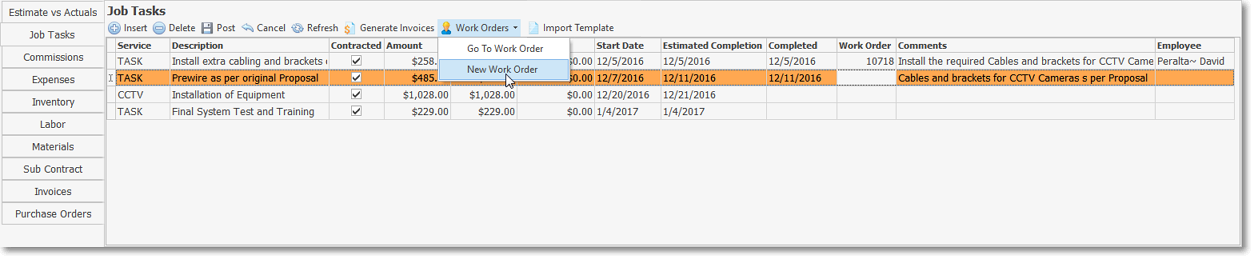
•Work Order - Click Down-Arrow ‚ on the Work Orders option at the top of the Job Tasks Tab, and Select New Work Order.
•Setting the Order in which the data in the grid is Listed within the Job Tasks Tab:
✓The default sorted order of the Job Tasks List is based on the Start Date - which is initially ordered from oldest to newest.
✓Thereafter, the column that determines the sorted order of the List may be easily changed, whenever needed.
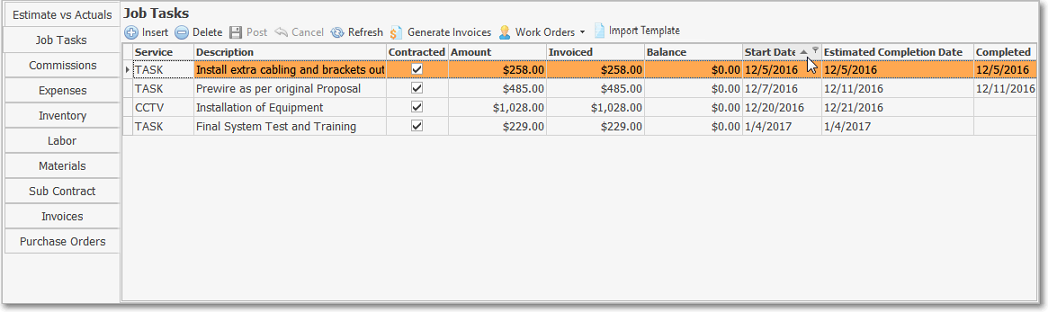
✓To do so:
▪Click another column's Header Name (the mouse currently points to the sorting arrow within the Start Date Header Name in the illustration above) to change the sorted order to be on that column of data, with the sorted order automatically set from lowest to highest (a-z or 1 - 9).
▪To change this newly selected column's sorted order from highest to lowest, Click that column's Header Name again.
▪An Arrow next to the Header Name indicates the column that is determining the sorted order of the Grid Data.
o~ indicates lowest to highest (a-z or 1 - 9)
o€ indicates highest to lowest (z-a or 9-1).
❑Creating various Custom Filters for the Job Tasks tab's data grid.
•Filtering the data that will be displayed in the grid:
✓Once the sorted order in which those columns will be listed is set, then one or more additional filters may be applied to the listed data, if desired.
✓See the "Creating a Custom Filter for the List" discussion in the Grids and Lists chapter for that information.
❑Generate an Invoice for that Work Order - This feature is used to progressively Invoice the Subscriber for the identified Job Tasks
•As an example, if the Pre-Wire portion of an installation being managed in Job Costing has been completed, the logical next step is to Invoice the Subscriber for that portion of the Job.
1.See Work Orders for Job Tasks for information on how to Invoice a Job Task directly within the Work Orders Form when that Work Order is Completed.
2.See Generate Invoices for instructions on how to create an Invoice for some, or all, of the Job Tasks that have been entered for this Job.