❑The LLP Schedule Icon is available on:
1.The Monitoring tab of the Edit View of the Subscribers Form
2.The Ribbon Menu on the Dealers Form
•Automated Text and Voice Communication will automatically send SMS or Voice messages to a Dealer, to the Subscriber's Premise, and/or to any Contact so they can interact with the system and handle certain designated Alarm Signals without the need for Operator intervention.
❖See Understanding the Schedules feature referenced by this LLP Schedule option below for more information about defining and using Schedules
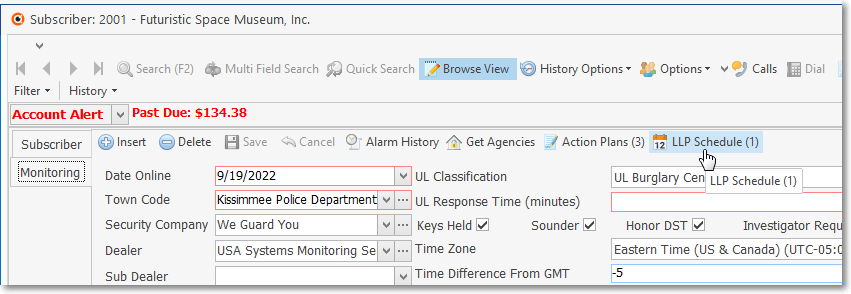
•To assign a Schedule using the LLP Schedule option on the Monitoring tab:
✓Open the Subscribers Form.
✓Retrieve (F2 Search) the appropriate Subscriber record.
✓Select the Edit View Icon on the Subscribers Form
✓Choose the Monitoring tab.
•The Central Station Data section of the Monitoring tab will be displayed.
✓ Click the LLP Schedule option on the Ribbon Menu to open the LLP Schedule Assignment dialog:
Edit View - Monitoring Tab - Ribbon Menu - LLP Schedule Icon
✓The LLP Schedule option opens the Subscriber Schedules dialog (or Dealer Schedules dialog when opened from the Dealers Form) with several options on its Ribbon Menu
❖See the Schedules chapter for detailed information about assigning and using Schedules for Low Level Processing (and other uses, too).
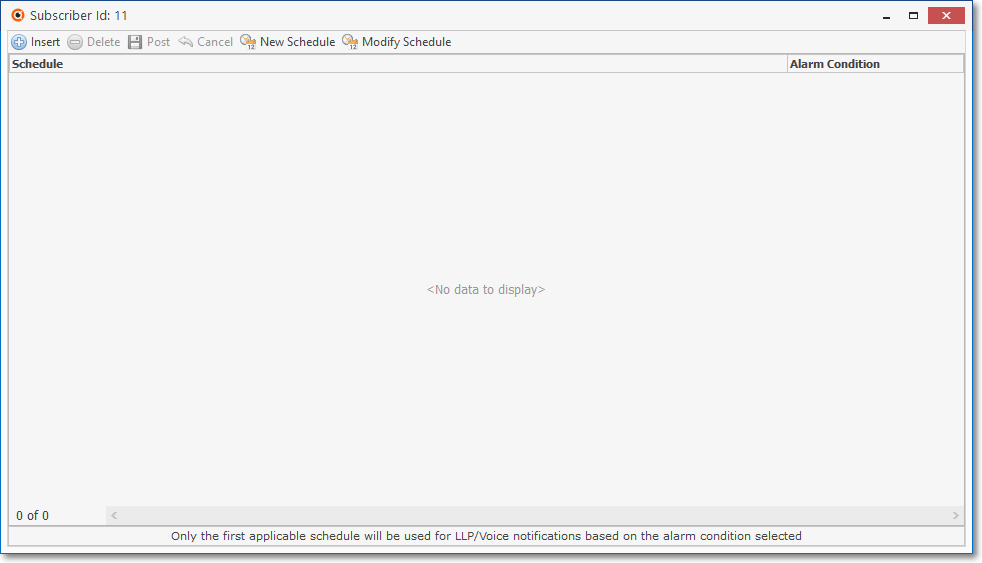
Subscriber - Schedules dialog - no entries
a.Insert - Click the ![]() option to assign a Schedule for this Subscriber
option to assign a Schedule for this Subscriber
i.Schedule - Using the Drop-Down Selection List provided, Choose the appropriate Schedule from this list
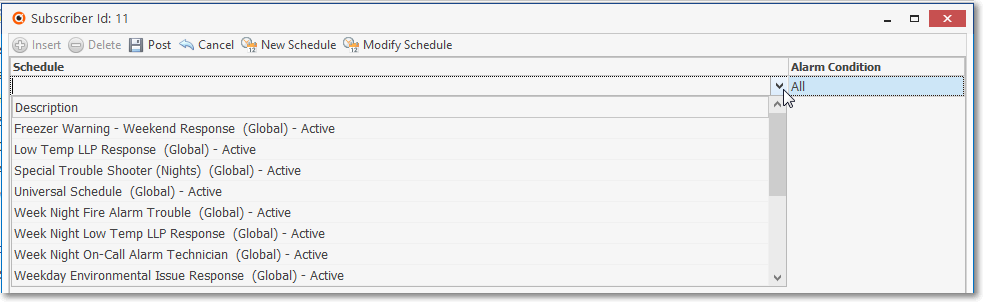
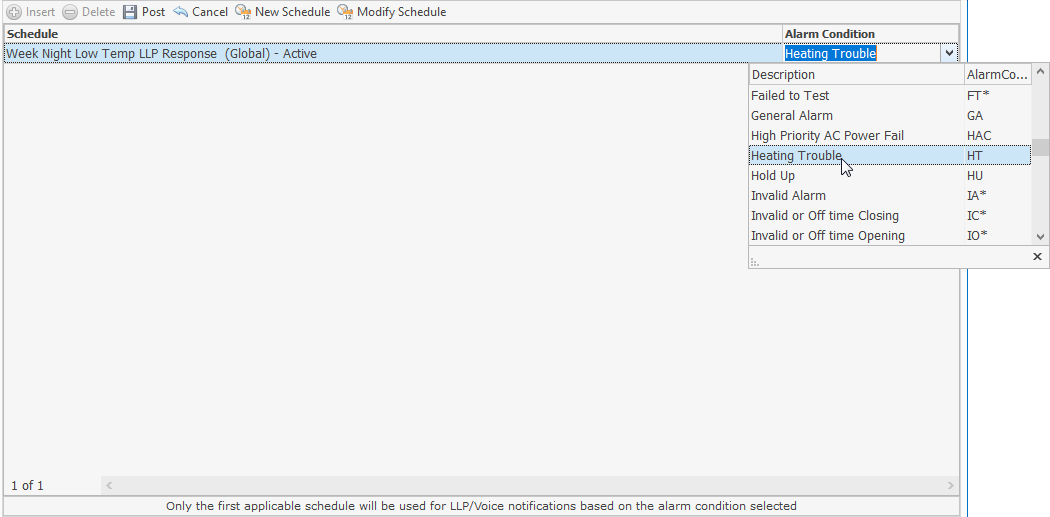
ii.Alarm Condition - The Alarm Condition defaults to All which means that the selected Schedule being added with be applied to All Alarm Conditions
▪Using the Drop-Down Selection List provided, Choose a specific Alarm Condition for this Schedule if it should only be applied when this specific Alarm Condition is received.
➢Important Reminder: Only one instance of an Alarm Condition may be assigned to an LLP Schedule for each Subscriber.
iii.Post - Click on this ![]() Icon to save this entry.
Icon to save this entry.
b.Delete - Click the ![]() option to remove the selected Schedule for the list
option to remove the selected Schedule for the list
c.Post - Click on this ![]() Icon to save this entry.
Icon to save this entry.
•Once a Schedule is added, the number of Schedules assigned to this updated next to the LLP Schedule Icon
d.Cancel - Click on this ![]() Icon to abandon the information that was just entered (prior to Posting)
Icon to abandon the information that was just entered (prior to Posting)
e.New Schedule - Click the New Schedule Icon to create a Schedule (custom made for this situation) for this Subscriber

i.The Schedules entry dialog will be displayed
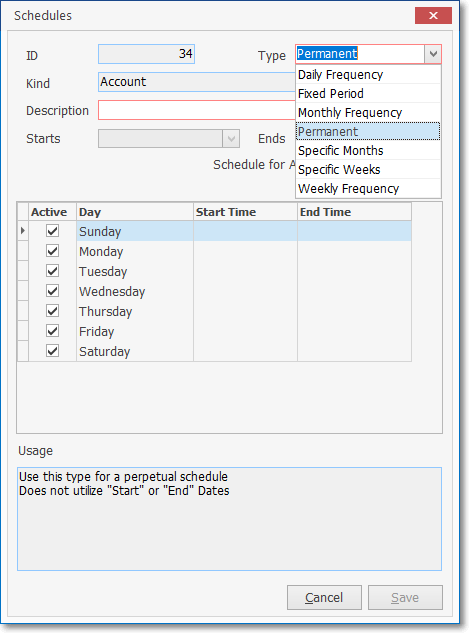
ii.Type - Using the Drop-Down Selection List provided, Choose the Type of the Schedule do be created.
iii.Once the Type is chosen, this Schedules Dialog will changed based on that selection
❖ See the Defining the Availability of a Schedule discussion in the Schedules chapter for an explanation of those possible changes
f.Modify Schedule - Click the Modify Schedule Icon to update/change the selected Schedule
❑Understanding the Schedules Form referenced by the LLP Schedule option:
•The Schedules Form displays all of the existing (previously created) Schedules and provides for the creation of new ones
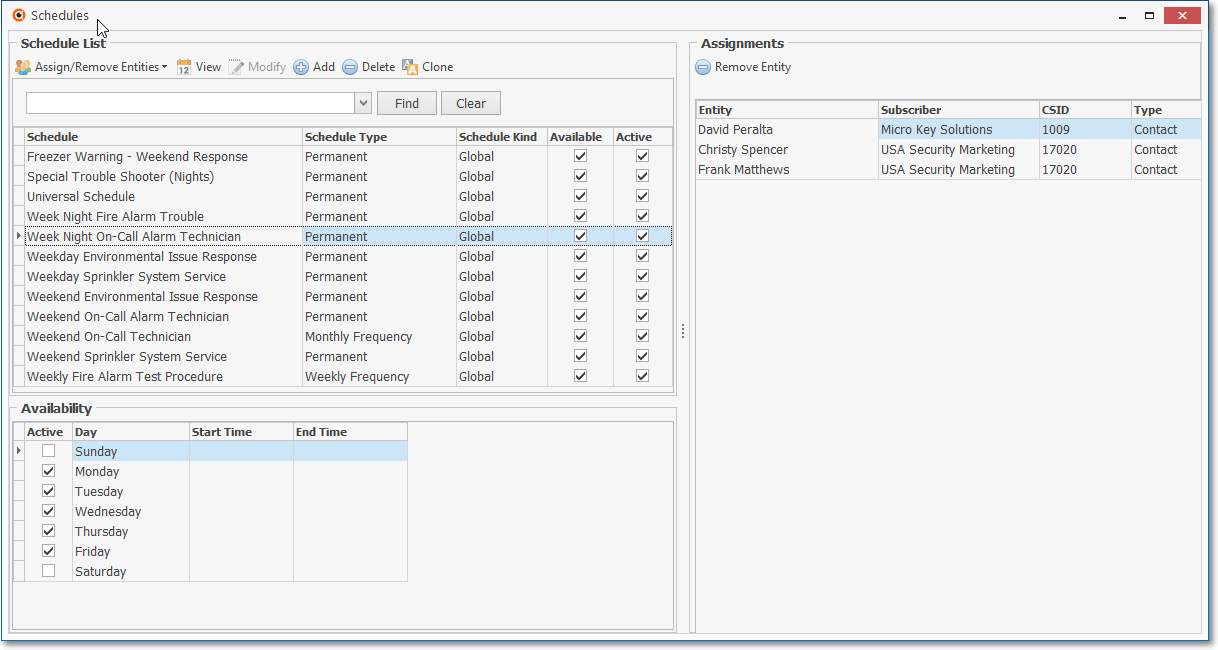
Maintenance - Monitoring Menu - Schedules Form
•The Schedules Form has three sections:
1)Schedule - Grid with all of the previous defined Schedules, and Schedule Type column, plus Available and Active columns
2)Availability - Grid with all of the Days of the Week and a Start and End time column used to set when the selected the Schedule should be used
3)Assignments - Grid containing all of the Entities - which may individuals, sets of individuals, and/or specific telephone numbers previously entered in one or more Subscriber's Contacts Lists - that are assigned to the selected Schedule
•When a Schedule is created, it will become one of three Kinds based on the following conditions:
1)Global - A Schedule created from the actual Schedules Form is considered to be Global and may therefore be used by anyone.
2)Account (Subscriber) - A Schedule created, the Assigned using this LLP Schedule option is reserved for use by this Account
3)Panel - A Schedule created, the Assigned from within the Contact Lists tab for a specific Subscriber Panel is reserved only for use by this CSID
•A Subscriber may be associated with a specific Schedule by being assigned to it using this LLP Schedule Icon and the selected Schedule will limit when an LLP Service response may be executed.
✓Only one Schedule may be assigned to a Subscriber
•The Available Contacts section on the Contact Lists Form displays a list of all Contacts who have not yet been assigned to the selected Contact List
✓ An Available Contact may be may be assigned to any number of Schedules
✓To assign an Available Contact to an existing or new Schedule, Right-Click on that Contact, or Click the View Schedules Icon ![]()
•A Contact List is used to define who should respond to a certain Alarm Condition and/or CSID Zone and/or Physical Zone Code within the Day, Date and/or Time parameters of the Schedule to which the Contact List has been assigned
✓ A Contact List may be may be assigned to any number of Schedules
✓Click the View Schedules Icon ![]() to open the Schedules For (this Contact List) dialog
to open the Schedules For (this Contact List) dialog
•List Members of a Contact List entry will be chosen from of the existing Contacts (selected from that Subscriber Panel's: Contacts (People To Call) , Alternate call list, and/or Dealer call list)
✓List Members of a Contact List entry may be assigned to any number of Schedules
✓Click the View Schedules Icon ![]() to open the Schedules For (this List Member) dialog with Assign New Schedule, Assign Existing Schedule, View Schedule, Modify Schedule (when not a Global Schedule), and Remove Schedule options
to open the Schedules For (this List Member) dialog with Assign New Schedule, Assign Existing Schedule, View Schedule, Modify Schedule (when not a Global Schedule), and Remove Schedule options