❑One of the most powerful features in the MKMS Accounts Receivable module is the automation of your Company's Recurring Revenue Billing.
•A substantial portion of the worth of an Alarm business is the value of that Company's Average Monthly Recurring Revenues.
✓Tracking your Company's Average Monthly Recurring Revenues over time lets you see whether your Company is expanding or contracting its Recurring Revenue base.
✓We suggest that you carefully review this Average Recurring Revenue Report on a monthly basis.
•This Average Recurring Revenue Report may be Reprinted at any time, for any Date Range, by selecting any of the available option(s), as needed.
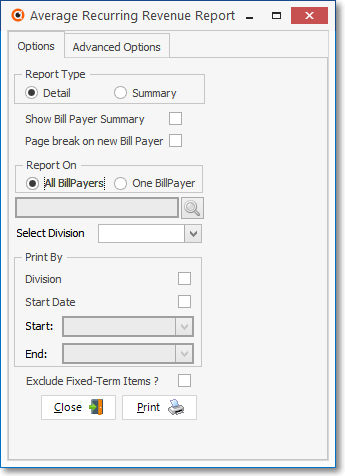
Average Recurring Revenue Report - Options tabs
❑Use the Average Recurring Revenue Report to help track your Recurring Revenues by amount and category.
•There are two ways to access the Average Recurring Revenue Report dialog:
a)From the Backstage Menu System Select Reports and Choose Receivable Reports, or
b)From the Quick Access Menu, Select Reports and Choose Receivable Reports.
✓Then, Select the Average Recurring Revenue option.
❑Average Recurring Revenue Report tabs - There are three tabs on the Average Recurring Revenue Report dialog.
•Options - Initially only the Options tabs are shown (until you make your Options selections and Select Print). Make the selections that provide the information you need:
✓Report Type - Indicate how much data is to be included.
▪Detail - Lists each Subscriber and the Recurring Revenues for which they are contracted.
▪Summary - Lists the defined types of Recurring Revenues by Sale Item Code and summarizes the number of each Recurring Revenue entries per Recurring Revenue Type and the gross value for each type.
✓Formatting - Indicate how the list will be formatted:
▪Show Bill Payer Summary - For Accounts that have multiple service addresses, the master Account (the Bill Payer of record) will be listed followed by each of its locations and Recurring Revenues.
▪Page Break on New Bill Payer - For Accounts that have multiple service addresses, the master Account (the Bill Payer of record) will be listed followed by each of its locations and Recurring Revenues.
oA new page will be started for each new Bill Payer.
✓Report On - Indicate who should be included on the Average Recurring Revenue Report:
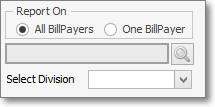
▪All Bill Payers - By default, all Bill Payers will be included.
▪One Bill Payer - Click One Bill Payer to have only one master Account - the master Account (the Bill Payer of record) - will be listed followed by each of its locations and Recurring Revenues.
oClick the Bill Payer Search Icon and use the Select Bill Payer dialog to Choose that Bill Payer.
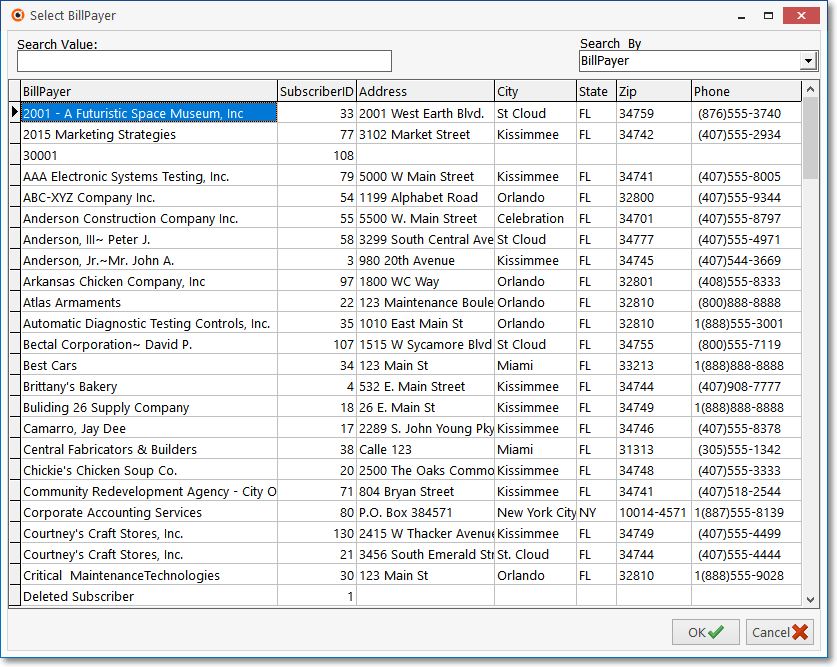
oSelect the appropriate Bill Payer.
oClick the OK übutton to Close the Select Bill Payer dialog.
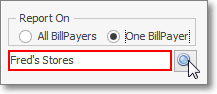
oThe Selected Bill Payer will be inserted into the One Bill Payer field.
✓Select Division - By default, this field is blank and all qualifying Accounts will be listed.
▪If a Division is selected using the Drop-Down Selection List provided, the report will be limited to Subscribers who have been assigned that Division code.
oThis Division could be the Alarm Dealer's name when your Company is billing the Alarm Dealer's Monitoring Accounts, an actual Company Division, or a Division Group to which some Subscribers have been assigned because their Division - identified on the Accounting Receivable Section within the Edit View of the Subscribers Form - is a Member if that Division Group.
oThe Division Group could also be selected to incorporate All Subscribers associated with that Division Group.
▪If you want to report the Average Recurring Revenues for only One Division (or Alarm Dealer - if your Company is billing the Alarm Dealer's Monitoring Accounts Billing), use the Drop-Down Selection List to Choose that Alarm Dealer, Division or Division Group, as may be required.
✓Print By - Indicate the preferred sorting and selection order if you want it changed.
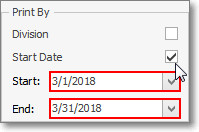
Start Date Option checked
▪Division - Check to have the report sorted by Division, then by Subscriber within each Division.
▪Start Date - Check this box to report only Recurring Revenues that started within a certain period of time by entering a Date Range for when their Recurring Revenue would have started:
oStart - Enter the on of after Date which this report will use to calculate the results.
oEnd - Enter the up to and including Date which this report will use to calculate the results.
✓Exclude Fixed Term Items? - Fixed Term Recurring Revenues are generally related to payment plans for installations, system additions, or fixed term leases - not regular on-going Recurring Revenue related Services. Check if you do not want Fixed Term items included in the report.
•Advanced Options - This tab allows you to choose the sorting method and set an ending Date Range (for those Recurring Revenue records which have an End Date defined).
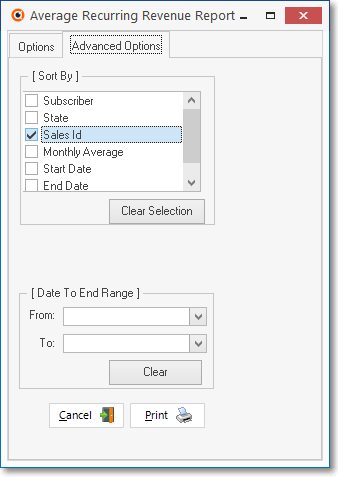
Average Recurring Revenue Report
Advance Options tab
✓Sort By - Choose the field on which the report will be sorted (ordered).
▪Subscriber - Alphabetically by Name
▪State - Alphabetically by State Code
▪Sales Id - Alphabetically by Sales Category Code (e.g., R-1, R-22, R-3)
▪Monthly Average - Numerically by Value of each Subscribers Average Recurring Revenue
▪Start Date - In Date order based on the Start Date entered on the Recurring Revenue Form
▪End Date - In Date order based on the End Date entered on the Recurring Revenue Form
✓Date To End Range - Set an ending Date Range (for those Recurring Revenue records which have an End Date defined).
▪From - Report those Recurring Revenue records with an End Date that is on or after the Date entered here.
▪To - Report those Recurring Revenue records with an End Date that is on or beforer the Date entered here.
✓Print - Click the Print button ![]() to Preview and optionally Print (to a File or a Printer) this Average Recurring Revenue Report.
to Preview and optionally Print (to a File or a Printer) this Average Recurring Revenue Report.
✓Cancel - Click the Cancel button ![]() to exit this Average Recurring Revenue Report dialog.
to exit this Average Recurring Revenue Report dialog.
•Preview - The Preview tab presents the report which resulted from the Options you've selected.
✓Up Arrow/Down Arrow - hi - Moves the report one line up, or one line down, respectively.
✓Page Up/Page Down - Moves the report to the previous or next page, respectively.
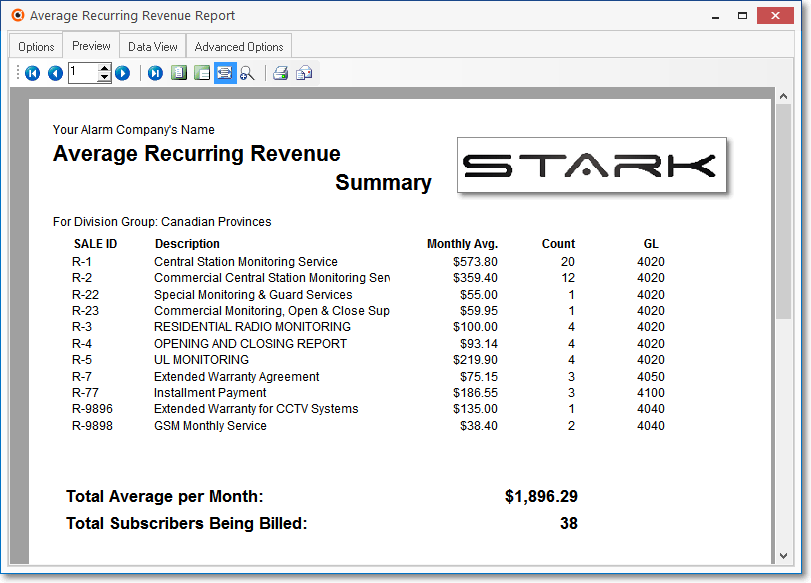
Average Recurring Revenue Report - Preview tab - Summary format
✓Home - ![]() - Using either the screen Icon or your Keyboard's Home key, moves the report to the top of the first page.
- Using either the screen Icon or your Keyboard's Home key, moves the report to the top of the first page.
✓End - ![]() - Using either the screen Icon or your Keyboard's End key, moves the report to the bottom of the last page.
- Using either the screen Icon or your Keyboard's End key, moves the report to the bottom of the last page.
✓Arrows - The arrows allow you to move back and forth, from page to page.
✓Number - Indicates the page number you are viewing.
▪You may also type in a specific page number, Press 8 Enter and that page will be displayed immediately.
▪If you enter an invalid page number, it will be ignored.
✓Fit To Page - Click the first button after the arrows to size a full page of the report to fit the screen.
✓Zoom To 100% - Click the second button after the arrows to display the page at 100% (of the printed view).
✓Fit To Page Width - Click the third button after the arrows to size the page of the report to fit the full width of the screen.
✓Zoom To Percentage - Click the fourth button after the arrows to re-size the page of the report by percentage.
![]()
▪When you Click the Zoom To Percentage button, the Percentage selector will be displayed.
▪You may then Click the Up or Down ‚ arrows to set the exact amount of Zoom you want.
✓Print - Click the Print button to Print (to a File or a Printer) ![]() the displayed Average Recurring Revenue Report.
the displayed Average Recurring Revenue Report.
✓Email - Click the Email button ![]() to send the Report to an Email Address of your choosing.
to send the Report to an Email Address of your choosing.
✓To Exit the Preview tab and Close this Report dialog Form, Click the Close box ![]() on the right at the top of the Preview tab.
on the right at the top of the Preview tab.
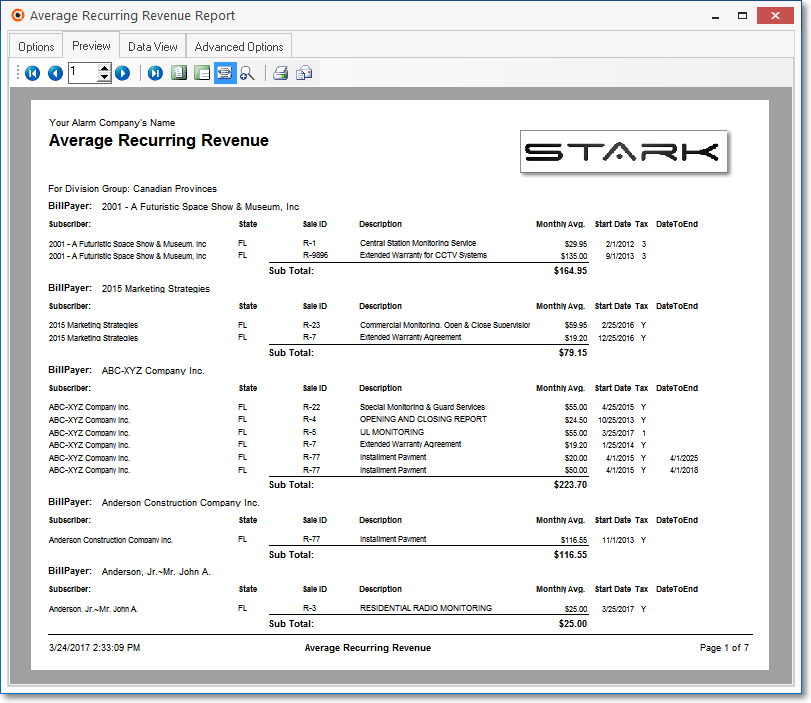
Average Recurring Revenue Report - Preview tab - Detail format
•Data View - This view provides a tabular (spreadsheet style) presentation of the selected data.
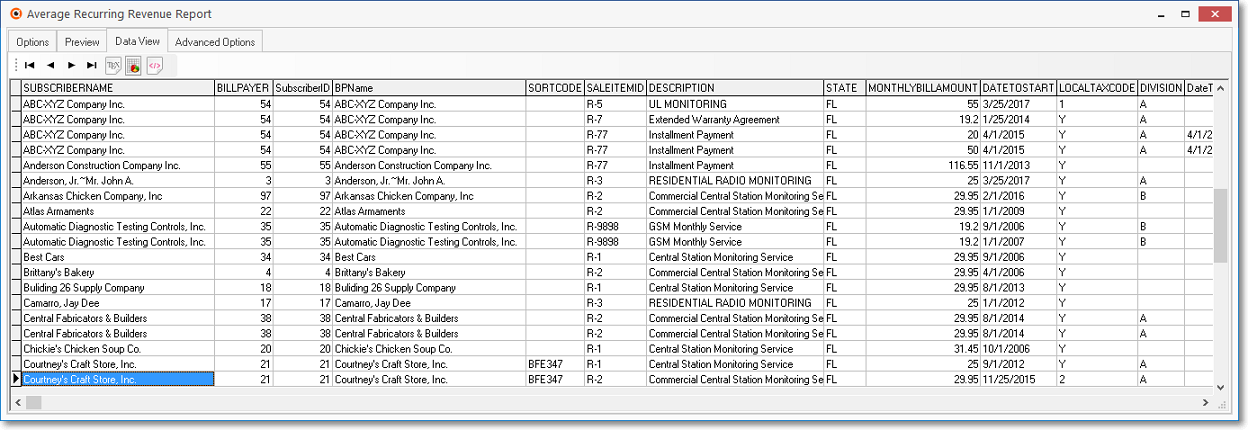
Average Recurring Revenue Report - Data View
✓Arrows - Click the arrows to move through the record.
✓Export - Exporting the data from this Data View tab (note the "fly-over" help available on these buttons):
▪Export to CSV - Click the first button after the arrows to export the data to a Comma Separated Values (CSV) file format.
▪Export To Excel - Click the second button after the arrows to export the data to an Excel (.xls) file format.
▪Export To Html - Click the third button after the arrows to export the data to an HTML formatted file.
✓To Exit the Data View tab and Close this Report dialog Form, Click the Close box ![]() on the right at the top of the Data View tab.
on the right at the top of the Data View tab.