❑The Open Invoice Statement report provides a list of Open Invoices (only Invoices with a Balance that is Unpaid).
a.The Open Invoice Statement will be printed using its own unique Format
b.The Open Invoice Statement may be printed for either the currently selected Subscriber, or for All Subscribers
•To access the Open Invoice Statement dialog:
a)From the Backstage Menu System Select Reports and Choose Receivable Reports, or
b)From the Quick Access Menu, Select Reports and Choose Receivable Reports
✓On the Receivable Reports Menu, Choose the Invoice Statements option to display the Open Invoice Statement dialog (shown below).
❑There are three tabs on the Open Invoice Statement dialog.
•Options - Initially only the Options tab is shown (until you make your Options selections and Select Print).
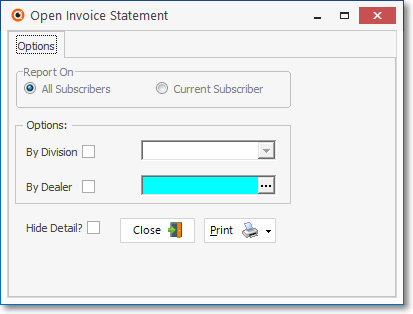
Open Invoice Statement - Options tab - All Subscribers
✓All Subscribers - If the Open Invoice Statement report is selected from the Accounts Receivable Reports Menu and no Subscribers Form is currently Open, All Subscribers will be selected (and may not be changed).
✓Options - Optionally, this report may be "filtered" based on each Subscriber's Dealer Code or Division assignment.
▪By Division - By default, All Outstanding Invoices from All Divisions are reported.
oTo limit which Invoices will be included to only those that were Sold to Subscribers assigned to a specific Division or Division Group, Check this box, then use the Drop-Down Selection List provided to Choose the appropriate Division (or Division Group) code.
▪By Dealer - By default, All Dealer's Accounts will be included, but a specified set of (one or more) Dealer Accounts may be chosen instead.
oTo do so, Check this By Dealer box, then Click the Ellipse to open the Select Dealers dialog.
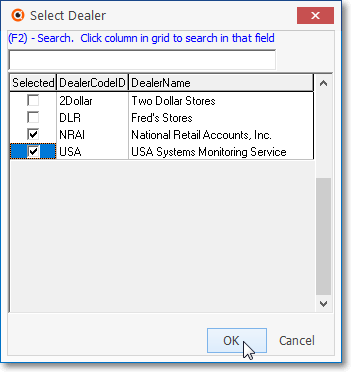
Select Dealers dialog
oCheck the Selected box for each Dealer whose Accounts are to be included in the Open Invoice Statement report
oClick Click the OK button to Close the Select Dealers dialog.
oThe Selected Dealer Code(s) will be copied into the By Dealer field.

✓Current Subscriber - If the report Open Invoice Statement is selected from the Accounts Receivable Reports Menu and there is a Subscribers Form that is Open, Current Subscriber will be selected (and should not be changed).
▪Options - The Dealer Code or Division selection is not available.
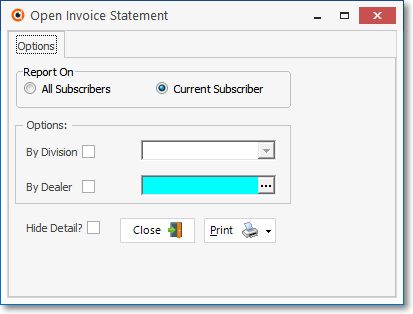
Open Invoice Statement - Current Subscriber
✓Hide Detail? - This Open Invoice Statement Format will, by default, include the Detail Line Items for each unpaid Invoice.
▪Check this box to exclude the Detail Line Items.
✓Print - Click the Print button ![]() to Preview and optionally Print (to a File or a Printer) these Open Invoice Statements (See the "Print Options Menu" discussion immediately below).
to Preview and optionally Print (to a File or a Printer) these Open Invoice Statements (See the "Print Options Menu" discussion immediately below).
▪These Open Invoice Statements will be previewed before printing.
➢Note: See the Custom Report Formats chapter if you want to learn how to modify the format of the Open Invoice Statement.
✓To Exit this Report dialog, Click the Close button ![]() toward the bottom of the Options tab.
toward the bottom of the Options tab.
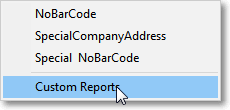
❖Print Options Menu - If you simply Click the Print button, the system's standard Invoice Statement format will be utilized to create the requested items.
![]()
✓However, if you Click the small down arrow ‚ to open the Custom Reports Print Options Menu, you can Choose a previously created Custom Report Format, or Choose to make a new one of your own design.
•Preview - The Preview tab presents the report which resulted from the Options you've selected.
✓Up Arrow/Down Arrow - hi - Moves the report one line up, or one line down, respectively.
✓Page Up/Page Down - Moves the report to the previous or next page, respectively.
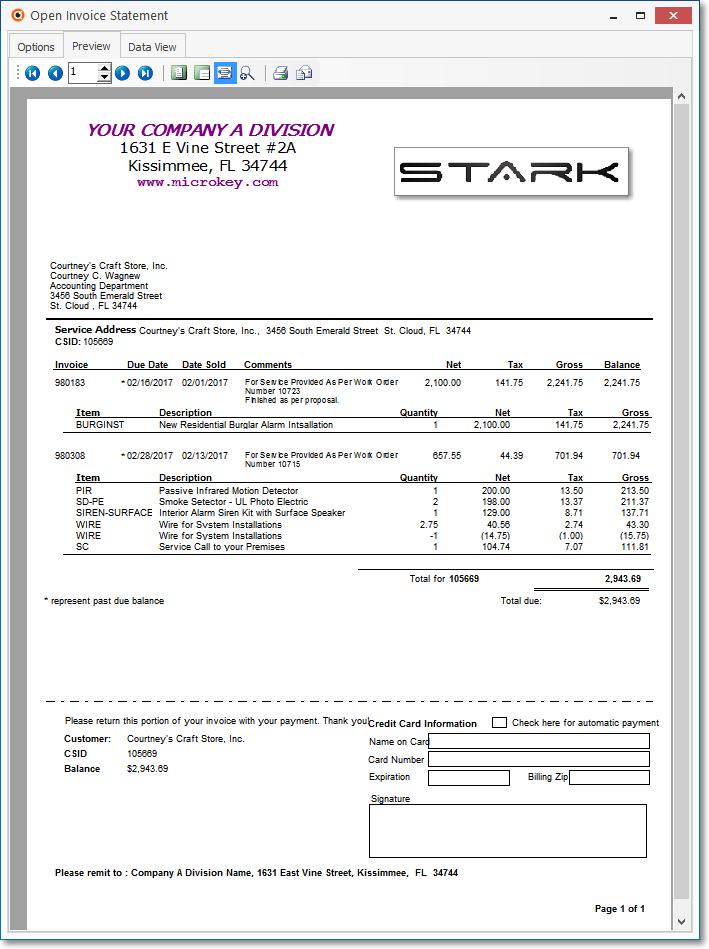
Open Invoice Statement - Preview tab - Detail included
✓Home - ![]() - Using either the screen Icon or your Keyboard's Home key, moves the report to the top of the first page.
- Using either the screen Icon or your Keyboard's Home key, moves the report to the top of the first page.
✓End - ![]() - Using either the screen Icon or your Keyboard's End key, moves the report to the bottom of the last page.
- Using either the screen Icon or your Keyboard's End key, moves the report to the bottom of the last page.
✓Arrows - The arrows allow you to move back and forth, from page to page.
✓Number - Indicates the page number you are viewing.
▪You may also type in a specific page number, Press 8 Enter and that page will be displayed immediately.
▪If you enter an invalid page number, it will be ignored.
✓Fit To Page - Click the first button after the arrows to size a full page of the report to fit the screen.
✓Zoom To 100% - Click the second button after the arrows to display the page at 100% (of the printed view).
✓Fit To Page Width - Click the third button after the arrows to size the page of the report to fit the full width of the screen.
✓Zoom To Percentage - Click the fourth button after the arrows to re-size the page of the report by percentage.
![]()
▪When you Click the Zoom To Percentage button, the Percentage selector will be displayed.
▪You may then Click the Up or Down ‚ arrow to set the exact amount of Zoom you want.
✓Print - Click the Print button to Print (to a File or a Printer) ![]() the displayed Open Invoice Statement.
the displayed Open Invoice Statement.
✓Email - Click the Email button ![]() to send the Report to an Email Address of your choosing.
to send the Report to an Email Address of your choosing.
✓To Exit the Preview tab and Close this Report dialog Form, Click the Close box ![]() on the right at the top of the Preview tab.
on the right at the top of the Preview tab.
•Data View - This view provides a tabular (spreadsheet style) presentation of the selected data.
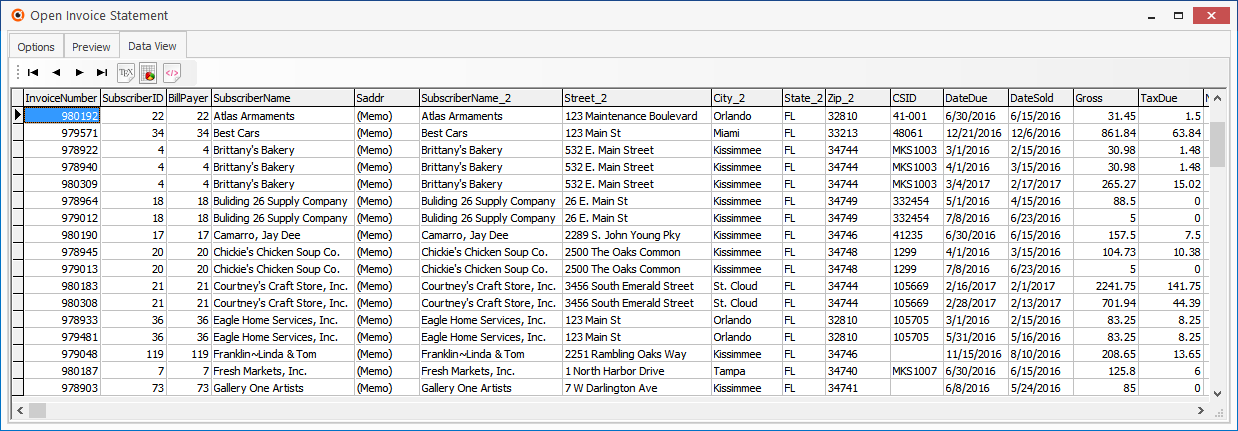
Open Invoice Statement - Data View tab
✓Arrows - Click the arrows to move through the record.
✓Export - Exporting the data from this Data View tab (note the "fly-over" help available on these buttons):
▪Export to CSV - Click the first button after the arrows to export the data to a Comma Separated Values (CSV) file format.
▪Export To Excel - Click the second button after the arrows to export the data to an Excel (.xls) file format.
▪Export To Html - Click the third button after the arrows to export the data to an HTML formatted file.
✓To Exit the Data View tab and Close this Report dialog Form, Click the Close box ![]() on the right at the top of the Data View tab.
on the right at the top of the Data View tab.