❑This Subscriber Listing report dialog may appear simple, but it actually contains several powerful features that will serve you well as you get to better understand its many capabilities.
•The basic purpose is to create a current List of Subscribers that you may view or print (to paper or a file), at will.
✓In its more advance format, it provides several tools to help you manage your database, discover potential lost revenues, and create customized lists based on your own specifications.
•To access the Subscriber Listing dialog:
a)From the Backstage Menu System Select Reports and Choose Subscriber Listing, or
b)From the Quick Access Menu, Select Reports and Choose Subscriber Listing
✓The Subscriber Listing dialog will be displayed as shown below.
❑Subscriber Listing tabs - There are three tabs on the Subscriber Listing dialog.
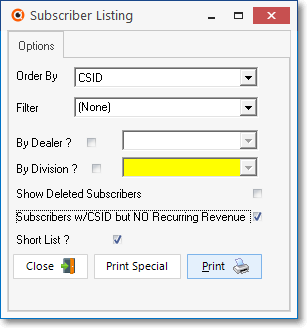
•Options - Initially only the Options tab is shown (until you Choose your Options and Select Print).
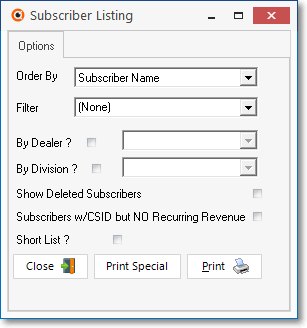
Subscriber Listing - Options
•Order By - Subscriber Name is the default. Use the Drop-Down Selection List provided to Choose the order of the listed data.
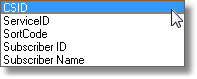
Order By Selections
•Filter - None is the default.
✓Use the Drop-Down Selection List provided to Choose a Predefined Subscriber Filter, if required.
✓Also, see "Print Special Filters" below.
•By Dealer? - To restrict the list to those Subscriber Accounts assigned to a specified Dealer, ordering those Subscriber Accounts based on the Order By selection chosen above, Check this box.
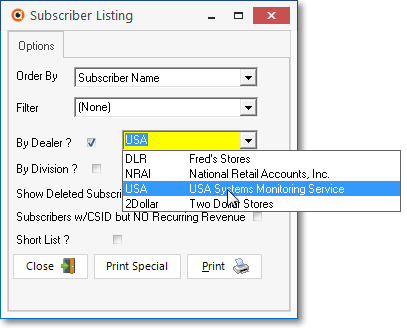
Subscriber Listing - By Dealer
✓Select Dealer - Use the Drop-Down Selection List provided to Choose that Dealer.
•By Division? - To restrict the list to those Subscriber Accounts assigned to a specified Division, ordering those Subscriber Accounts based on the Order By selection chosen above, Check this box.
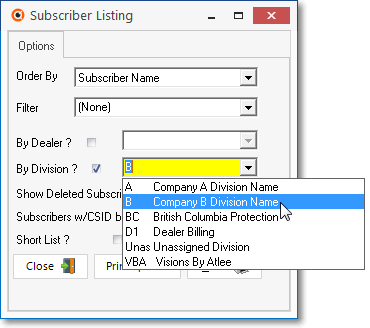
Subscriber Listing - By Division
✓Select Division - Use the Drop-Down Selection List provided to Choose that Division.
▪To create this Subscriber Listing for Accounts who have no Division assignment, Choose the Unassigned option!
•Show Deleted Subscribers - To include Deleted Subscribers in the list, Check this box (Otherwise, Deleted Subscribers will not be included).
•Subscribers w/CSID but NO Recurring Revenue - Use this option to locate and list all Monitored Subscribers who have No Recurring Revenue Defined
✓See the "Subscribers w/CSID but NO Recurring Revenue" discussion below.
•Short List? - Provides a list with one-line-per Subscriber (i/e/, Name, CSID, Telephone number).
•To Exit this Report dialog, Click the Close button ![]() toward the bottom of the Options tab.
toward the bottom of the Options tab.
•Print - Click the Print button ![]() to Preview and optionally Print (to a File or a Printer) theSubscriber Listing.
to Preview and optionally Print (to a File or a Printer) theSubscriber Listing.
•Print Special - Click the Print Special ![]() button to access the Select Filter Criteria Form
button to access the Select Filter Criteria Form
❖See the Print Special Label Filters chapter for more information.
❑Subscribers w/CSID but NO Recurring Revenue - Although this Subscriber Listing is not generally thought of as a Recurring Revenue and Sales Analysis tool, there is a particularly critical feature provided in this report that will be find extremely useful.
•This critical feature is activated with the Subscribers w/CSID but NO Recurring Revenue question.
✓In the course of the data entry process: interruptions, task shift, and personnel changes can all lead to data entry errors.
✓One of the most costly mistakes that can be made is forgetting to enter the Recurring Revenue information for a new Subscriber.
✓This mistake will continue to cost money month after month - actually forever - until this error of omission - the hardest kind to locate - is discovered.
✓Without a doubt, errors of omission are always the hardest to find.
•The Subscriber Listing Report can (and will) locate and list all Monitored Subscribers who have No Recurring Revenue Defined - but almost certainly should have - as follows:
Subscriber Listing - for No Recurring Revenue
✓Order By - Using the Drop-Down Selection List provided, Choose Subscriber Name or CSID, as appropriate.
✓Subscribers w/CSID but NO Recurring Revenue - Check the Subscribers w/CSID but NO Recurring Revenue box.
✓Short List? - Check the Short List? box.
✓Print - Click the Print button to Preview or Print (to a File or a Printer) this report.
▪The report will list every Account that must be reviewed, and perhaps with updated with the appropriate Recurring Revenue rules.
▪If so identified, it is suggested that you create an Auto Billing record, with a zero (0.00) payment rate, for those Subscribers who are correctly receiving these services at no charge.
▪By doing so, they will no longer appear on this list in the future.
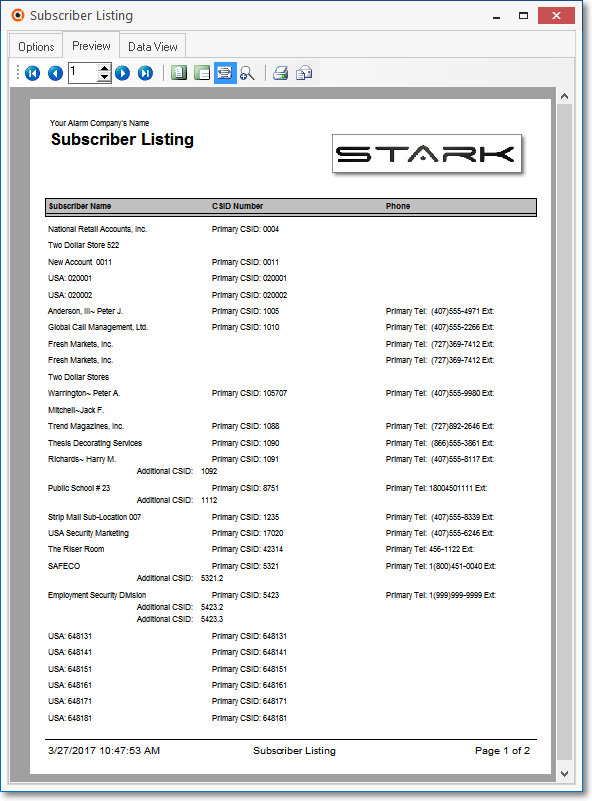
Subscriber Listing - Preview tab -with CSID but No Recurring Revenue defined
❑Print Special Filters
•If the predefined Subscriber Filters will not produce the list you need, you may create a Special Selection for the Subscriber Listing.
•Click the Print Special button.
•See the Print Special Filters chapter for more information on this option.

Special Selection for Subscriber Listing dialog
❑Preview - The Preview tab presents the Subscriber Listing which resulted from the Options you've selected.
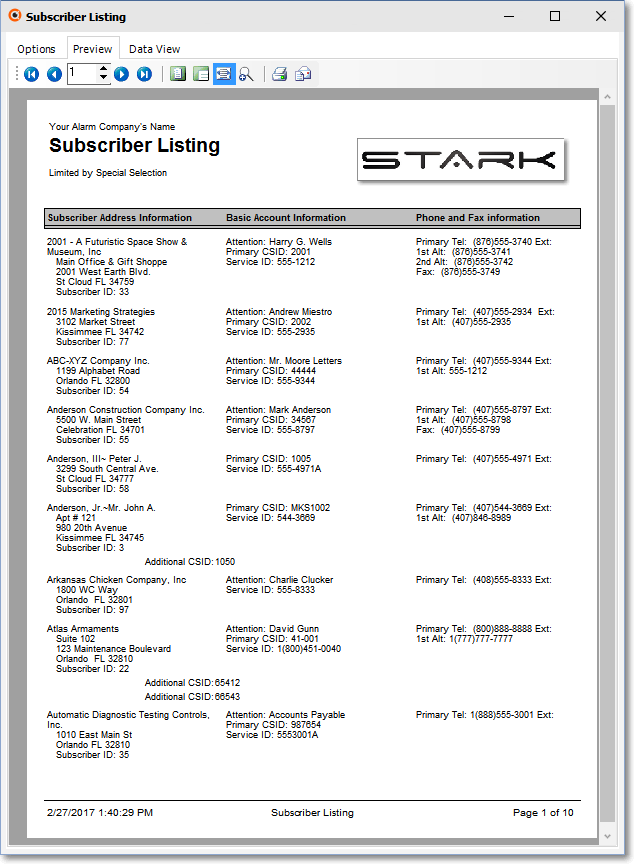
Subscriber Listing - Preview tab
•Home - ![]() - Using either the screen Icon or your Keyboard's Home key, moves the report to the top of the first page.
- Using either the screen Icon or your Keyboard's Home key, moves the report to the top of the first page.
•End - ![]() - Using either the screen Icon or your Keyboard's End key, moves the report to the bottom of the last page.
- Using either the screen Icon or your Keyboard's End key, moves the report to the bottom of the last page.
•Arrows - The arrows allow you to move back and forth, from page to page.
•Number - Indicates the page number you are viewing.
✓You may also type in a specific page number, Press 8 Enter and that page will be displayed immediately.
✓If you enter an invalid page number, it will be ignored.
•Fit To Page - Click the first button after the arrows to size a full page of the report to fit the screen.
•Zoom To 100% - Click the second button after the arrows to display the page at 100% (of the printed view).
•Fit To Page Width - Click the third button after the arrows to size the page of the report to fit the full width of the screen.
•Zoom To Percentage - Click the fourth button after the arrows to re-size the page of the report by percentage.
![]()
✓When you Click the Zoom To Percentage button, the Percentage selector will be displayed.
✓You may then Click the Up or Down ‚ arrows to set the exact amount of Zoom you want.
•Print - Click the Print button to Print (to a File or a Printer) ![]() the displayed Subscriber Listing.
the displayed Subscriber Listing.
•Email - Click the Email button ![]() to send the Report to an Email Address of your choosing.
to send the Report to an Email Address of your choosing.
•To Exit the Preview tab and Close this Report dialog Form, Click the Close box ![]() on the right at the top of the Preview tab.
on the right at the top of the Preview tab.
❑Data View - This view provides a tabular (spreadsheet style) presentation of the selected data.
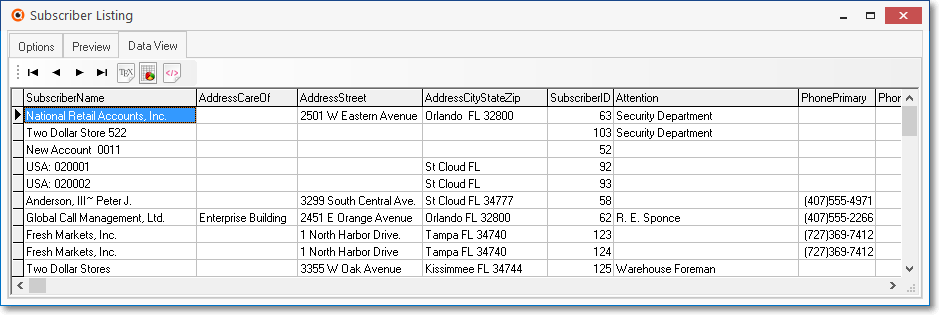
Subscriber Listing - Data View tab
•Arrows - Click the arrows to move through the record.
•Export - Exporting the data from this Data View tab (note the "fly-over" help available on these buttons):
✓Export to CSV - Click the first button after the arrows to export the data to a Comma Separated Values (CSV) file format.
✓Export To Excel - Click the second button after the arrows to export the data to an Excel (.xls) file format.
✓Export To Html - Click the third button after the arrows to export the data to an HTML formatted file.
•To Exit the Data View tab and Close this Report dialog Form, Click the Close box ![]() on the right at the top of the Data View tab.
on the right at the top of the Data View tab.