Subscribers - The Reason for an Accounts Receivable System
❑The Subscriber Form is the anchor of the Accounts Receivable System just like your Company's Subscribers are the anchor of your Alarm Company.
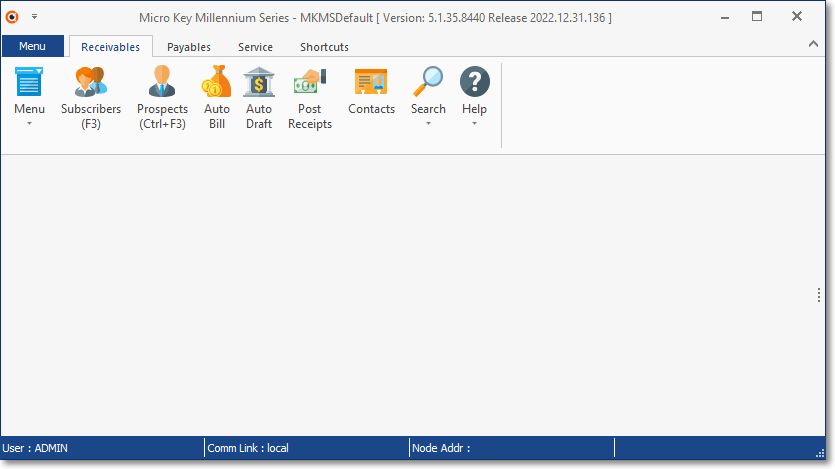
MKMS STARK Desktop - Receivables Tab
•To access the Subscribers Form, on the MKMS Desktop and Press F3, or Select the Receivables Tab on the MKMS Desktop and Click the Subscribers Icon on the Receivables Tab's Ribbon Menu which also provides Icons for certain Periodic Tasks required in the Accounts Receivable module and access specialized Search Options, plus an Icon to open the Prospects Form (Ctrl+F3).
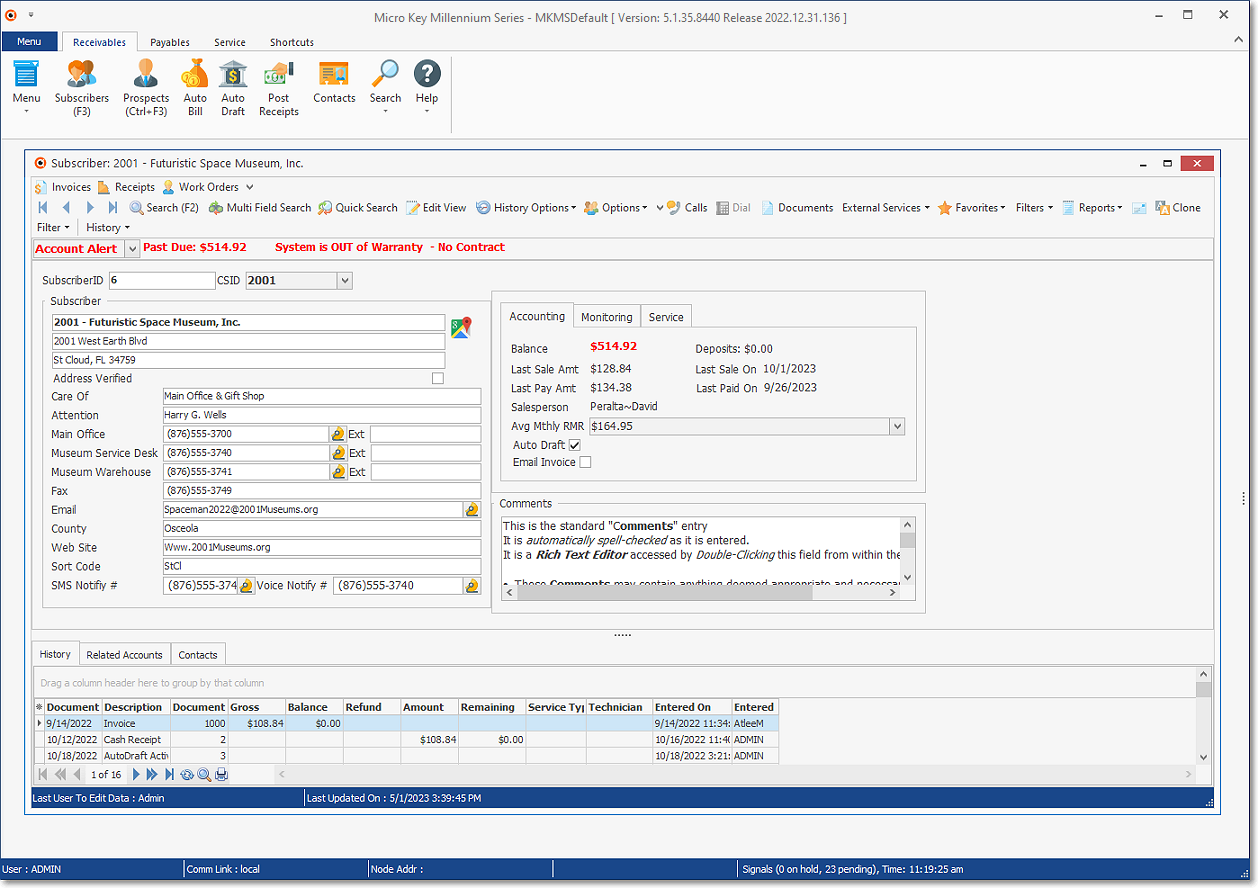
MKMS Desktop - Receivables Tab - Subscribers Form
•This Subscribers Form, its Ribbon Menu, the Edit View and other specialized Icons and an Information Bar (see below) is the base Form and the access point to the Accounts Receivable System.
✓The Ribbon Menu on the Subscribers Form provides:
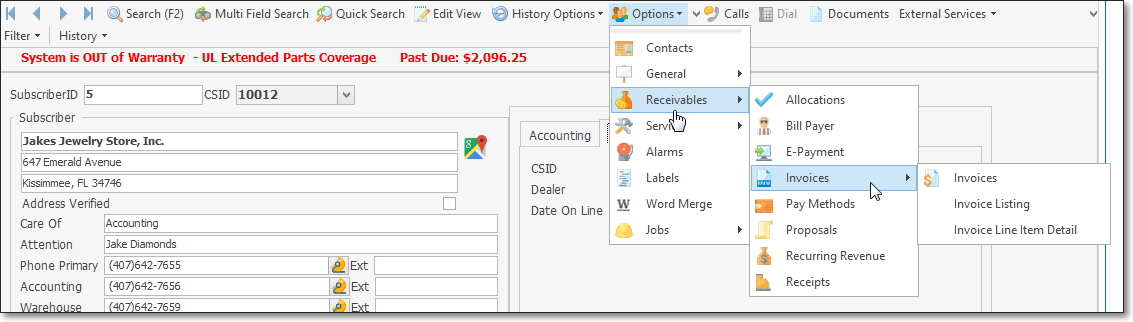
▪A Navigation section with Record Movement and Search Icons, the History Options, the Subscriber Options Drop-Down Menus which provides One Click access to most Daily Procedures (e.g., Entering Invoices, Posting Receipts, setting up Auto Billing)
▪An Actions section with special Dial, Documents, External Services, Favorites, Filters and Reports Icons
▪An Information Bar (for Alert Messages such as a Past Due notice)

Subscribers Form - Ribbon Menu (Navigation & Actions Icons) - Information Bar
✓Most Accounts Receivable System Reports are accessed through the Backstage and/or Quick Access Menus, but some are also available using the Actions section's Reports Icon.
❑Understanding the Subscribers Form's Navigation section Icons:
![]()
Subscribers From - Navigation Menu
•Record Movement - Provides the usual First, Previous, Next, and Last record Icons
![]()
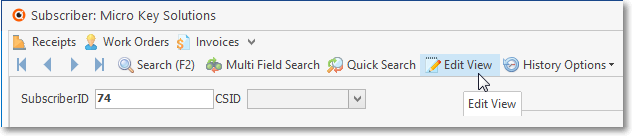
•Edit View - This Icon displays the editing format for entry and modification of Subscriber information.
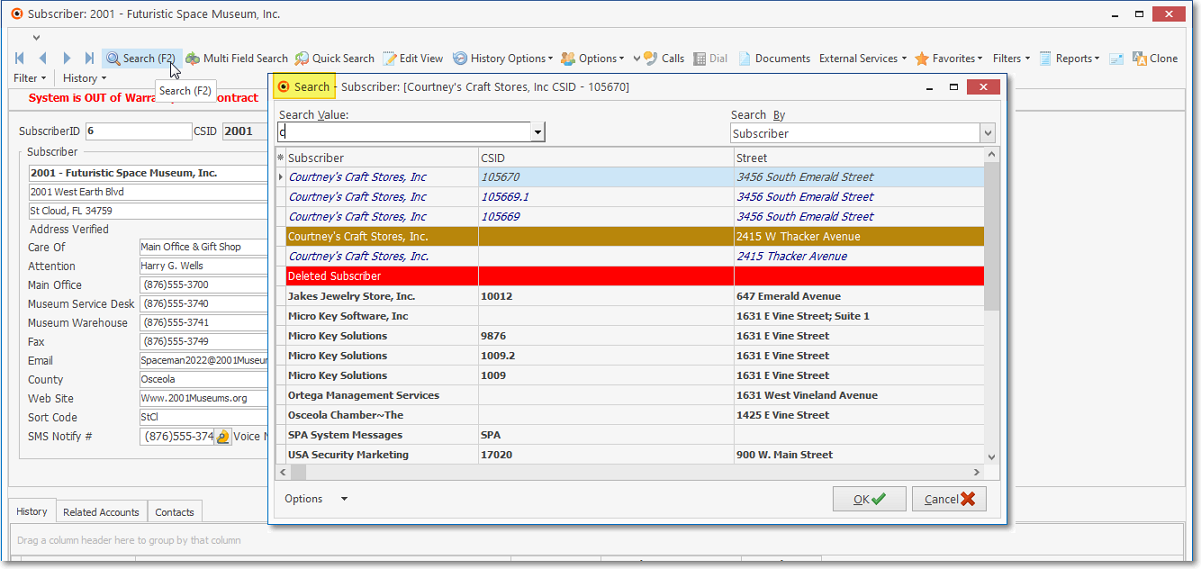
•Search - This Icon activates the Subscriber Search Function (which is also accessible by Pressing F2)
•History Options - This Icon displays the History Options Menus for Turning it On and Off, Filtering, and designating the History Period the Subscribers Form History Grid for what is displayed based on that Filter.
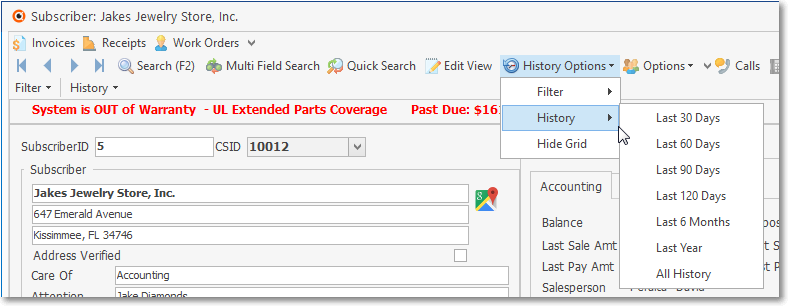
•Subscriber Options - This Icon opens a Subscriber Options Menu which provides access to various Subscriber associated Data Entry Forms, plus Processing Forms and Reports
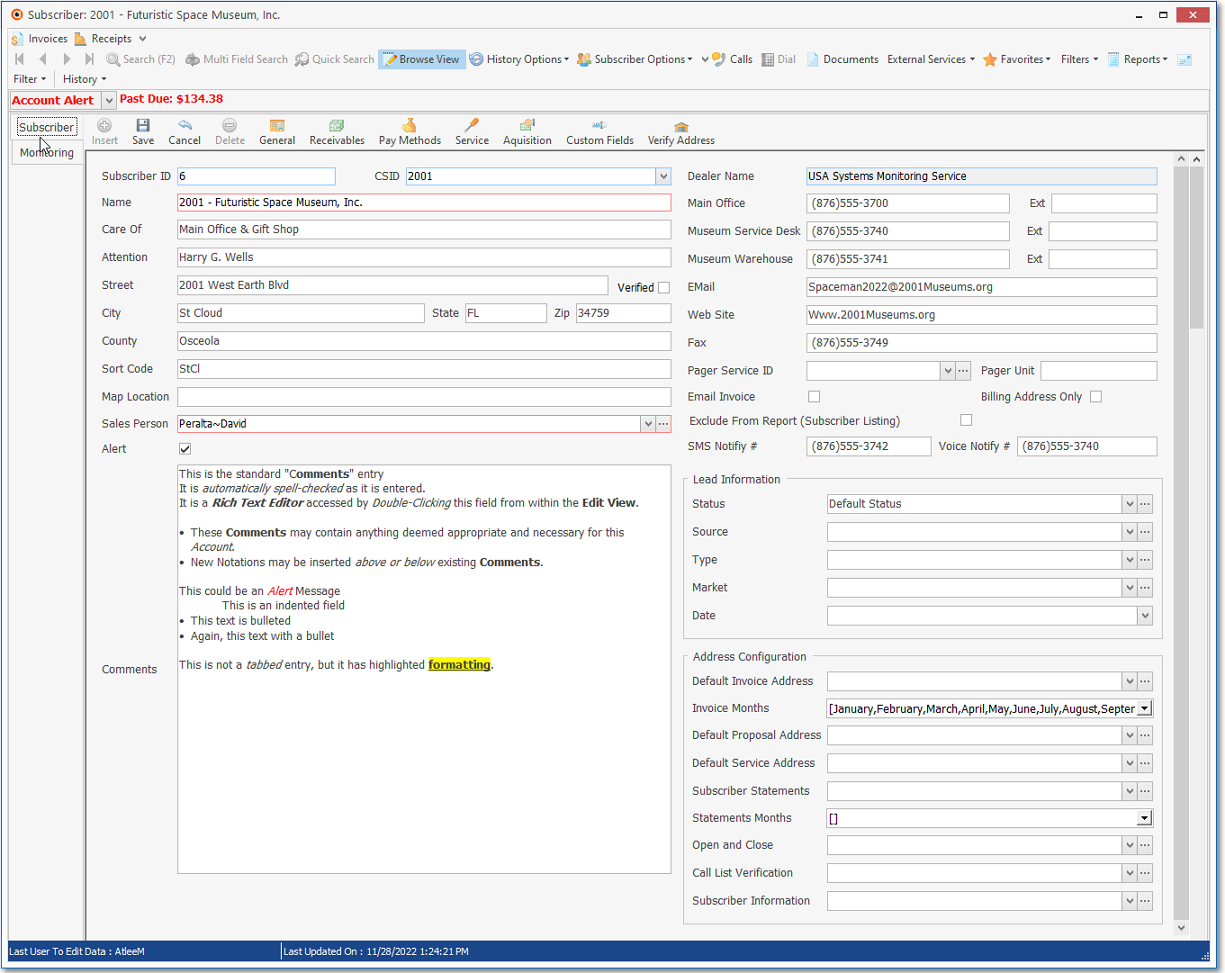
❑Record Information - A view of the Subscriber Information is displayed on the Subscribers Tab
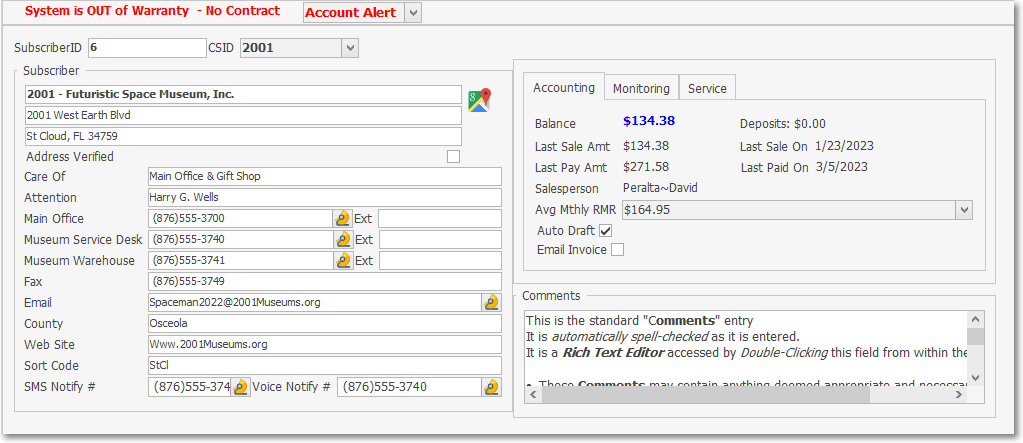
•The Subscriber Information is displayed in Data Sections - some Tabbed - each having its own Title which are:
✓Subscriber - Basic Name, Address, and Contact information
✓Accounting - Balance (displayed in Blue if Current, Red if Past Due), Last Sale and Last Payment information, Salesperson assigned to the Account, Average Monthly Recurring Revenue, plus Auto Draft and Email Invoice check boxes
✓Monitoring - Primary CSID, Dealer information and On Line (and Off Line) Dates
✓Service - Service Contract and Warranty Expiration date
✓Comments - An Edit Rich Text field where notes, comments and other information may be entered
❑Google Maps® - Once the Subscriber record is saved, Click the ![]() Icon to the right of the Subscriber's address to open a Digital Map Display showing the exact location of this Subscriber.
Icon to the right of the Subscriber's address to open a Digital Map Display showing the exact location of this Subscriber.
•Any Technicians having a Coverage Area Zip Code that matches that of the Subscriber, will also be identified on this Google Map®.
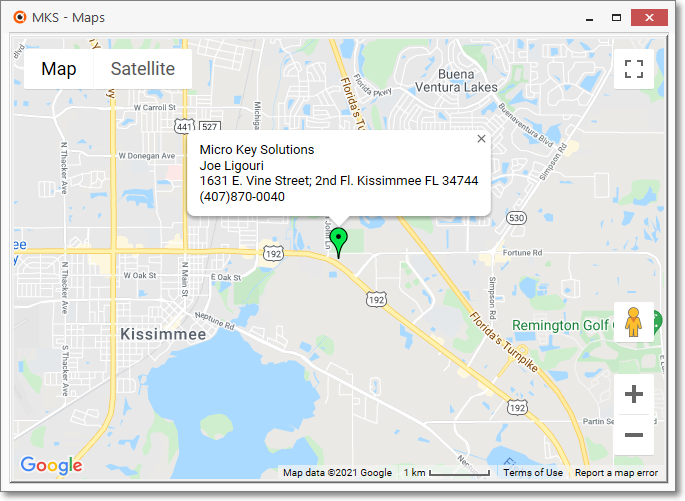
Google Maps showing Subscriber location
The New Edit View
❑Entering a New Subscriber record
•Open the Subscribers Form by Clicking the Receivables Tab on the MKMS Desktop and Pressing F3 (or Clicking the Subscribers Icon on the Receivables Tab's Ribbon Menu), then Select the Edit View Icon
![]()
•The Edit View on the Subscribers Form (shown below) is where a new Subscribers record is entered.
✓Open the Subscribers Form by Clicking the Receivables Tab on the MKMS Desktop and Pressing F3 (or Clicking the Subscribers Icon on the Receivables Ribbon Menu).

✓Select the Edit View Icon and Choose the Subscriber side-tab (which should be the default)
✓Click the Add Icon to start a new Subscriber record entry.
❖See the Subscribers Form - Edit View chapter and each of its sub-chapters for complete information on entering new Subscribers.
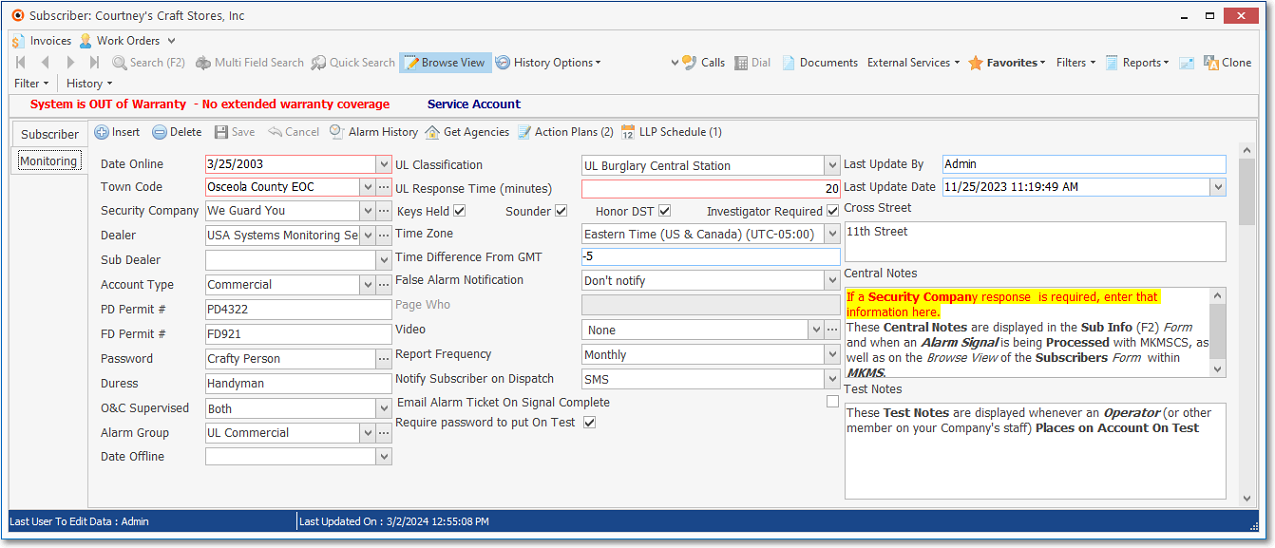
❑There are two Subscriber Data Entry Tabs offered on the Edit View: The Subscriber and the Monitoring Tabs.
•Subscriber - This tab within the Edit View - contains the six (6) sub-sections listed below - and is used to enter a new Subscriber record and enter the information associated with the Receivables and Service Tracking modules.

1.General - This sub-section contains fields for identifying the following information:
a.System maintained fields displaying certain data that is entered elsewhere (e.g, Subscriber ID, CSIDs, Dealer Name).
b.Basic Data Entry (e.g., Name, Address, Contact fields and certain coding information)
c.Comments - An Edit Rich Text field which allows you to enter any special notes or comments relating to this Subscriber
d.Leads information including the Source, Type, Market area and original Date of the Lead that led to the acquisition of this Account
e.Address Configurations to change the default Return Address information on Invoices, Proposals,Statements, and certain Central Station related reports
2.Receivables - This sub-section initializes the Subscriber record for accepting Receivables Transactions.
a.Accounts Receivable for Configuring this Subscriber record for the Accounts Receivable System
b.Account Status as it relates to Dates and Amounts of Recurring Revenue, Balance Due, Receipts and Sales.
3.Subscriber Payment Methods - For entering Bank Draft or Credit Card using the Payment Methods dialog.
4.Service - This sub-section provides the means to Activate the Service Account for the Subscriber
5.Acquisition This sub-section is used to record detailed information relating to each Account which are Acquired and/or Lost.
6.Custom Fields - This sub-section is display and enter the required information into previously defined Custom Fields.
7.Verify Address - This will execute an Address Validation process - that will be performed by the United States Postal Service ("USPS") - for the currently selected Subscriber.
•Monitoring - The Monitoring tab with the Edit View is used to enter the information associated with the Central Station Monitoring of this Subscriber's premises.
✓Also see "The Monitoring tab" discussion below, and the Central Station Monitoring chapter for related information.
❑Defining a new Subscriber record
•Open the Subscribers Form by Clicking the Receivables Tab on the MKMS Desktop and Pressing F3 (or Clicking the Subscribers Icon on the Receivables Tab's Ribbon Menu)
✓Select the Edit View Icon.
![]()
•Edit View Icon (shown above) on the Subscribers Form opens the data entry view where Subscriber's information is initially defined.
✓Categories & Sub-Sections - The Edit View is divided into two Categories (Subscriber and Monitoring), and six Sub-Sections which further segregate information based on its function and/or purpose.
▪See the Subscriber Form: Edit View chapter for basic Subscriber record entry information.
▪The instructions for defining other information (e.g., Accounts Receivable, Service, Acquisition, etc.) are available in other chapters.
▪Select the Edit View Icon and Choose the Subscriber Tab (which should be the default)
▪Once selected, the Edit View Icon changes to the Browse View Icon.
▪Click the Browse View Icon to return to the regular Browse View.
Subscribers Form - Edit View - Subscriber tab displayed
•This is where Central Station Monitoring related information is entered within the Edit View of the Subscriber Form, .
Subscribers Form - Edit View - Monitoring tab displayed
➢Note: Whenever the Monitoring tab within the Edit View of the Subscribers Form is available, the Alarm History Icon will be accessible.

Edit View - Monitoring Tab - Navigation Menu - Alarm History Icon
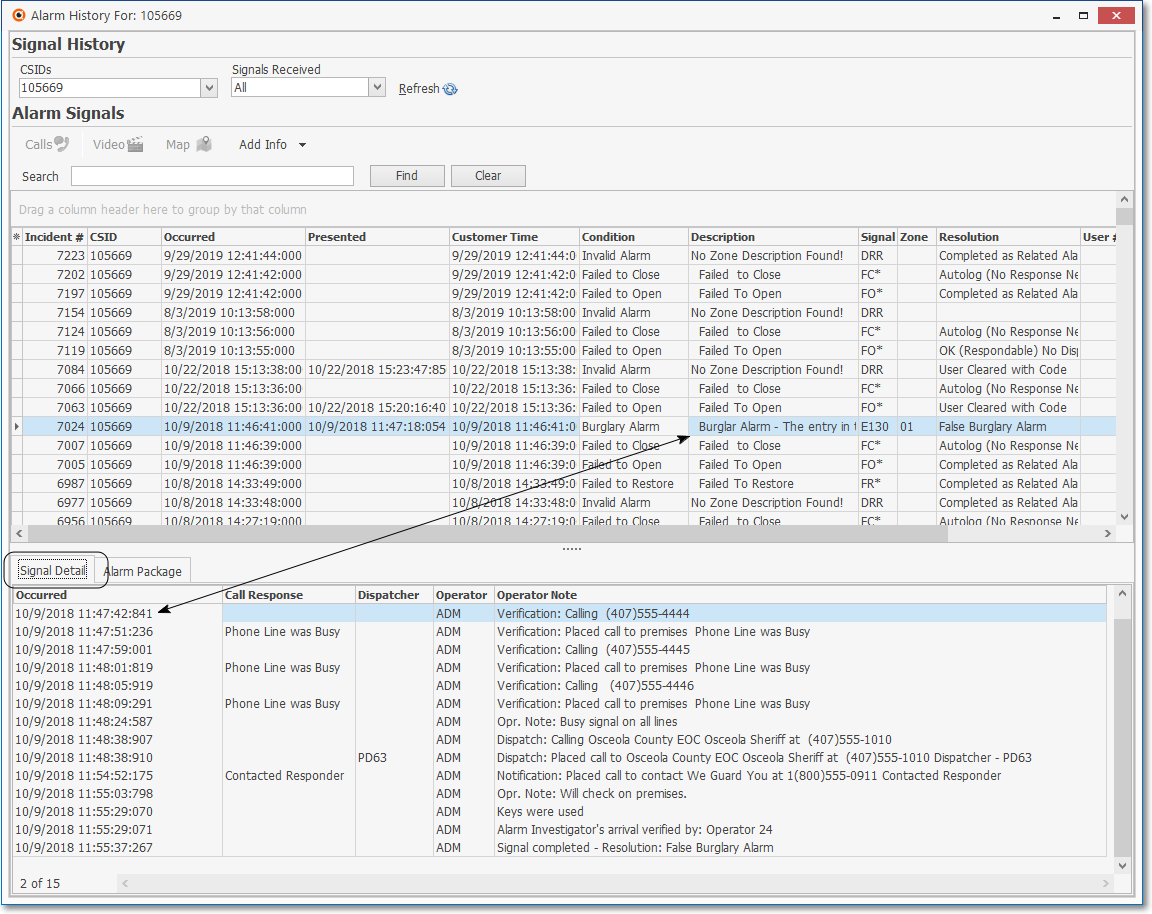
Alarm History option - Signal History Form - Signal Detail tab
A.The Central Station Data section at the top of the Monitoring tab within the Edit View of the Subscribers Form and is used to enter the basic Central Station related information such as Start Date, Coding, Passcodes, Permit Information and certain other information for Monitoring this Subscriber (see the Central Station Data section illustration above).
•The Ribbon Menu for the Monitoring tab has several new Icons which are Alarm History, Get Agencies, LLP Schedule, and Action Plans
B.The Subscriber Panels section is below the Monitoring tab and is where CSID(s) and the associated CSID specific information is entered for each CSID identified there and has sub-tabs that are used to access (and define) all of the ancillary information (e.g., Events, Call List, Zones, Contacts (People To Call)) Forms needed to properly Monitor Alarm Signals from a Subscriber (the Subscriber Panels section and its sub-tabs are shown in the illustration immediately below).
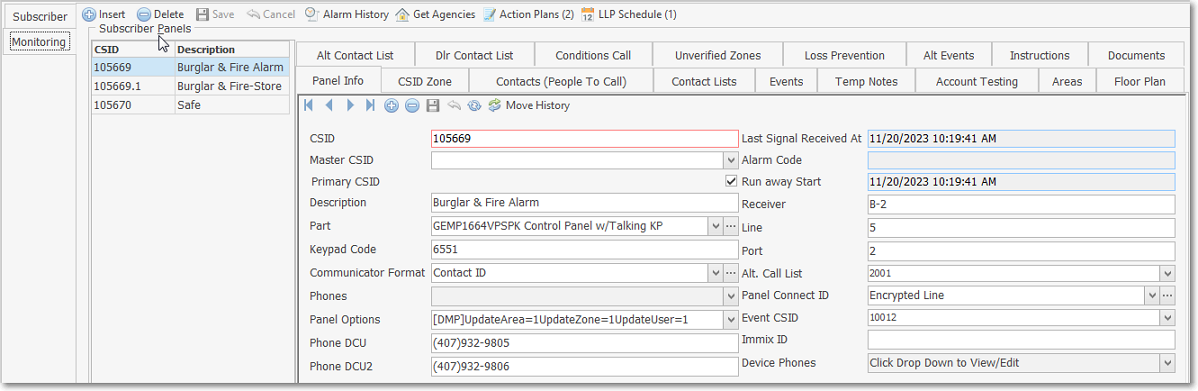
Subscribers Form - Edit View - Monitoring tab - Subscriber Panels section with sub tabs
1.Panel Information - Define each CSID programmed to report from this Subscriber's Premises.
2.Account Testing - Define the Account Testing information for the selected Subscriber Panel CSID thereby establishing what constitutes a valid Test Signal for this Account.
3.Alternate Call List - Assign an Alternate Contacts (People To Call) List which is entered as a CSID in the Alt.Call List field which then attaches that Alternate CSID's Contacts (People To Call) list to this Subscriber Panel's CSID record.
4.Alt Events - Identify another Account's CSID which contains Events to be used with this Subscriber Panel's CSID record.
5.Areas - Define each Area within a Subscriber's Premises that needs to be monitored individually, Armed and Disarmed individually, and have Opening, Closing, and other types of Test Events Supervised individually.
6.Call Order - Redefine the Call Order - the sequence in which individuals are to be called - for the existing list of Contacts (People To Call)
7.Conditions Call List - Identify an Alarm Condition Code (and optionally a Signal ID and/or Physical Zone) which, when assigned to an Alarm Signal received from a specified Subscriber Panel(s) CSID, will utilize a customized Contacts (People To Call) List and Calling Order specifically defined for that purpose (in a special CSID Zones record).
8.CSID Zones - Define the Exceptions to the default Panel Zones of the Communicator Format assigned to the currently selected CSID.
9.Dealer Call List - Assign the appropriate Dealer's Contacts (People To Call) List which is entered as a CSID in the Alt.Call List field which then attaches that Alternate CSID's Contacts (People To Call) list to the Subscriber Panel's CSID record.
10.Documents - Associate and/or attach specific Documents to this Subscriber Panel's CSID record.
11.Events - Define the supervised Events that are to be monitored for this Subscriber Panel's CSID record.
12.Floor Plan - Attach a Floor Plan image to this Subscriber Panel's CSID record.
13.History - Look up Alarm Signal History for this Subscriber Panel's CSID record.
14.Instructions - Look up the Control Panel's Instructions entered in the Installed Equipment Codes Form for the Part identified in this Subscriber Panel's CSID record
15.Loss Prevention - Define and/or update a Loss Prevention tracking record for this Subscriber Panel's CSID record.
16.Contacts (People To Call) - Enter the Contact information for this Subscriber Panel's CSID record.
17.Temp Notes - View the active Temporary Notes for this Subscriber Panel's CSID record.
18.Unverified Zones - Look-up and/or reset the Unverified Zones information for this Subscriber Panel's CSID record.
C.Special Monitoring Info sub-tabs
1.Notifications - This sub-tab provides the ability to identify and define one or more specific Alarm Conditions which - when received by SPA - are to be processed internally by sending a Predefined Message via an Email or Pager message (using the Communications Module) to a specific Person.
2.CS Commands - This sub-tab provides the ability to define specific Commands for an Operator to display a Web Site or run an Application to use while Processing an Alarm Signal for this Subscriber.
3.Holidays - This sub-tab allows you to identify those Holidays that are observed by this Subscriber (non-residential supervised Accounts)
D.Medical Information - Enter the Medical Information for any individual residing at the currently selected Subscriber's Premises:
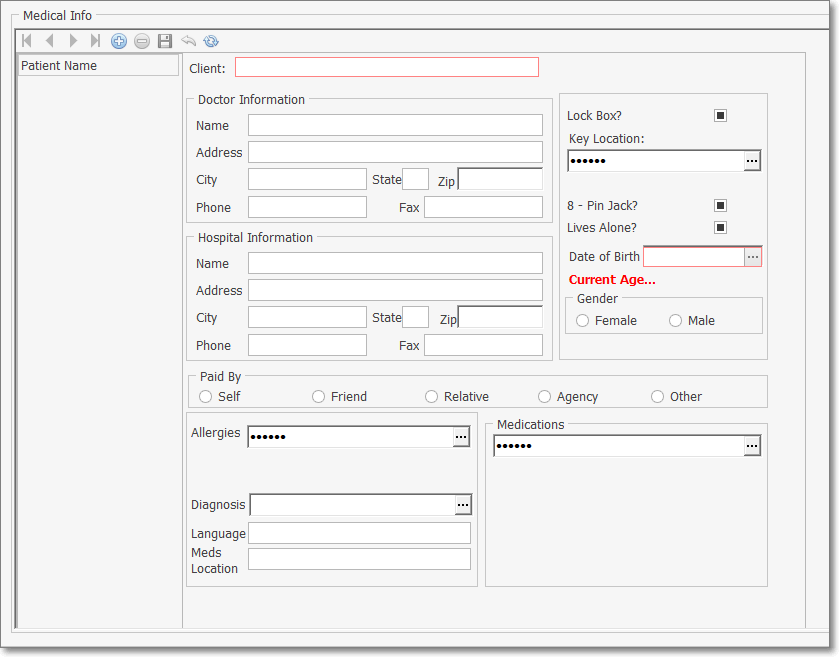
Medical Information Form
✓This Medical Info section allows you to define Medical Information for any individual residing at the currently selected Subscriber's Premises - regardless of which Subscriber Panel CSID is currently selected - for whom your Company's Central Station is providing an emergency medical acknowledgment & notification service.