❑The ability to enter a Temporary Note, and have it displayed when that Subscriber's Alarm System is activated (sends an Alarm Signal to the Central Station), is a useful tool for helping Operators provide a more accurate alarm response.
•Temp Notes, entered as a result of a Subscriber call-in, an alarm event, a verification response, and some other Subscriber related situation that occurs in a Central Station, can help eliminate a double dispatch, contacting the wrong (unavailable) person, or knowing important information like a family being on vacation, or business closed because of an unusual schedule change.
✓So, it is very useful to be able to attach a Temp Note to the Subscriber's record - with a starting and ending date and time in which it will be shown to an Operator when she/he is Processing an Alarm Signal.
✓In the event of another signal being transmitted from that Subscriber, the next Operator will be informed of the "issue" through the display of a Temp Notes message.
❑Creating a Temporary Note:
•You may add a Temp Note for a Subscriber in three places:
1.In MKMS following these instructions:
▪Open the Subscribers Form and Retrieve (F2 Search) the appropriate Subscriber record.
▪Select the Edit View Icon and Choose the Monitoring Tab and locate the Subscriber Panels section.
▪Select the appropriate Subscriber Panel's CSID.
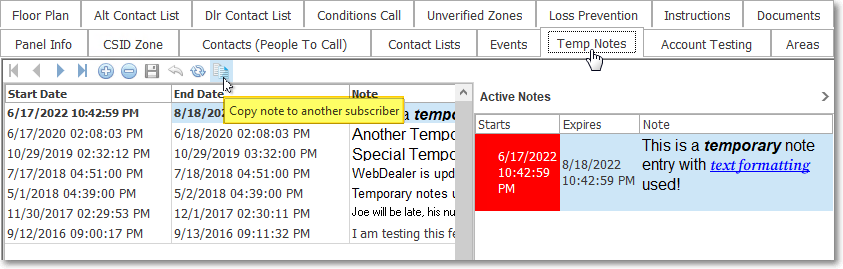
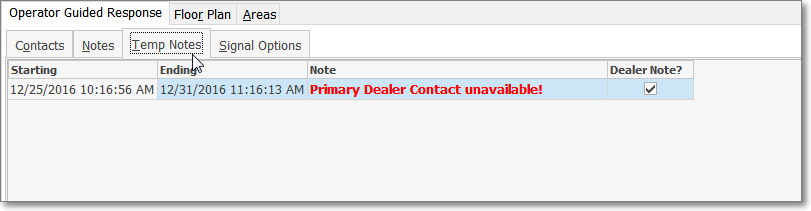
▪Click the Temp Notes tab.
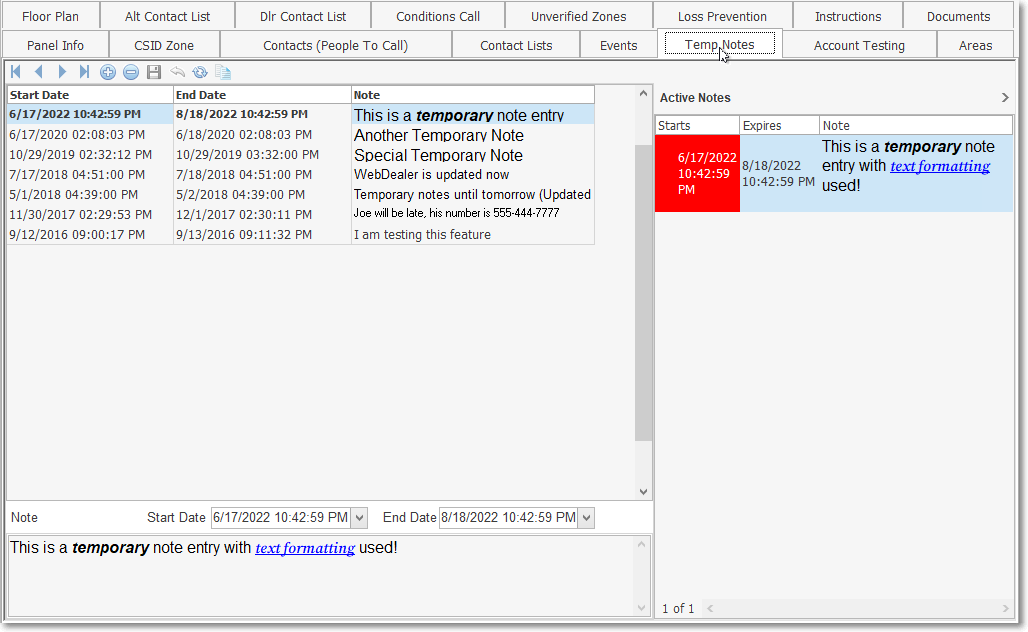
Subscriber Form - Edit View - Monitoring tab - Subscriber Panels section - Temp Notes tab
2.Using the Dealer Module Client Connection following these instructions:
▪Locate the appropriate Subscriber using the Search option.
▪Select the Panels tab on the Dealer Module Form.
▪Choose the appropriate Subscriber Panel CSID.
▪Click on the Notes Information Access Button.
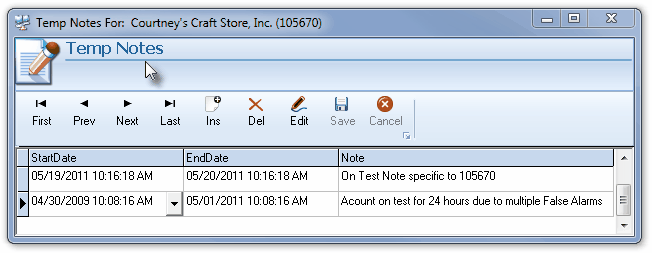
Dealer Module - Client Access module - Panels tab - Temp Notes dialog
3.In MKMSCS following these instructions:
▪Press F2 to open the Sub Info Form.
▪On its Subscriber Information Menu, Click the Temp Notes Icon.
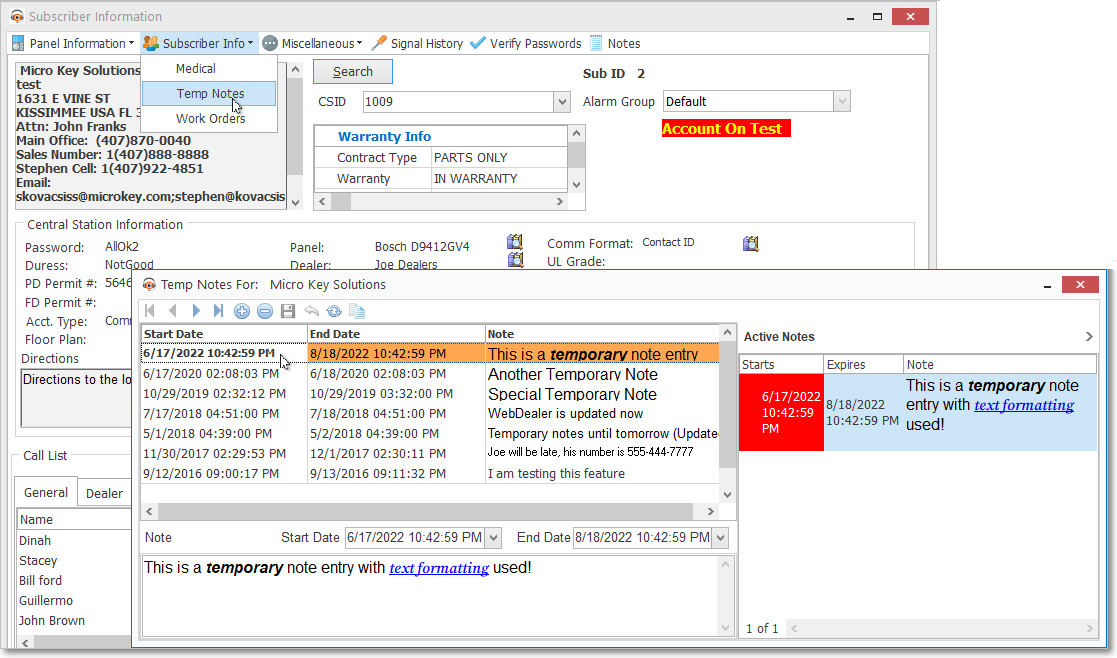
Subscriber Information (F2) Form - Subscriber Info Menu - Temp Notes dialog
➢Note: The Copy To... Icon (see "Using the Copy To function" below) is not available within MKMSCS.
4.In MKMS on the associated Subscribers Form, as long as a Temp Note is Active, ACTIVE TEMP NOTES message(s) will be displayed in a Drop-Down Info Box on the Information Bar
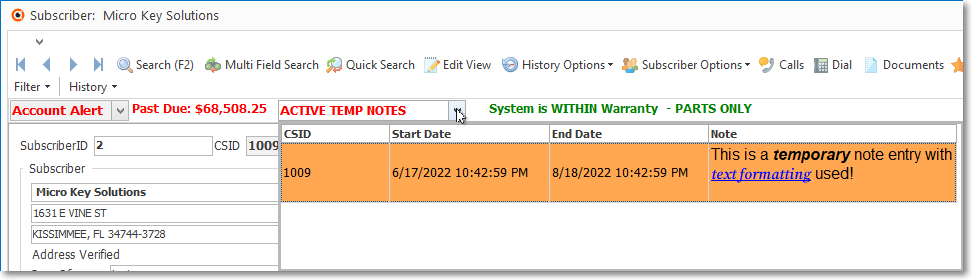
Subscribers Form - Information Bar - ACTIVE TEMP NOTES Drop-Down Info Box
•In any case, the Temp Notes dialog will be displayed.
❑Entering a Temp Note:
•Click the ![]() Icon to open the expanded Temp Notes dialog.
Icon to open the expanded Temp Notes dialog.

Temp Notes tab - with a new Data Entry line
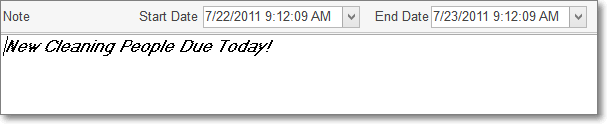
•Start Date - Use the Drop-Down Calendar/Date Entry field to Choose the starting date and time for this Temp Note.
✓By default, it is Today and Now.
•End Date - Use the Drop-Down Calendar/Date Entry field to Choose the ending date and time for this Temp Note.
✓By default, it is Today and Now.
✓You must reset this ending date and/or time to reflect when you want this Temporary Note to expire.
•Note - Enter the Note to be displayed for the Operator.
✓Type the note or comment that is to be displayed for the User or Operator.
✓This is a Rich Text Edit Form and so to format or color the text, Double-Click this field to open the Rich Text Editor.

Rich Text Editor Form used when entering Temp Notes
✓Press Ctrl+S to save a Edit Rich Text entry.
•Click the ![]() Icon at the top of the Temp Notes Form to record the Temp Note entry.
Icon at the top of the Temp Notes Form to record the Temp Note entry.
❑Using the Copy To function:
•Once entered, from time to time a User or an Operator may want (need) to copy an existing Temp Note to another Subscriber Panel's CSID which has been set up for this same Subscriber.
•To do so, Open the Subscribers Form and Retrieve (F2 Search) the appropriate Subscriber record.
✓Select the Edit View Icon and Choose the Monitoring Tab and locate the Subscriber Panels section.
✓Select the appropriate Subscriber Panel's CSID.
✓Click the Temp Notes Icon.
✓Click the Copy To... Icon to open the Select Panels dialog.
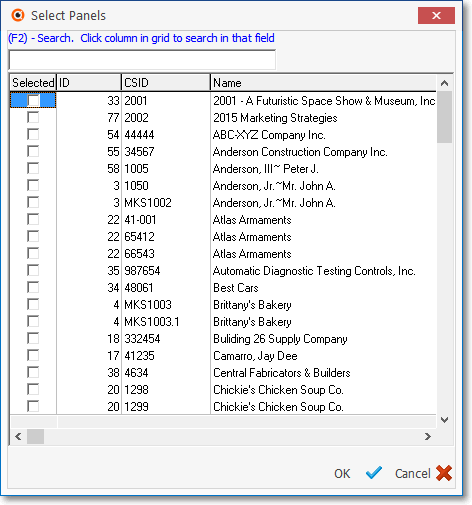
✓Click on any Header Name (ID, CSID, Name, etc.) column's field.
✓Press F2
✓In the (F2) Search field, enter the Subscriber's ID, CSID or Name depending on the field selected, to identify the Subscriber Panel's CSID to which the selected Temp Note is to be copied.
✓This is an incremental search function so, as you type your entry, the highlighted record will continue to be relocated until you have found the required record.
✓Check the desired Account.
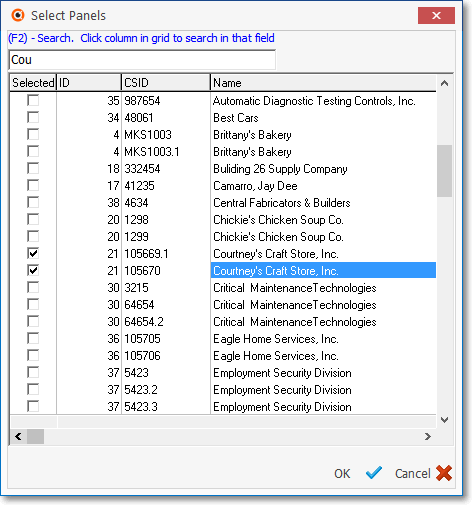
Select Panels dialog for the Temp Notes Form
✓Click the OK button to execute the Copy To function.
✓The Selected Temp Note will be copied to the Temp Notes tab of the Selected Subscriber(s) record(s) and the Select Panel dialog will close.
❑Editing a Temp Note:
•Select the Temp Note that needs to be changed.
•Edit the information in the bottom section of the Temp Notes tab, as needed.
✓This is a Rich Text Edit Form and so to format or color the text, Double-Click this field to open the Rich Text Editor.
•Click the ![]() Icon to record the Temp Note changes.
Icon to record the Temp Note changes.
❑Deleting a Temp Note: The Temp Notes are stored indefinitely by the system until actually deleted.
•It is the Users responsibility to permanently delete Temp Notes, when deemed appropriate.
•Select the Temp Note that needs to be removed.
•Click Delete - Icon to execute the deletion.
❑All active Temporary Notes for a Subscriber are displayed for the Operator when an Alarm Signal is first presented on the Signal Processing screen in two ways:
1.A Message box is displayed at the top of the Signal Processing Form with the active Temp Note.
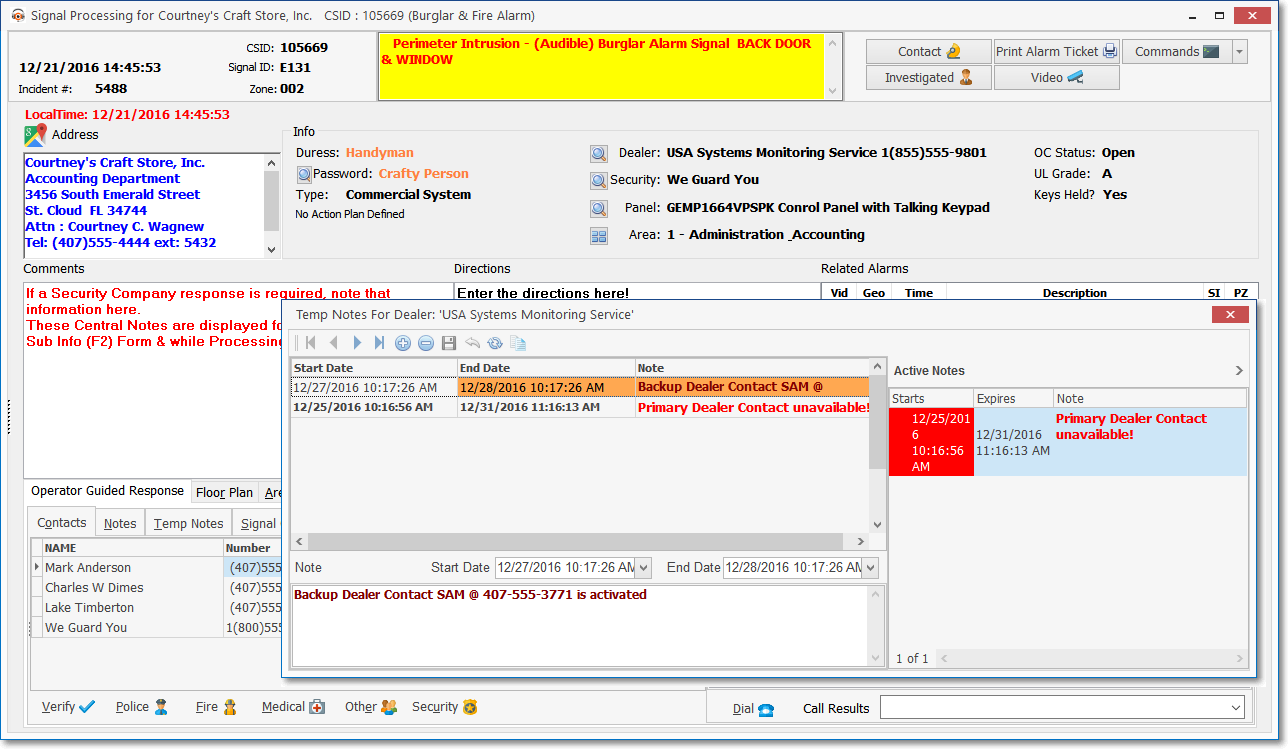
2.The Temp Notes dialog is also displayed.
✓Once viewed, the Operator must close the Temp Notes dialog to continue to process the signal.
✓To view the Temp Notes dialog for this Account again, Press Shift+F5 or Click the Temp Notes tab on the Signal Processing screen (see below).
Temp Notes dialog displayed on the Signal Processing screen
3.If a Temp Note is active (within the date and time range for when it is to be displayed), the Temp Notes field will be displayed on the Information Bar whenever the Subscribers Form is opened (see below) in MKMS.
Subscribers Form - Information Bar - ACTIVE TEMP NOTES Drop-Down Info Box