❑The Subscriber Information page has three (3) tabs from which the Central Station tab may be selected.
•The Central Station tab contains the Subscriber's basic Central Station associated data, plus the a) Subscriber Actions Plans and the b) Scheduled Reports options
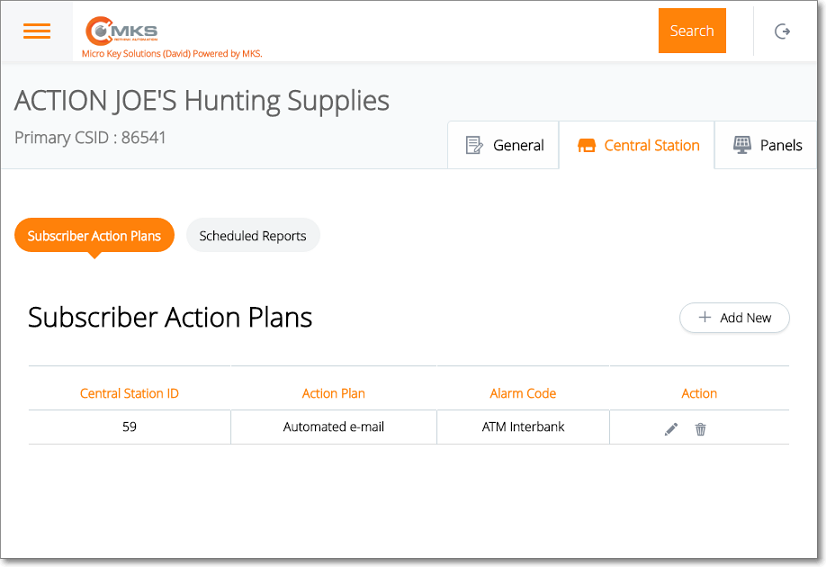
a)Subscriber Action Plans - The Subscriber Action Plans option located at the top left of the Central Station tab provides the ability to identify a specific Alarm Condition Code and its associated Action Plan which, when received at the Central Station, will not be processed by the Operator, but instead will be processed in the background (using the Action Steps defined in the designated Action Plan ) and the Micro Key Solutions Enhanced Automated Signal Processing using the MKS Connect Service.
▪To define a Subscriber Action Plan,
oTap or Click the Subscriber Action Plans option
oClick the (+) Add New option on the Subscriber Action Plans page
oComplete each field listed below, as appropriate.
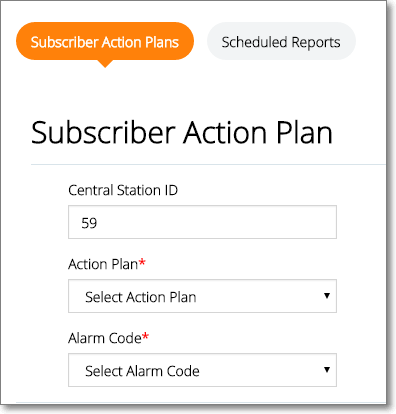
oCentral Station ID - This is the internal record number of the CSID associated with this Subscriber Action Plan
oSelect Action Plan - Use the Drop-Down Selection List to Choose required Action Plan.
oSelect Alarm Code - Use the Drop-Down Selection List to Choose required Alarm Condition Code.
▪Save - Tap or Click the Save option to record this Subscriber Action Plan information.
oA confirmation message will be displayed when the changes have successfully been posted to the database.
oTap or Click the OK button to continue.
oTap or Click the Central Station tab to return to that page.
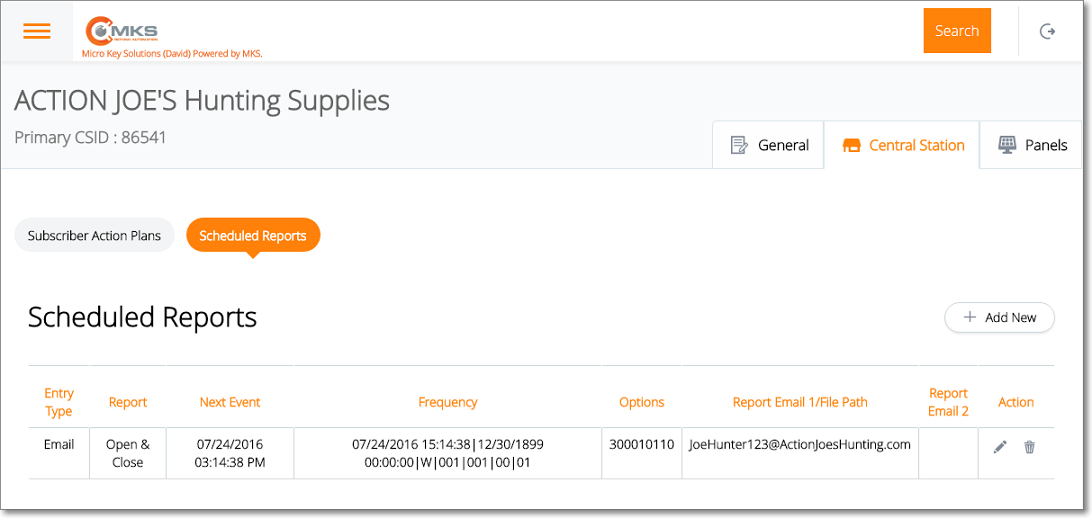
b)Scheduled Reports - The Scheduled Reports option located at the top left of the Central Station tab provides the ability to identify those Scheduled Reports for Subscribers who need to receive specific Reports about the alarm events that effect them (This feature is only available if the MKS Connect Service is registered).
▪To define a Scheduled Report
oTap or Click the Scheduled Reports option
oClick the (+) Add New option on the Scheduled Reports page
oComplete each field listed below, as appropriate.
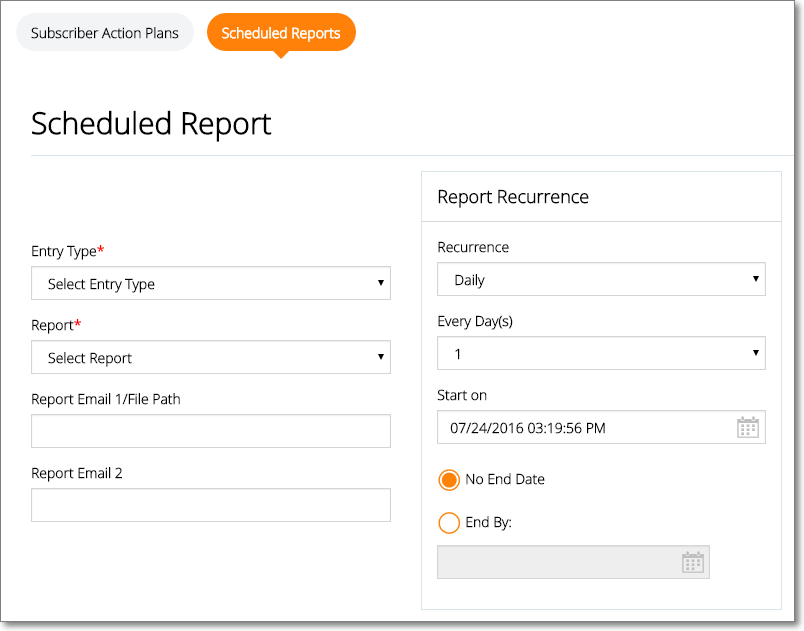
oEntry Type - Use the Drop-Down Selection List to Choose either Fax, Email, or Printer.
oReport - Use the Drop-Down Selection List to Choose the type of report desired (i.e., Alarm Activity, Open & Close, Alarms Only)
oReport Email 1/File Path - As appropriate, enter the Email address or file location (based on the Entry Type selected above) to which the report is to be sent.
oReport Email 2 - As appropriate, enter a second Email address to which the report is to be sent.
oReport Recurrence - Identify how often and how long this Scheduled Report should be produced (and transmitted), the required entries to define the "how often and when" parameters are determined by the Recurrence selection (i.e., Daily, Weekly, Monthly, Yearly):
a.Recurrence - Use the Drop-Down Selection List to Choose required frequency.
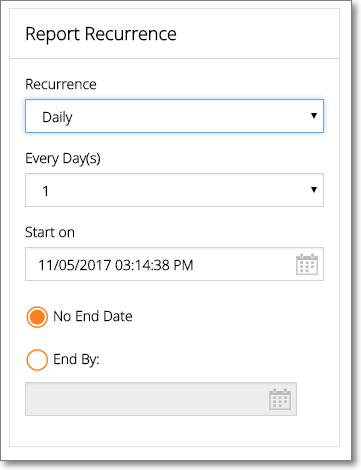
Central Station - Scheduled Report - Report Recurrence - Daily
i.Daily - Indicate every day (1), or every nn of days when this report should be created.
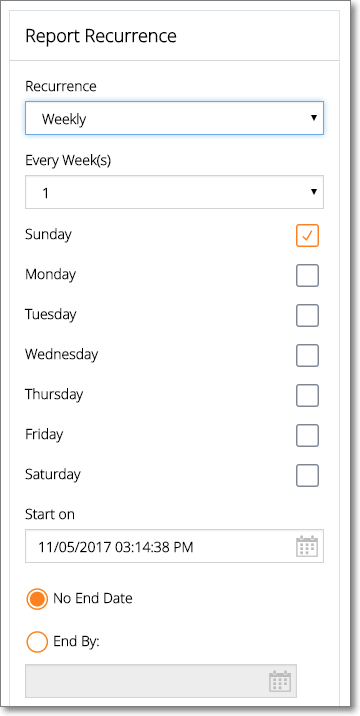
Central Station - Scheduled Report - Report Recurrence - Weekly
ii.Weekly - Indicate every week (1), or every nn of weeks when this report should be created and on which day of the week it should be created.
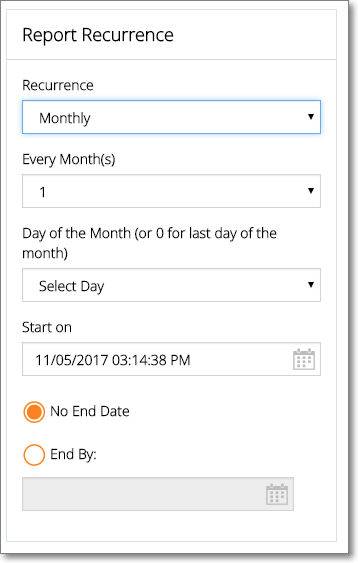
Central Station - Scheduled Report - Report Recurrence - Monthly
iii.Monthly - Indicate every month (1), or every nn of months when this report should be created and on which day of the month it should be created.
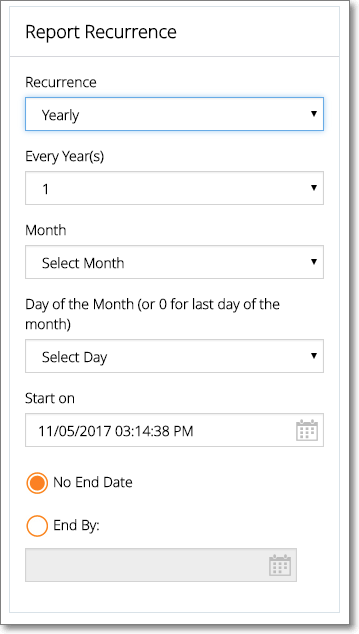
Central Station - Scheduled Report - Report Recurrence - Yearly
iv.Yearly - Indicate every year (1), or every nn of years when this report should be created, the month when that should happen, and on which day within that month it should be created.
b.Start on - Use the Drop-Down Calendar/Date Entry field to set the start date.
c.No End Date - Click this button to indicate this is an ongoing request.
d.End By - Click this button to indicate this request ends on the specific date. Use the Drop-Down Calendar/Date Entry field to Choose that end date.
▪Save - Tap or Click the Save option to record this information.
oA confirmation message will be displayed when the changes have successfully been posted to the database.
oTap or Click the OK button to continue.
oTap or Click the Central Station tab to return to that page.
❑Understanding and Using the Central Station tab
•The Subscriber's basic Central Station related data may be updated as necessary:
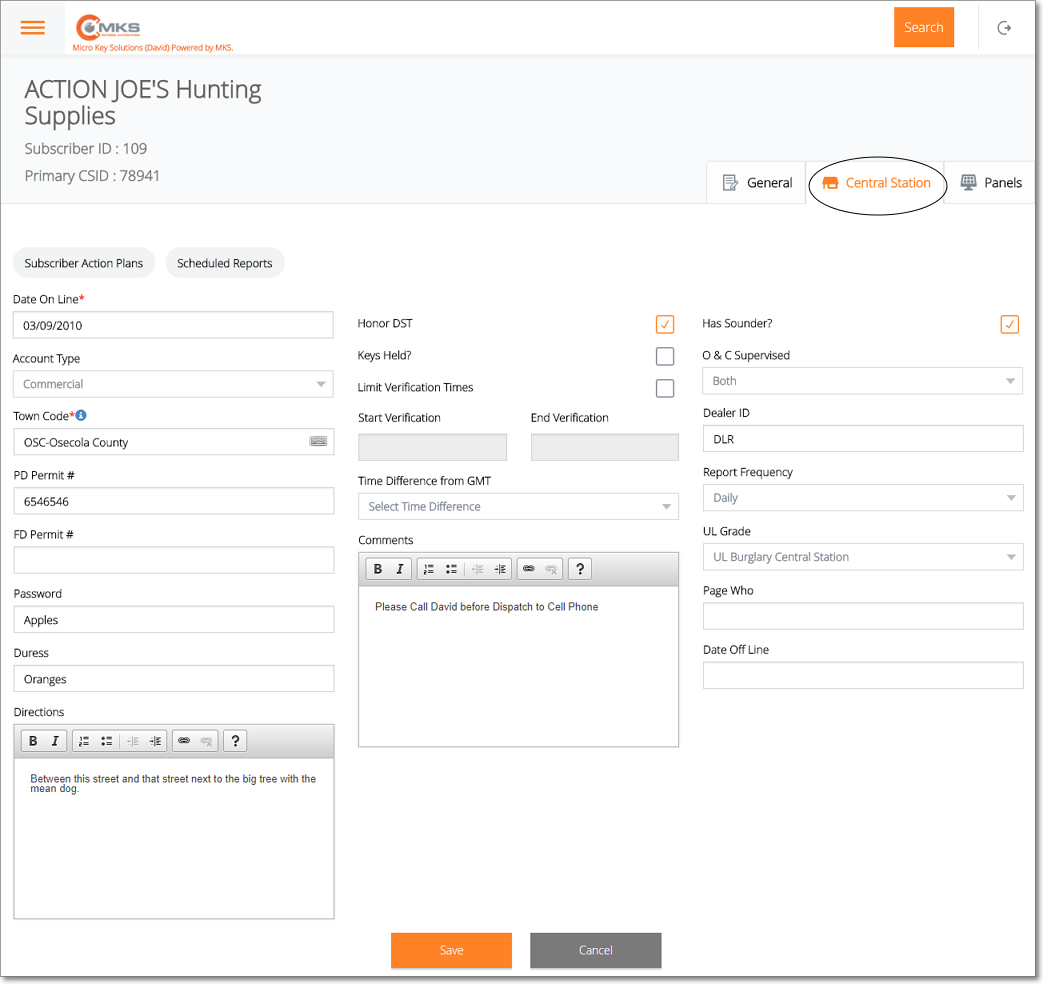
Web Dealer Access - Subscriber Information - Central Station tab
Central Station tab - Column 1
✓Date Online - By default, the Date offered is Today when first entered.
▪Use the Drop-Down Calendar/Date Entry field to reset that Date, if needed.
✓Account Type - Each monitored Subscriber must be assigned an Account Type - which is a general classification of the type of monitored account this will be.
▪Using the Drop-Down Selection List provided, Choose the appropriate Account Type for this Subscriber.
✓Town Code - This code represents an abbreviation for a Municipality (or similar governmental entity) that provides Emergency Response Services when requested by an Operator (while Processing an Alarm Signal) during a Dispatch procedure.
▪Using the Drop-Down Selection List, Choose the appropriate Town Code (responding authority) for this Subscriber.
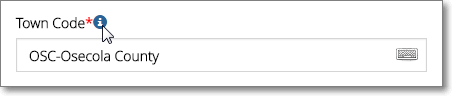
▪Click the Info Icon to view the associated dispatch Phone Numbers
✓Dealer - Because this Account is being monitored by your Company's Central Station for an Alarm Dealer, that Dealer Name will be inserted automatically.
✓PD Permit # - If the Operator is required by this Emergency Response Service to provide a Police Department Permit Number before a Dispatch request will be accepted, the required Permit Number must be entered in this PD Permit # field.
✓FD Permit # - If the Operator is required by this Emergency Response Service to provide a Fire Department Permit Number before a Dispatch request will be accepted, the required Permit Number must be entered in the FD Permit # field.
✓Password - For identification purposes, enter the Password that the Subscriber will use to Verify their identity.
▪The Password entered may be up to 25 characters in length and contain numbers and letters.
▪Keep in mind that a Password will be communicated verbally and so should be entered as it would be "heard" by an Operator.
✓Duress - For identification purposes, enter a Duress code to be used by the Subscriber to indicate that this Subscriber (customer, employee, agent, etc.) is unable to verbally request the need for help because that person is communicating with an Operator while under duress.
▪The Duress code entered may be up to 25 characters in length and contain numbers and letters.
▪Keep in mind that a Duress code will be communicated verbally and so should be entered as it would be "heard" by an Operator.
✓Directions - Enter concise Directions to this location. This field has Rich Text capability.
Central Station tab - Column 2
✓Honor DST - Check this box if this Subscriber's location honors Daylight Savings Time.
✓Keys Held - Check this box if your Company has a set of keys to the Subscriber's premises.
✓Limit Verification Times - If the Subscriber only wants their Alarm Signals Verified within a specific time frame, Check this box.
▪If the Limit Verification Times box is Checked, enter the Start and End Verification times using a 24 hour clock cycle, as shown below:
oStart Verification - By default, 09:00. Reset the starting time as needed.
oEnd Verification - By default, 18:00. Reset the ending time as needed.
✓Time Difference From GMT - The system will insert the time difference - in the number of hours - between Greenwich Mean Time and the Subscriber's local time zone (e.g., Eastern Time in US is five hours behind [-5] Greenwich Mean Time and Pacific Time is eight hours behind [-8] Greenwich Mean Time).
✓Comments - Enter any Central Station related note or comment which the Operator should see when this Subscriber has an Signal top be processed.
Central Station tab - Column 3
✓Has Sounder - Check this box if this Subscriber's system has an audible alarm.
✓O&C Supervised - Check this box if this Subscriber's system is supervised for Opening & Closing.
✓Dealer ID - Because this Account is being monitored for an Alarm Dealer, that Dealer ID will be inserted automatically.
✓Report Frequency - If Opening and Closing activity will be supervised, use the Drop-Down Selection List to Choose how often the Subscriber should receive an Open and Close Report.
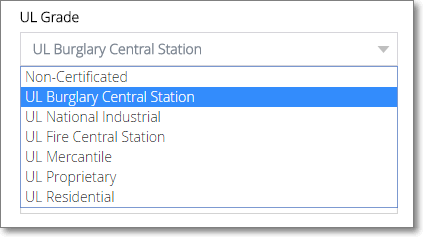
✓UL Grade - If the installation will be issued a UL® Alarm Certificate, use the Drop-Down Selection List provided to Choose the UL Classification of the system.
✓Page Who - This field has been deactivated.
✓Date Off Line - If this Account is to be canceled, Tap or Click within the Date Off Line field
▪Caution! This action takes All CSIDs defined in the Subscriber Panels section Off Line.
▪Enter the Central Station Off-line Date in the pop-up box provided.
oTap or Click the OK button to continue (or the Cancel button to abort the process).
oSee the Off Line Date discussion for detailed information.
✓Save - Tap or Click the Save option to record any changes or updates to this information.
▪A confirmation message will be displayed when the changes have successfully been posted to the database.
▪Tap or Click the OK button to continue.
❖When the Subscriber Information page is accessed (by Choosing Subscriber as the Select Login Type in the Web Dealer Enhanced Access module) the Central Station tab will appear with additional data and options as shown immediately below.
✓Dealer Info - The Dealer (or Sub Dealer) to which this Subscriber is associated is identified here.
✓Call Dealer - Select this option to dial the Dealer's Telephone Number (as shown in the Dealer Info section). Tap or Click the General tab to return to that page.
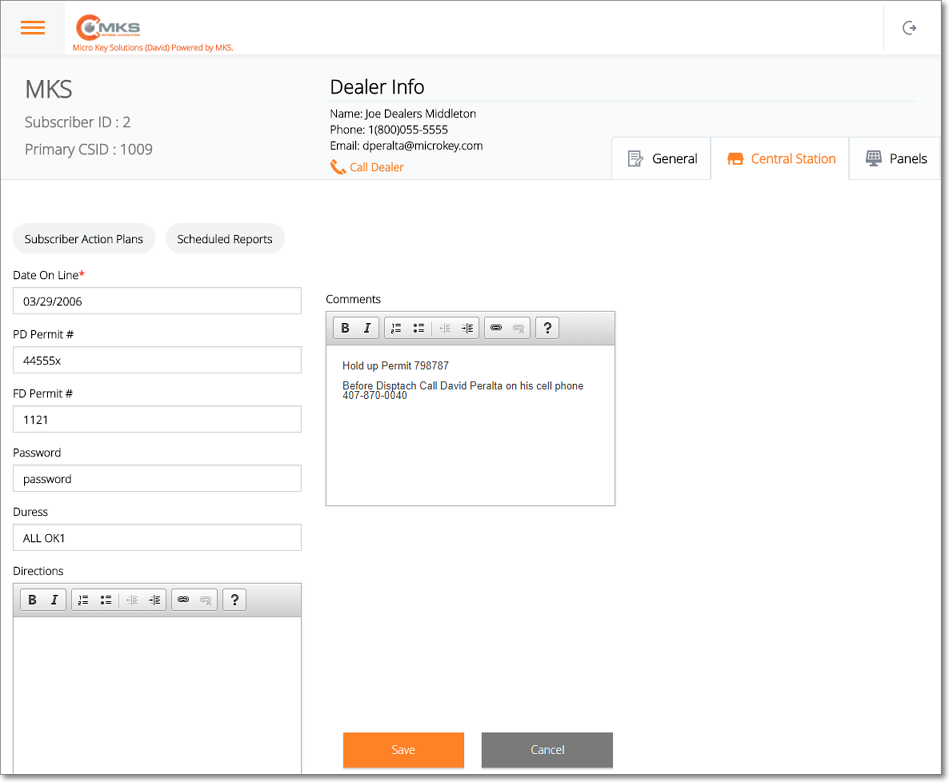
Web Dealer Enhanced Access - Subscriber has opened the Subscriber Information - Central Station tab
➢Note: When the Subscriber Information page is displayed (by Choosing Subscriber as the Select Login Type in the Web Dealer Enhanced Access module), these are the only data fields that may be added to, or modified by that Subscriber.
▪Password - For identification purposes, enter the Password that the Subscriber will use to Verify their identity.
oThe Password entered may be up to 25 characters in length and contain numbers and letters.
oKeep in mind that a Password will be communicated verbally and so should be entered as it would be "heard" by an Operator.
▪Duress - For identification purposes, enter a Duress code to be used by the Subscriber to indicate that this Subscriber (customer, employee, agent, etc.) is unable to verbally request the need for help because that person is communicating with an Operator while under duress.
oThe Duress code entered may be up to 25 characters in length and contain numbers and letters.
oKeep in mind that a Duress code will be communicated verbally and so should be entered as it would be "heard" by an Operator.
✓Save - Tap or Click the Save option to record any changes or updates to this information.
▪A confirmation message will be displayed when the changes have successfully been posted to the database.
▪Tap or Click the OK button to continue.