❑The Subscriber Information page has three (3) tabs with the General tab displayed as the default.
•The General tab contains the contact related information which may be updated, as appropriate.
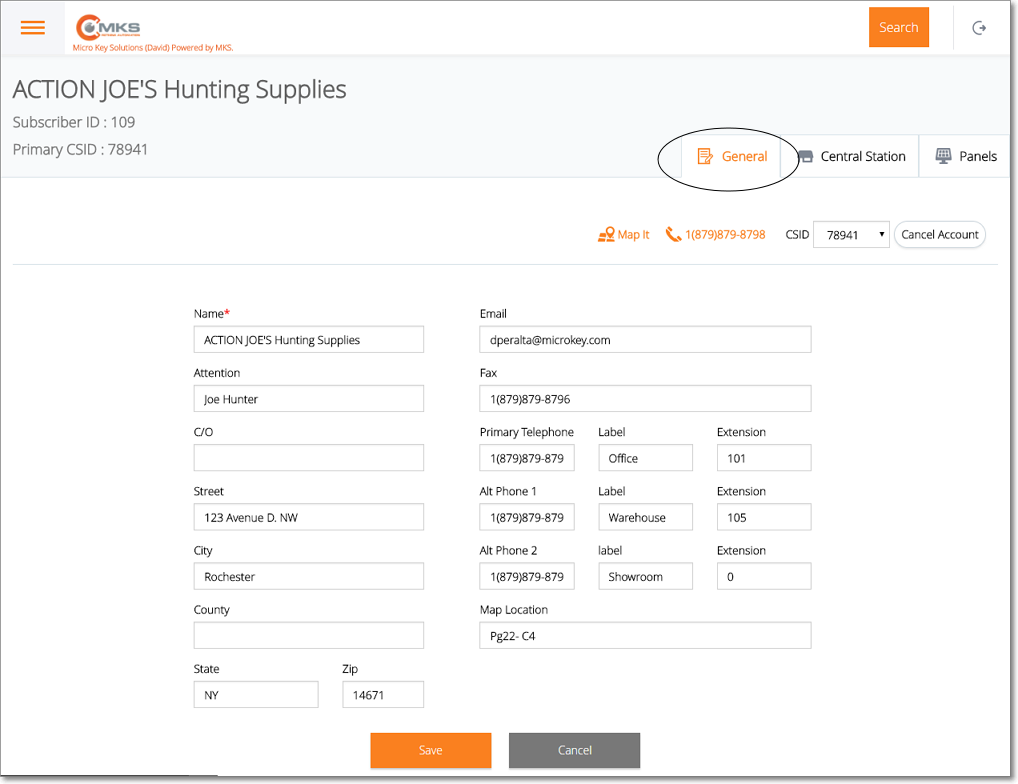
✓At the top of the General tab are three options:
1. Select this option to display the Map View of this location. Tap or Click the General tab to return to that page.
2.![]() Select this option to dial the Subscriber's Primary Telephone Number. Tap or Click the General tab to return to that page.
Select this option to dial the Subscriber's Primary Telephone Number. Tap or Click the General tab to return to that page.
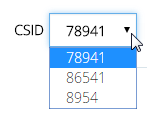
3. CSID - If this Subscriber has more than on CSID defined in the Subscriber Panels section of the Monitoring tab within the Edit View of the Subscribers Form., Select to see a complete list of those CSIDs.
4.Cancel Account - Tap or Click this option to cancel monitoring service for this Account.
Web Dealer Access - Subscriber Information - General tab
✓Name - Enter the Subscriber's name (up to 70 characters in length - but keep in mind the limited display area of a standard #10 Window Envelope).
▪Entering a Business Name
oEnter the Name as it would be listed in the Telephone Directory
oIf a prefix is part of the name but that name is not normally alphabetized by that prefix (such as the word "the"), enter the name followed by a tilde ("~") and the prefix.
oExample: "ABC Company~The"
▪Entering an individual Person's Name
oLast Name is entered first
oType a tilde ("~")
o(The tilde tells the system that everything after it is the Employee's first name and middle initial.)
oEnter the First Name and Middle Initial
oFor Prefixes (Mr., Mrs., Ms., etc.), enter them after the Tilde and before the first name
oFor Suffixes (MD., Jr., III, etc.), enter them after the last name and before the tilde.
oExample: "Smith, MD~Dr. James T."
✓Attention - The Attention line will be printed below the Subscriber's Name on their Invoice's Mailing Address (up to 30 characters in length).
▪This may be used for a building name, a person, suite number, additional address information or skipped entirely - depending on what you need.
✓Care Of - The Care Of field also provides a place to expand the Subscriber's address information, and will appear below the Attention line (up to 30 characters in length), if entered.
✓Street - Enter the Street address and name (up to 30 characters in length).
✓City, State, Zip - Enter the City (up to 25 characters in length), which will not be included in any printed forms (Invoices, Statements, Proposals) but will be shown in the Sub Info (F2) Form in MKMSCS, State code (or Province) and Zip (or Postal) code.
✓E-mail - Enter one or more E-mail addresses. This field will accept multiple Email Addresses (up to a total of 100 characters).
▪If you Check E-Mail Invoice? (see below), this is the E-mail address(es) that will be used.
▪Each additional E-mail address must be separated from the previous one by a semi-colon.
✓Primary Telephone - Enter the Primary Telephone Number following the rules below:
➢Note: The name of this field - its Title - may be changed for this specific Subscriber record, as appropriate (see the "Renaming the Telephone Number field Titles" discussion in the Subscribers Form: Edit View chapter)
▪If no Area Code is required, enter the seven (7) digit telephone number (it cannot start with a 1)
▪If 10 digit dialing is in effect - no "1"prefix is needed, but you do need to dial an Area Code as part of the telephone number:
oPress the <Space Bar> first.
oThen enter the three digit Area Code.
oFinally, enter the seven digit Telephone Number.
oCorrect formatting will be applied automatically.
▪Long distance Telephone Numbers (with a "1" prefix) are entered as such, and the appropriate formatting parentheses and dash is applied automatically.
✓Ext - Enter any Extension number that is required.
✓1st Alt Tel - Continue with the Alternate Numbers as needed following the Telephone Number entry rules outlined above.
✓Ext - Enter any Extension number that is required.
✓2nd Alt Tel - Continue with the Alternate Numbers as needed following the Telephone Number entry rules above.
✓Ext - Enter any Extension number that is required.
✓Fax - Enter their Fax number.
✓Map Location - This field is used to record the page number and map coordinates for this location, GPS coordinates, or any other consistent methodology your Company adopts to easily locate a Subscriber's premises.
❖When the Subscriber Information page is accessed (by Choosing Subscriber as the Select Login Type in the Web Dealer Enhanced Access module) the General tab will appear with additional data and options as shown immediately below.
▪Dealer Info - The Dealer (or Sub Dealer) to which this Subscriber is associated is identified here.
▪Call Dealer - Select this option to dial the Dealer's Telephone Number (as shown in the Dealer Info section). Tap or Click the General tab to return to that page.
▪Email Dealer - Select this option to Email the Dealer (opens an Email Dealer Request page) as Account Update or Service Request.
▪Call to Cancel Alarm - Select this option to dial the appropriate number to Cancel an Alarm.
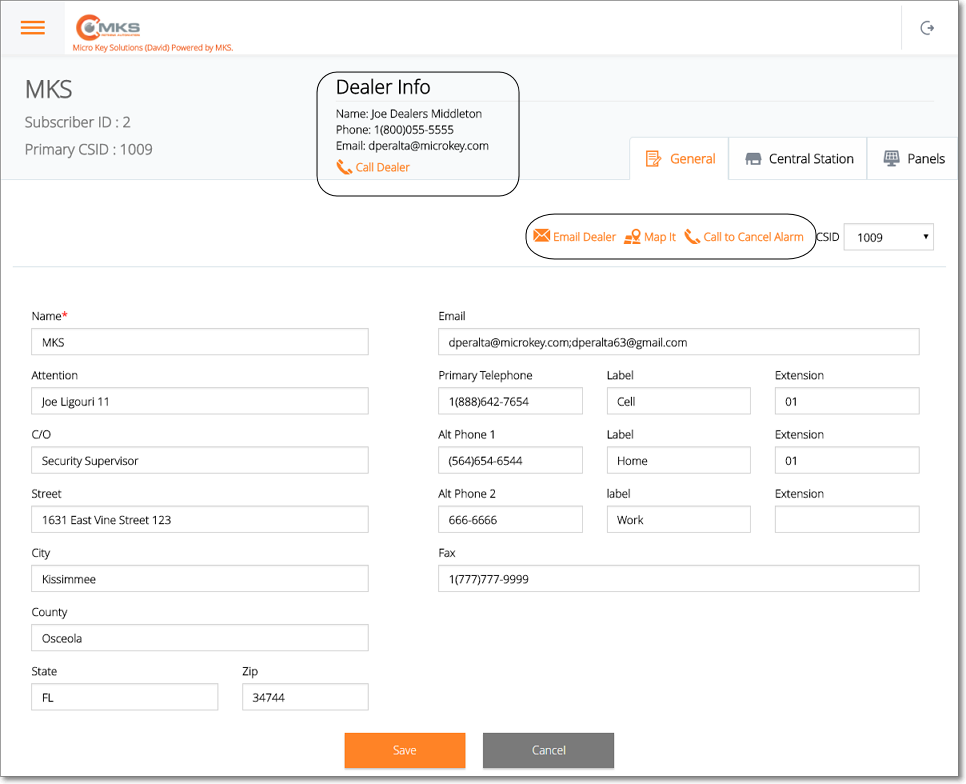
Web Dealer Enhanced Access - Subscriber has opened the Subscriber Information - General tab
➢Note: When the Subscriber Information page is displayed (by Choosing Subscriber as the Select Login Type in the Web Dealer Enhanced Access module), these are the only data fields that may be added to, or modified.
▪E-mail - Enter or modify one or more E-mail addresses. This field will accept multiple Email Addresses (up to a total of 100 characters).
oIf you Check E-Mail Invoice? (see below), this is the E-mail address(es) that will be used.
oEach additional E-mail address must be separated from the previous one by a semi-colon.
▪Primary Telephone - Enter or modify the Primary Telephone Number following the rules below:
➢Note: The name of this field - its Title - may be changed for this specific Subscriber record, as appropriate (see the "Renaming the Telephone Number field Titles" discussion in the Subscribers Form: Edit View chapter)
oIf no Area Code is required, enter the seven (7) digit telephone number (it cannot start with a 1)
oIf 10 digit dialing is in effect - no "1"prefix is needed, but you do need to dial an Area Code as part of the telephone number:
i.Press the <Space Bar> first.
ii.Then enter the three digit Area Code.
iii.Finally, enter the seven digit Telephone Number.
iv.Correct formatting will be applied automatically.
oLong distance Telephone Numbers (with a "1" prefix) are entered as such, and the appropriate formatting parentheses and dash is applied automatically.
▪Ext - Enter or modify any Extension number that is required.
▪1st Alt Tel - Continue with the Alternate Numbers as needed following the Telephone Number entry rules outlined above.
▪Ext - Enter or modify any Extension number that is required.
▪2nd Alt Tel - Continue with the Alternate Numbers as needed following the Telephone Number entry rules above.
▪Ext - Enter or modify any Extension number that is required.
▪Fax - Enter or modify their Fax number.
•Save - Tap or Click the Save option to record any changes or updates to this information.
✓A confirmation message will be displayed when the changes have successfully been posted to the database.
✓Tap or Click the OK button to continue.
•Select this option to Email the Dealer an Account Update or Request for Service:

✓This will open an Email Dealer Request page
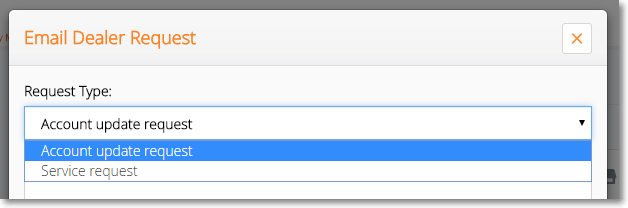
▪Request Type - Using the Drop-Down Selection List to Choose the request type
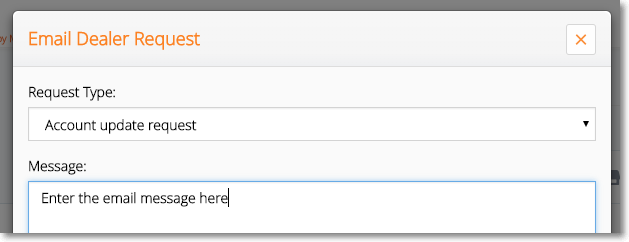
▪Message - Enter the message relating to the selected Request Type.
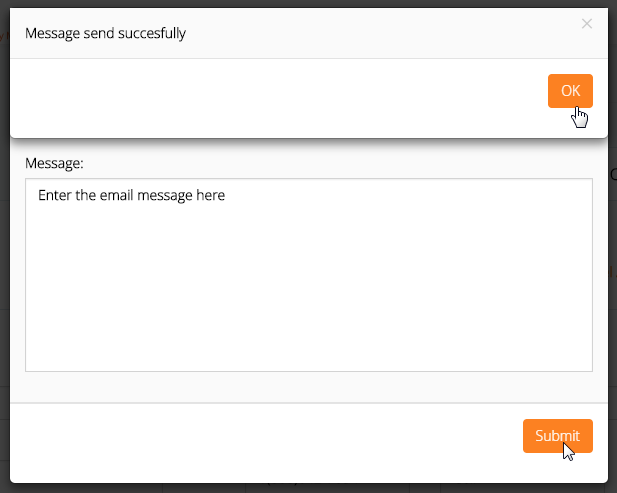
▪Submit - Tap or Click the Submit button to send this meessage anbd a confirmation message will be displayed
▪OK - Tap or Click the OK button to return to the